We can do big, hard things. This is sort of becoming a mantra at our house. Though most of our big things are small things and our hard things are not-so-hard things, but they are for us. You know, things like saying good-bye to mom before getting on the bus to school, or planning ahead and using a calendar, or saying no instead of overcommitting. And then there are other big-hard things like making a cheese board for a party. Ask me to design a whole house, and I’ll leap with glee. But ask me to create a winter cheese board, and I’ll sweat faster than a cold block of cheese in a warm room.
Cheese boards intimidate me—from flavor pairings to the final assembly. There are so many decisions involved, decisions I feel ill-equipped to make. But after realizing that everything is at-the-ready at the grocery store, after realizing these are the biggest crowd-pleasers that come together super fast, after realizing I can use the same design principles that I use in a room on a board, I’m wrapping my head around creating a Simple Winter Cheese Board and sharing it too. Just in case it’s on your big-hard list.
Let’s break this Simple Winter Cheese Board down to doable and beautiful.
How to Create a Simple Winter Cheese Board
4 key components to keep in mind: flavor profile, color palette, repetition, and variety
1. Choose a starting place: cheese, produce, herbs, meat, or nuts. There’s no right starting place, it’s just important to start somewhere (which can be the hardest part). Think of this starting place as the inspiration piece for designing your living room, I mean cheese board. It will help to guide the rest of your decision making.
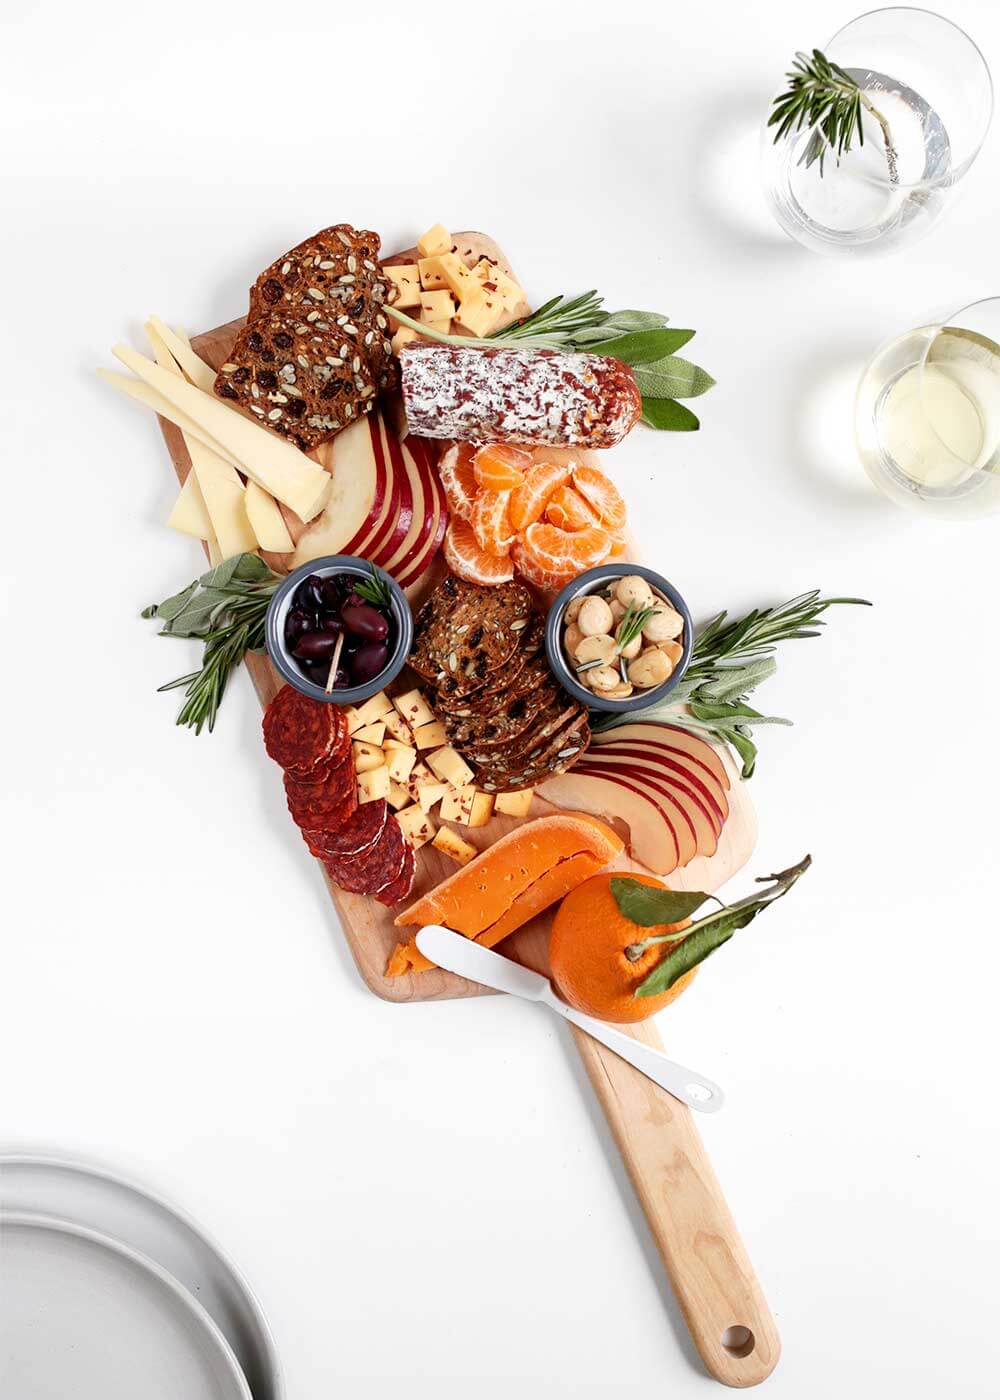
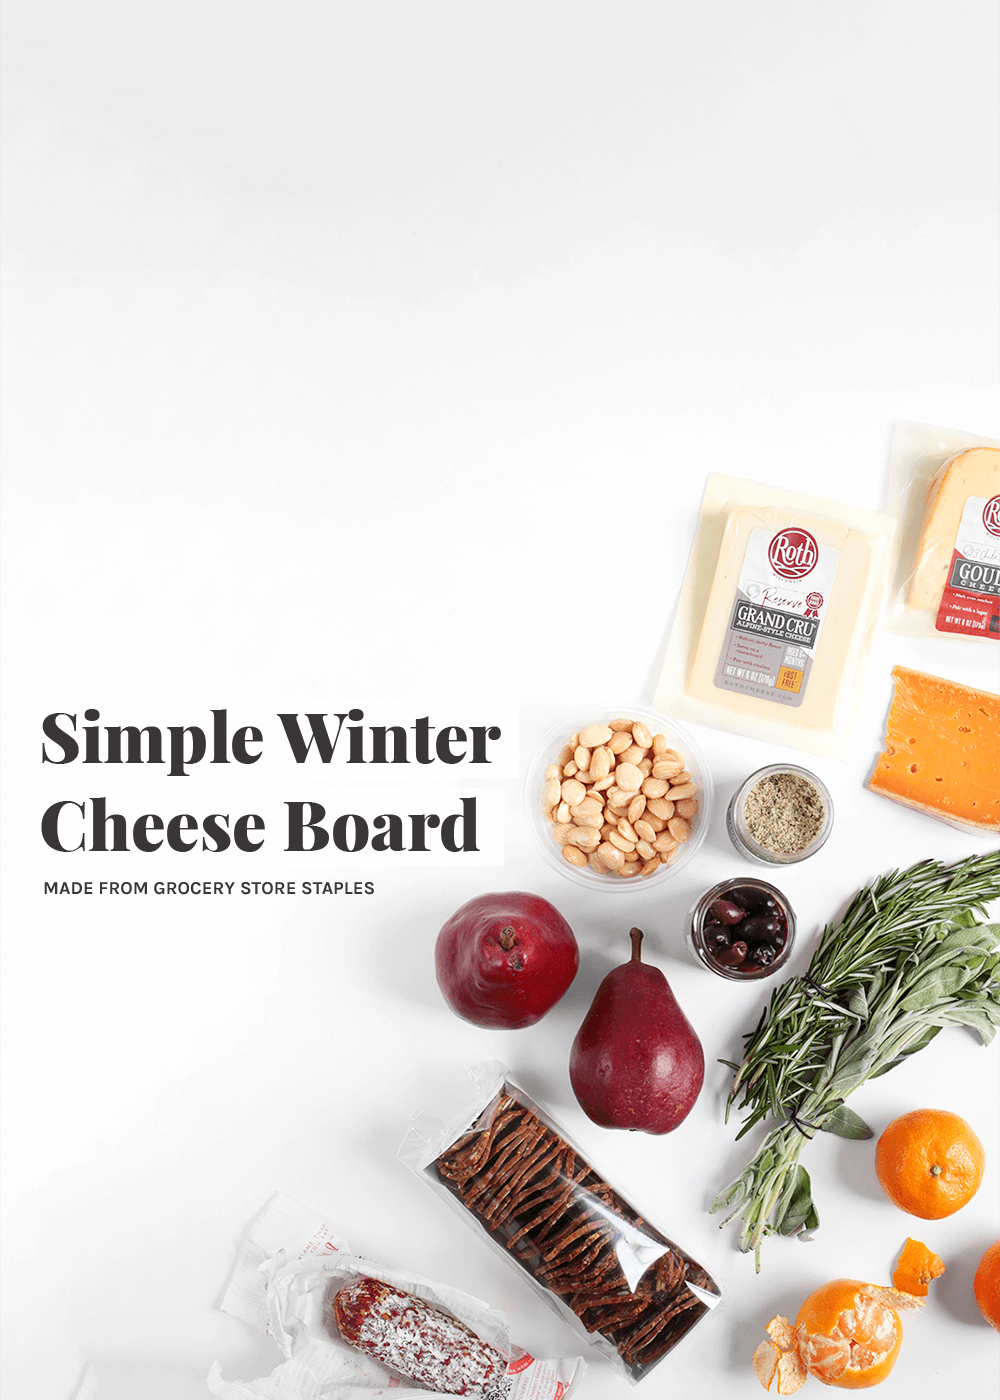
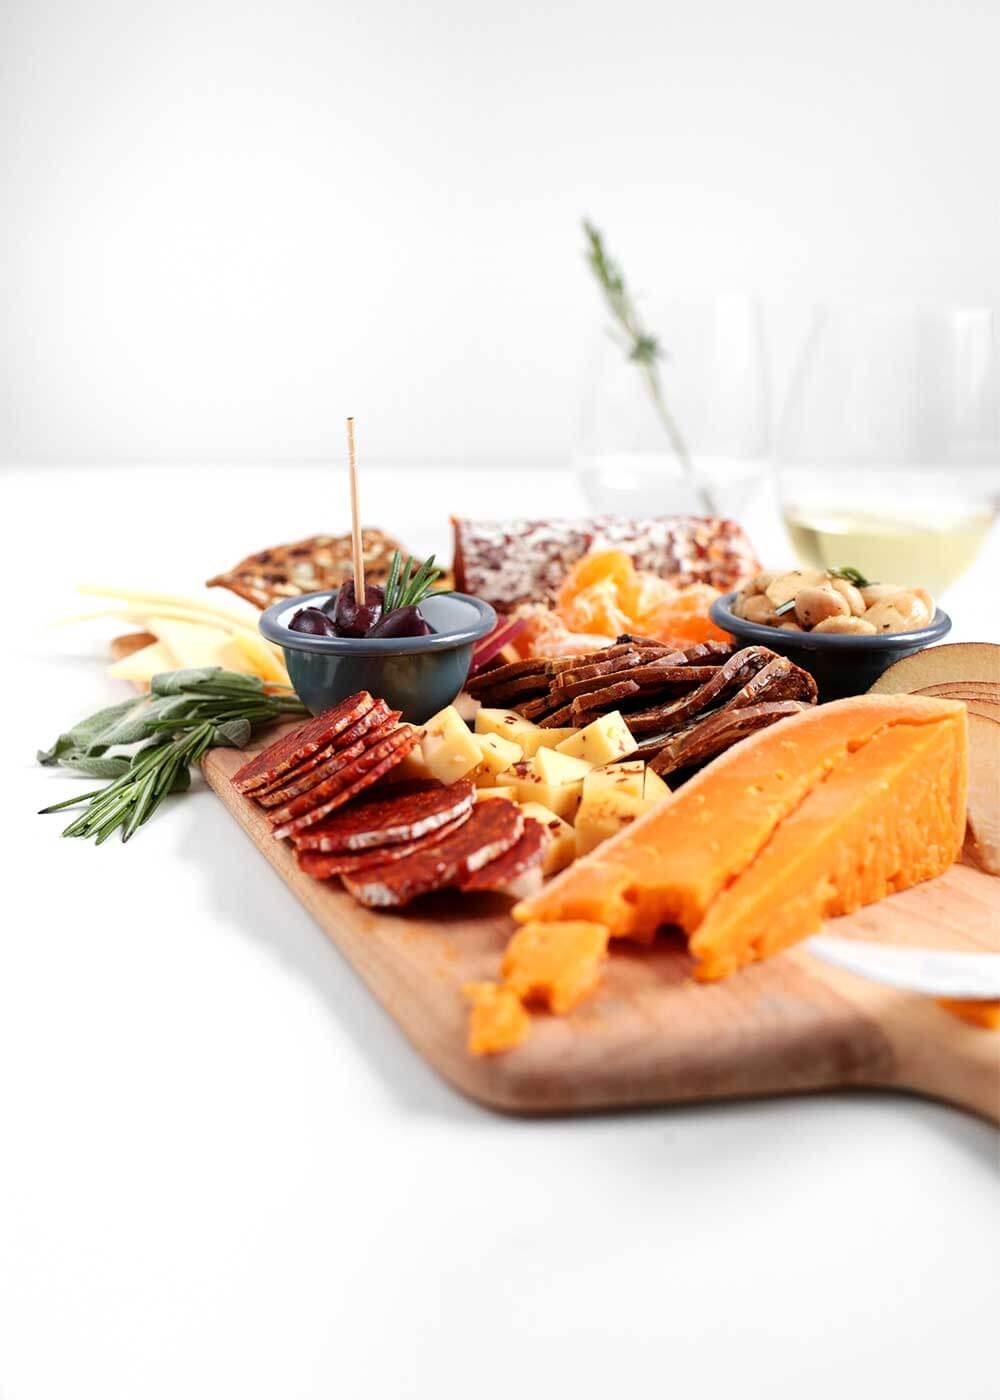
2. I’m starting with the cheese, using Roth Grand Cru Reserve, Roth 3 Chile Pepper Gouda, and Roth Prairie Sunset. Don’t think too hard here. Just pick your favorites. Also consider varying the texture of the cheeses you choose: hard, crumbly, soft, etc. Note: Roth cheese can be purchased in the deli area, either prepackaged or in wheels cut-to-size and wrapped on site.
3. Next, choose a flavor profile based off your starting point: sweet, spicy, savory, sour, nutty, etc. Since I started with cheese, my flavor profile for the board was dictated by the cheese. One of my favorite things about Roth Cheese is that they list flavor profiles and pairings on their packaging. No more ignorantly sweating at the cheese case. I grabbed spicy from the gouda, nutty from the Grand Cru, and sweet from the Prairie Sunset. Spicy, sweet, and nutty.
4. Now head to the produce aisle, making selections based on what’s in season. During winter months, vegetables need a bit of work and cooking to serve. Let’s keep this simple and buy preserved vegetables instead. As for fruit, grab for pears, citrus, or pomegranates. Let those colors begin to dictate the color palette of the board. Now we have a flavor profile and a color palette nailed down. Whew!
5. Choose an herb to highlight. When choosing an herb, think of it like the herby garnish on a cocktail. It’s a minor flavor component that often adds more aroma than flavor. But it also makes things taste and look alive. It’s like adding a plant to a room. I chose rosemary and accented with sage for texture. Try repeating this herb in other elements throughout the board.
6. Head to the preserved vegetable aisle. Make selections based on flavor and/or color palette. I went with black olives wrapped in a deep purple hue to add a bit of contrast to the board.
7. Choose a nut or seed with a pop of flavor. Because I’m using rosemary on the board, I wanted to repeat it here, so I used a salted rosemary Marcona almond. If you can’t find what you’re looking for at-the-ready, you can always lightly heat your nut or seed of choice on a skillet and coat with a little oil, salt, and herb.
8. Choose a cracker. Try repeating a flavor in this selection too. I went with something nutty and sweet, a rosemary (there it is again) raisin pecan cracker. And, to add visual contrast to the board, I preferred a darker cracker. Imagine what the board would look like if the cracker were the same color as the cheese or the pears.
9. Choose a deli meat (optional). Look for something requiring minimal prep to add to the board that will also last an hour or two out at room temperature. I chose a beautifully cured pepperoni, which picks up the color of the pear and adds a nice salty contrast to the sweet components.
10. Prep the board. Cut the cheeses and produce just before serving. When cutting, think about how you might easily eat or assemble a bite. I generally tend towards thin slices of everything, which also lays beautifully on a board. For cheese, try a variety of cuts, from thin wedges to small cubes to large wedges that can easily be cut with a knife or broken with hands. Use tiny bowls to compartmentalize items on the board and house wet ingredients, like olives. Note: for the best flavor, let cheeses sit at room temperature for 30 minutes before serving.
11. Assemble the board. You’ve made all the hard decisions. Now to assemble them. Lean heavily on repetition and movement here. Start by adding any small bowls to the board. Next, choose one color to start with and repeat it around the board. Notice the pops of reds that I started with, zig-zagging them around the board.
Layer in the additional colors, repeating them around the board as well. Vary the placement of ingredients by adding the same ingredient to multiple places. To add movement, make the ingredients dance, bend, stack, and curve around each other. Lastly, tuck in the herbs and sprinkle a bit little here and liven things up. Don’t be afraid to add whole fruit or a large hunk of the remainder of an ingredient to vary the visual scale of things. You can always cut into it if needed.
12. Pair with a slightly sweet white wine and then drink some for me. Spicy, sweet, nutty, delicious, and beautiful. We did it.
May the big-hard things turn into doable-little things like this simple winter cheese board.
Assemble the board using the detailed how-to above.
Notes
Roth cheeses can be found in your grocer’s deli case and online via Instacart and Amazon Fresh. To find Roth cheeses near you, head this way for the store locator.
Recipe Card powered by
If you like this Simple Winter Cheese Board, you may also like:
This blog is made possible by your support (thank you), select brand partnerships, advertisements, and affiliate links to items I love and use. READ MORE >


Comments
Your email address will not be published. Required fields are marked *