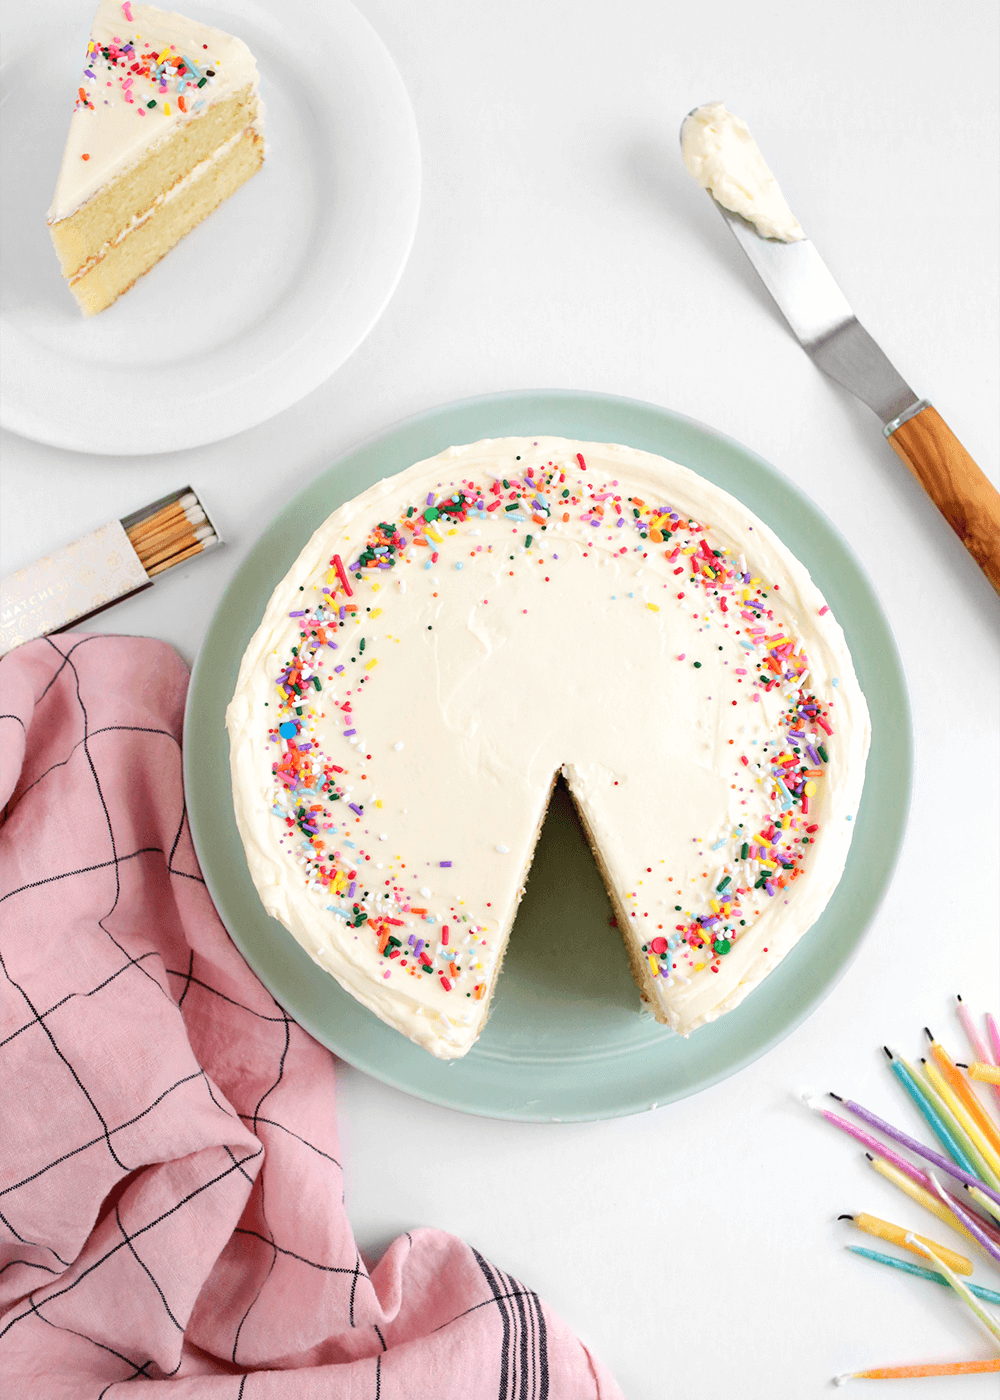
I’ve had it on my list for years, along with printing pictures of my kids, to work on a really good vanilla cake. A simple yet delicious vanilla cake that comes together easily with a tight sturdy crumb, maybe even skirting the line of dense. A vanilla cake that comes together from the humble remnants of the pantry yet yields something memorable and flavorful. This vanilla cake is that, thanks to the simple reverse creaming method. It’s reliably good every time, even when you run out of all-purpose flour and have to swap in a little whole wheat pastry flour. I can attest.
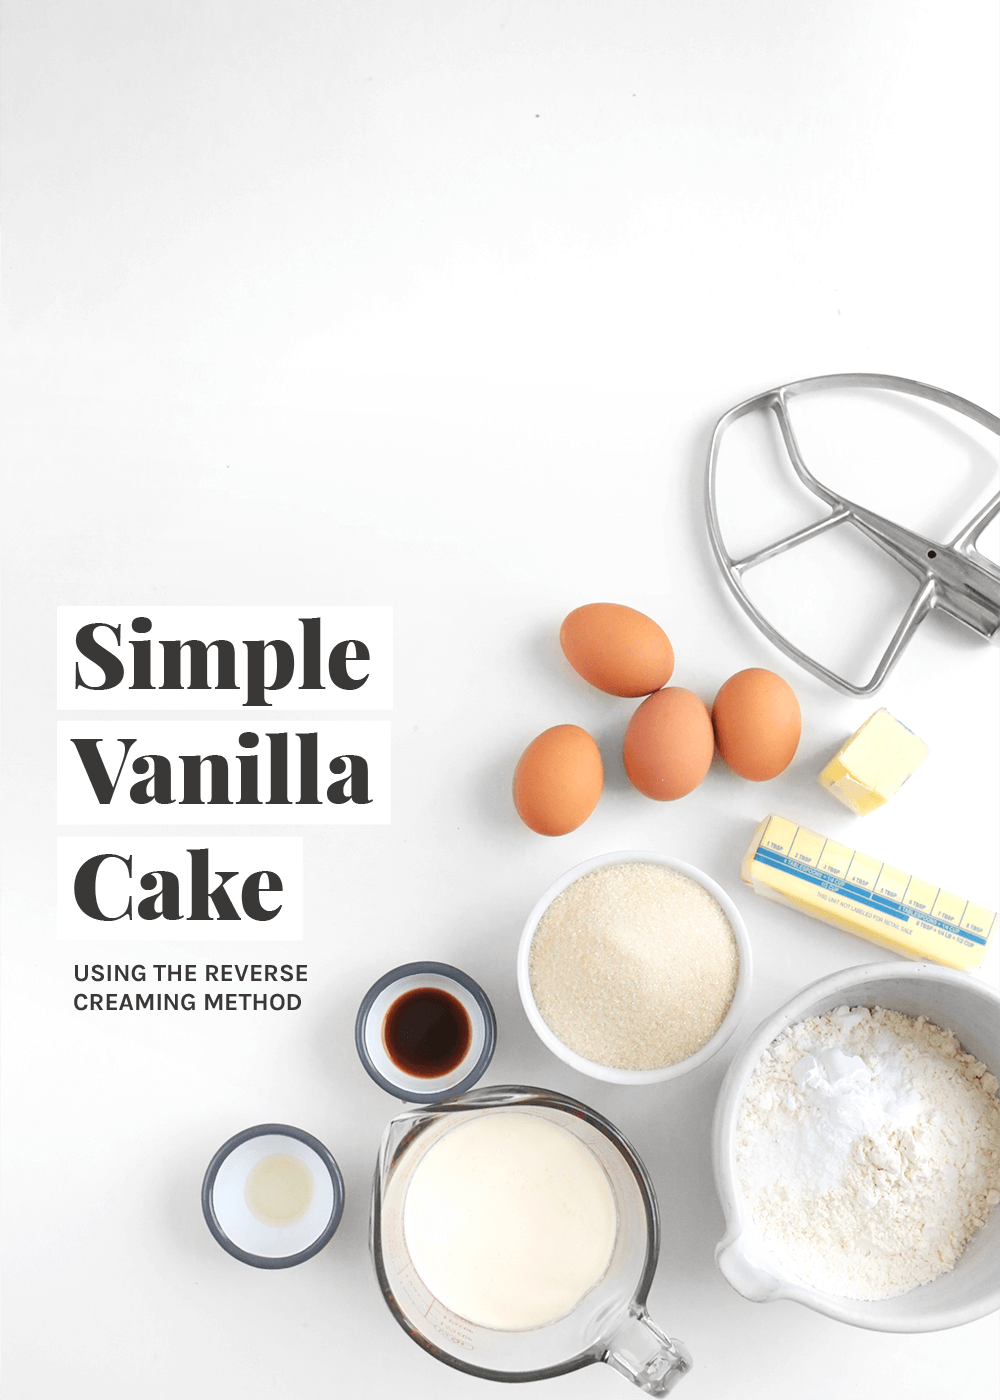
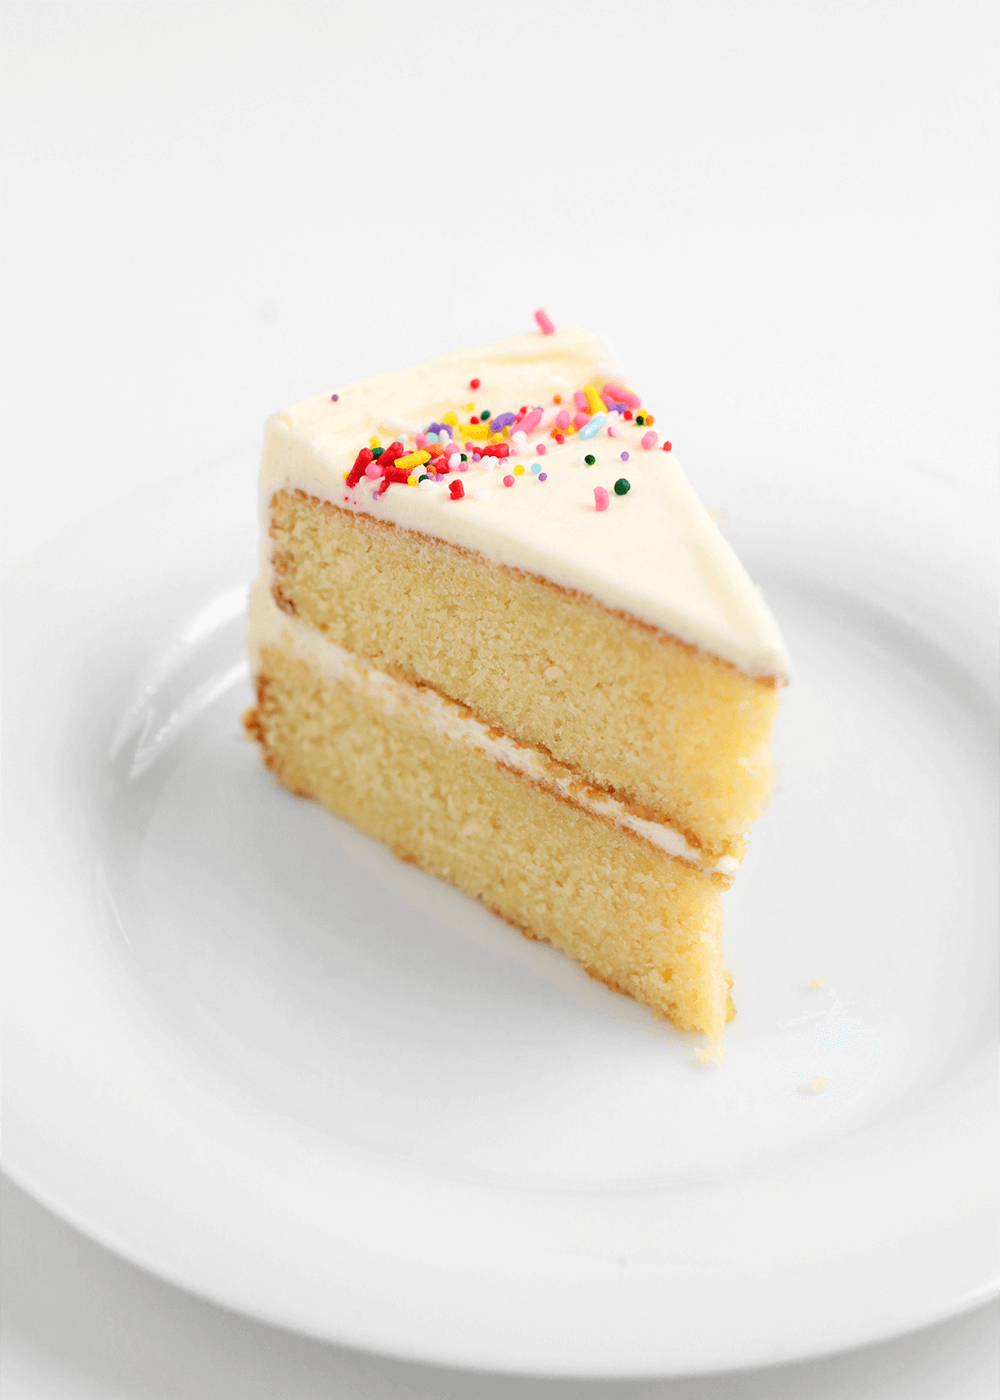
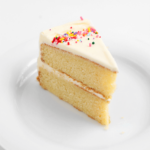
Simple Vanilla Cake
This simple vanilla cake is made with all the usual suspects: flour, sugar, butter, cream, milk, eggs, and vanilla. I’ve snuck in a little vinegar, too, to add a touch of tang. You know, the same kind of tang buttermilk or sour cream provides, which I never keep stocked in the fridge. Before you scrunch up your nose, let me explain. In the same way that salt has a way of making sweet things taste sweeter, vinegar has a way of making things taste more pronounced, more like themselves. And, in this case, it takes this vanilla cake from dull to perfection. I tested it every which way.
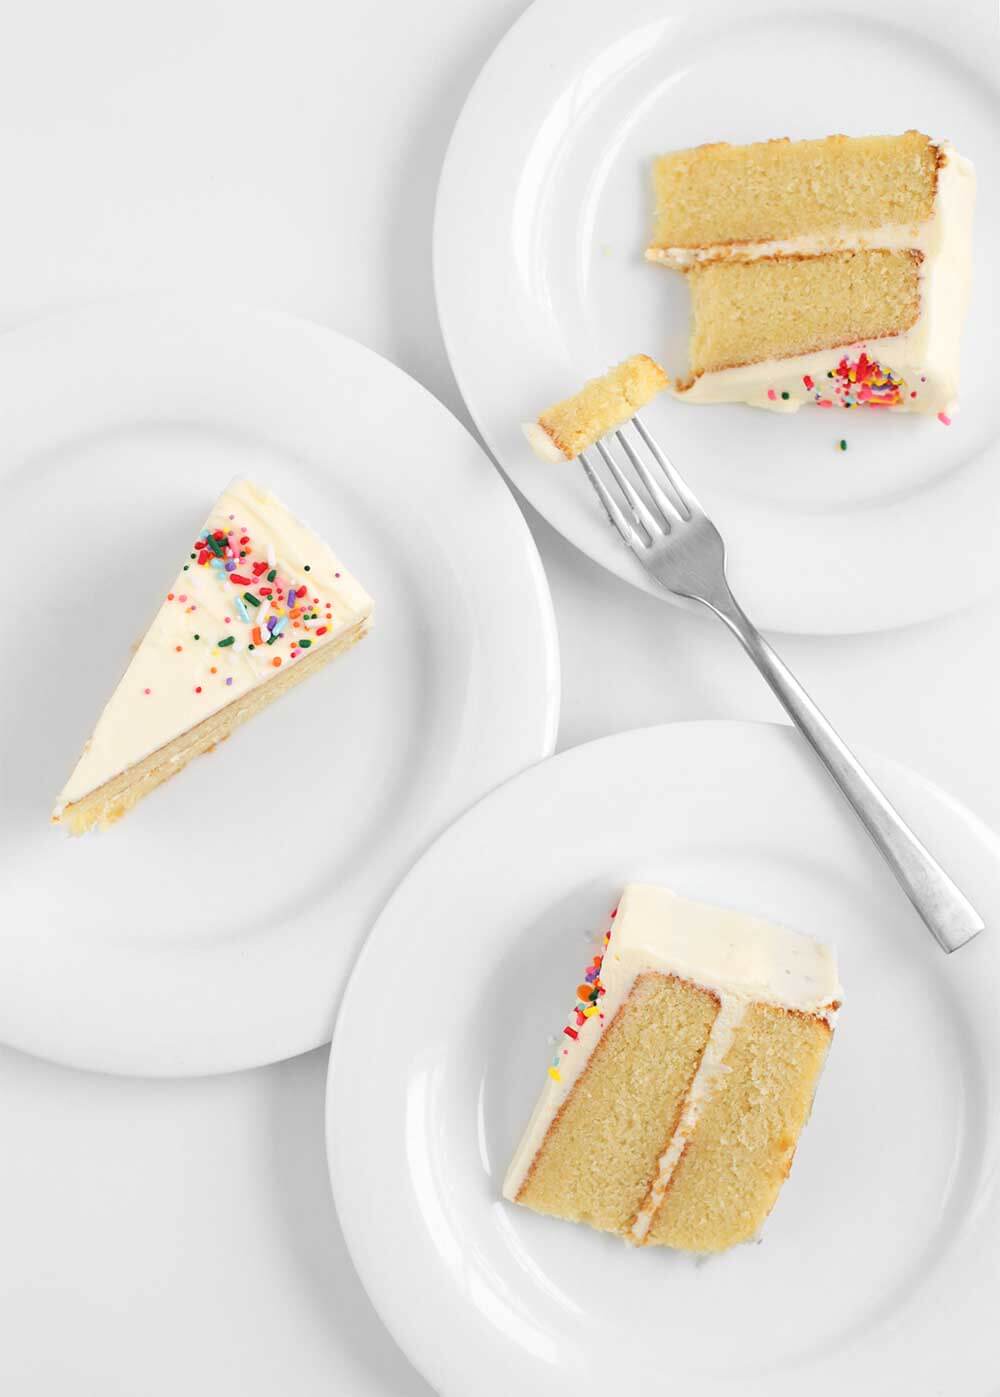
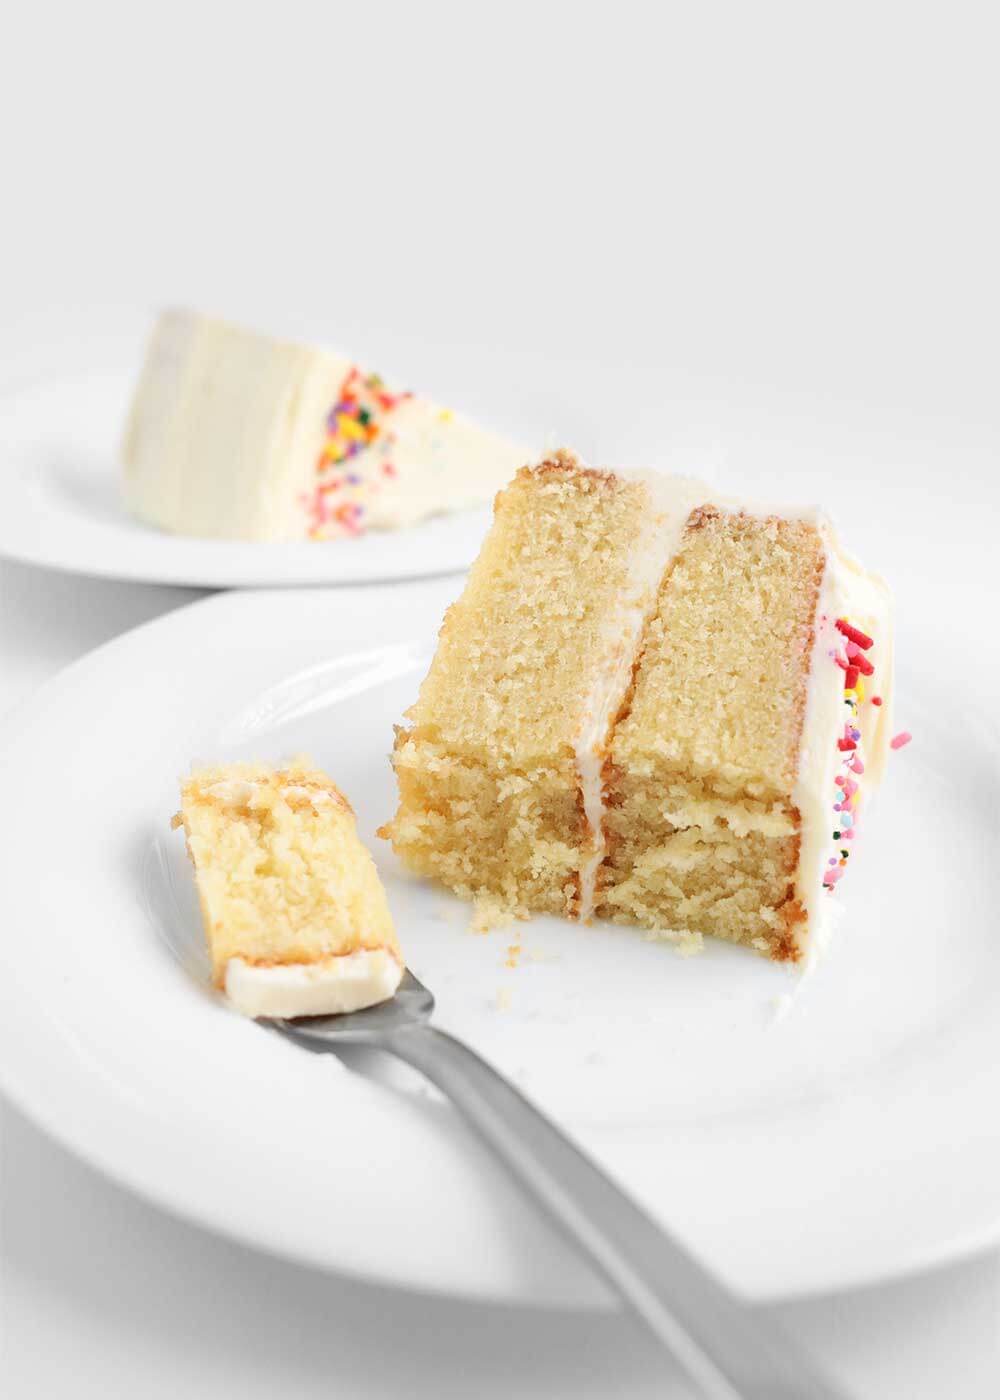
While we’re at it, let’s talk about texture, too. Because just as the flavor of the cake is important, so is the texture, the mouth-feel. When I eat cake, I want each bite to wow. No fluffy cakes for me, unless we’re talking about Angel Food Cake. But between the eggs and the leavening and the beating, cakes tend towards fluffy. Enter the reverse creaming method. I first learned this method from Sarah Kieffer. It went against everything I knew, beating the butter directly into the flour. This can’t be right, I thought. But it made for a tender, tight-crumbed cake packed with flavor. A very memorable cake. So I grabbed her method and my favorite old cake recipe and came up with this.
Reverse Creaming Method
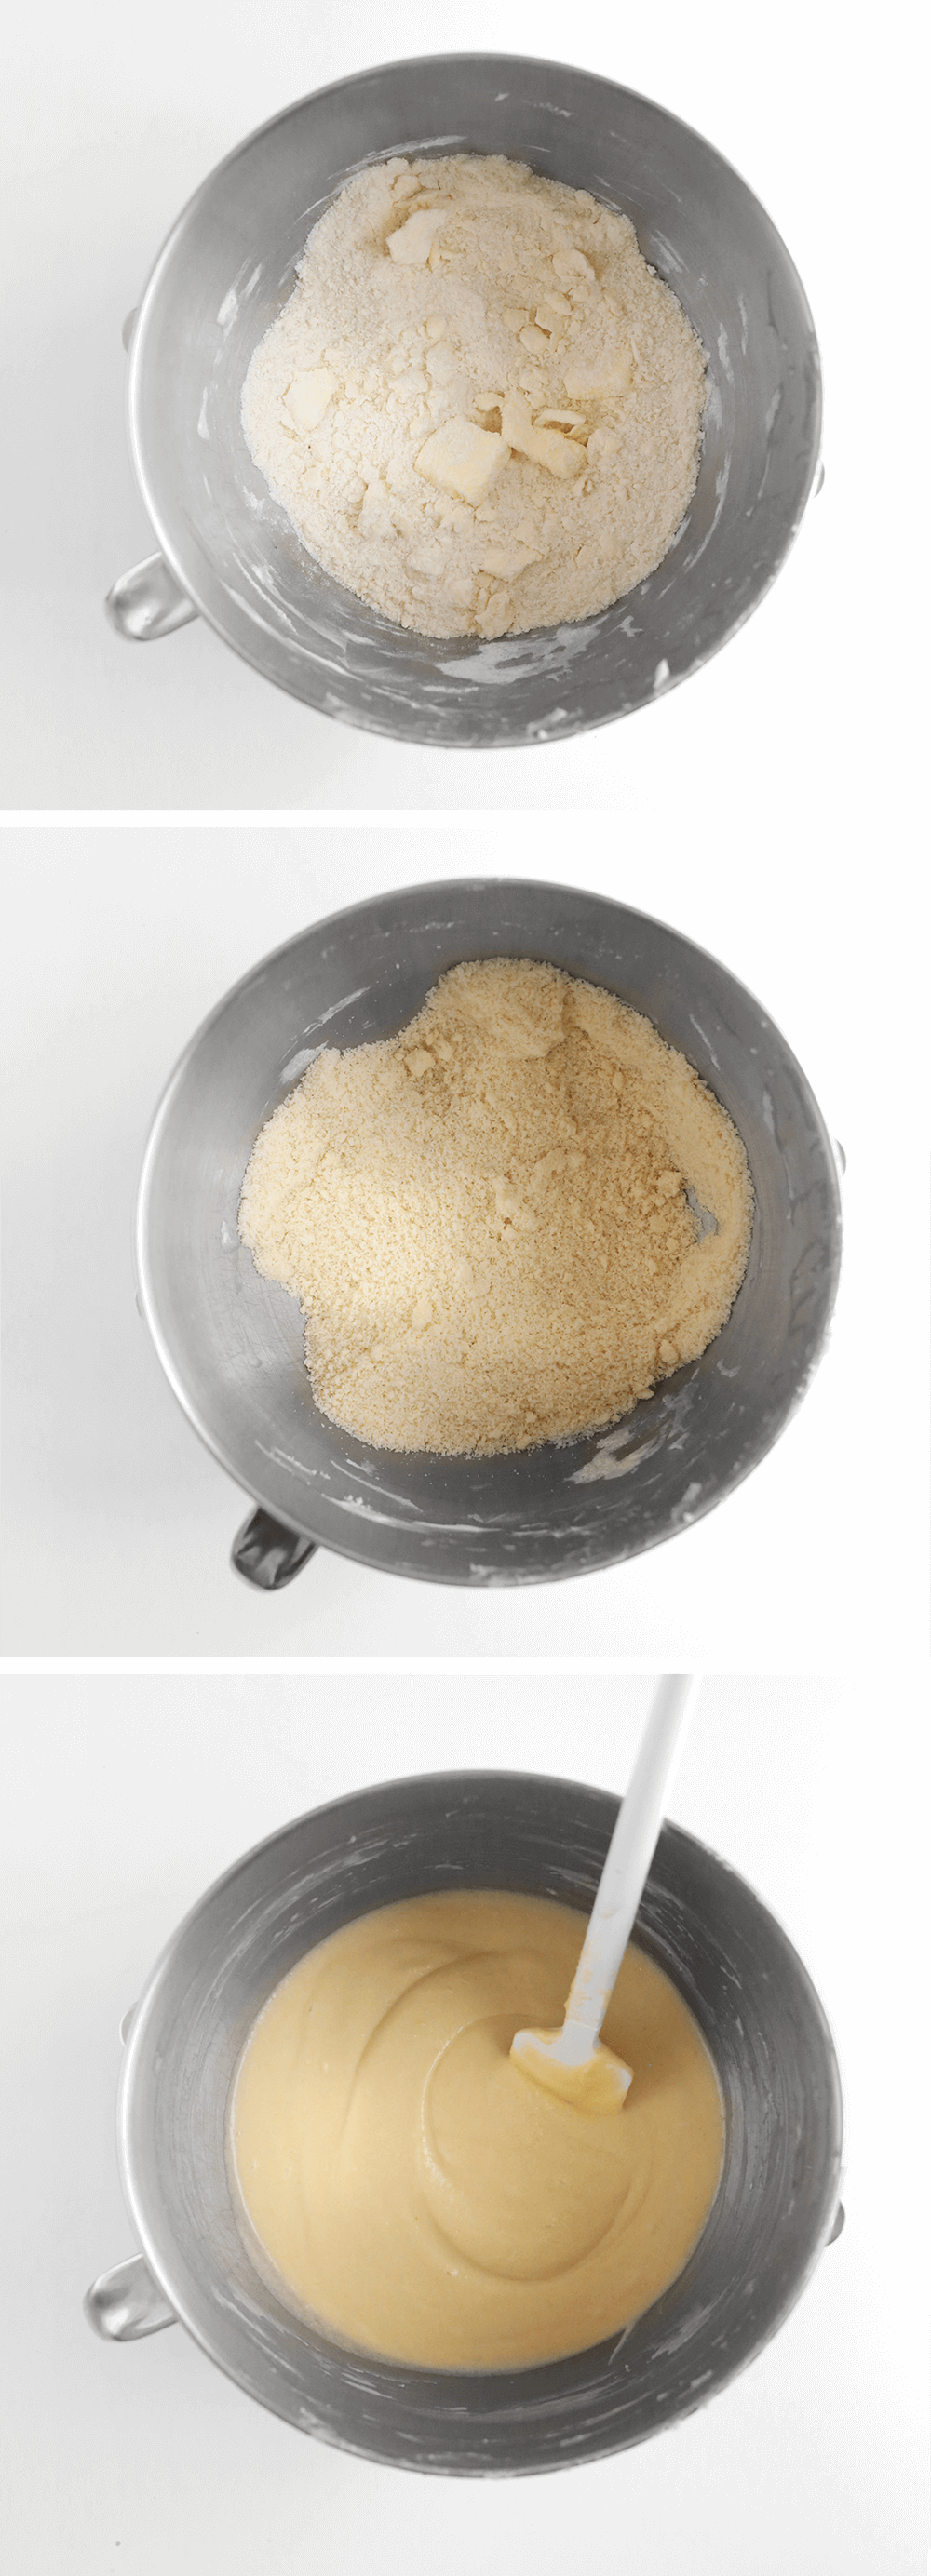
With the reverse creaming method, you cream the butter directly into the flour/sugar mixture and mix until you’re left with a sandy, coarse meal (see above). Then you add in the liquids, beating on low to incorporate until just combined. It’s a bit like making a scone or a biscuit, with a higher liquid ratio and much tinier specks of butter.
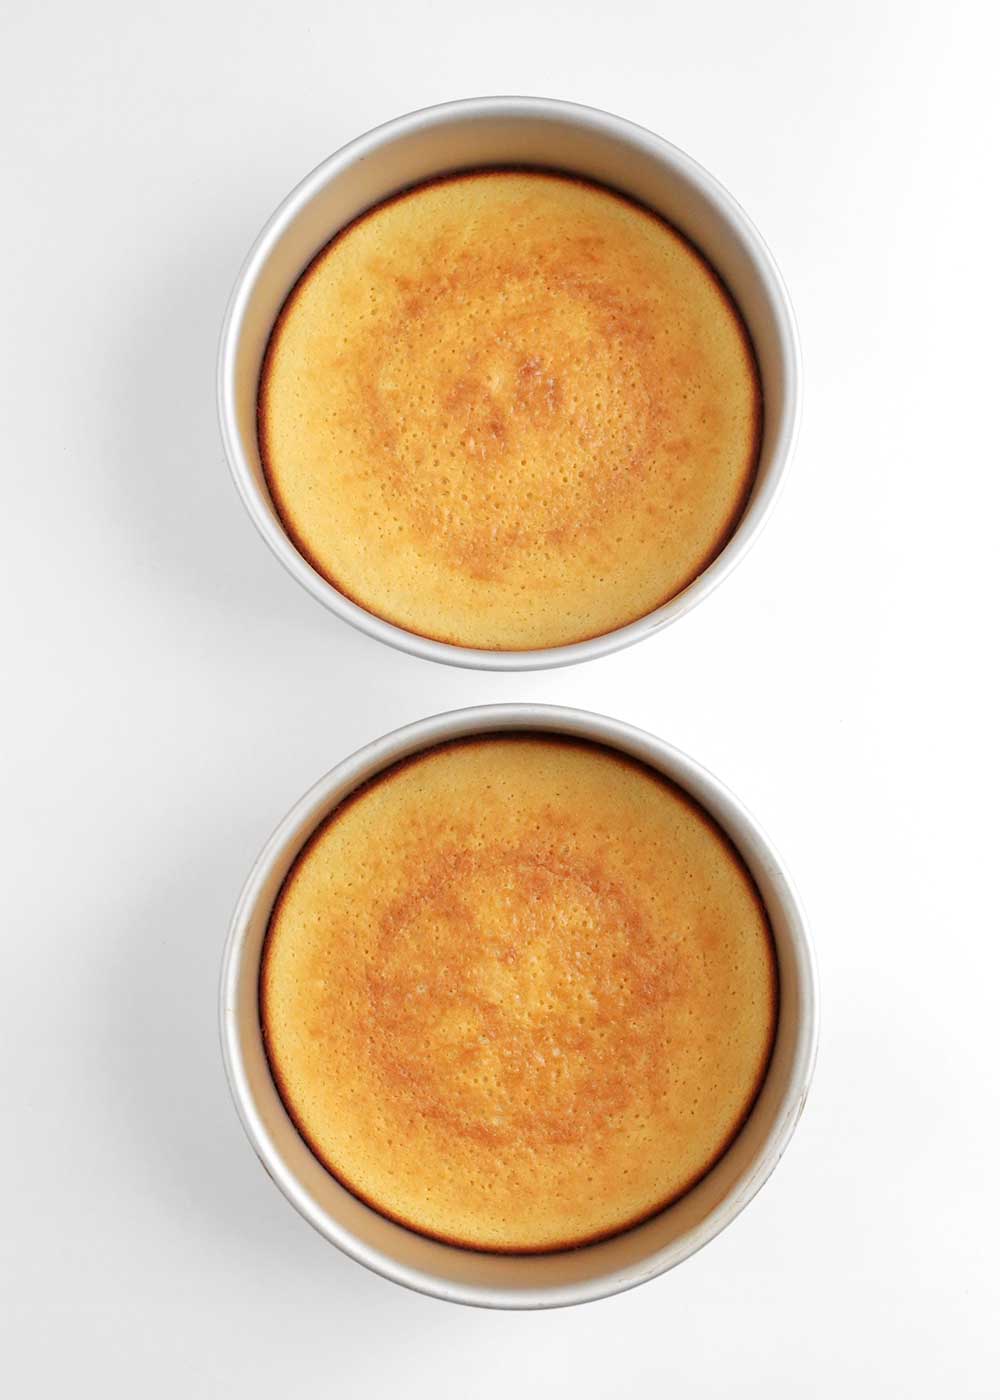
Mixing, whipping, and creaming—they all add air. The goal of the reverse creaming method is to reduce air, yielding a tight crumb. This also helps to create flat cakes. Domed cakes often take longer to cook, as the tall, airy center needs extra time to finish, yielding an overcooked, dry rim of the cake. Not so with this method.
Maybe you’ve seen it in recipes: don’t overbeat or mix until just combined. This is typically an effort to prohibit or stall gluten formation. When making bread, we want lots of gluten formation and stringy webs, requiring a good amount of mixing and kneading to create. There’s always a rest time incorporated, too, to let the gluten relax and stretch back out after a workout. When making pastries and cakes, however, we want just enough gluten formation to hold things together. And, with no rest time before baking, an overmixed batter will yield everything from a tough, chewy, overly airy, or dense result. Once again, the reverse creaming method helps prevent this common baking mistake, allowing you to take as long as you want to combine the butter before adding in the liquids, thus activating the gluten.
Have I convinced you to give this method a whirl yet?
I’m still working on a good old-fashioned vanilla buttercream that isn’t cloyingly sweet. I got really close the other day when I wasn’t measuring. Of course. I’ll report back on that front soonish. Until then, here’s to making a really good and really simple vanilla cake. And trying new things, like the reverse creaming method. Amen.
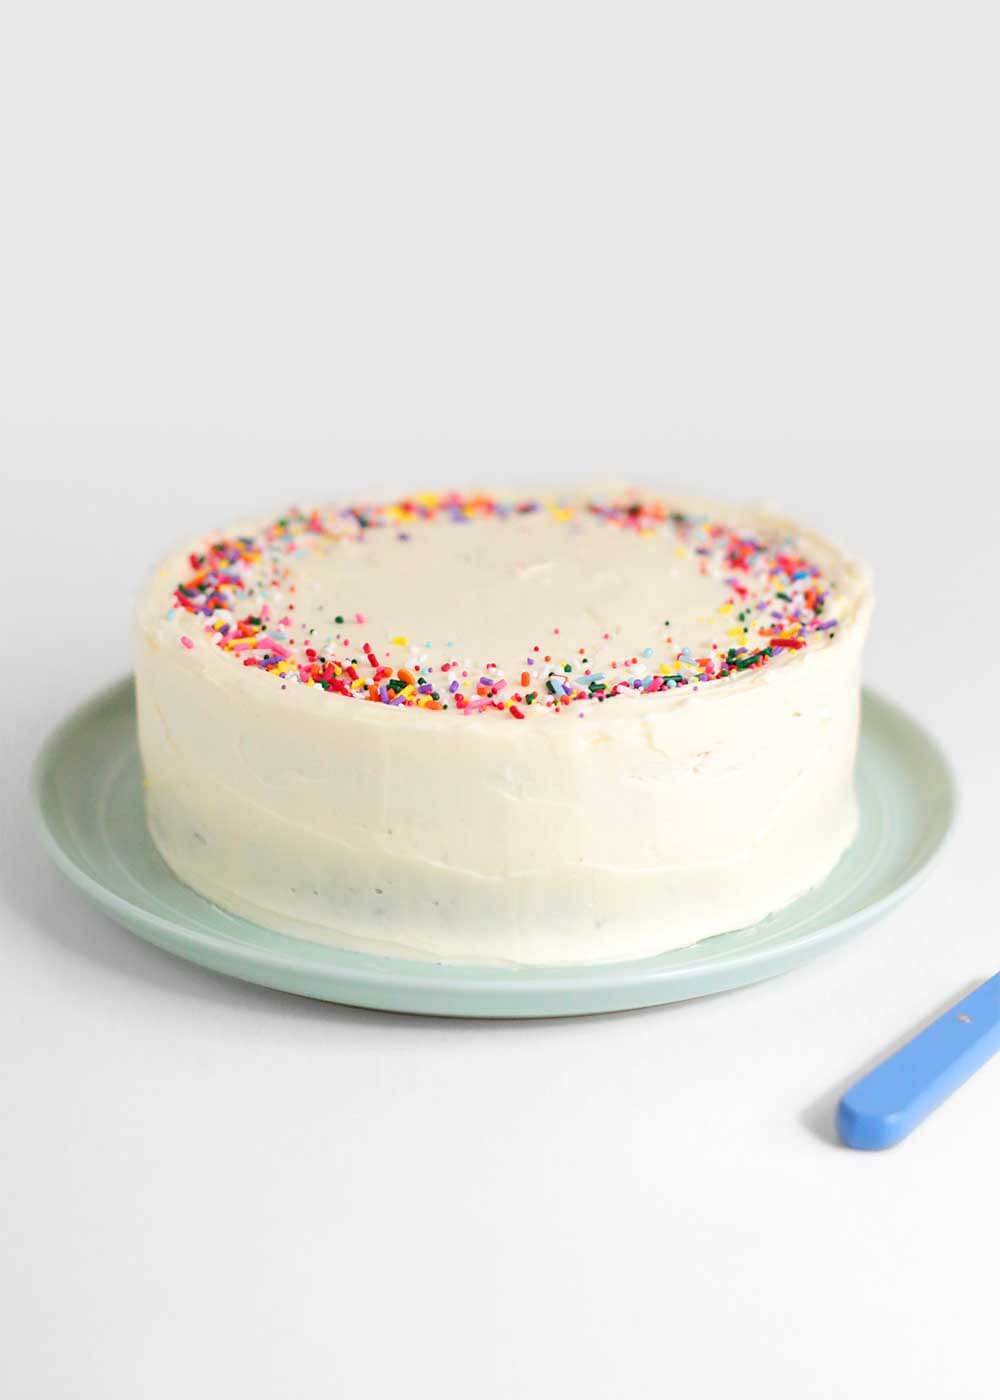
This simple vanilla cake is made from pantry staples and packed with flavor using the reverse creaming method, creaming the butter into the flour. It yields a tight crumb, flat top, and flavorful cake. Take this recipe slow, literally. As usual, I’ve taken this recipe down to the lowest sugar amount possible for it to still taste like cake and remain moist. Like most baked goods, this is best made a day in advance.
Ingredients
Scale
Wet
1/2 c. whole milk
1/2 c. heavy cream
2 tsp. pure vanilla extract
1 tsp. white vinegar
4 large eggs, room temperature
Dry
1 3/4 c. unbleached all-purpose flour
1 1/3 c. pure cane sugar
1 1/2 tsp. aluminum-free baking powder
3/4 tsp. kosher salt
1/8 tsp. baking soda
3/4 c. (1 1/2 sticks) unsalted butter, room temperature
Instructions
Preheat the oven to 350°F. Line two 8-inch cake pans along the bottom with parchment paper. To do so, fold a sheet of parchment paper in half, the same width as the cake pan. Trace and cut inside the line. Place both sheets inside the cake pan. Set aside.
Combine the wet ingredients. In a liquid measuring cup, add all the wet ingredients except for the eggs. Set aside. (Note: to bring eggs to room temperature more quickly, place in a small bowl covered with warm water.)
Meanwhile, mix the dry ingredients. In a stand mixer fitted with a paddle attachment, add all the dry ingredients into the bowl, except for the butter, and mix on low speed to incorporate. Cut the butter into tablespoon-sized slices and add one at a time to the mixer while on low speed. Mix until a sandy, coarse meal forms, about 3-4 minutes. (See picture above for reference.)
Once the flour mixture looks like a coarse meal, whisk the eggs into the wet ingredients (the liquid measuring cup) until evenly combined.
Pour the wet ingredients into the dry ingredients in 3-4 increments over low speed. Stay low here so as not to add too much air to the batter. Scrape down the sides of the bowl between each addition. Continue mixing on low until you achieve a smooth batter.
Now, mix once more on medium-high speed for 2-3 seconds, no more, just to combine everything. Reminder: the goal of this method is to beat in as little additional air as possible while creaming together.
Evenly distribute the batter between the two cake pans and rap (a short drop) on the counter a couple of times to remove any large air bubbles.
Bake for 24-28 minutes. The cake is done when golden and slightly domed at the top. A light tap on the top to check for doneness will feel springier than you may be used to. It’s ready to come out. Remove from the oven to cool. As the cake cools, the dome will level out and flatten.
Remove from the pan after about 10 minutes, sliding a thin knife around the edges to loosen. Carefully remove layers and place on a cooling rack to cool completely before icing.
Store cake in an airtight container for up to 4 days. The cake is best after an overnight rest.
Prep Time:15 min.
Cook Time:24 min.
Recipe Card powered by
If you like this Simple Vanilla Cake, you may also like:
This blog is made possible by your support (thank you), select brand partnerships, advertisements, and affiliate links to items I love and use. READ MORE >
Hi Melissa! This is an amazing recipe!! The texture is perfect! I want to use it as a base recipe to make other flavors (salted caramel, chocolate, as well as pistachio) and was wondering how I would tweak it without messing with the texture. For example, if I add pistachios do I need to add more wet ingredients? Or if I add dulce de leche to make a salted caramel cake, would I omit some of the milk/heavy cream? Sorry for all the questions but am thankful for your input!
Hi Karina! I’m so so happy you liked this recipe! (It’s my favorite too.) And now you have my wheels spinning on how to tweak this. I think someone else in the comments turned this into a chocolate cake with ease. To give you any solid answers, I’d have to test, which I might just do one of these days! But you’re on the right track! In general, when I’m retrofitting a recipe, I look at the wet to dry ratio. I also look at the leavening—do I need to balance the acids (the baking soda and vinegar)? I’m guessing a chocolate cake would do well with a different baking soda/baking powder ratio for this reason. And finally, I look at fat, which this recipe has plenty of, making it so user-friendly. I might also take a look at baking temp and time for more finicky things like chocolate that tend to dry out quickly (though the fat in this cake should help prevent that). I hope this is a little helpful! If you end up trying it out, will you let me know? Happy cake-making! (PS: I’m still working on that buttercream recipe.)
This is hands down the best vanilla cake I have ever had/made. Crumb is perfect and the flavor is outstanding. I now refuse to make any other! Thank you so much for your wonderfully simple and beyond delicious recipes. With 2 kids under 5, they have truly been a lifesaver for our family!
Well, you just made my week, Jo! I’m so so happy to hear you like this cake as much as we do. (And other recipes too.) It’s so nice to hear these recipes are working in other kitchens too.
Hey Melissa, I just made this cake for my daughter’s 8th birthday and it was a revelation! The texture was superb and the flavour was perfect – we all loved it. I don’t have a stand mixer so I just pulsed the cold butter with the dry ingredients in my food processor until it reached the right texture then stirred in the wet ingredients, This will be definitely be my go to cake from now on, so easy and delicious. I also halved the recipe and made a chocolate version by adding a couple of tablespoons of cocoa and that got rave reviews too. Thank you for all of your testing to bring us this – can’t wait to try the not too sweet vanilla buttercream when you’re ready to share that too 🙂


This simple vanilla cake is just what I was looking for. My daughter loves vanilla and this cake was moist and flavorful.
Hi Melissa, is it possible to give me your recipe in metric measurements? Where I live hard to find sticks butter thank you in advance
Can you use cake flour ? If so, how do you convert the amounts considering AP flour weigh more than cake flour?
I just made this with cake flour . I didn’t change anything else about the recipe. . It’s a fabulous cake! Topped it with buttercream icing .
Melissa, this is the perfect cake! Brava!
I’m wondering if you’ve finalized a frosting recipe you can share with us?
Thanks so much!
Hi Chel! I slowed way down on this progress after a move this summer. But the frosting base I’ve been working from is this recipe, but sized way up!
Hi Melissa! This is an amazing recipe!! The texture is perfect! I want to use it as a base recipe to make other flavors (salted caramel, chocolate, as well as pistachio) and was wondering how I would tweak it without messing with the texture. For example, if I add pistachios do I need to add more wet ingredients? Or if I add dulce de leche to make a salted caramel cake, would I omit some of the milk/heavy cream?
Sorry for all the questions but am thankful for your input!
Hi Karina! I’m so so happy you liked this recipe! (It’s my favorite too.) And now you have my wheels spinning on how to tweak this. I think someone else in the comments turned this into a chocolate cake with ease. To give you any solid answers, I’d have to test, which I might just do one of these days! But you’re on the right track! In general, when I’m retrofitting a recipe, I look at the wet to dry ratio. I also look at the leavening—do I need to balance the acids (the baking soda and vinegar)? I’m guessing a chocolate cake would do well with a different baking soda/baking powder ratio for this reason. And finally, I look at fat, which this recipe has plenty of, making it so user-friendly. I might also take a look at baking temp and time for more finicky things like chocolate that tend to dry out quickly (though the fat in this cake should help prevent that). I hope this is a little helpful! If you end up trying it out, will you let me know? Happy cake-making! (PS: I’m still working on that buttercream recipe.)
Thank you Melissa! I will let you know!
I’m excited to try this! And definitely looking forward to the frosting recipe. I make lots of your recipes often! 🙂
This is hands down the best vanilla cake I have ever had/made. Crumb is perfect and the flavor is outstanding. I now refuse to make any other! Thank you so much for your wonderfully simple and beyond delicious recipes. With 2 kids under 5, they have truly been a lifesaver for our family!
Well, you just made my week, Jo! I’m so so happy to hear you like this cake as much as we do. (And other recipes too.) It’s so nice to hear these recipes are working in other kitchens too.
Hey Melissa, I just made this cake for my daughter’s 8th birthday and it was a revelation! The texture was superb and the flavour was perfect – we all loved it. I don’t have a stand mixer so I just pulsed the cold butter with the dry ingredients in my food processor until it reached the right texture then stirred in the wet ingredients, This will be definitely be my go to cake from now on, so easy and delicious. I also halved the recipe and made a chocolate version by adding a couple of tablespoons of cocoa and that got rave reviews too. Thank you for all of your testing to bring us this – can’t wait to try the not too sweet vanilla buttercream when you’re ready to share that too 🙂