Description
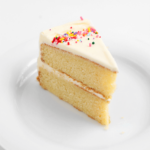
This simple vanilla cake is made from pantry staples and packed with flavor using the reverse creaming method, creaming the butter into the flour. It yields a tight crumb, flat top, and flavorful cake. Take this recipe slow, literally. As usual, I’ve taken this recipe down to the lowest sugar amount possible for it to still taste like cake and remain moist. Like most baked goods, this is best made a day in advance.
Ingredients
Scale
Wet
- 1/2 c. whole milk
- 1/2 c. heavy cream
- 2 tsp. pure vanilla extract
- 1 tsp. white vinegar
- 4 large eggs, room temperature
Dry
- 1 3/4 c. unbleached all-purpose flour
- 1 1/3 c. pure cane sugar
- 1 1/2 tsp. aluminum-free baking powder
- 3/4 tsp. kosher salt
- 1/8 tsp. baking soda
- 3/4 c. (1 1/2 sticks) unsalted butter, room temperature
Instructions
- Preheat the oven to 350°F. Line two 8-inch cake pans along the bottom with parchment paper. To do so, fold a sheet of parchment paper in half, the same width as the cake pan. Trace and cut inside the line. Place both sheets inside the cake pan. Set aside.
- Combine the wet ingredients. In a liquid measuring cup, add all the wet ingredients except for the eggs. Set aside. (Note: to bring eggs to room temperature more quickly, place in a small bowl covered with warm water.)
- Meanwhile, mix the dry ingredients. In a stand mixer fitted with a paddle attachment, add all the dry ingredients into the bowl, except for the butter, and mix on low speed to incorporate. Cut the butter into tablespoon-sized slices and add one at a time to the mixer while on low speed. Mix until a sandy, coarse meal forms, about 3-4 minutes. (See picture above for reference.)
- Once the flour mixture looks like a coarse meal, whisk the eggs into the wet ingredients (the liquid measuring cup) until evenly combined.
- Pour the wet ingredients into the dry ingredients in 3-4 increments over low speed. Stay low here so as not to add too much air to the batter. Scrape down the sides of the bowl between each addition. Continue mixing on low until you achieve a smooth batter.
- Now, mix once more on medium-high speed for 2-3 seconds, no more, just to combine everything. Reminder: the goal of this method is to beat in as little additional air as possible while creaming together.
- Evenly distribute the batter between the two cake pans and rap (a short drop) on the counter a couple of times to remove any large air bubbles.
- Bake for 24-28 minutes. The cake is done when golden and slightly domed at the top. A light tap on the top to check for doneness will feel springier than you may be used to. It’s ready to come out. Remove from the oven to cool. As the cake cools, the dome will level out and flatten.
- Remove from the pan after about 10 minutes, sliding a thin knife around the edges to loosen. Carefully remove layers and place on a cooling rack to cool completely before icing.
- Store cake in an airtight container for up to 4 days. The cake is best after an overnight rest.
- Prep Time: 15 min.
- Cook Time: 24 min.