
We’re really close to wrapping up the Pinch of Yum Studio design project, a project that started a whopping 6 months ago. A project that began with me asking a lot of personal and professional questions that seemed to keep running into each other, begging for answers. I took the one-word advice I’ve given to others with a pile of questions that need answering: Play. That’s just what I did. In this case, play looked like designing a space outside of my home, for a client other than myself and Kev, thankfully for friends. It’s been messy and amazing, fun and hard. I’ll tell you more about all this playing another day. A couple weeks ago, I shared the office design plans and the aesthetic for the studio. Later this week, I’ll share the final reveal of the office spaces (!). But today, I’m sharing the kitchen and dining room renderings.
A note of thanks
A huge thank you to IKEA®, who furnished a good chunk of the studio, from the offices to the kitchen, which was amazing as I was already using their products in the design. IKEA is a registered trademark of Inter IKEA Systems B.V. The views, ideas and opinions expressed here are my own. Note: Affiliate links are used throughout.
Kitchen Renderings
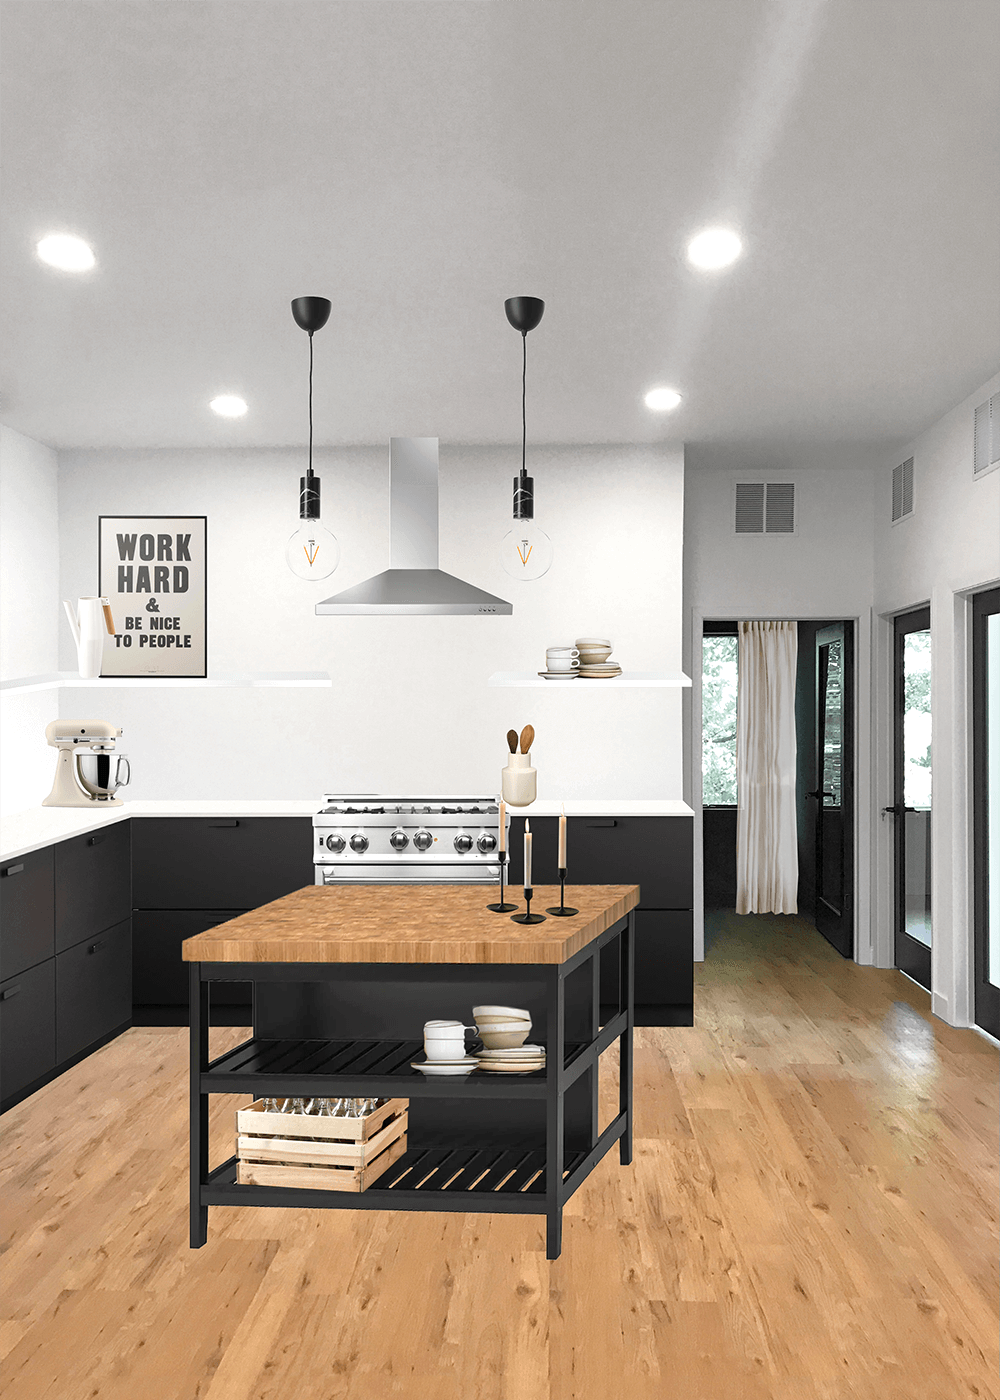
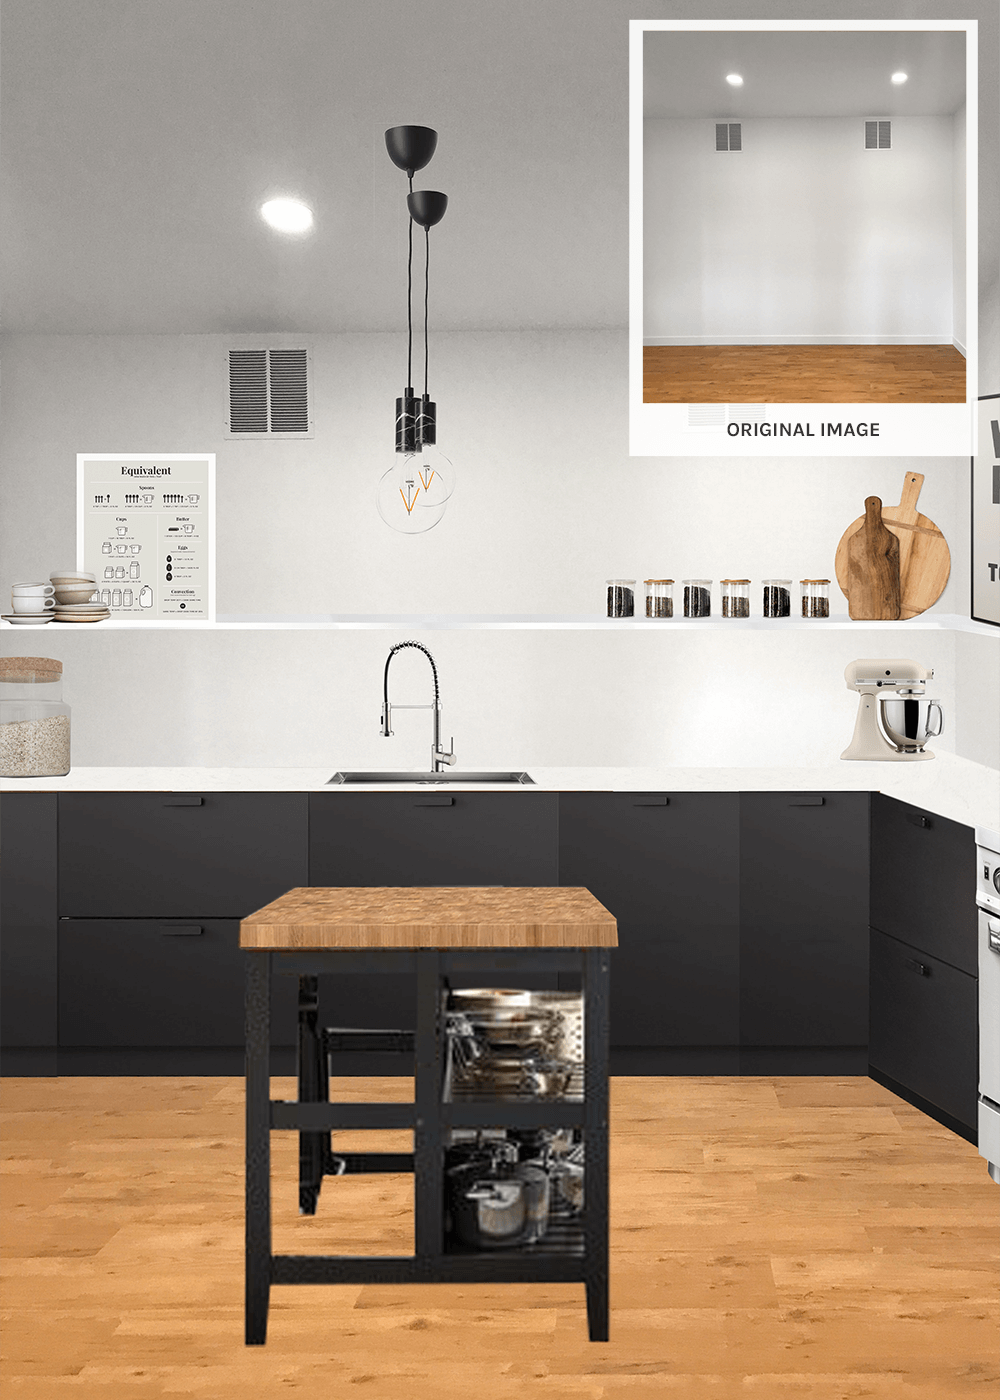
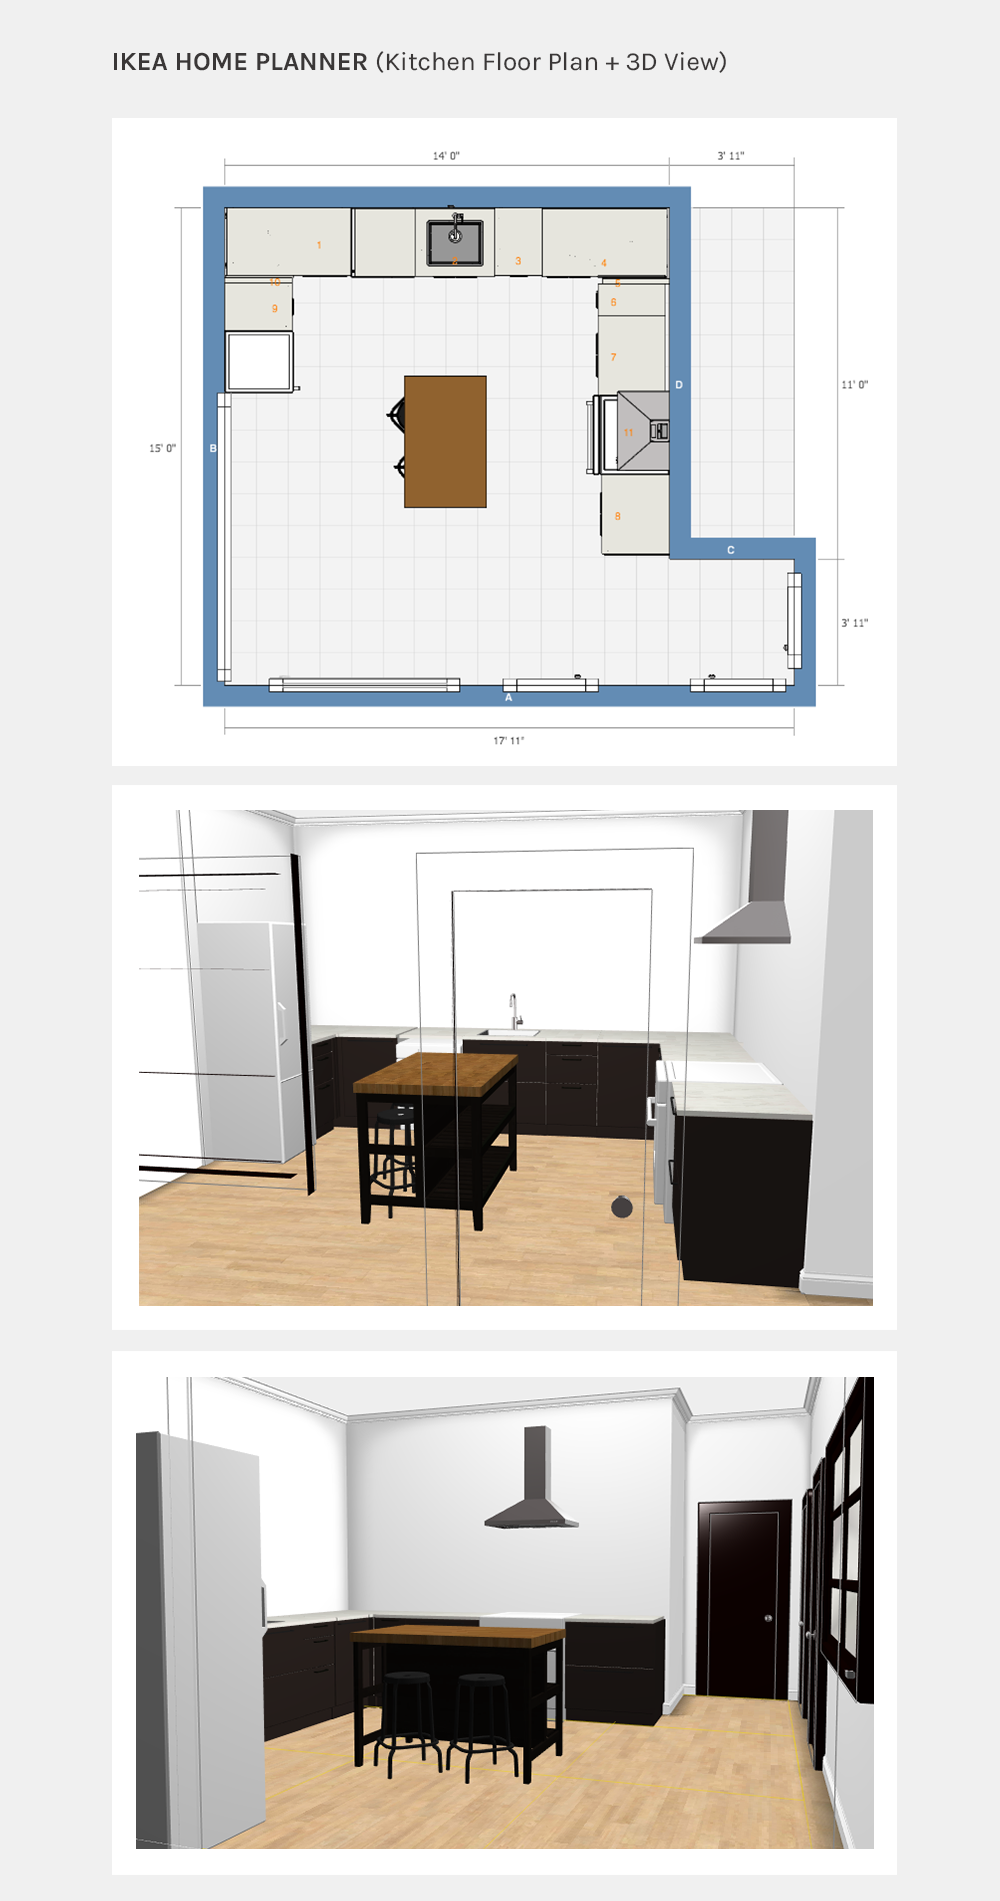
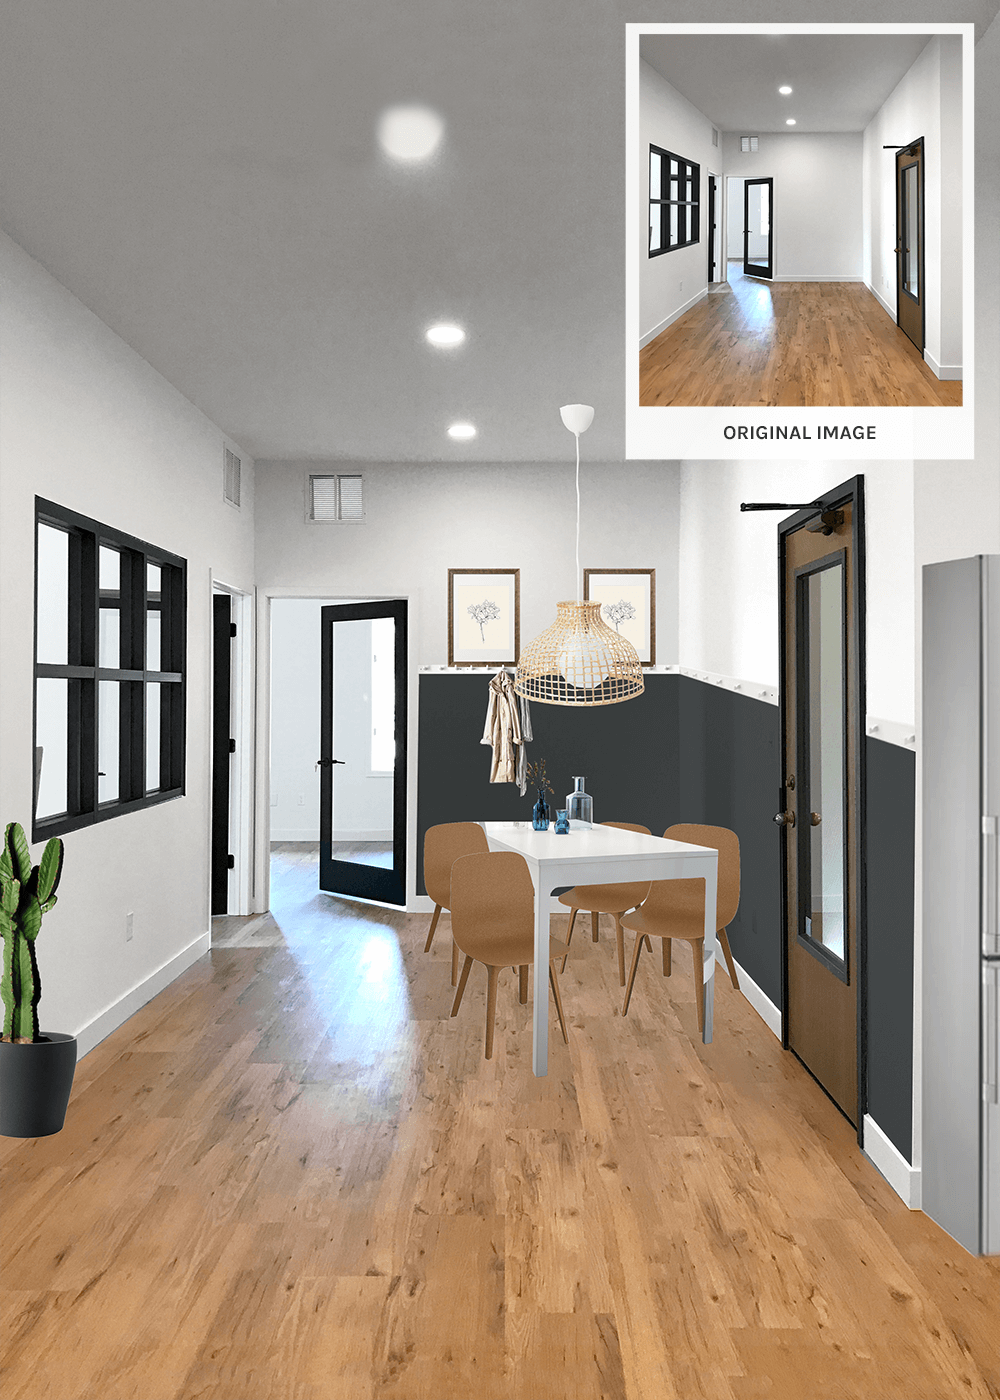
Below are the Photoshop renderings for the spaces. For each rendering, you’ll see the original image, the empty room, that the file was built on. The large image is the final rendering used to implement the design. Designing this way helps me to better understand how colors and textures will interact together in the final space. With both the kitchen and dining room, I also used the online IKEA Home Planner tool to design for scale, cabinetry, appliances, plumbing, and electrical.
PS—I’ve used their user-friendly online planning tool before in our laundry room. The in-store IKEA staff are also super knowledgeable at helping answer any questions. I took full advantage of this with the kitchen. They made a couple of genius, last-minute tweaks to my kitchen design before ordering. (Thank you Eva, if you ever happen to read this!)
Pinch of Yum, as you probably know, is a food blog, a very delicious one. May I suggest their Chicken Pot Pie with Biscuits and Magic Green Sauce? (Not at the same time.)
This kitchen needed to be more than just a heat-up-your-lunch studio kitchen. It needed to be a test kitchen. Design-wise, they wanted to keep the studio minimal and open. The kitchen is surrounded by white walls, black glass doors, and black interior windows with offices on the outside. In order to balance these dark, heavy elements lining one side of the open space, I recommended going dark in the kitchen. They agreed, so we went with these beautiful matte black IKEA Kungsbacka cabinets made from plastic bottles (so cool) and kept things light and airy up top with open shelving. With their previous studio only having lower cabinets, and far fewer than this, this arrangement gives them plenty of storage space.
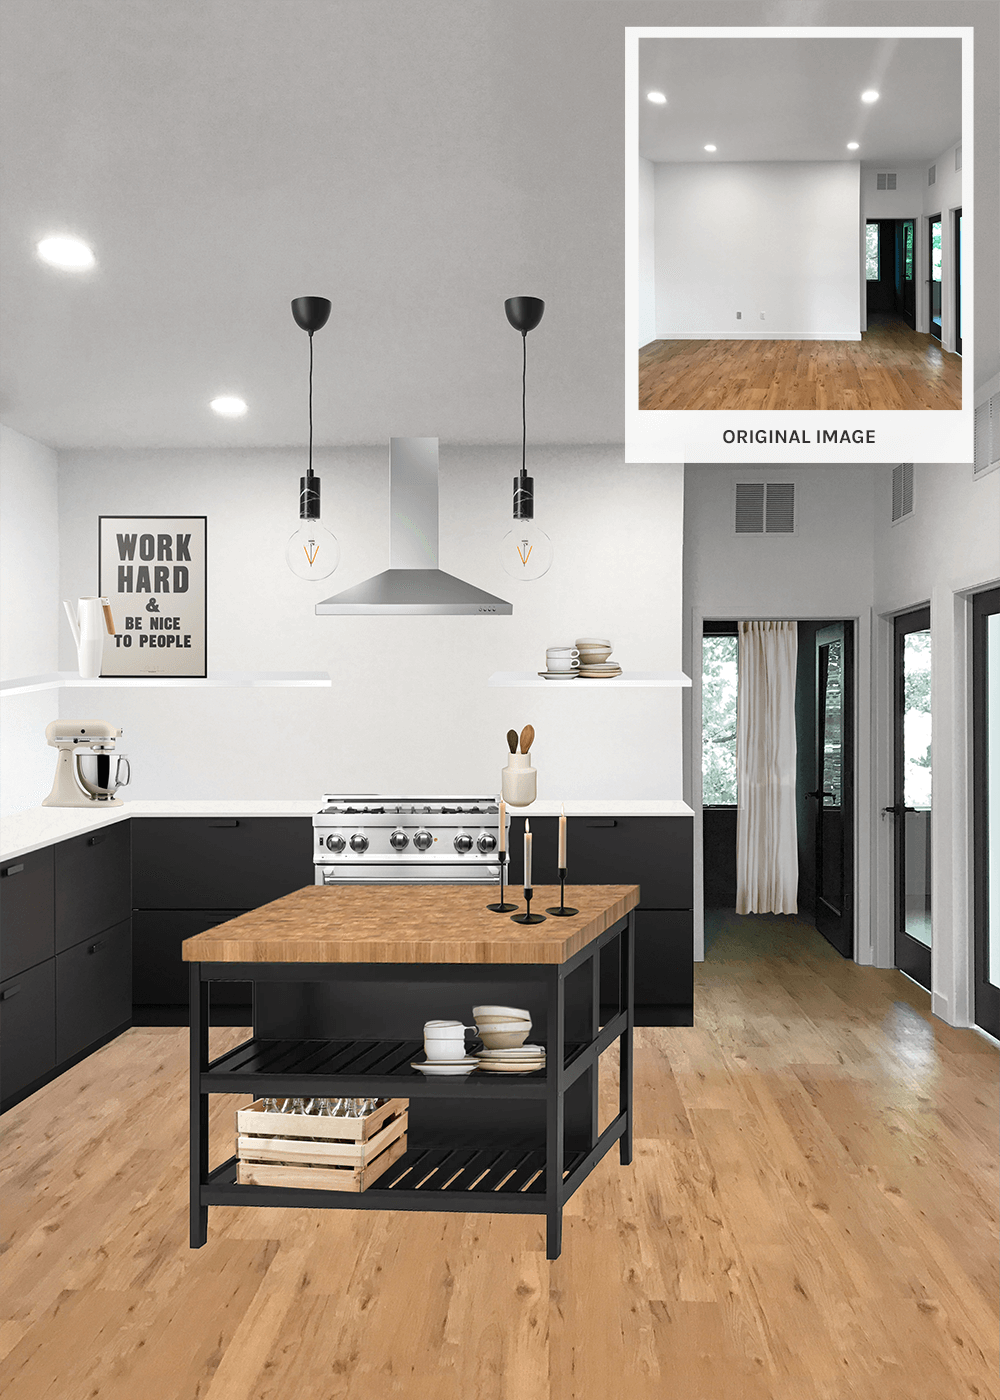
They went with a freestanding island to keep the space nimble and transient. Not having worked in the space beforehand, it’s hard to predict all the specific needs. For that reason, we kept the island flexible, with the ability to be altered in the future as needs arise. (Note: all sources will be listed and linked in the final reveal post.) Below is the floor plan and 3D view of the kitchen created in the IKEA Home Planner.
Dining Room Rendering
When entering the studio through the original wood door, the dining room is the first room you walk in to. It’s a narrow space with just enough room for a slender table. To the left is the kitchen. The dining room needed to double as an eating area and a meeting space. And, with no formal entry space, it also needed a touch of hospitality in the execution of the design.
We lined the space with hooks and painted the bottom half of the wall a muted dark blue, after seeing a similar idea at IKEA. The hooks could be both functional for leaning artwork and hospitable for hanging coats of guests. We’re in Minnesota after all. There will be coats. I found a slender, sturdy table for everyday usage with the ability expand for special occasions, floating a large but airy light fixture above.
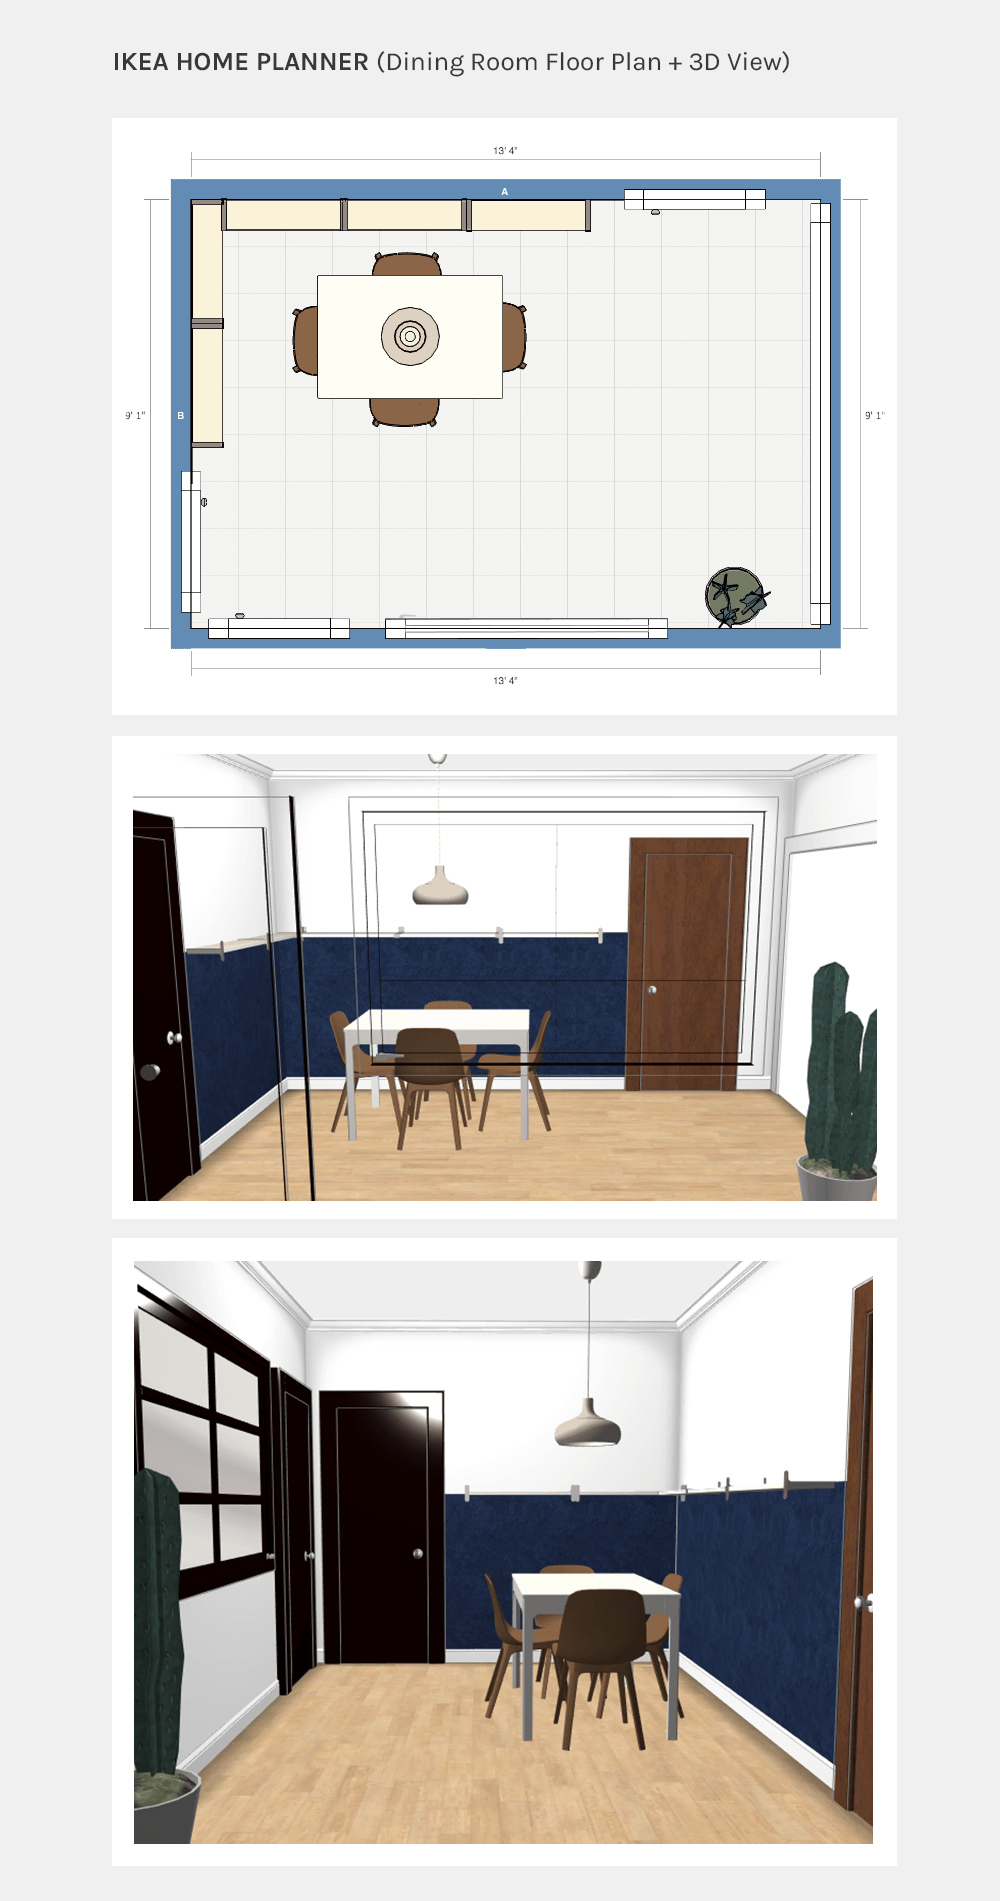
Below is the floor plan and 3D view of the dining room created in the IKEA Home Planner. While this tool is extremely beneficial for understanding the capabilities of a space, it lacks in color and texture accuracy, as most interior design programs do. I’ve said it once and I’ll say it again: Photoshop to the rescue.
I can’t wait to share these final spaces with you, a culmination of 6 months of work. The stone counters went in last week, and the open shelving goes in tomorrow. And, if all goes as planned, I’ll scarf down my final meal in the dining room while styling and shooting it later this week, just before signing off for the holiday break.


Hi Melissa,
I have discovered your site late last evening, while looking for a no mow grass. Thank you for Prairie Nursery!
Although I am convinced that you don’t need a background story, I feel that a context is necessary. I am a math teacher working through all this distance learning situation.
After long hours of sitting, planning while sitting, teaching while sitting, grading while sitting, and every email related activity and professional development interactive meeting happening while I am sitting, I finally turn around, walk through my home, and hope that I will find ways to be active and relax.
I have been longing for home improvements, long overdue, completing tiny projects, always restricted by budget and time limitations.
My home and my heart need a clean space, as eco friendly as possible. In December I have planned a new look for ceilings, and after that comes flooring.
Don’t you love the above text? Because I have one question only: what is that beautiful wood flooring in your home? That’s pretty much it.
Have been researching for a while, every flooring specialist tries to push vinyl planks and /or laminate, every worker suggests porcelain tile that looks like wood. I know it is my money, my home. Pro arguments involve cleaning and water resistance, my cons would be noise level, unnatural/cheap look, eco friendly materials which laminate and vinyl are really not.
Hi Daniela! Sorry I’m responding so late. I just found some comments that went to spam. Ack! Did you end up doing the no mow grass? If so, what do you think?
For our wood flooring, we used a low-grade red oak (they were supposed to be white oak). Either way, we went low grade for their imperfect knotty appearance. The really big holes were filled and the smaller ones were left open. We love them still!