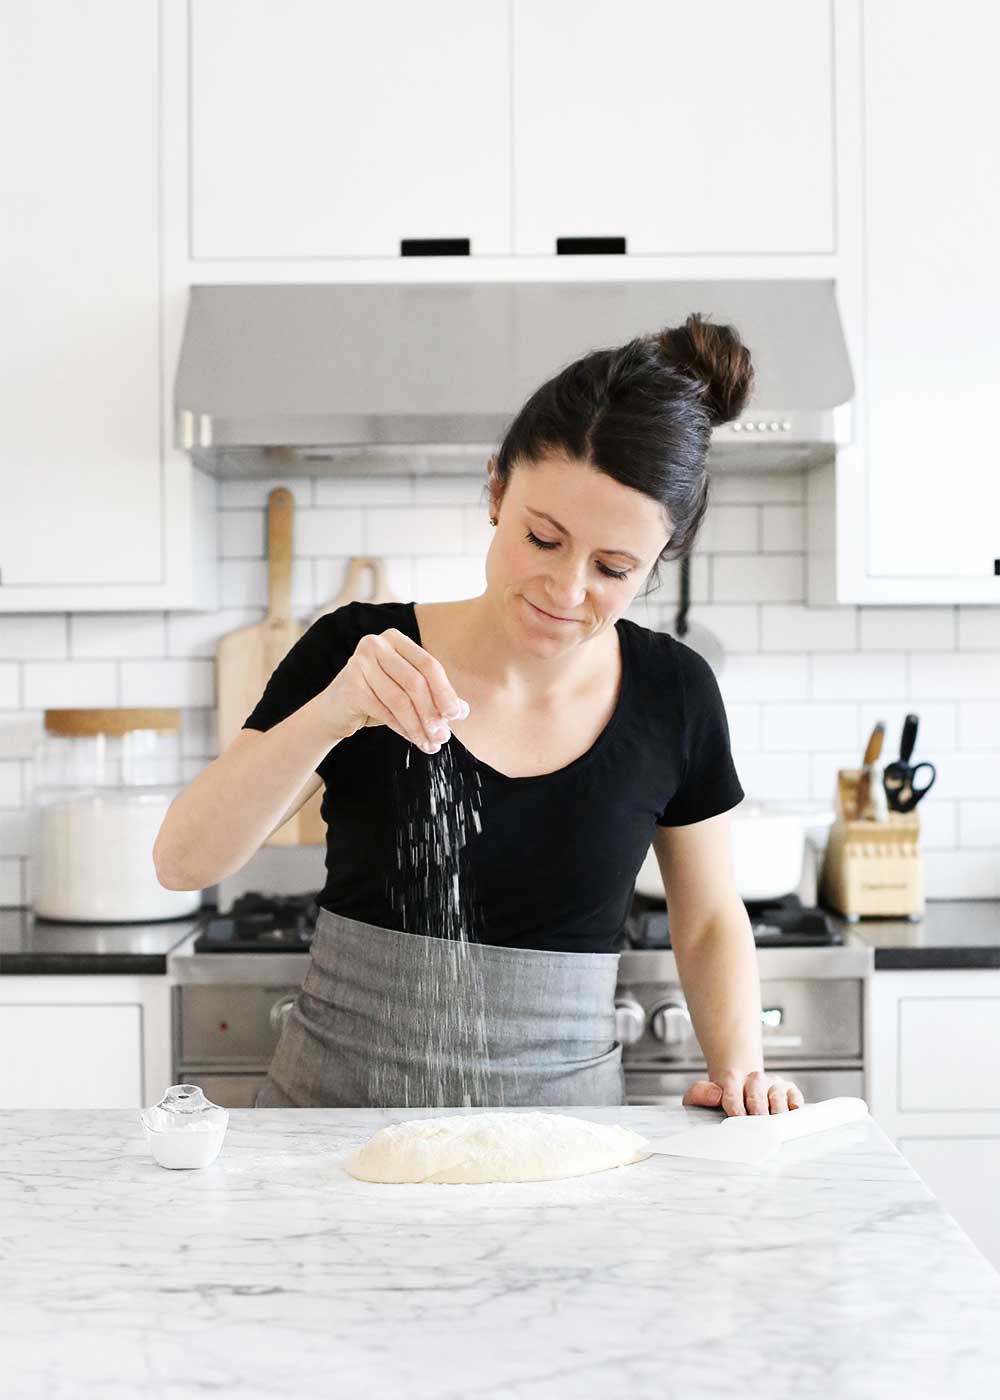
The 3-part pizza mini-series continues today with Part 2: Wood Fired Pizza Dough. Catch up on Part 1: The Gear and Part 3: The Sauce. I wrote a post over a year ago about how to make really good homemade pizza. That recipe carried us through years of pizza making. I thought we’d use it in our outdoor oven too. But in true fashion, Kev and I had differing ideas about our pizza. He wanted something closer to a traditional Neapolitan crust, while I wanted something a bit more non-traditional.
The Story Behind the Wood Fired Pizza Dough
We had a dough-off. A lot of dough-offs. Under the high heat (around 800°F), my trusty dough couldn’t compete. I lost.
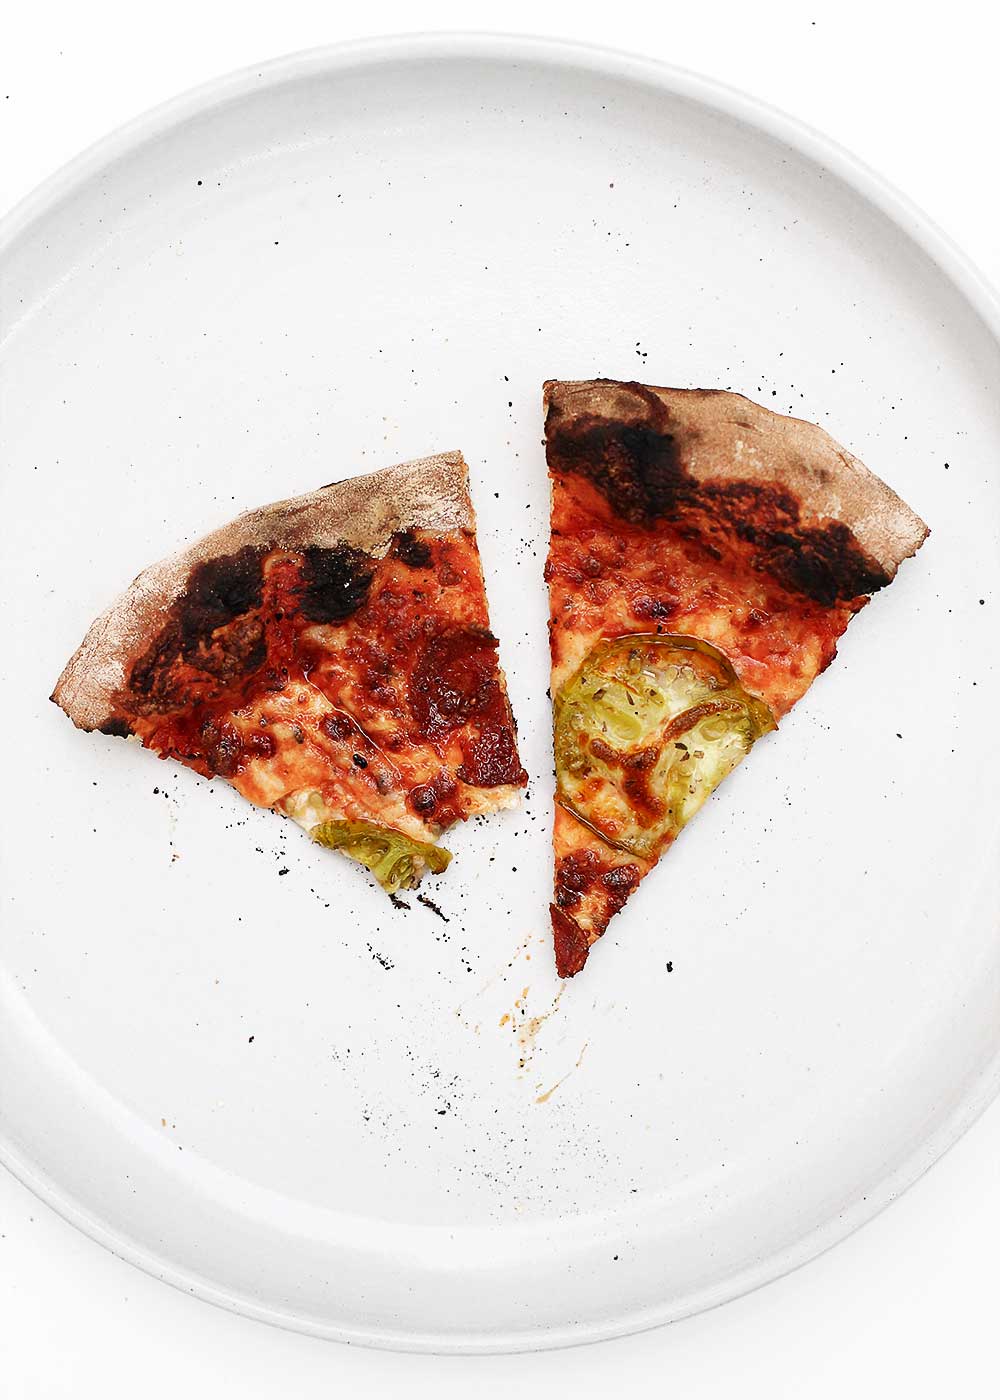
We continued to tweak the recipe over the summer—to the point it was so good, we didn’t want to go out and pay for pizza. In the end, we landed closer to a New Haven-style pizza compared to a Neapolitan. After spending two years in New Haven, we fell in love with this style of pie. (For the pizza purists out there, this pie doesn’t land firmly in either category.)
Like any good Neapolitan pizza, we kept the chewy crust but cooked it longer and hotter to achieve a crispy shell like New Haven pizza, with hits of black char around the edges. After eating a New Haven pie, your hands will be happily coated in black dust. There’s nothing better. (Side note: New Haven pies are coal-fired. Our oven is wood-fired.)
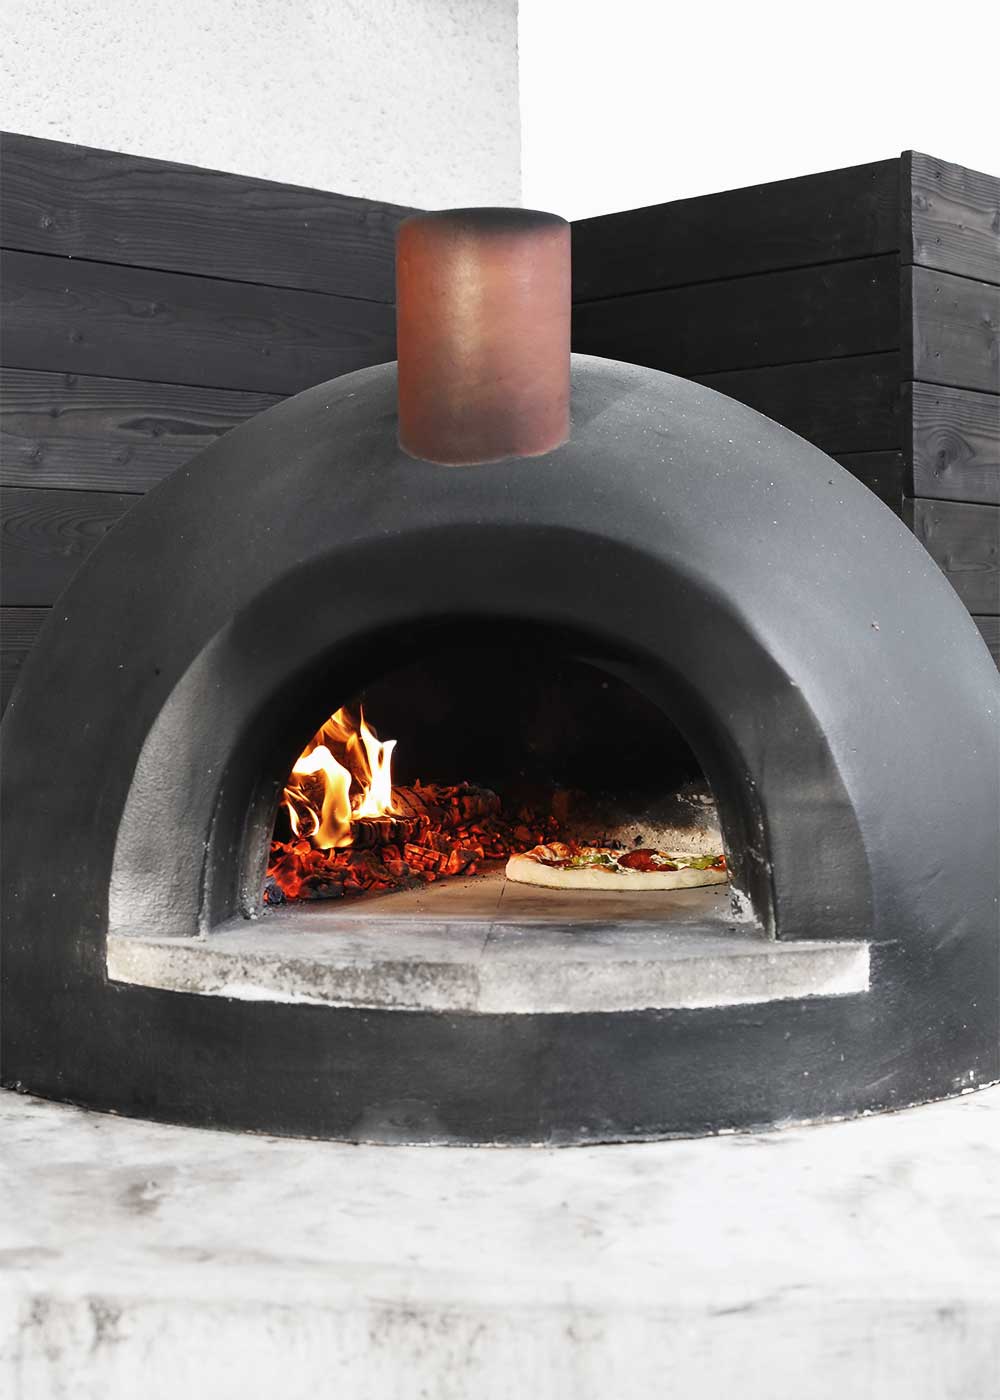
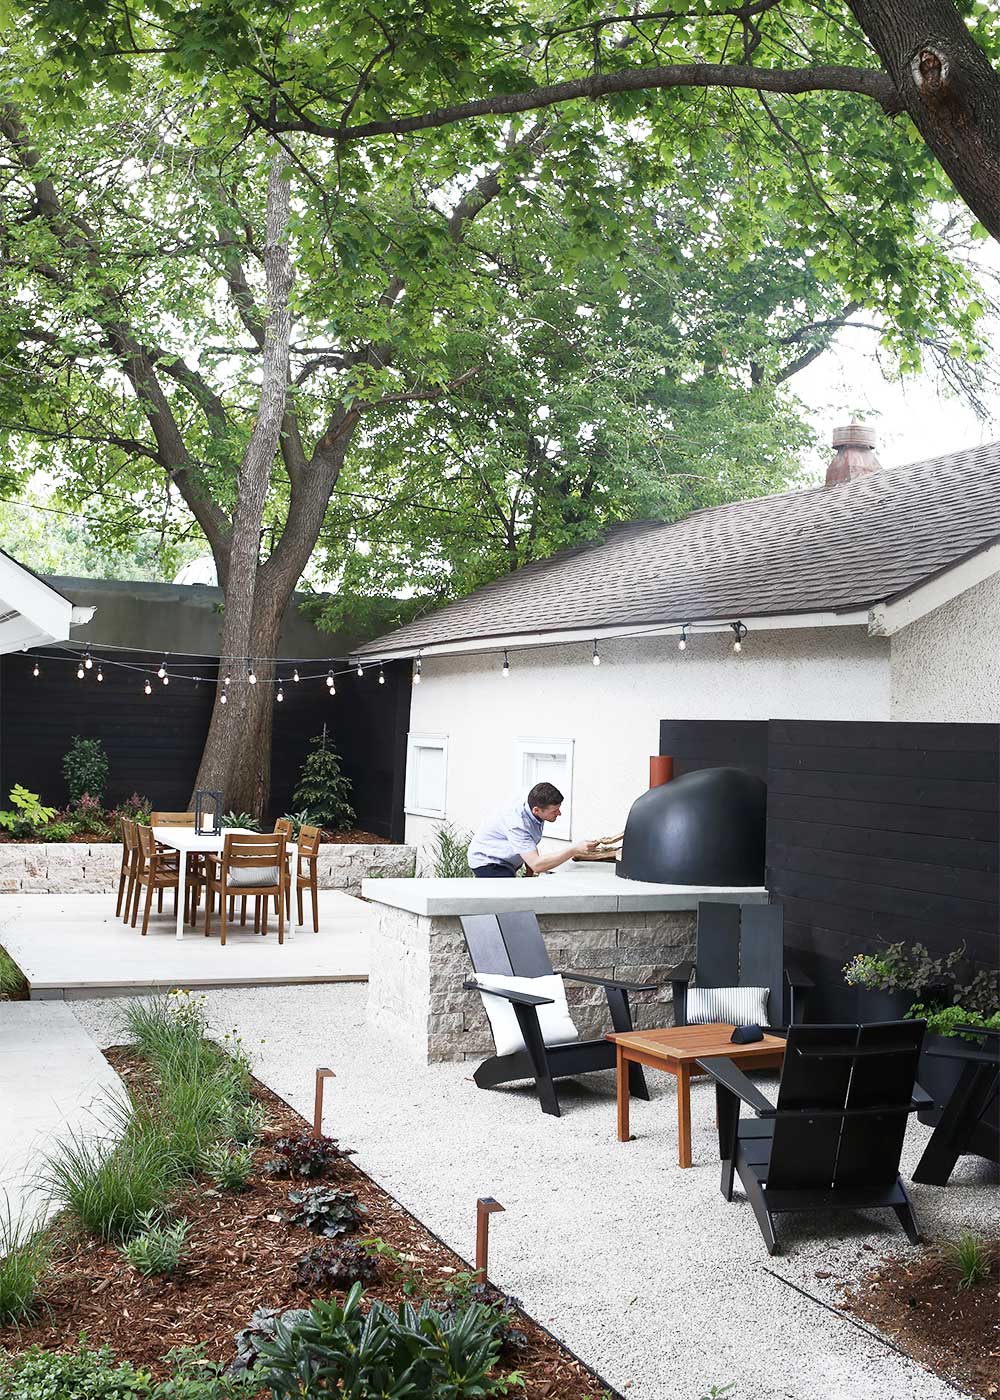
Here’s what cooking pizza in our Forno Bravo wood fired oven looks like. It’s a two-person job over here, and we’re still total amateurs. But I feel really lucky that Kev and I get to have a shared hobby that will take us a lifetime to master. Currently, I carry the title of wood fired pizza dough maker and pizza assembler, while Kev keeps the title of log splitter, fire whisperer, and pizza spinner.
The final recipe has very similar bones to my old trusty recipe, but it’s far more hydrated, meaning it’s a really wet dough. That helps to yield that chewy handlebar of a crust. It’s a simple recipe with simple ingredients—flour, salt, sugar, yeast, water, and olive oil. But the real flavor maker is not in the ingredient list. The 72-hour ferment in the fridge that does all the delicious-making work. While you have to plan in advance for this wood fired pizza dough recipe, it’s well worth it.
00 Flour
We made a major change to our pizza flour for this recipe. I’ve been using bread flour for years. But so many good pizza makers swear by 00 flour. After going back and forth between bread and 00 flour all summer, we too swear by this Italian flour. It yields the best kind of chewy. (Note: this flour has a short expiration date, so buy amounts accordingly. I love short expiration dates since they usually mean the food has no preservatives and should be eaten fresh.)
How to shape the dough
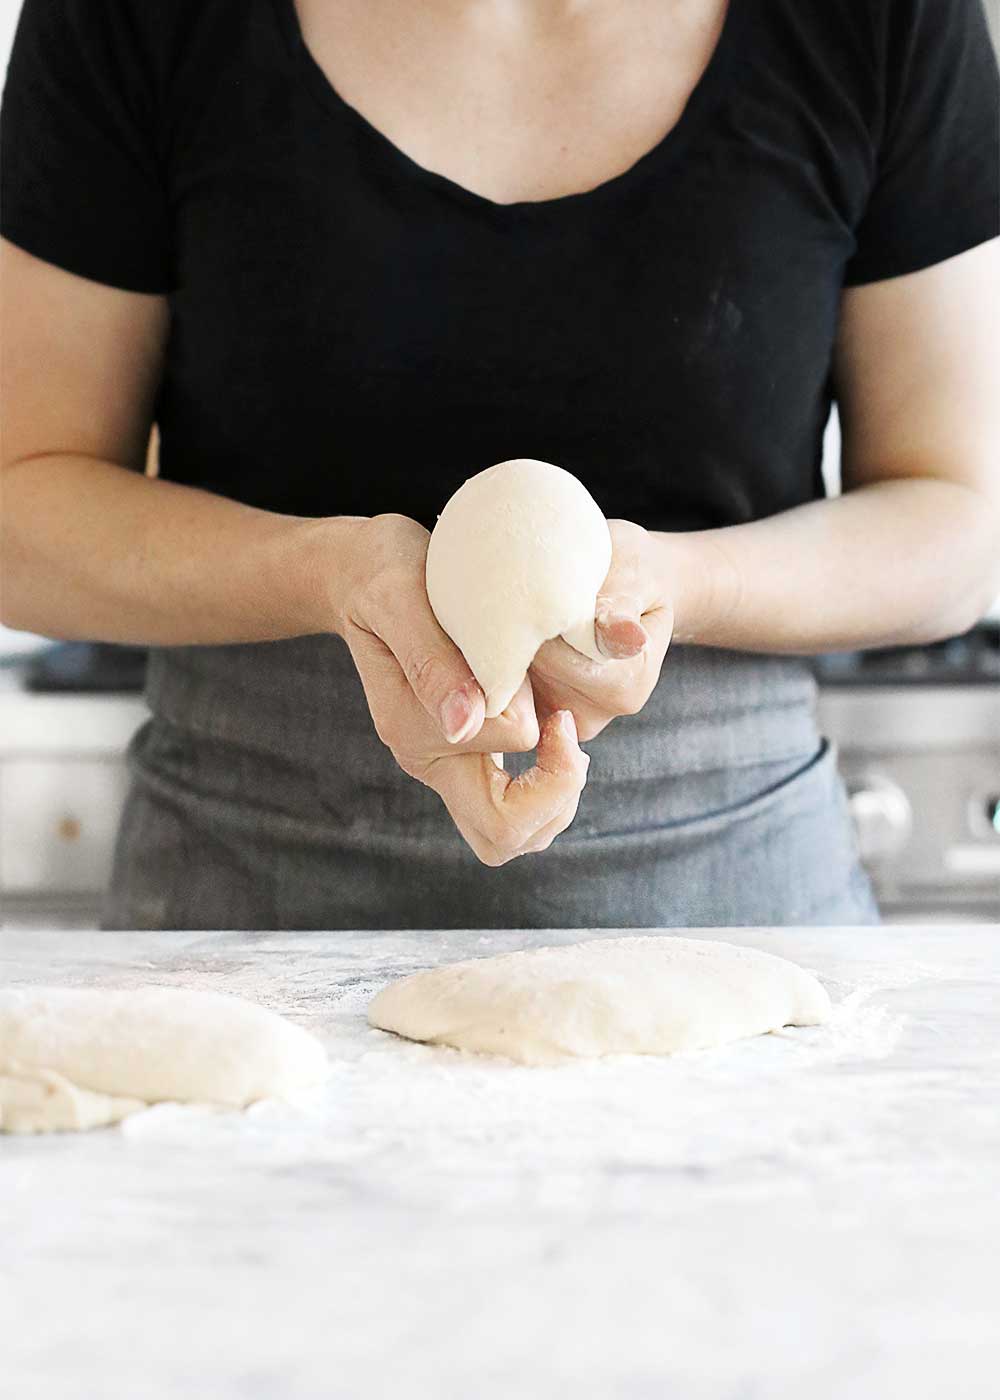
On day 3, a couple hours before pizza-making, the dough is shaped and placed in a proofing box to rise before assembly. If you’ve ever watched someone stretch mozzarella, shaping pizza dough is a similar motion. You continue pulling the top of the dough down and into itself until you form a tight, smooth dough ball, with the bottom seam pinched closed.
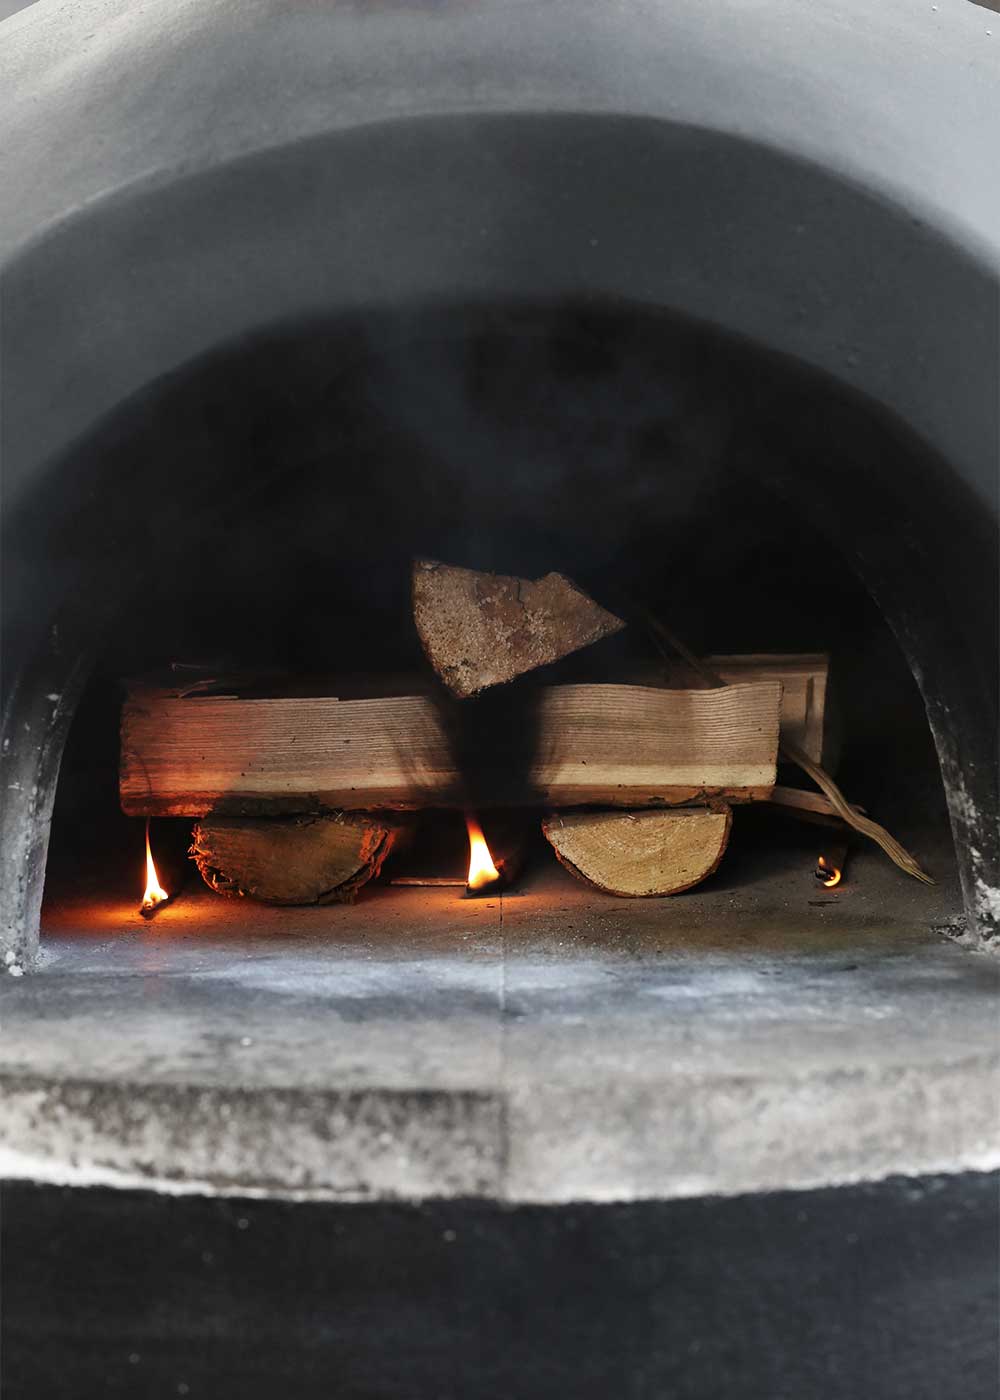
How to start a fire
About 45 minutes before cooking pizza, Kev starts the fire. There’s a thousand different ways to start a fire. Kev likes to use a mixture of fatwood fire starter and hard firewood. Here’s how he does it—on the base layer, alternate fatwood and firewood. Then stack two more alternating layers of firewood on top (see image above). Finally, light the fatwood, which will eventually catch the firewood.
Heat the oven until the floor reaches about 700°F and the roof reaches about 1000°F. Feed the fire as needed. The logs will begin to look like flaming grey coals when ready.
Assembly
Once the oven is nearly ready and the wood has turned to coals, I start preparing the pizzas indoors. For easiest assembly, shred the cheese and prepare the sauce and toppings ahead of time. Pizza cooks quick in a wood fired oven, so assembly needs to be fairly quick as well. I assemble on smaller pizza peels for easy transportation outside.
Cooking by Fire
Just before cooking the first pie, slide the coals off to the side of the oven. Cook 1-2 pies at a time, spinning with the round peel every so often for even cooking. For extra charring on the top, raise the pizza to the roof, where it’s hottest. Cooking times vary as the oven temperature fluctuates, but plan on 2-5 minutes at this high of heat.
This is not a traditional Neapolitan-style pizza. If it has to be something, it’s closer to New Haven-style pizza in flavor and texture. The flavor development happens over the 72-hour ferment in the fridge, something so many pizza slingers swear by. We now do too. This recipe has been developed for an 800°F pizza oven. Cooking at lower temperatures will yield different results.
Ingredients
Scale
Dry:
5 1/2 c. 00 flour
heaping 1 tbsp. kosher salt
1 tbsp. pure cane sugar
1 1/2 tsp. SAF instant yeast (see notes)
Wet:
2 1/4 c. room temperature water, plus more as needed
2 tbsp. olive oil
Assembly:
corneal, for sprinkling
sauce
grated mozzarella (not fresh)
pecorino
Instructions
At least 72 hours (3 days) before making pizza, prepare the dough. In a stand mixer fitted with the paddle attachment, add all the dry ingredients. Mix on medium-low speed until evenly incorporated. With the speed set to low, slowly pour in the wet ingredients and mix until loosely incorporated. Dough will look lumpy. Switch to the dough hook and mix on low for 2 minutes. Dough should look fairly smooth by the end. Rest for 5 minutes. Mix for 1 minute more on low. Rest for 5 minutes.
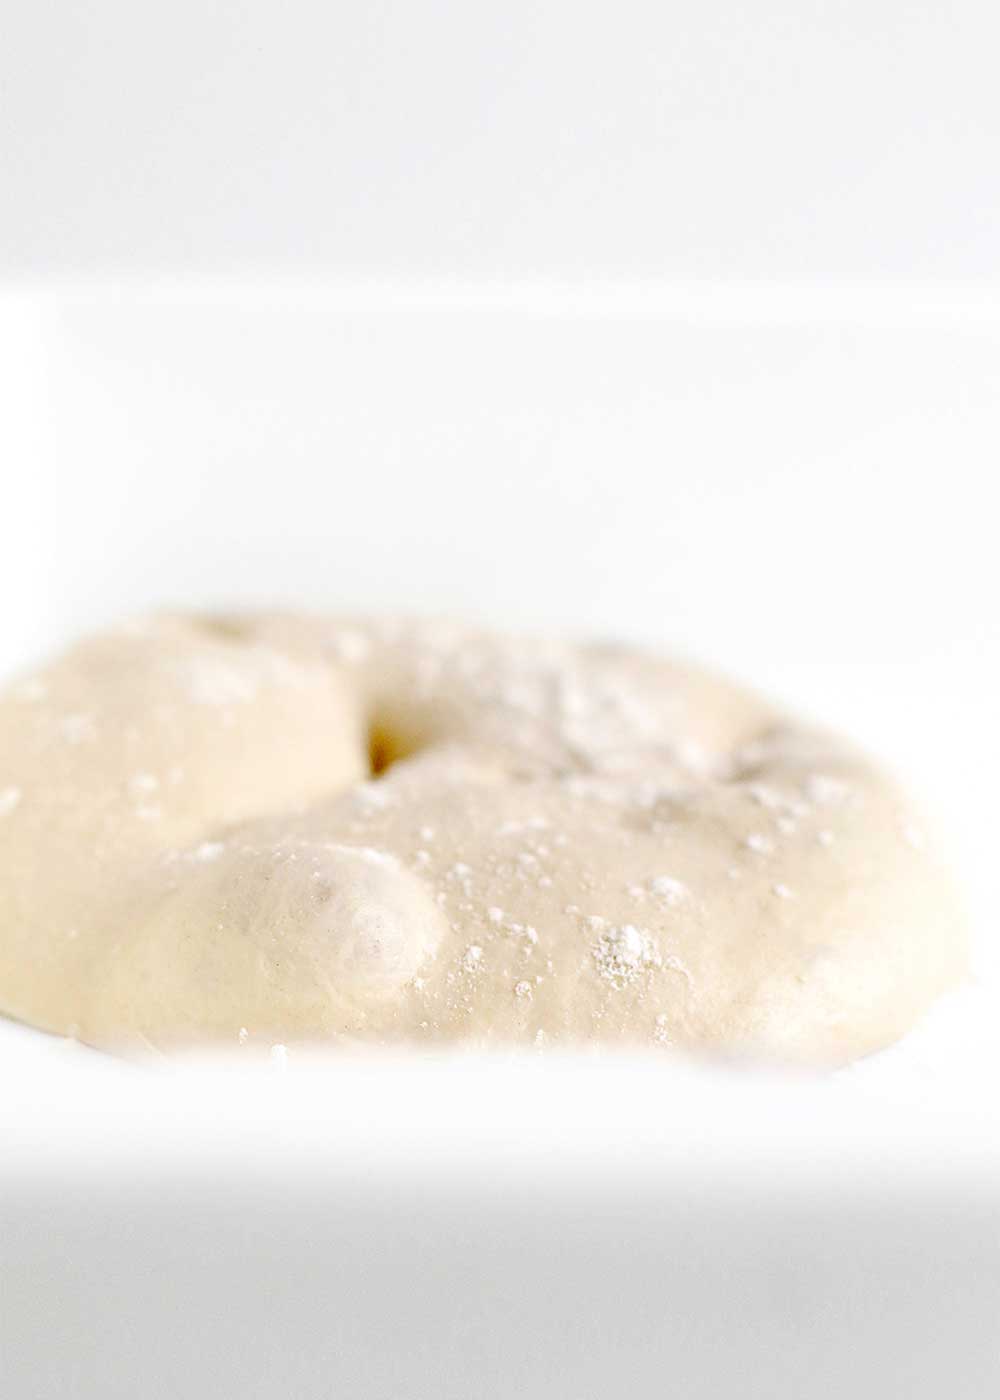
At this point the flour should be well absorbed into the dough, however it will be on the wetter side. (If you touch it, it will leave some sticky remnants on your hand.) If not, you’ll want to mix in a tablespoon or so more of water. It’s important for this dough to be well hydrated. I find that I need to add a bit more water during the dryness of the winter.
Note: it’s difficult to add water into the dough after this point, but far easier to add flour later during the balling stage. This knowledge for the proper consistency will accumulate as you make the dough over and over again, and can vary by climate and season.
Place dough in a bowl with enough space to double in size or this 4 qt Dough Container + Lid. If using a bowl, cover with plastic wrap to keep the dough from drying out. Store in the fridge, untouched, for 72 hours.
On the day of pizza making, about 3-4 hours before cooking, turn the dough out onto a floured surface. Cut into 6 equal parts. Form into dough balls by pulling the dough down into itself until a smooth ball forms (see video). Use enough flour to keep the dough from sticking to your hands. Place in proofing box, cover, and allow to rise at room temperature. Timing will vary depending on the temperature of your kitchen, which can change from summer to winter.
The dough is ready when it easily stretches into a round pizza. Again, the more you make this, the more you’ll begin to understand timing and consistency and room temperature in your kitchen.
About 1-2 hours before cooking, start the fire. Prepare the sauce, cheese, and toppings.
Once the fire is ready (the floor is 700°F and the roof is 1000°F), assemble the pies. Liberally sprinkle flour on top of a dough ball. Using a spatula or pastry bench, carefully slide under the dough ball to remove from the tray. On a well floured surface, place the dough ball and coat with flour for easy handling. Liberally sprinkle a pizza peel with cornmeal and set nearby. Gently press your fingers into the dough ball to loosen the dough. Toss 1-2 times or gently shape dough by using a bit of gravity. Hang the dough, rotating quickly, for the final stretch. Leave about 3/4-inches of protected area for the crust. Make sure dough is adequately floured (no wet spots) before placing on the prepare pizza peel. Give the peel a little shake to make the dough will slide. If it sticks, carefully pull up sticky spots and add more cornmeal.
Add a light coat of sauce. Top with cheese(s) of choice. We’ve come to prefer grated mozzarella as opposed to fresh for the even distribution and saltiness, with a light dusting of pecorino. Add toppings as desired, being sure not to weigh the pie down too much.
With the coals moved to the side of the oven and the floor brushed clean, slide the pizza into the oven. Using a rounded pizza peel, spin the pizza in the circular motion every so often for even crust browning. I like my crust slightly charred. If you don’t, remove the pizza earlier. If the pie needs extra heat on the top, place the pie in the roof of the oven for a second. Serve immediately.
If serving pizza as a sit-down meal like we often do, make the pizzas slightly ahead of time and reheat just before serving by holding them to the top of the oven, using a peel. If trying this route, you’ll want to skip any charring on the first round and save this for the second heat.
Notes
I like to use SAF instant yeast as it requires no activation. It’s sold in large quantities but stores well for a year+ in the fridge. If using a yeast that requires activation first, proof the yeast in warm water (the same amount called for in the recipe).
Recipe Card powered by
If you like this wood fired pizza dough, you might also like:
This blog is made possible by your support (thank you), select brand partnerships, advertisements, and affiliate links to items I love and use. READ MORE >
hello i don’t have a dough hook, do you think this recipe will do ok full hand work? I’ve done a Neapolitan dough by hand I’m finding that dough does not have enough flavor. excited to try your recipe. also is the sugar you use coarse? i have not added sugar to my prev recipes. tyia
Have you had luck with the dough fermenting for only 2 days? I waiting too long to decide, so now we are about 2 days out from our get together. Any suggestions on what we can do to make it work?
I came across this post while looking for a unique dough recipe. I was looking for that type of recipe that I can cook in my wood-fired oven and enjoy the flavors. I was wondering are you aware of the gluten-free pizza recipe. By the way, it’s fantastic; I’m going to give it a try.
Hi Dani! I know this has happened to us before but I can’t remember the outcome. (It’s been a while. We usually are trying to make it work in 2 days from poor planning.) Zoe Bakes has a book called Artisan Bread in 5 and she has bread doughs sitting in the fridge for up to 2 weeks, though her process is slightly different. Sorry I can’t be more helpful!
We just had to move from my home with my forno bravo oven. 8-(, but we got a new forno bravo Primavera 70 waiting in the driveway (need bobcat to move to back of house), 8-). My question … is there any advantage to bulk rising? I’ve seen recipes that divide (right after mixing) into smaller tupperware (with vent hole). The dough rises for 72 hours individually. I’m wondering if (with a high hydration), its difficult to deal with the dough division after the long ferment. Thanks! Tim, Raleigh, NC
Hi Tim! Exciting you were able to put one in your current house! I tell my husband all the time that we can never move, mostly because of the oven. You are right on about the dough. I’m not sure that you’d be able to handle it. The dough triples in size during the ferment. I think you’d have a dough ball explosion. We’ve recently tried to freeze the dough after the 72 hour ferment and let it thaw and rise the day of. It worked OK, but adds additional hydration through the thawing process. I think I’d have to adjust the recipe to account for this. In the meantime, we’re still making dough using this method and recipe, adding additional hydration during the dry winter months. Let me know if other questions come up!
In the fire building process, what is Fat wood? Is that like soft evergreen tree wood? And what kind of hard wood are you using? do you have to order the hard wood from somewhere special? Thank you!
Melissa – Just want to double check my understanding of the 72 fridge period: Does the dough go directly from the mixer into the fridge (where it will double in volume), or does it sit at room temp for a few hours for it to double in size and then go into the fridge?
Hi Robert! The dough heads directly into the fridge. It feels crazy, but it will double slowly over the 72 hours in the fridge. Let me know if other questions come up!
Melissa – Thanks, I figured that was the case and took that approach. It doubled after three days and even featured a quite dramatic bubble coming out of the center about the size of a baseball! I cooked in a ceramic cooker with a dome temp of 650 and it came out great. If was fun to eventually get in the rhythm of having a new pizza prepped and ready to cook as the one cooking completed.
Hey Melissa, I just fell on this post when I was researching dough 🙂 I’m also a Forno Bravo owner and absolutely love it. Luckily we built ours into a seating arrangement around it so guests can be there while I’m baking the pizzas. Perfect!
I’m surprised you list the recipe by volume rather than by weight. Have you converted it to % hydration values and ingredient weight? You can get lots of variation in hydration otherwise.
Hi Chuck! I haven’t yet. I actually don’t own a scale, though that’s the most accurate way to go about it. I measure by volume and use visual cues to know when it’s ready, so I wrote the recipe that way. I’m just getting in to making sourdough and might have to break down and get a scale. If so, I’ll add notes to the recipe with the weights and hydration.
Hi Bill! It makes 6 11-inch pizzas. You can freeze the dough balls after the 72-hour ferment. Ball the dough as if you were to let it rise for the final time. Instead of rising, place in a freezer-safe storage bag, removing as much air as possible. Pull out the day of and allow to thaw for 4-8 hours in a proofing box or lightly covered with plastic wrap. Let me know if other questions come up!
We are trying our first batch of pizzas! I don’t have any proofing boxes. Is there something I might already have that could work? Do you proof in the fridge, oven, on the counter?
Exciting! I just updated the recipe a bit based on your questions. This makes quite a bit of dough, so you’ll want something large enough to handle the amount. A large bowl will work for the dough to rise for 3 days in the fridge. For the proofing stage just before baking, you can place the balled dough on a baking sheet to rise at room temperature. Drizzle the tops of the dough with a bit of oil and cover lightly with plastic wrap. The oil will help to keep the plastic wrap from sticking to the dough. You could try covering with a towel, but I’m afraid the exterior of the dough might dry out too much during the rise. Let me know if any other questions come up!
Hi Melissa, another Mpls Forno Bravo owner here! We’ve had ours since 2011 and as you’ve said, it’s a learning process. I read on the Forno Bravo forum that you’re still a beginner until you’ve made at least 100 pizzas and that’s true! We are still learning…
I am the dough maker in the family and I prefer King Arthur Bread Flour. I partition the dough balls before the days of refrigeration, in small reusable containers that stack. We can fit about 20 of these in our basement fridge, where they stay until shortly before the party. Our pizza parties are like an ‘open house’ concept: Pizzas keep coming out every 5 minutes or so for a couple of hours, and people can grab a slice of whatever pizza they like. No sit-down dinners here. This solves the issue of trying to feed everyone at once. Your parbake system is intriguing! We also do all the prep outside next to the oven, but then our oven is pretty far from our back door. Happy National Pizza Day from Linden Hills!
Thanks Melissa! We’ll try it out on Friday:) This has been our biggest challenge…. with me managing dough and toppings, and my husband cooking, it’s tough to just have fun with guests! I have lots of peels so we can probably just let the almost-done pizzas wait there, then reheat at the very last minute. That would work, right? (We’ve tried keeping them warm in the oven and they just LOSE something! :((). I think we really just need you guys to come down and run our pizza party!!! LOL:)) Now THAT would be fun!
Set up tables around the pizza oven so while your husband is cooking and guests are eating, everyone is congregated in the same place. Plus it’s fun for your guests to watch the fire and the cooking process!
Melissa, Thanks for your comments about trying to manage a “sit down dinner.” We have a Forno Bravo that handles 2 pizzas at a time, and my husband (who insists that the pizzas are best served hot right out of the oven) ends up cooking while the guests sit down alone to eat. How do you manage the time when you have guests? We like to have everyone Make Their Own (their favorite part), but then we get clogged up with some pizzas done, others cooking, and still others prepping. Can you give me a little help on the reheating part? Thanks so much for your recipes and expertise…. You’re a bit further than we are!
So cool to talk to another Forno Bravo owner! The sit down dinner part has been the very hardest! We bought a long cutting board from Ikea that can fit about 3 pizzas on it. (For big crowds, I think we need to buy another one.) We cook the pizza until slightly underdone, but making sure the crust is fully cooked inside. Then we line the cutting board, even stacking pies on top of one another! Not sure I should admit that ?. Then once we sit down to eat, we put two pies back into the oven and let them crisp up on the bottom for a second, before raising the pie to the top of the oven to heat the cheese and char the crust (about 30 seconds). It’s almost better this way, which we figured out after reheating leftovers on a hot cast iron skillet! Let me know if you have any other questions! I’d love to help if I’m able!
Melissa, have you had any luck finding 00 flour locally? I know Cosetta’s market carries Caputo red (about $10 2kg, I think). I also had the owner of a local Italian restaurant give me some Pivetti 00 to try after chatting pizza with him one night. I really loved it, but it’s so tough to find!
It is so hard to find! We buy it at Broder’s (the deli) or France 44 cheese shop. However, we’ve been going through so much lately, I finally ordered it in bulk off of Amazon. We were spending so much time chasing these tiny bags down ?
I can only imagine! I just used the last of mine and had been debating whether or not Inshould track more down. Will likely be headed to Cosetta’s soon!
On another note, my roommate bought a new oven recently and my 5+ year old seasoned pizza stone was sitting in the old one when they sent it away. I was *devastated* when I realized it was gone ?…until it became the reason I’ve needed to finally upgrade to a baking steel!
I follow the Lahey method of pizza dough…love 00 four, never use anything but that. I’m from Chicago, we are all about pizza, but I also love St. Louis style. I would recommend a quick read of Alexandra’s Kitchen 08/01/2013 Baking Steel Pizza blog…excellent info
Love, love my pizza, I am from CHICAGO and of course, we think we know it all!!! Try St. Louis style sometime, love that as well. I totally agree with the flour. 00 is the best ever and have never looked back. I urge you to look up Alexandra’s Kitchen: 08/01/2013 Baking Steel Pizza using the Lahey Pizza dough…sits for 18 hours…you’ll be happy I’m sure!!! Love this series!! So enjoy your recipes…


hello i don’t have a dough hook, do you think this recipe will do ok full hand work? I’ve done a Neapolitan dough by hand I’m finding that dough does not have enough flavor. excited to try your recipe. also is the sugar you use coarse? i have not added sugar to my prev recipes. tyia
Have you had luck with the dough fermenting for only 2 days? I waiting too long to decide, so now we are about 2 days out from our get together. Any suggestions on what we can do to make it work?
Hello, Melissa,
I came across this post while looking for a unique dough recipe. I was looking for that type of recipe that I can cook in my wood-fired oven and enjoy the flavors. I was wondering are you aware of the gluten-free pizza recipe. By the way, it’s fantastic; I’m going to give it a try.
Cheers!
Looking forward to finally trying this recipe! Do you think there would be any issue if I put it in the fridge 4 days in advance rather than 3?
Hi Dani! I know this has happened to us before but I can’t remember the outcome. (It’s been a while. We usually are trying to make it work in 2 days from poor planning.) Zoe Bakes has a book called Artisan Bread in 5 and she has bread doughs sitting in the fridge for up to 2 weeks, though her process is slightly different. Sorry I can’t be more helpful!
would prefer to see baker’s percentages listed
This is not my specialty but if you want to give it a go, add to the comments to help others with the same question!
You can go to woodprix if you would like to make it yourself guys.
We just had to move from my home with my forno bravo oven. 8-(, but we got a new forno bravo Primavera 70 waiting in the driveway (need bobcat to move to back of house), 8-). My question … is there any advantage to bulk rising? I’ve seen recipes that divide (right after mixing) into smaller tupperware (with vent hole). The dough rises for 72 hours individually. I’m wondering if (with a high hydration), its difficult to deal with the dough division after the long ferment. Thanks!
Tim, Raleigh, NC
Hi Tim! Exciting you were able to put one in your current house! I tell my husband all the time that we can never move, mostly because of the oven. You are right on about the dough. I’m not sure that you’d be able to handle it. The dough triples in size during the ferment. I think you’d have a dough ball explosion. We’ve recently tried to freeze the dough after the 72 hour ferment and let it thaw and rise the day of. It worked OK, but adds additional hydration through the thawing process. I think I’d have to adjust the recipe to account for this. In the meantime, we’re still making dough using this method and recipe, adding additional hydration during the dry winter months. Let me know if other questions come up!
In the fire building process, what is Fat wood? Is that like soft evergreen tree wood? And what kind of hard wood are you using? do you have to order the hard wood from somewhere special?
Thank you!
It’s skinny pieces of pine with natural resin that stay lit long enough to let the larger hunks of wood to catch on fire.
Melissa – Just want to double check my understanding of the 72 fridge period: Does the dough go directly from the mixer into the fridge (where it will double in volume), or does it sit at room temp for a few hours for it to double in size and then go into the fridge?
Hi Robert! The dough heads directly into the fridge. It feels crazy, but it will double slowly over the 72 hours in the fridge. Let me know if other questions come up!
Melissa – Thanks, I figured that was the case and took that approach. It doubled after three days and even featured a quite dramatic bubble coming out of the center about the size of a baseball! I cooked in a ceramic cooker with a dome temp of 650 and it came out great. If was fun to eventually get in the rhythm of having a new pizza prepped and ready to cook as the one cooking completed.
Yes! This is so great to hear.
Hey Melissa, I just fell on this post when I was researching dough 🙂 I’m also a Forno Bravo owner and absolutely love it. Luckily we built ours into a seating arrangement around it so guests can be there while I’m baking the pizzas. Perfect!
I’m surprised you list the recipe by volume rather than by weight. Have you converted it to % hydration values and ingredient weight? You can get lots of variation in hydration otherwise.
Hi Chuck! I haven’t yet. I actually don’t own a scale, though that’s the most accurate way to go about it. I measure by volume and use visual cues to know when it’s ready, so I wrote the recipe that way. I’m just getting in to making sourdough and might have to break down and get a scale. If so, I’ll add notes to the recipe with the weights and hydration.
So how many 12″ thin crust pizzas will this dough recipe make? And can you freeze these to have ready to go for unexpected guests?
Hi Bill! It makes 6 11-inch pizzas. You can freeze the dough balls after the 72-hour ferment. Ball the dough as if you were to let it rise for the final time. Instead of rising, place in a freezer-safe storage bag, removing as much air as possible. Pull out the day of and allow to thaw for 4-8 hours in a proofing box or lightly covered with plastic wrap. Let me know if other questions come up!
We are trying our first batch of pizzas! I don’t have any proofing boxes. Is there something I might already have that could work? Do you proof in the fridge, oven, on the counter?
Exciting! I just updated the recipe a bit based on your questions. This makes quite a bit of dough, so you’ll want something large enough to handle the amount. A large bowl will work for the dough to rise for 3 days in the fridge. For the proofing stage just before baking, you can place the balled dough on a baking sheet to rise at room temperature. Drizzle the tops of the dough with a bit of oil and cover lightly with plastic wrap. The oil will help to keep the plastic wrap from sticking to the dough. You could try covering with a towel, but I’m afraid the exterior of the dough might dry out too much during the rise. Let me know if any other questions come up!
Hi Melissa, another Mpls Forno Bravo owner here! We’ve had ours since 2011 and as you’ve said, it’s a learning process. I read on the Forno Bravo forum that you’re still a beginner until you’ve made at least 100 pizzas and that’s true! We are still learning…
I am the dough maker in the family and I prefer King Arthur Bread Flour. I partition the dough balls before the days of refrigeration, in small reusable containers that stack. We can fit about 20 of these in our basement fridge, where they stay until shortly before the party. Our pizza parties are like an ‘open house’ concept: Pizzas keep coming out every 5 minutes or so for a couple of hours, and people can grab a slice of whatever pizza they like. No sit-down dinners here. This solves the issue of trying to feed everyone at once. Your parbake system is intriguing! We also do all the prep outside next to the oven, but then our oven is pretty far from our back door. Happy National Pizza Day from Linden Hills!
If using a dry yeast that requires activation, do you still recommend the 1 1/2 teaspoons?
It should be an equal exchange 1:1.
Thanks Melissa! We’ll try it out on Friday:) This has been our biggest challenge…. with me managing dough and toppings, and my husband cooking, it’s tough to just have fun with guests! I have lots of peels so we can probably just let the almost-done pizzas wait there, then reheat at the very last minute. That would work, right? (We’ve tried keeping them warm in the oven and they just LOSE something! :((). I think we really just need you guys to come down and run our pizza party!!! LOL:)) Now THAT would be fun!
Set up tables around the pizza oven so while your husband is cooking and guests are eating, everyone is congregated in the same place. Plus it’s fun for your guests to watch the fire and the cooking process!
Melissa, Thanks for your comments about trying to manage a “sit down dinner.” We have a Forno Bravo that handles 2 pizzas at a time, and my husband (who insists that the pizzas are best served hot right out of the oven) ends up cooking while the guests sit down alone to eat. How do you manage the time when you have guests? We like to have everyone Make Their Own (their favorite part), but then we get clogged up with some pizzas done, others cooking, and still others prepping. Can you give me a little help on the reheating part? Thanks so much for your recipes and expertise…. You’re a bit further than we are!
So cool to talk to another Forno Bravo owner! The sit down dinner part has been the very hardest! We bought a long cutting board from Ikea that can fit about 3 pizzas on it. (For big crowds, I think we need to buy another one.) We cook the pizza until slightly underdone, but making sure the crust is fully cooked inside. Then we line the cutting board, even stacking pies on top of one another! Not sure I should admit that ?. Then once we sit down to eat, we put two pies back into the oven and let them crisp up on the bottom for a second, before raising the pie to the top of the oven to heat the cheese and char the crust (about 30 seconds). It’s almost better this way, which we figured out after reheating leftovers on a hot cast iron skillet! Let me know if you have any other questions! I’d love to help if I’m able!
Melissa, have you had any luck finding 00 flour locally? I know Cosetta’s market carries Caputo red (about $10 2kg, I think). I also had the owner of a local Italian restaurant give me some Pivetti 00 to try after chatting pizza with him one night. I really loved it, but it’s so tough to find!
It is so hard to find! We buy it at Broder’s (the deli) or France 44 cheese shop. However, we’ve been going through so much lately, I finally ordered it in bulk off of Amazon. We were spending so much time chasing these tiny bags down ?
I can only imagine! I just used the last of mine and had been debating whether or not Inshould track more down. Will likely be headed to Cosetta’s soon!
On another note, my roommate bought a new oven recently and my 5+ year old seasoned pizza stone was sitting in the old one when they sent it away. I was *devastated* when I realized it was gone ?…until it became the reason I’ve needed to finally upgrade to a baking steel!
I follow the Lahey method of pizza dough…love 00 four, never use anything but that. I’m from Chicago, we are all about pizza, but I also love St. Louis style. I would recommend a quick read of Alexandra’s Kitchen 08/01/2013 Baking Steel Pizza blog…excellent info
Love, love my pizza, I am from CHICAGO and of course, we think we know it all!!! Try St. Louis style sometime, love that as well. I totally agree with the flour. 00 is the best ever and have never looked back. I urge you to look up Alexandra’s Kitchen: 08/01/2013 Baking Steel Pizza using the Lahey Pizza dough…sits for 18 hours…you’ll be happy I’m sure!!! Love this series!! So enjoy your recipes…