Description
This is not a traditional Neapolitan-style pizza. If it has to be something, it’s closer to New Haven-style pizza in flavor and texture. The flavor development happens over the 72-hour ferment in the fridge, something so many pizza slingers swear by. We now do too. This recipe has been developed for an 800°F pizza oven. Cooking at lower temperatures will yield different results.
Ingredients
Dry:
- 5 1/2 c. 00 flour
- heaping 1 tbsp. kosher salt
- 1 tbsp. pure cane sugar
- 1 1/2 tsp. SAF instant yeast (see notes)
Wet:
- 2 1/4 c. room temperature water, plus more as needed
- 2 tbsp. olive oil
Assembly:
- corneal, for sprinkling
- sauce
- grated mozzarella (not fresh)
- pecorino
Instructions
At least 72 hours (3 days) before making pizza, prepare the dough. In a stand mixer fitted with the paddle attachment, add all the dry ingredients. Mix on medium-low speed until evenly incorporated. With the speed set to low, slowly pour in the wet ingredients and mix until loosely incorporated. Dough will look lumpy. Switch to the dough hook and mix on low for 2 minutes. Dough should look fairly smooth by the end. Rest for 5 minutes. Mix for 1 minute more on low. Rest for 5 minutes.
At this point the flour should be well absorbed into the dough, however it will be on the wetter side. (If you touch it, it will leave some sticky remnants on your hand.) If not, you’ll want to mix in a tablespoon or so more of water. It’s important for this dough to be well hydrated. I find that I need to add a bit more water during the dryness of the winter.
Note: it’s difficult to add water into the dough after this point, but far easier to add flour later during the balling stage. This knowledge for the proper consistency will accumulate as you make the dough over and over again, and can vary by climate and season.
Place dough in a bowl with enough space to double in size or this 4 qt Dough Container + Lid. If using a bowl, cover with plastic wrap to keep the dough from drying out. Store in the fridge, untouched, for 72 hours.
On the day of pizza making, about 3-4 hours before cooking, turn the dough out onto a floured surface. Cut into 6 equal parts. Form into dough balls by pulling the dough down into itself until a smooth ball forms (see video). Use enough flour to keep the dough from sticking to your hands. Place in proofing box, cover, and allow to rise at room temperature. Timing will vary depending on the temperature of your kitchen, which can change from summer to winter.
The dough is ready when it easily stretches into a round pizza. Again, the more you make this, the more you’ll begin to understand timing and consistency and room temperature in your kitchen.
About 1-2 hours before cooking, start the fire. Prepare the sauce, cheese, and toppings.
Once the fire is ready (the floor is 700°F and the roof is 1000°F), assemble the pies. Liberally sprinkle flour on top of a dough ball. Using a spatula or pastry bench, carefully slide under the dough ball to remove from the tray. On a well floured surface, place the dough ball and coat with flour for easy handling. Liberally sprinkle a pizza peel with cornmeal and set nearby. Gently press your fingers into the dough ball to loosen the dough. Toss 1-2 times or gently shape dough by using a bit of gravity. Hang the dough, rotating quickly, for the final stretch. Leave about 3/4-inches of protected area for the crust. Make sure dough is adequately floured (no wet spots) before placing on the prepare pizza peel. Give the peel a little shake to make the dough will slide. If it sticks, carefully pull up sticky spots and add more cornmeal.
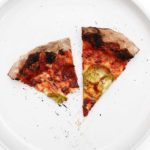
Add a light coat of sauce. Top with cheese(s) of choice. We’ve come to prefer grated mozzarella as opposed to fresh for the even distribution and saltiness, with a light dusting of pecorino. Add toppings as desired, being sure not to weigh the pie down too much.
With the coals moved to the side of the oven and the floor brushed clean, slide the pizza into the oven. Using a rounded pizza peel, spin the pizza in the circular motion every so often for even crust browning. I like my crust slightly charred. If you don’t, remove the pizza earlier. If the pie needs extra heat on the top, place the pie in the roof of the oven for a second. Serve immediately.
If serving pizza as a sit-down meal like we often do, make the pizzas slightly ahead of time and reheat just before serving by holding them to the top of the oven, using a peel. If trying this route, you’ll want to skip any charring on the first round and save this for the second heat.
Notes
I like to use SAF instant yeast as it requires no activation. It’s sold in large quantities but stores well for a year+ in the fridge. If using a yeast that requires activation first, proof the yeast in warm water (the same amount called for in the recipe).