Pie Crust. It’s your kryptonite. It’s your Achilles’ heel. It’s the painful thorn in your side.
You know what I’m talking about. We’ve all been there. After failed attempts at home, we shamefully head to the grocery store, pause to make sure no one’s looking, and hide a box of store bought pie crust in the cart. Hours later only to find out the filling we paid careful attention to isn’t quite as good when surrounded by this boxed stuff. Looking around the room, dessert plates are sprinkled with leftover crust, and it’s not because people were too full.
It’s time to remove the thorn, and take back pie crusts one pie at a time. They will be beautiful. Rustic. And delicious in taste. There will be no crumbs left on the plate. Can I get an amen?!
First, the essentials. Butter, cold, patience—the keys to a great crust. Butter. All-butter crusts are far better, in my opinion, than shortening crusts. They are prettier, tastier, and flakier. There I said it. (I know I’ll receive flack for this one.) If you don’t believe me, check out The Pioneer Woman’s taste/appearance test. She agrees. I did a little happy dance when the all-butter crust won. Yes, I am a super dork. Cold. For a successful crust, you have to keep the ingredients cold, especially the butter. In order to create a flaky crust, you need chunks of edamame-sized butter, pea-sized at smallest. If the butter gets too warm, it spreads, and that’s no bueno. Go chunky or go home. The water should also be ice-cold. An ice cube will do the trick. As for the flour, I keep mine in the freezer, so it’s already cold. Room temperature flour will work just fine though. In order to keep the dough itself cold, you must work quickly yet patiently. Ah, patience. I hate this word. So if I can make a pie crust, I promise you can. You must be patient. So patient you keep the food processor in the cabinet and work with your hands. I’ve found that I overwork the dough when using a food processor. But when I work with my hands, I have control. Ok, so maybe I’m OCD. Without going into more detail here, just promise me you’ll follow the recipe. Force yourself to slow down. And remember butter, cold, patience.
Next, the video. Disclaimer: this is not the prettiest video you’ve ever seen, but it’ll teach you how to make a darn good pie crust!
And finally, the recipe. It’s the best. I’ve tried many, and this one works for me every time. Even when I break my rules. Shame on me. Do as I say not as I do.
Place flour, sugar, and salt in bowl. Whisk together.
Dice butter and place into flour mixture. Using a pastry knife/blender, cut butter into flour until it is edamame-sized. (You may be tempted to cut the butter into smaller pieces, however, as you add the water and continue to work the dough, the size of the butter will decrease. Remember, go chunky or go home.)
Using a pastry fork (or a large, hefty fork), add 1/2 cup of the ice cold water into mixture and combine. Continue adding water 1 tablespoon at a time until dough just comes together. This is where the patience comes into play. Begin to gather/work the dough together with your hands, adding an additional tablespoon of water if necessary. Dough should neither be wet or dry. (You may not need the full cup of water.)
Gather dough into a disk. Cut in half, wrap disks in plastic wrap, and place in fridge for 40 minutes to chill. Warm dough is not your friend.
Roll the dough out on a well floured surface large enough to slightly overhang in a pie dish. Periodically make sure dough is not stuck to surface. Add more flour. Work quickly to keep the dough from getting too warm. Fold the dough in fourths and transfer to pie dish. Unfold. Place in freezer for 5 minutes if too warm.
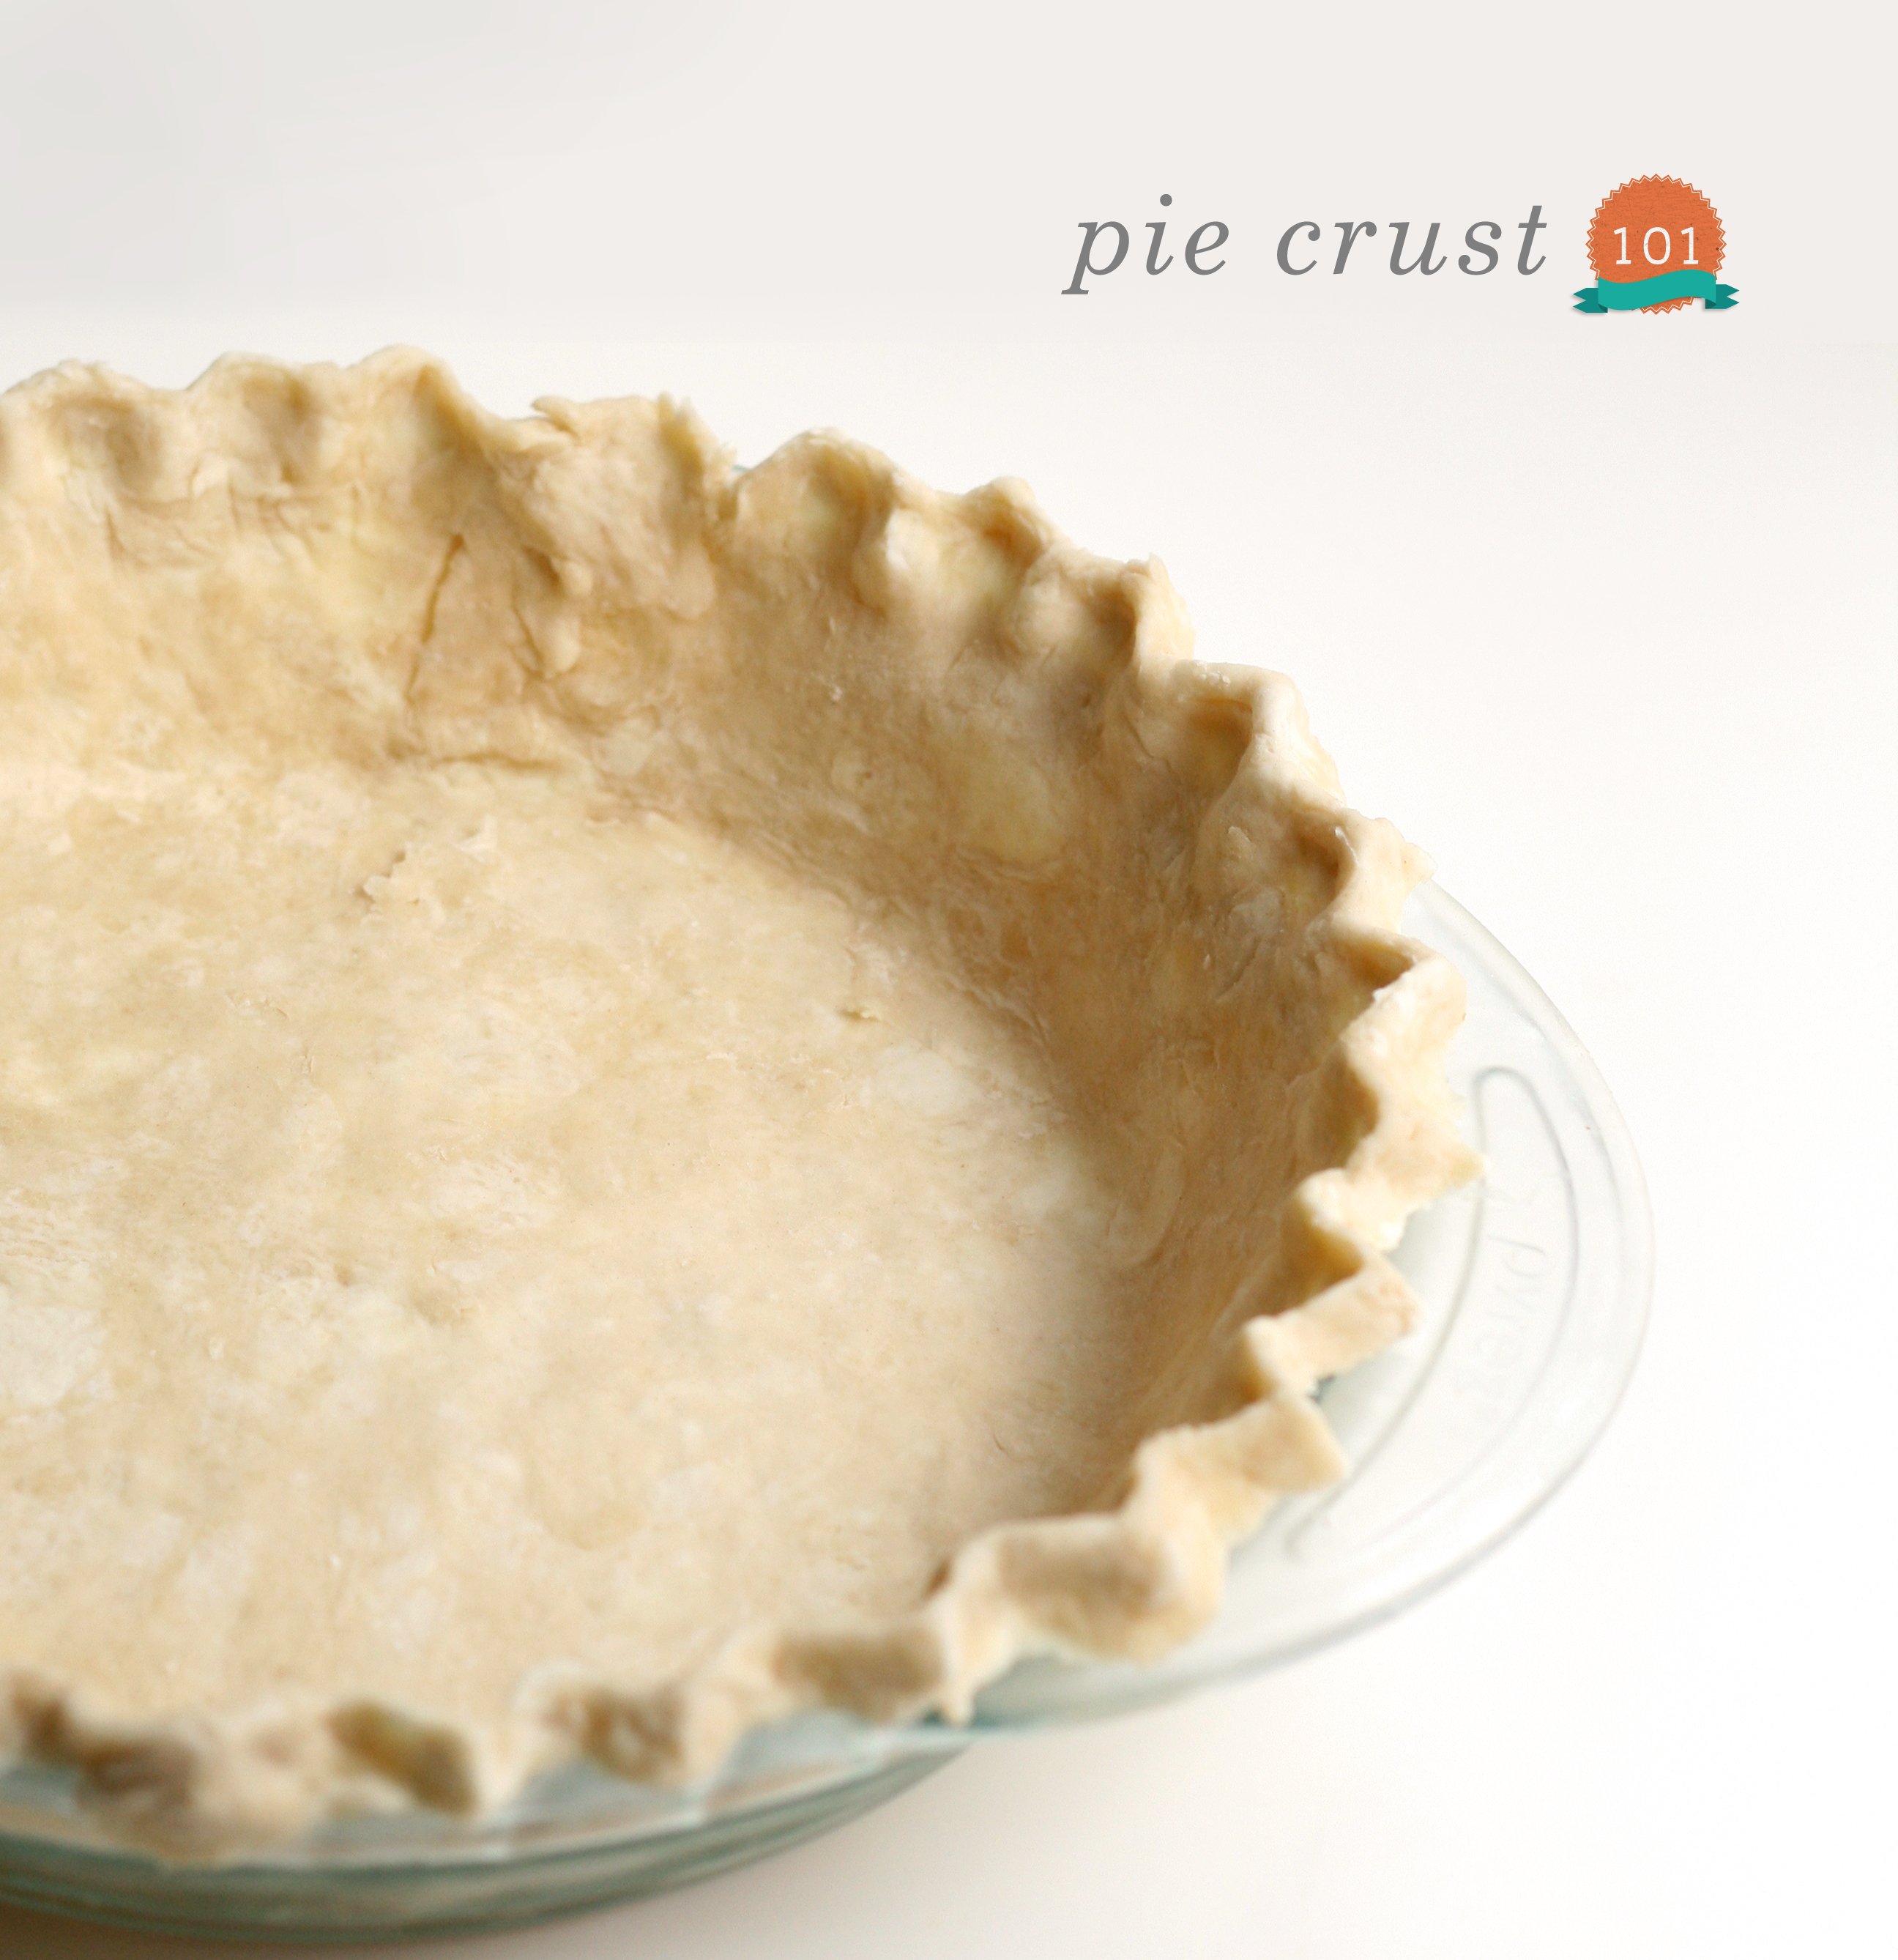
Trim excess dough if necessary, leaving an overhang for crimping. Create a decorative edge with your pointer finger and thumb held together pinching the dough in with your opposite thumb. Repeat. Use extra dough to clean up any rough patches or holes. Blend together with water if needed. Again, place in freezer for 5 minutes if too warm.
Using a pastry brush, brush crust with egg wash. This will give it that beautiful golden color as it bakes. Sprinkle with turbinado. Fill pie according to recipe.
Preheat oven to 400°. Place pie on a baking sheet to catch any overflow. Bake for 20 minutes. Lower the temp to 335° and continue baking for about 40 minutes. Once crust begins to brown, cover with foil.
Allow pie to set up for at least an hour before serving.
This blog is made possible by your support (thank you), select brand partnerships, advertisements, and affiliate links to items I love and use. READ MORE >
Just wanted to write a big THANK YOU for the post! This has been my go to pie crust for Thanksgiving and Christmas now 5 years running and EVERYONE comments on how awesome it is! Thanks!
This is how my mom taught me to make pie and it truly is the best! Someone may have already said, but It’s an extra bit even better if you use some fancy European unsalted butter like Plugra as it’s fat content is a little higher than ours…
Ack, how did I miss that? I’ve updated the recipe. Here’s the missing step: Preheat oven to 400°. Bake for 20 minutes. Lower the temp to 335° and continue baking for about 40 minutes. Once crust begins to brown, cover with foil. Happy pie baking!
Great video. And what a helpful post! Somewhere in my baking I become endowed with pie crust skills but I love reading up and seeing everyone else’s recipes and tips and techniques.
After taking the dough out of the refrigerator, is it immediately ready to roll out? My biggest problem is always that when I start to roll it out, the dough starts cracking. I don’t know if it is too cold or I made it too dry. Help? Thanks!!
That’s a great question! If it chills for too long, you may have to let it get a bit warmer before rolling. Cracking is no good as you know. Basically, you want the butter chunks to harden again before rolling out. With this dough recipe, I have left it in the fridge for days and it rolls out just fine without warming up. Different variables could change that—temp of fridge, amount of flour added when rolling. Does this help?


Just wanted to write a big THANK YOU for the post! This has been my go to pie crust for Thanksgiving and Christmas now 5 years running and EVERYONE comments on how awesome it is! Thanks!
I love your video! I’m going to give this a try today…thanks so much.
Let me know how it goes!
This is how my mom taught me to make pie and it truly is the best! Someone may have already said, but It’s an extra bit even better if you use some fancy European unsalted butter like Plugra as it’s fat content is a little higher than ours…
I must try it now with Plugra. Thanks for the inspiration!
As close to Grandma showing it as you can get 😛 Thanks for the video and descriptions along the way. I will not fear pie crusts anymore 🙂
I was referring to this from the apple pie post, and I was wondering how long do you typically bake the pie for??
Ack, how did I miss that? I’ve updated the recipe. Here’s the missing step: Preheat oven to 400°. Bake for 20 minutes. Lower the temp to 335° and continue baking for about 40 minutes. Once crust begins to brown, cover with foil. Happy pie baking!
Since it makes two…could you freeze the other one until you need it? Or should you shape it first then freeze it?
Giving this a try for Thanksgiving. Glad I can make the crust a few days ahead with so much cooking and baking to do day of! Thanks!
Great video. And what a helpful post! Somewhere in my baking I become endowed with pie crust skills but I love reading up and seeing everyone else’s recipes and tips and techniques.
okay, THANK YOU! i can not bake…and wanted to learn how to do this for so long!!! just found your site… im hooked
After taking the dough out of the refrigerator, is it immediately ready to roll out? My biggest problem is always that when I start to roll it out, the dough starts cracking. I don’t know if it is too cold or I made it too dry. Help? Thanks!!
That’s a great question! If it chills for too long, you may have to let it get a bit warmer before rolling. Cracking is no good as you know. Basically, you want the butter chunks to harden again before rolling out. With this dough recipe, I have left it in the fridge for days and it rolls out just fine without warming up. Different variables could change that—temp of fridge, amount of flour added when rolling. Does this help?
Yes! That helps. I can’t wait to try this recipe. I am determined to get it perfect…one day.
This may sound weird…but there’s something very relaxing about watching you make pie dough. lol yea…that was weird.
Haha! You’re in good company. I didn’t take it as weird, more so a compliment. Thanks Gina!
You make it seem so easy – thanks for sharing!
super awesome video, my dear!! I love it.
You are too kind to me. Thank you Lisa!
Butter makes EVERYTHING better — especially crusts.
Great post with a really nice video. Bookmarking this one for the next time I make a pie. Thanks!
love the tutorial M!
Thank you A! Honored you like it!
Fantastic tutorial, Melissa! I have honestly never baked a pie, just galettes. I think I’ll bake my first pie for Thanksgiving!
Thanks Kathryne! I think I love galettes just as much or more than pies. So rustic! I hope to see a post on your first pie…
Oh me, oh my! This sounds lovely. Nothing like a classic pie.
Oh boy. I hear one complaint at home, almost daily: honey, why don’t you make me more pies? And then you go and post this. Now I have no excuses. Arg!
Hahaha! Just pretend you never saw this 🙂
fleet foxes remix! what!?
Yeah! Birdy’s been remixing it up. She covers some Bon Iver songs too.
Thank you it turned out great and I like the video. It’s really cute.