How to make good coffee at home | @thefauxmartha

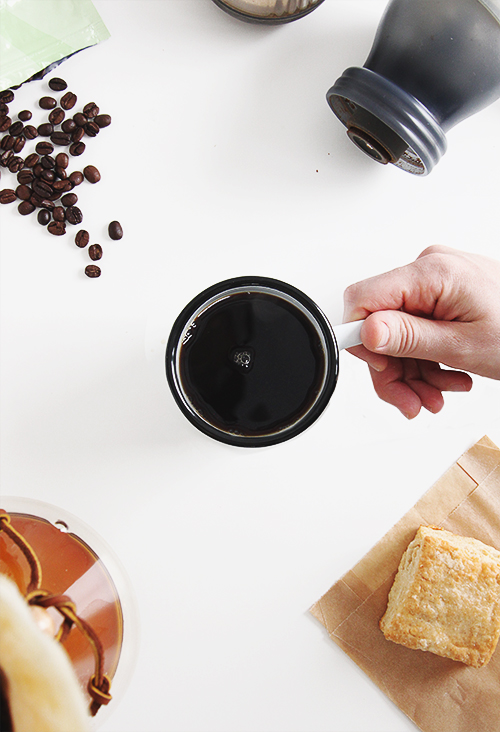
There are more important things that need protecting in this world than my morning coffee routine. But I protect it because there are more important things in this world. Coffee fuels those efforts. Quick and fast are heralded words these days. I like to apply those terms to my weeknight dinners. But with a new day soon to be swept away with 10,000 to-dos, I like to start my mornings slow. With pour over coffee that requires a quiet and steady attention. Hallie now knows our coffee time is sacred time. She pulls out two enamel mugs from the drawer. “Oh, here you go mommy.” We cheers with our pretend coffee while I continue attending to the real coffee. This all started after going to a coffee cupping, much like a wine tasting, during our time in Chicago. I fell in love with the nuances in flavor and the brewing technique. I’ve been making pour over coffee since, 3+ years and counting. Here’s a guide to making really good coffee at home. Read more

It may be the end of the season, but I’ve finally figured out how to cut watermelon without chopping off my fingers. For years I’ve shied away from buying them until I finally realized to cut it as I would cut anything round (from a carrot, to a butternut squash, to a watermelon). Always start by giving yourself a flat edge. Then liberally trim off the skin. The white and light pink meat hold very little flavor. Continue by dicing small portions at a time, always rocking and rotating to give yourself a flat surface.

Skip the mess of deseeding pomegranates. Add two cut and stretched pom halves into ziplock bags before deseeding. Smack the peel of the pomegranate with the back of a wooden spoon, releasing just enough for your desired serving. Store in the fridge. Repeat as needed.

Music by Sara Bareilles and Ingrid Michaelson. Winter Song.

And we’re live with a brand new site! I’m high on adrenaline. 4 hours of sleep for a girl that requires at least 8. Last night felt like Christmas Eve. I kept peeking around the corner to see if Santa had dropped in yet. He came early this morning. I was sleep deprived but oh so giddy. The front end doesn’t look all that different, but the backend surely does. I’ll tell you next week who helped me with the site. It’s a fun little secret I’ve been keeping. Have a click around. I’m still updating portions of the site so things may look a little weird the next couple of days. Let me know if something seems super off. In the meantime—let’s play.

Music by: Monsters Calling Home

Pie Crust. It’s your kryptonite. It’s your Achilles’ heel. It’s the painful thorn in your side.

You know what I’m talking about. We’ve all been there. After failed attempts at home, we shamefully head to the grocery store, pause to make sure no one’s looking, and hide a box of store bought pie crust in the cart. Hours later only to find out the filling we paid careful attention to isn’t quite as good when surrounded by this boxed stuff. Looking around the room, dessert plates are sprinkled with leftover crust, and it’s not because people were too full. Read more

They won me over. They wooed me in. I owe this baking habit of mine to scones. (And I’m hoping to share the habit with you. Have you entered the giveaway yet? Ends Sept. 16.) After making them, you will feel empowered. You’ll begin to transform into Steve Urkel. Pants high, suspenders taut, glasses thick, in a nasally pitch saying—Did I do that? Read more

I’m not sure if anyone else has this problem—but from time to time, my bread flops. It fails to rise. And it’s the worst feeling ever. I’m embarrassed to say that I used to boil water before pouring it over yeast. Needless to say I killed the yeast. Big time.

Luckily, I’ve learned a thing or two since. So to ease your bread making, yeast rising fears, I made a video. Just humor me. This is my first video making attempt. Definitely a faux and not a pro when it comes to this.


How to proof yeast
1. According to your recipe, add warm liquid (s) to bowl. It should between 110°-115°. Use a thermometer to be sure. When you get more comfortable, you can ditch the thermometer. I hold my hand just above the water to detect warmth. You want it to be warm but not hot. I’m not a mom yet, but I imagine the baby bottle squirt on wrist technique will work for this as well.
2. Add a pinch of sugar to the liquid whether the recipe calls for it or not. Sugar feeds the yeast and helps it to grow. If the recipe calls for sugar, only add a pinch during this step.
3.  Pour yeast into bowl. Give it a little stir and watch it proof or foam. Bubbles will begin to appear on the surface. This takes 5-10 minutes.
4. Use yeast mixture according to recipe.

Why proof?
Proofing allows you to make sure the yeast is active before you add it to the rest of the ingredients. If it fails to proof, start over. Most likely you’ve only wasted water and a pinch of sugar.

Give it a try with the Brioche Burger Buns recipe. I wish you great success in your bread rising adventures!


© The Faux Martha 2024. Privacy Policy. An exclusive Member of Mediavine Food.