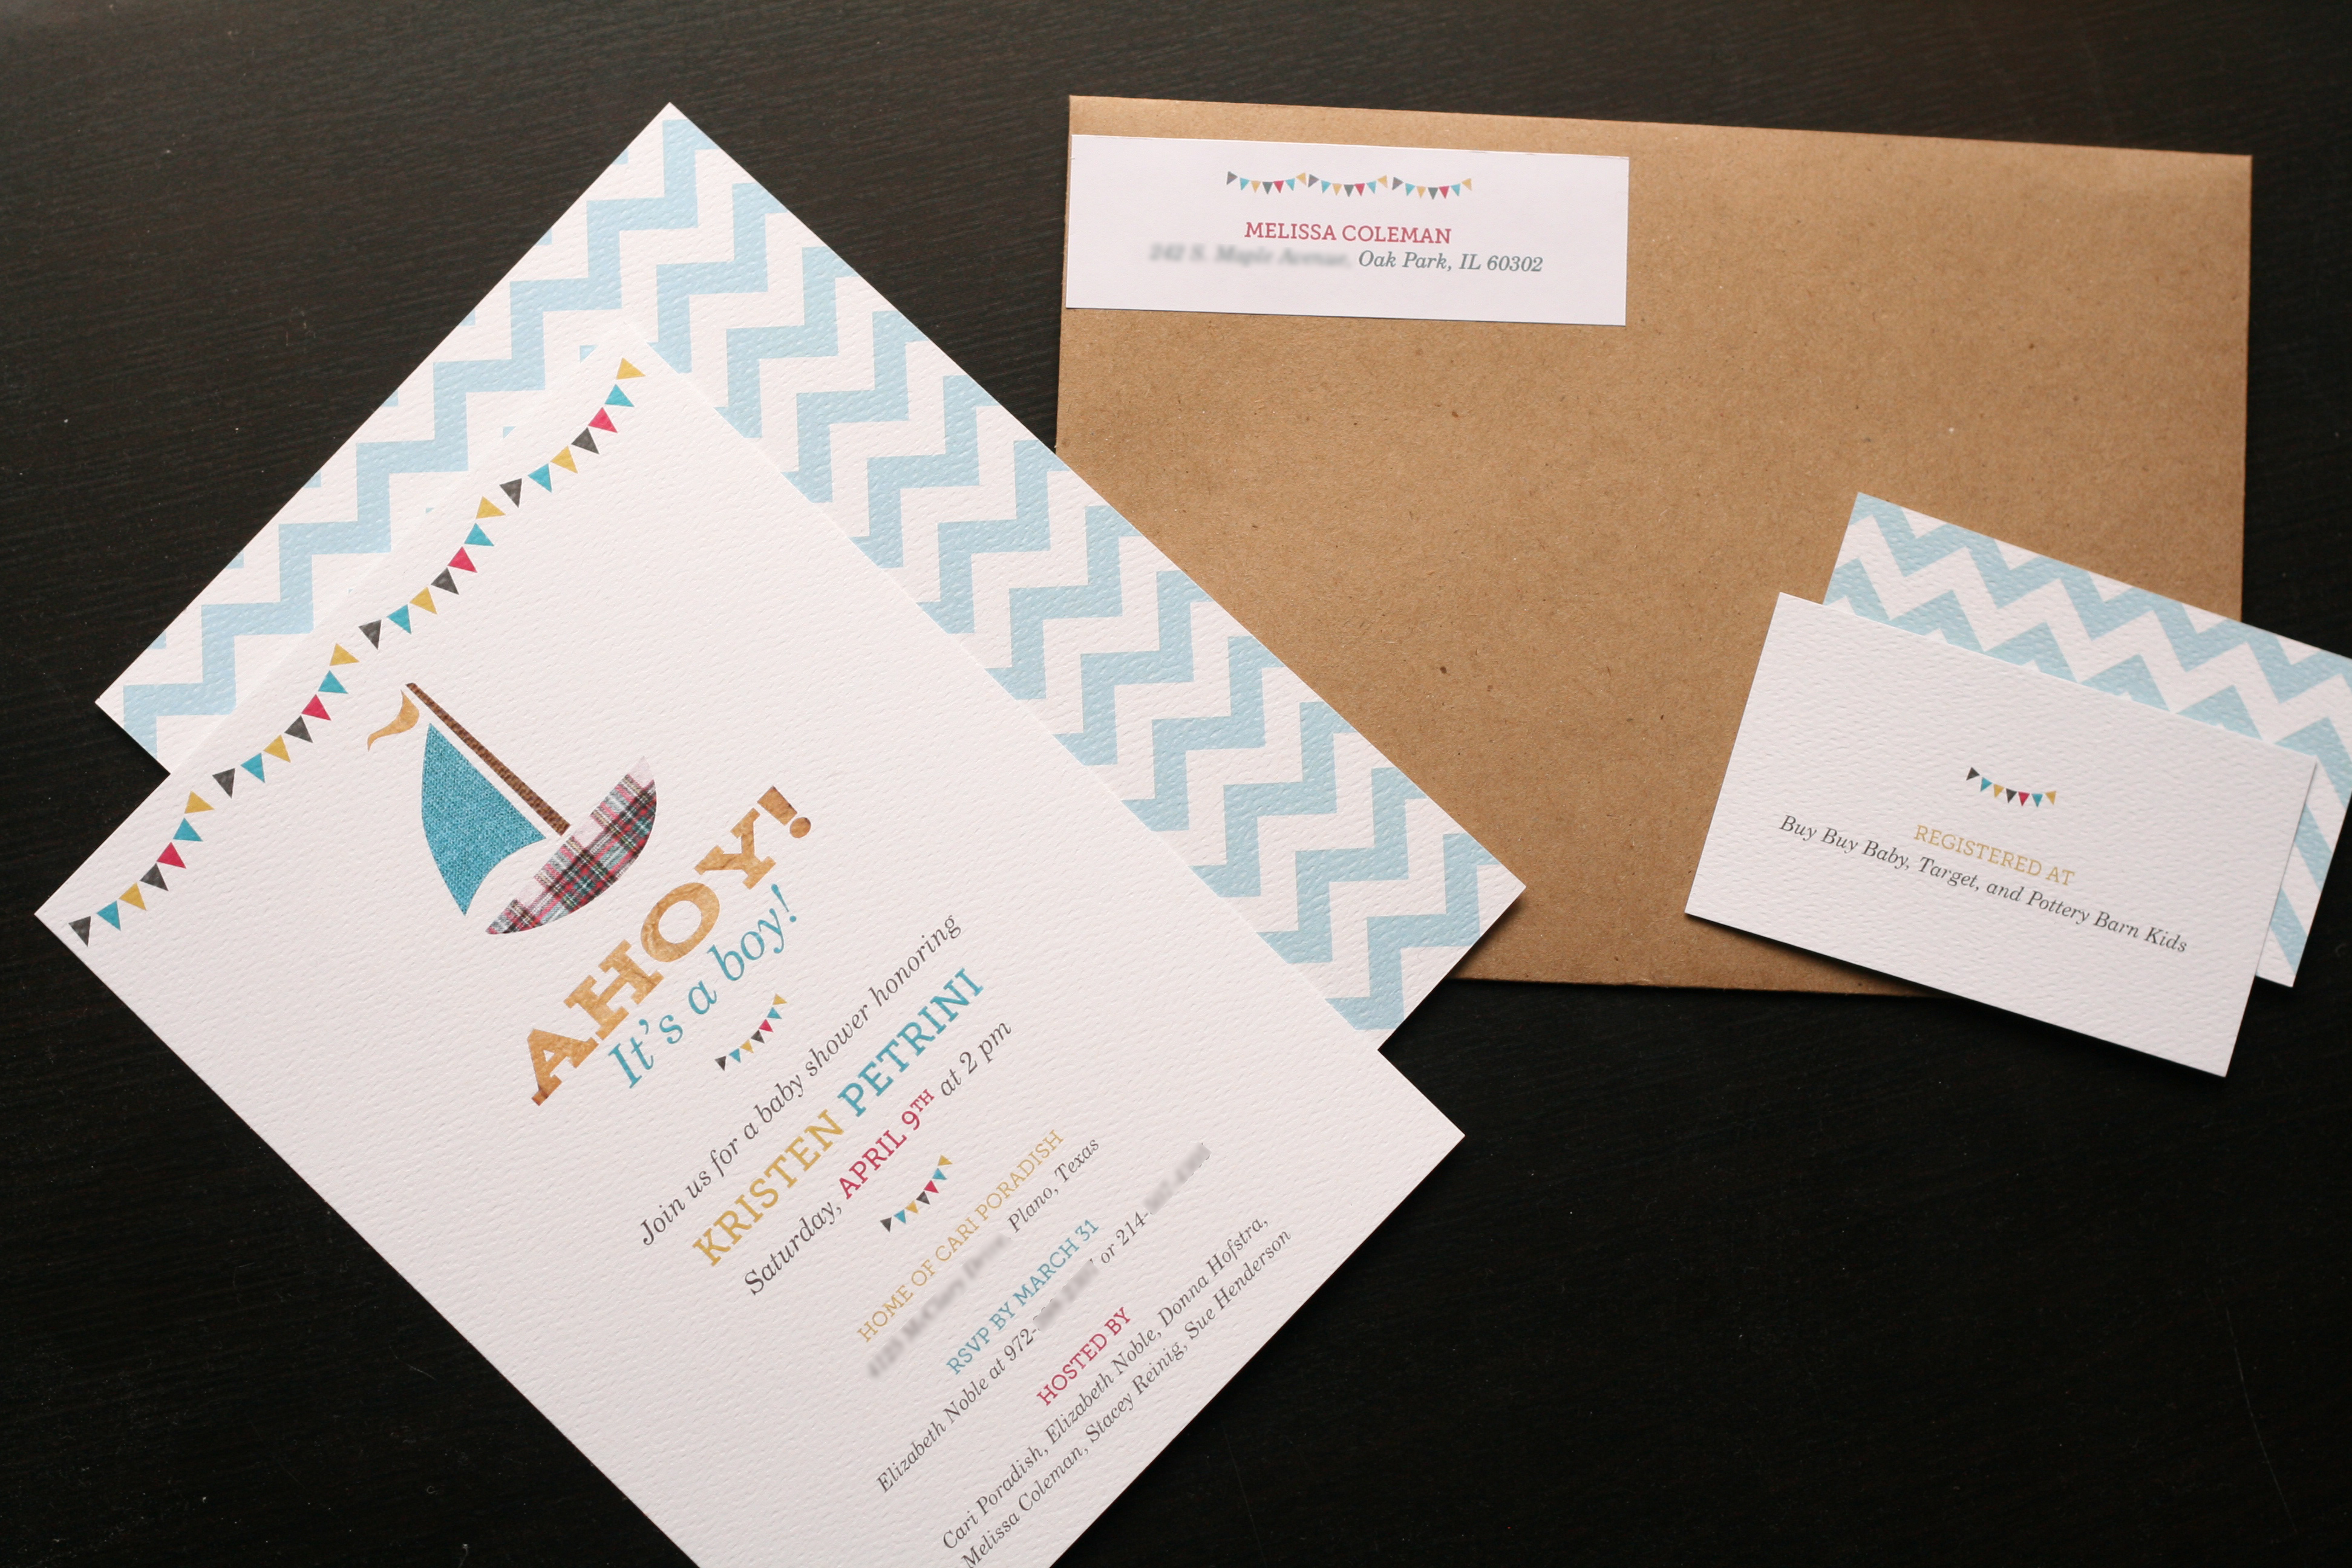
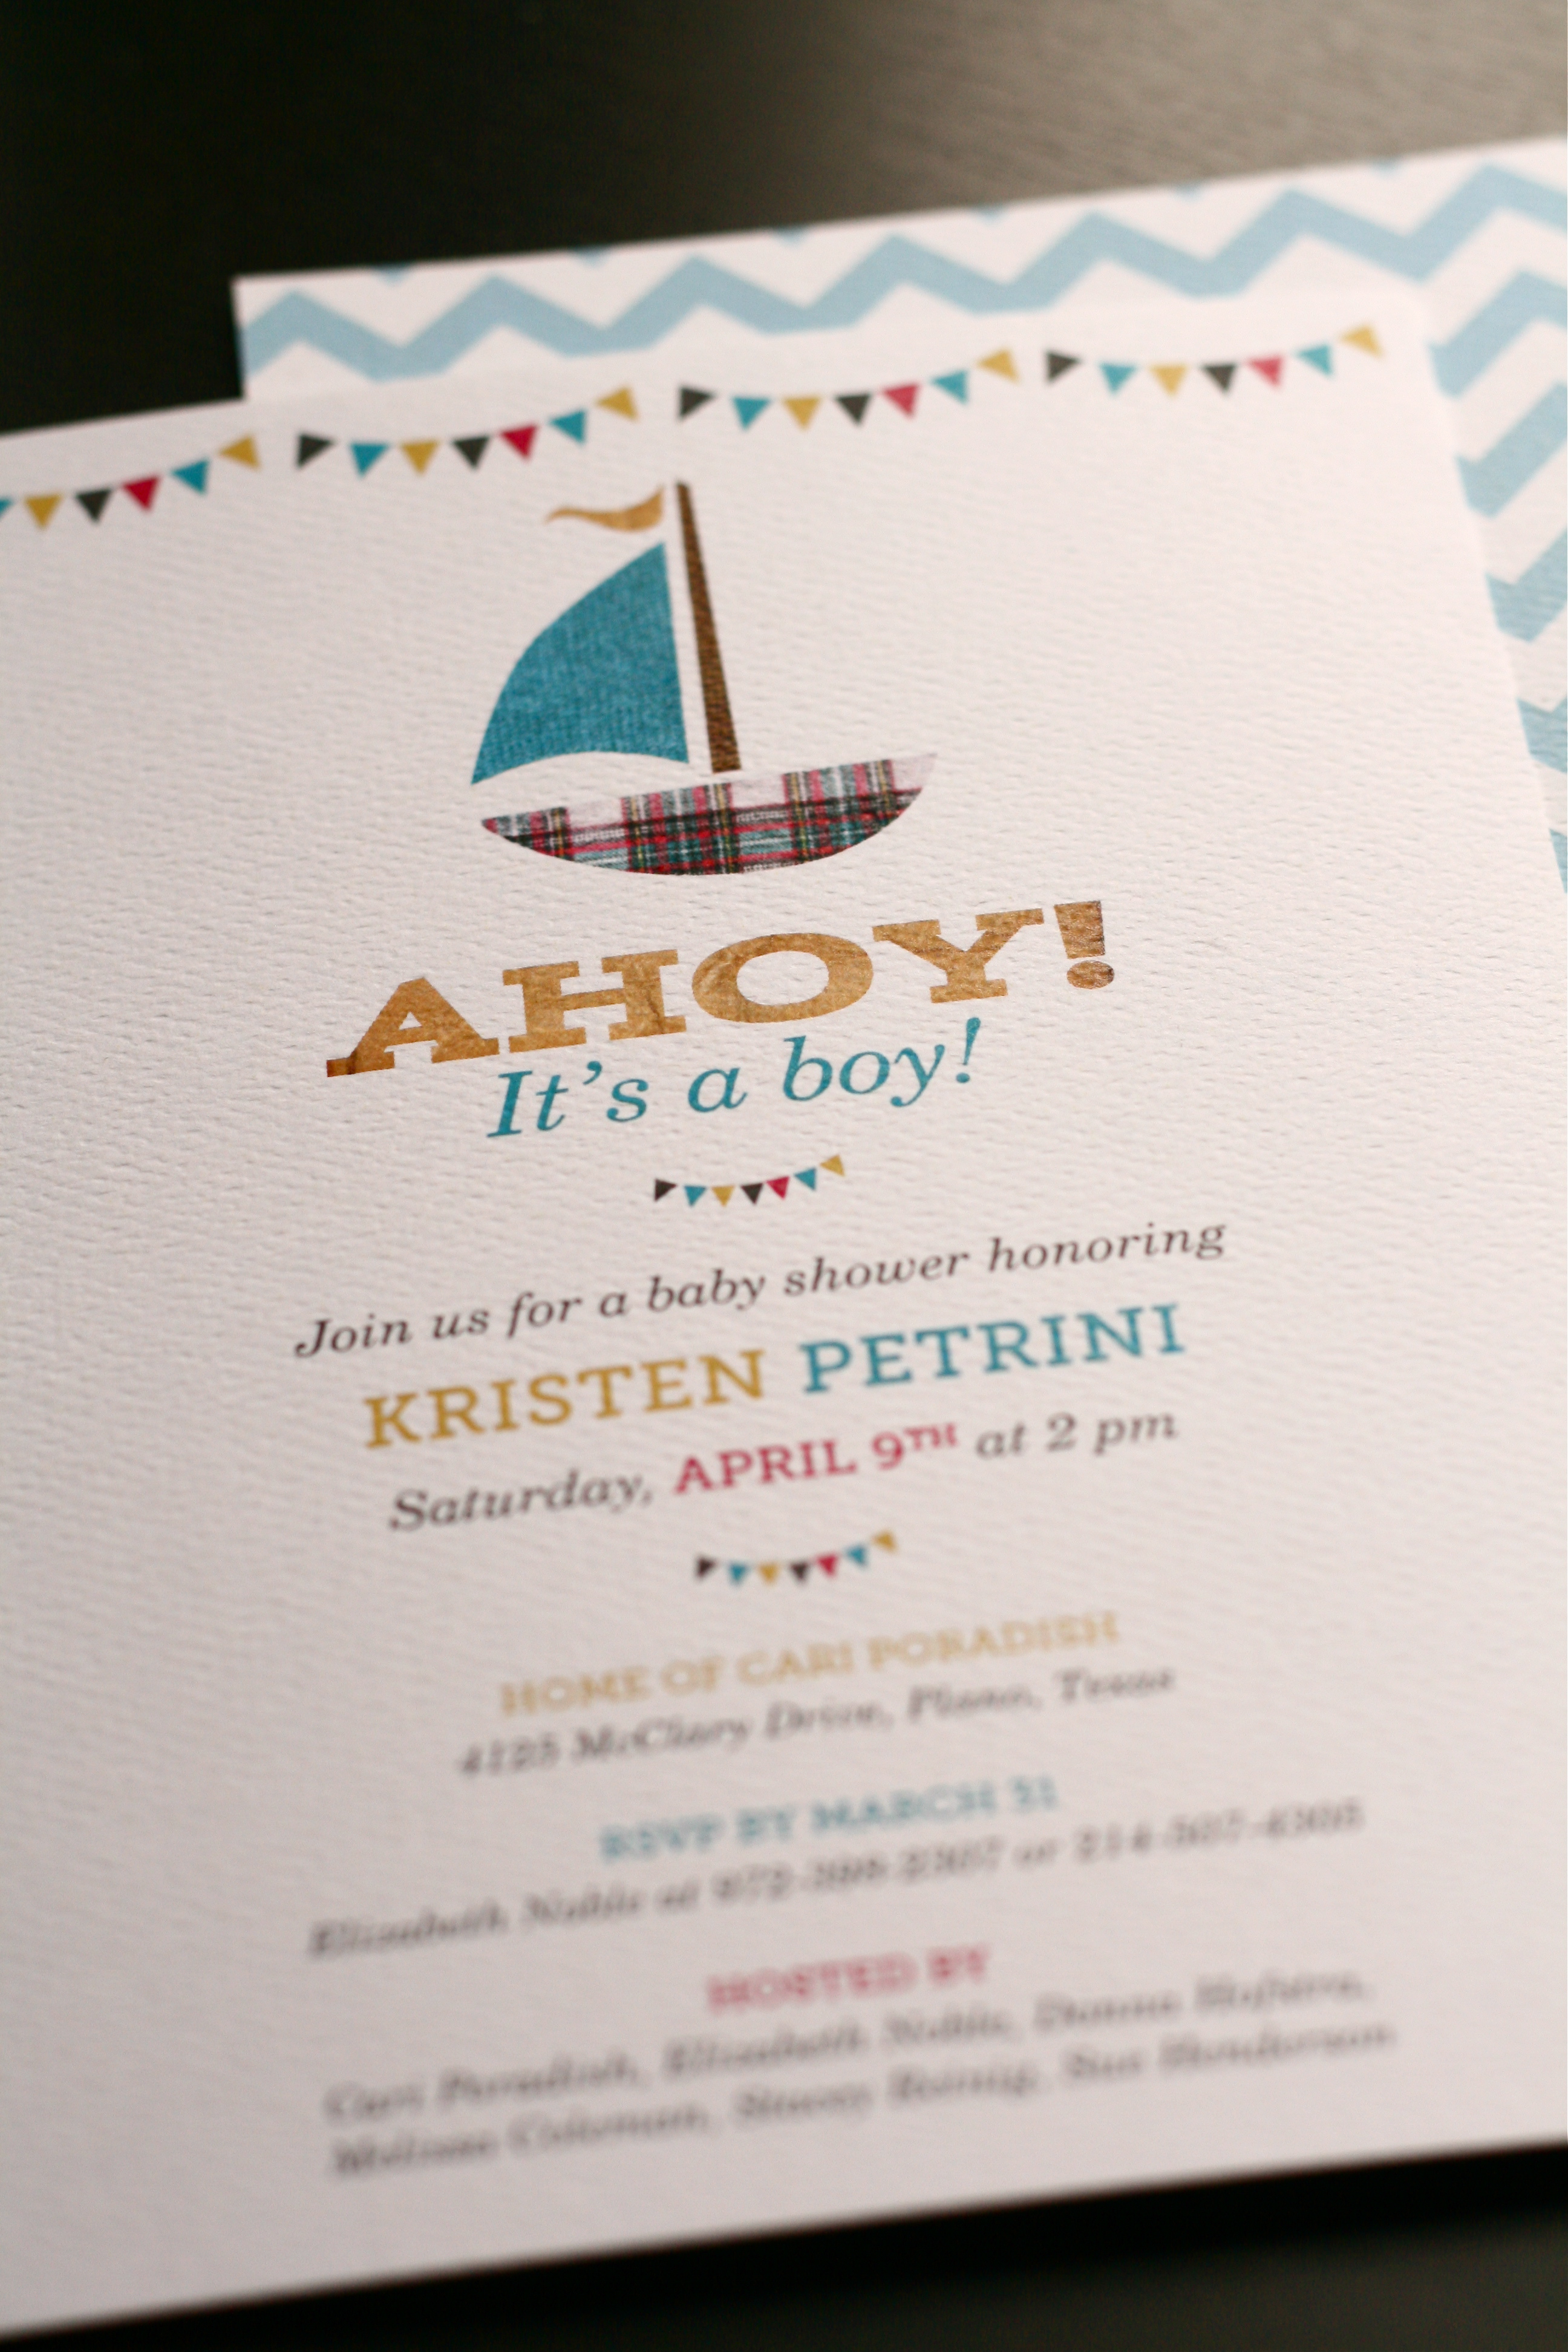
Remember the Ahoy! It’s a boy! invites I shared with you a couple weeks ago? I told you I may or may not be making cupcakes with a cute DIY topper. Well, I wasn’t lying. It’s time for more sharing and free downloads!

This post includes DIY instructions for the sailboat cupcake toppers. Another post on the recipe for red velvet cupcakes and cream cheese frosting is to come. So sit down, get out a pen an paper (or just bookmark this page), and let’s get decorating!

Here’s what you’ll need:
• Plaid Cupcake Liners (I ordered mine from Bake it Pretty. Sweet LuLu is another great resource for cute baking supplies.)
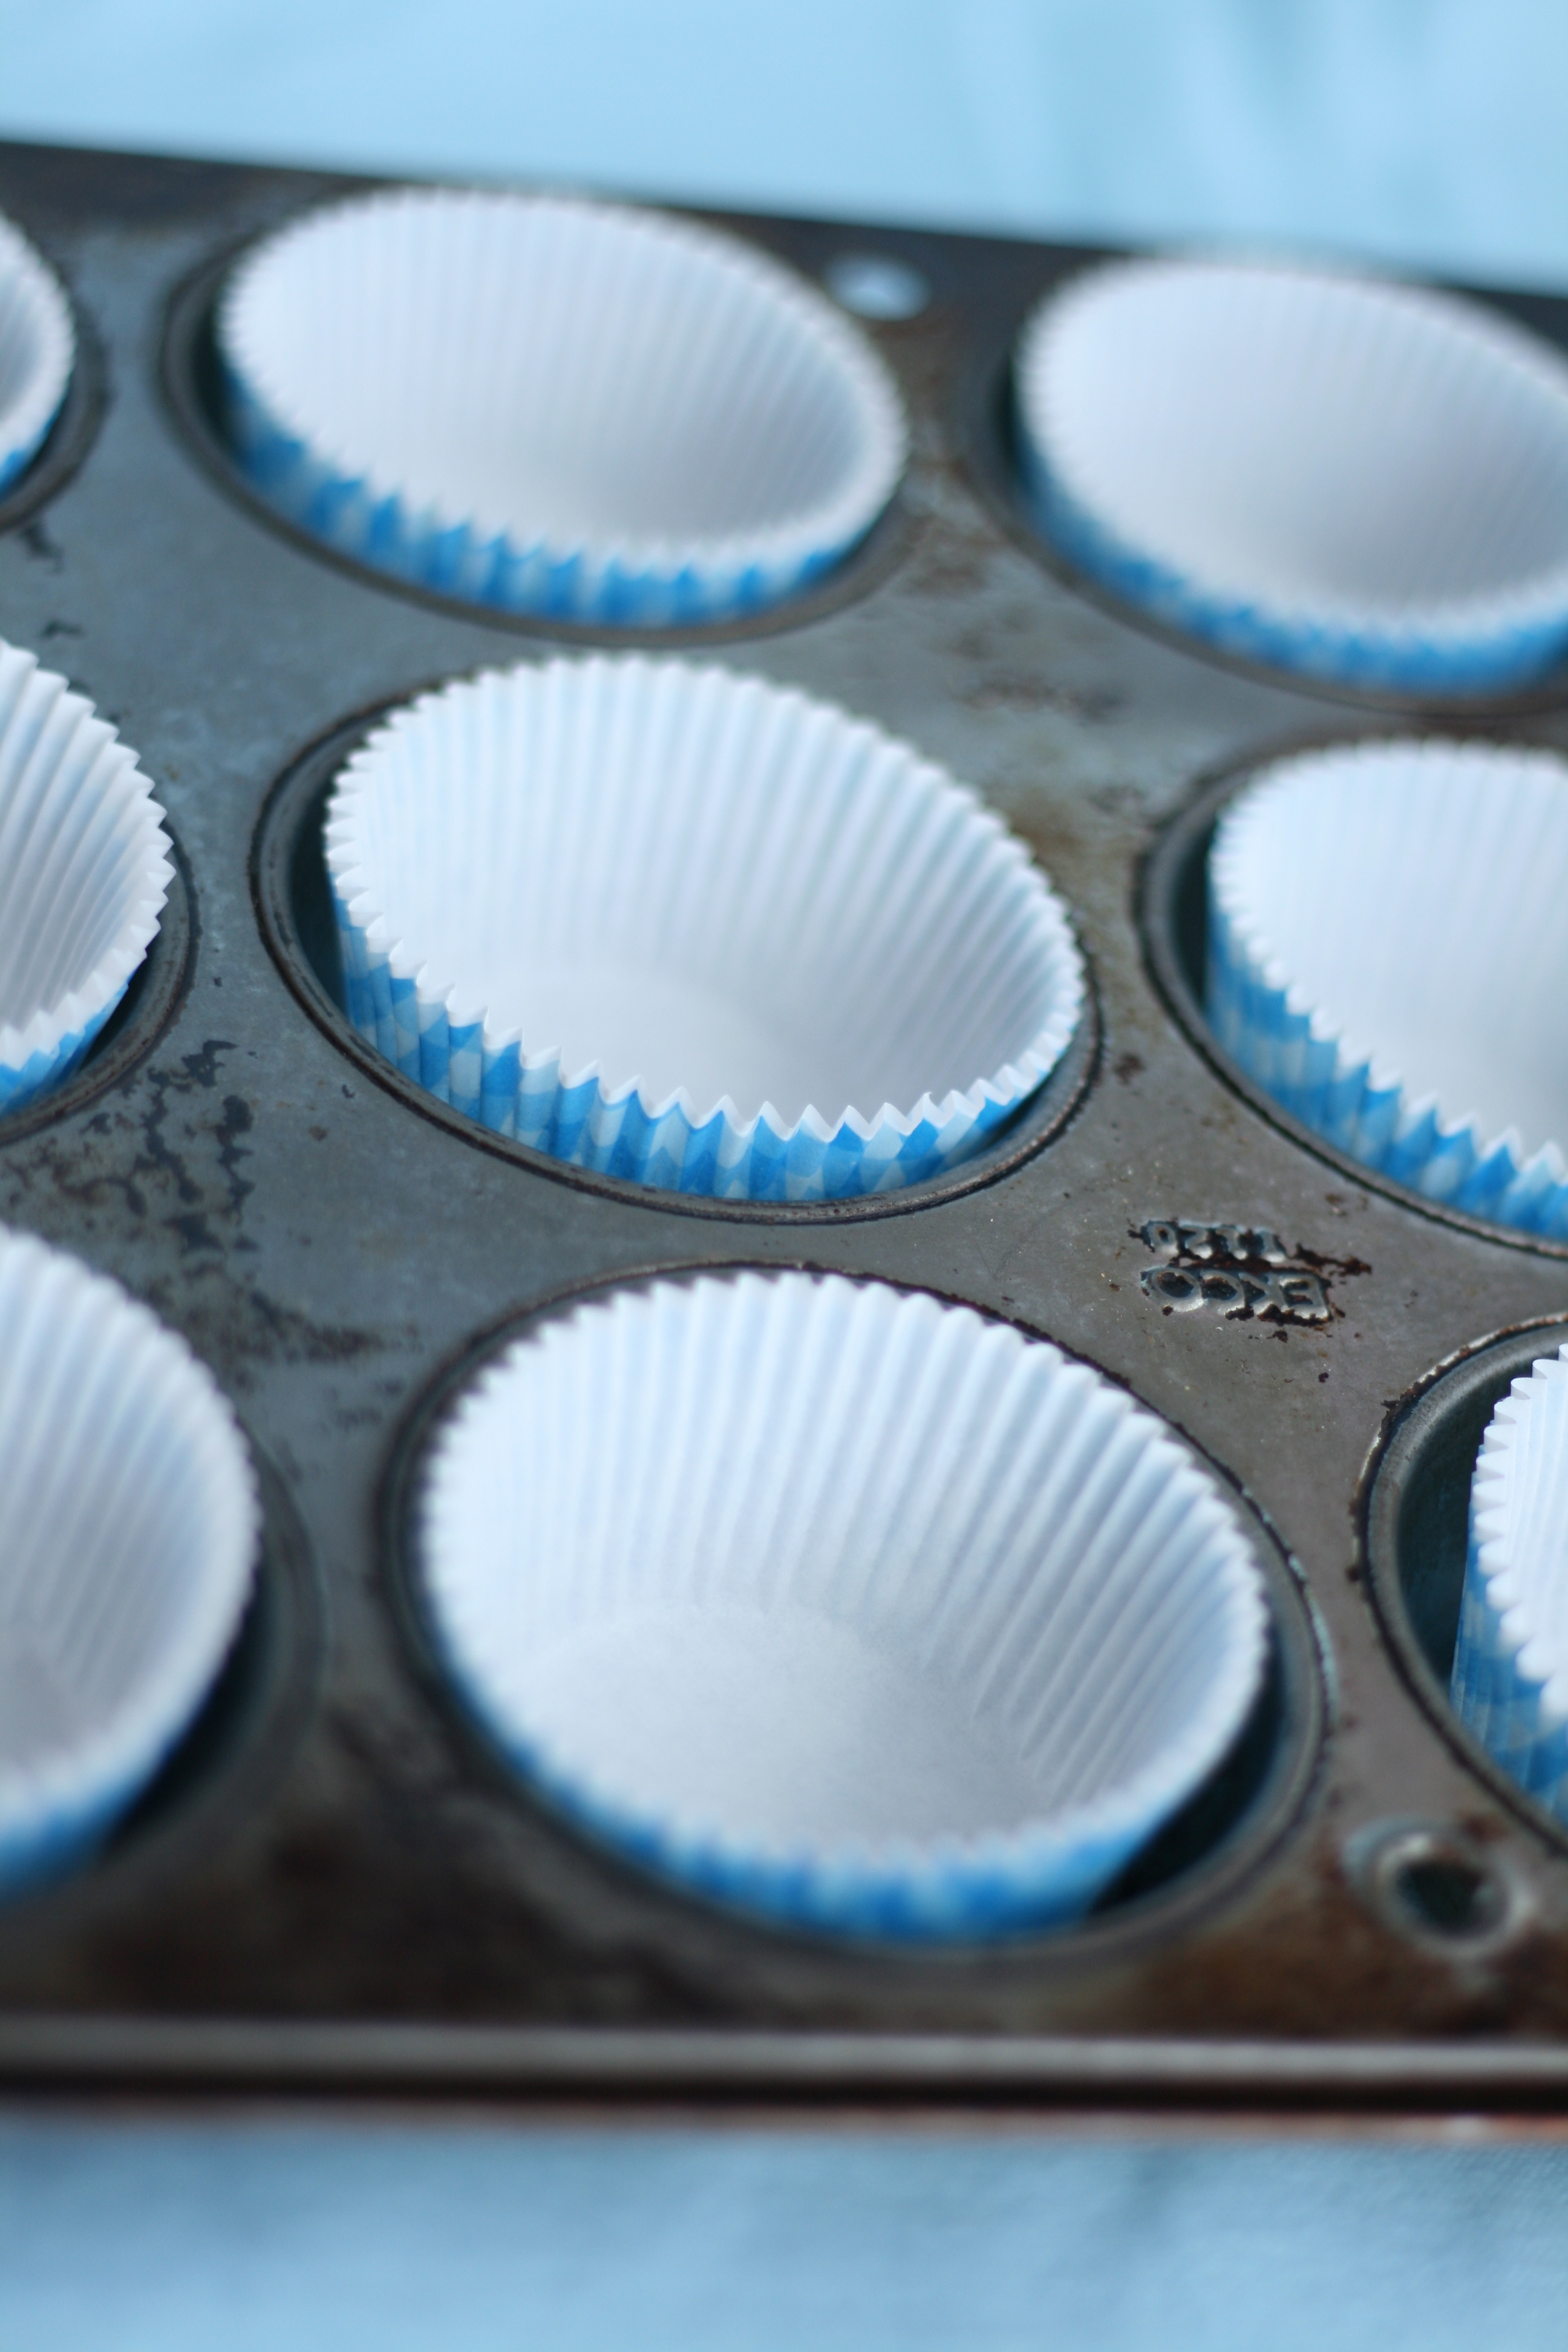
• White Cupcake Liners (Always double up your liners so you can actually see the pretty liner. If you use one liner, when the cupcake bakes, the color of the cupcake will bleed into the liner thus losing its pretty pattern. Sad.)
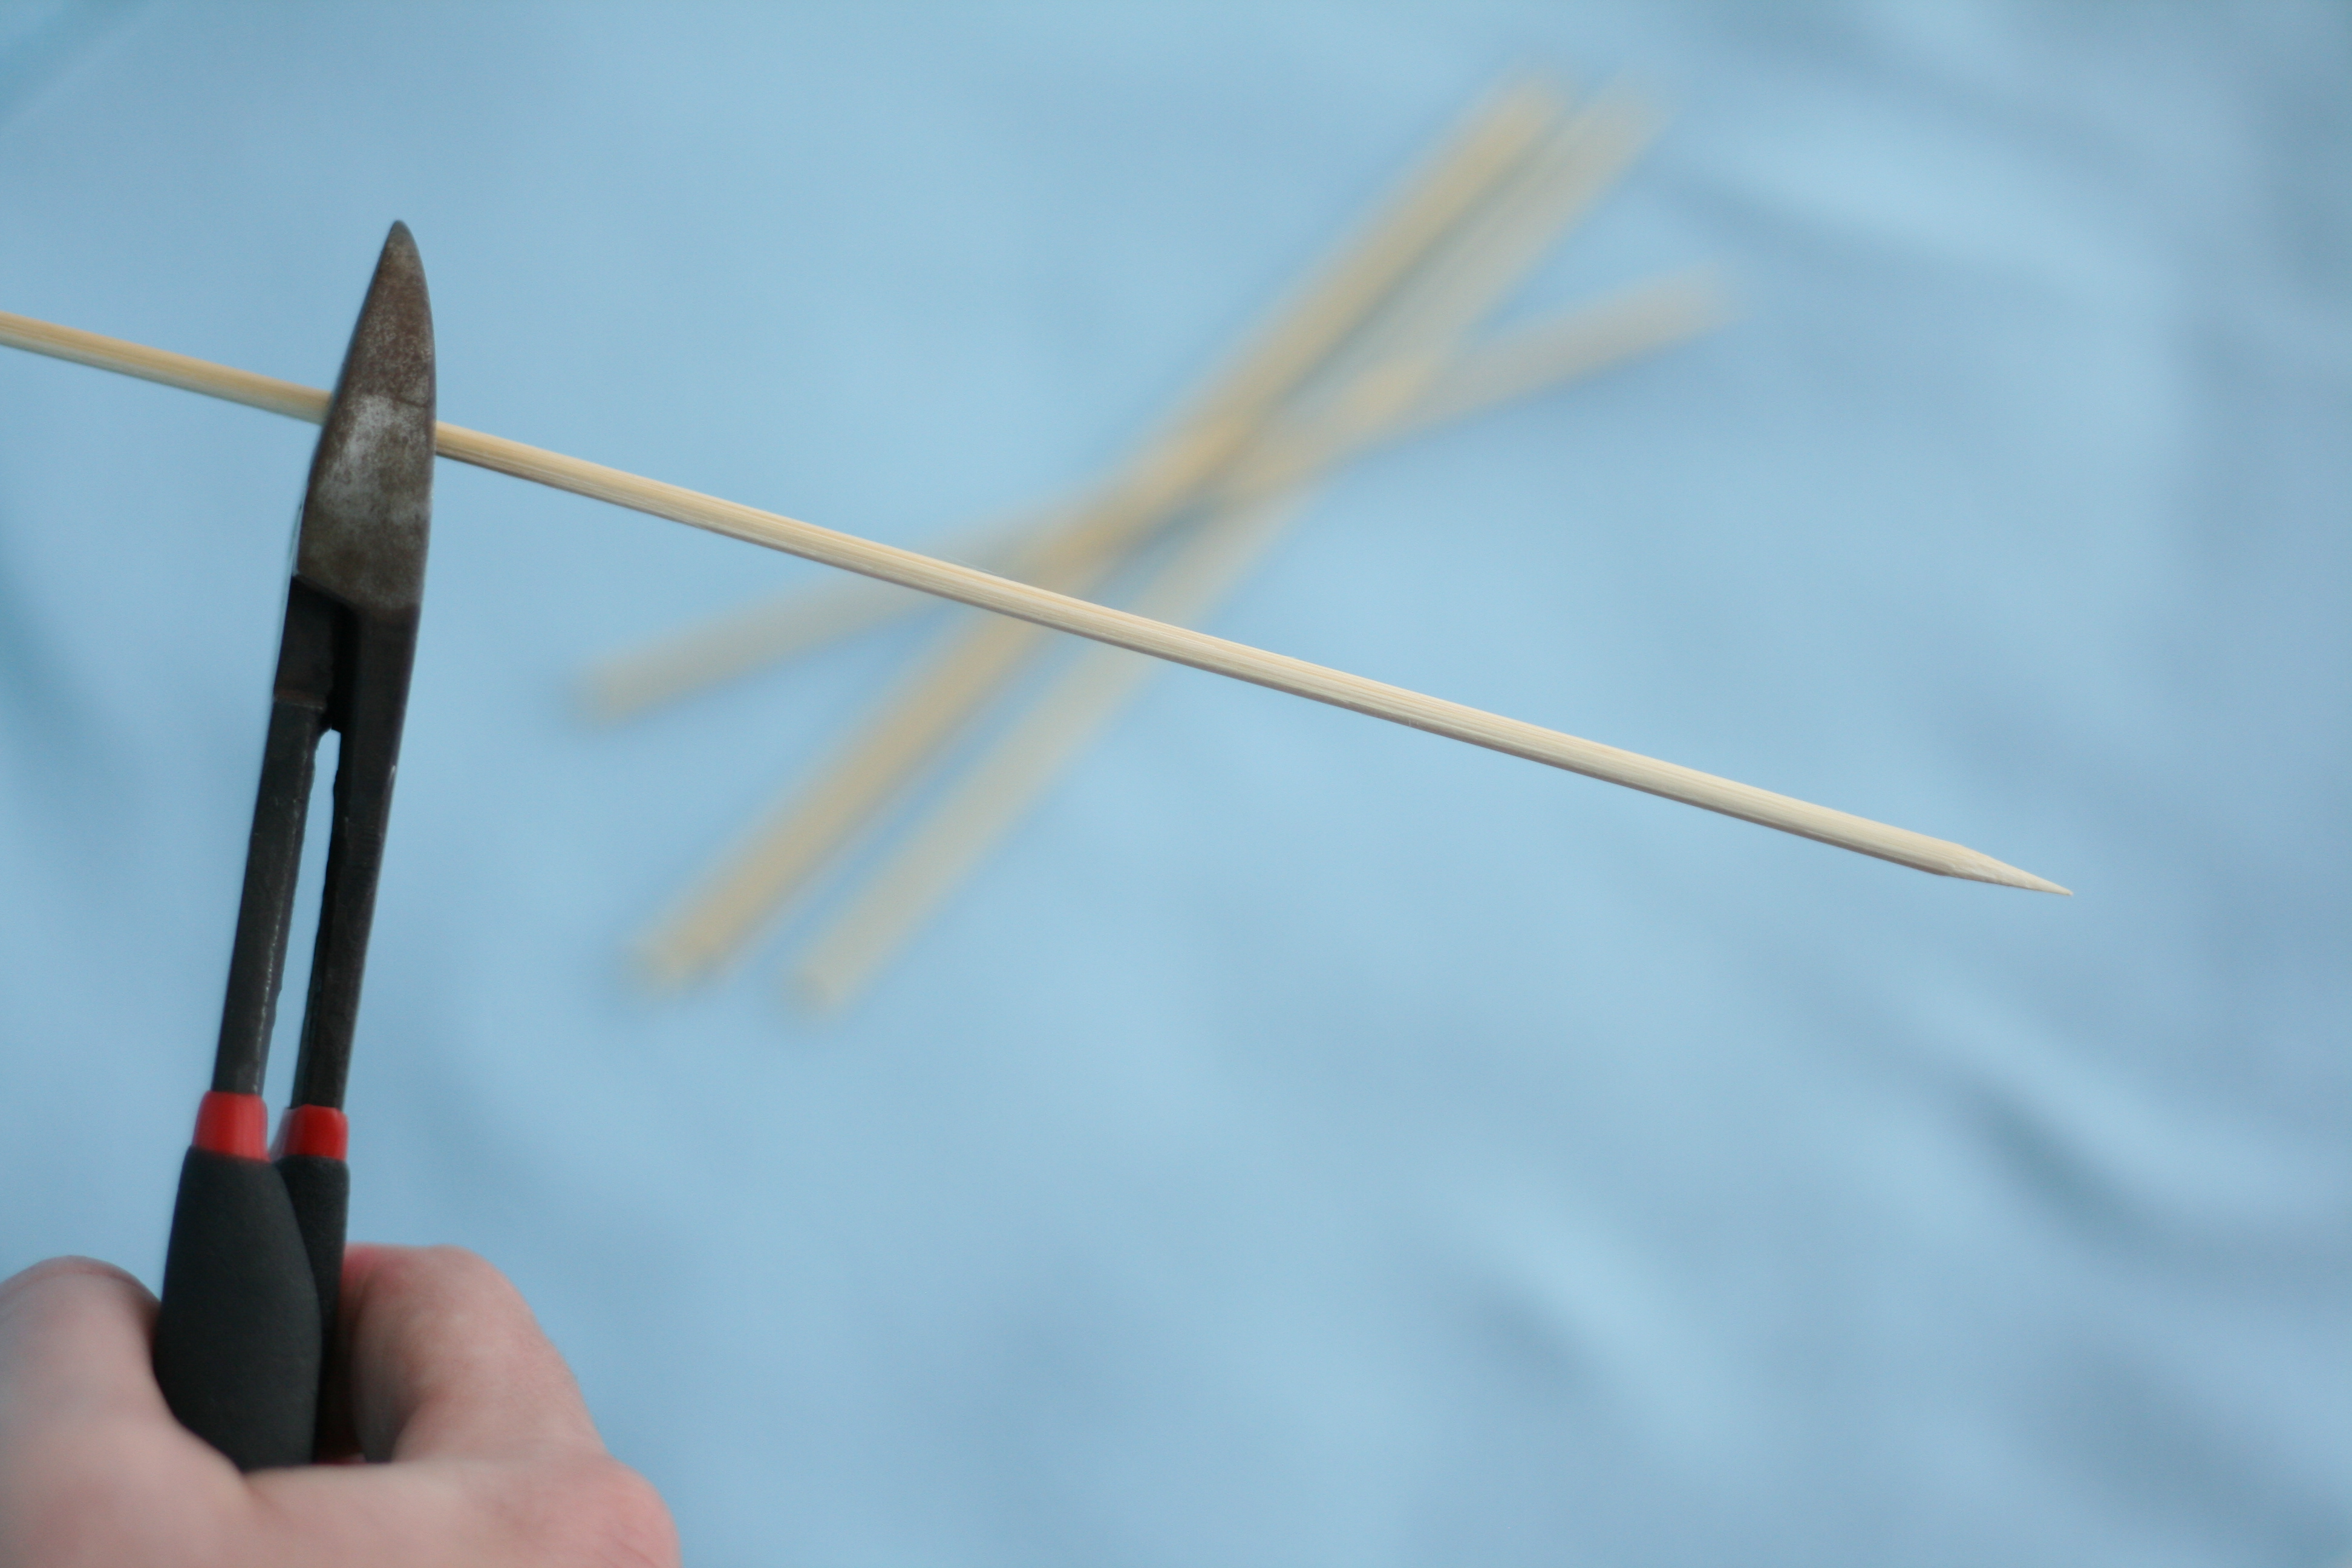
• Wooden Skewers (Think kabobs.)
• Wire Cutters
FauxMartha Cupcake Sail Pattern
• Printer
• Textured, cardstock weight paper
• Scissors
• Exacto Knife
• Cutting Board
• Colored Duck Tape (or colored masking tape)

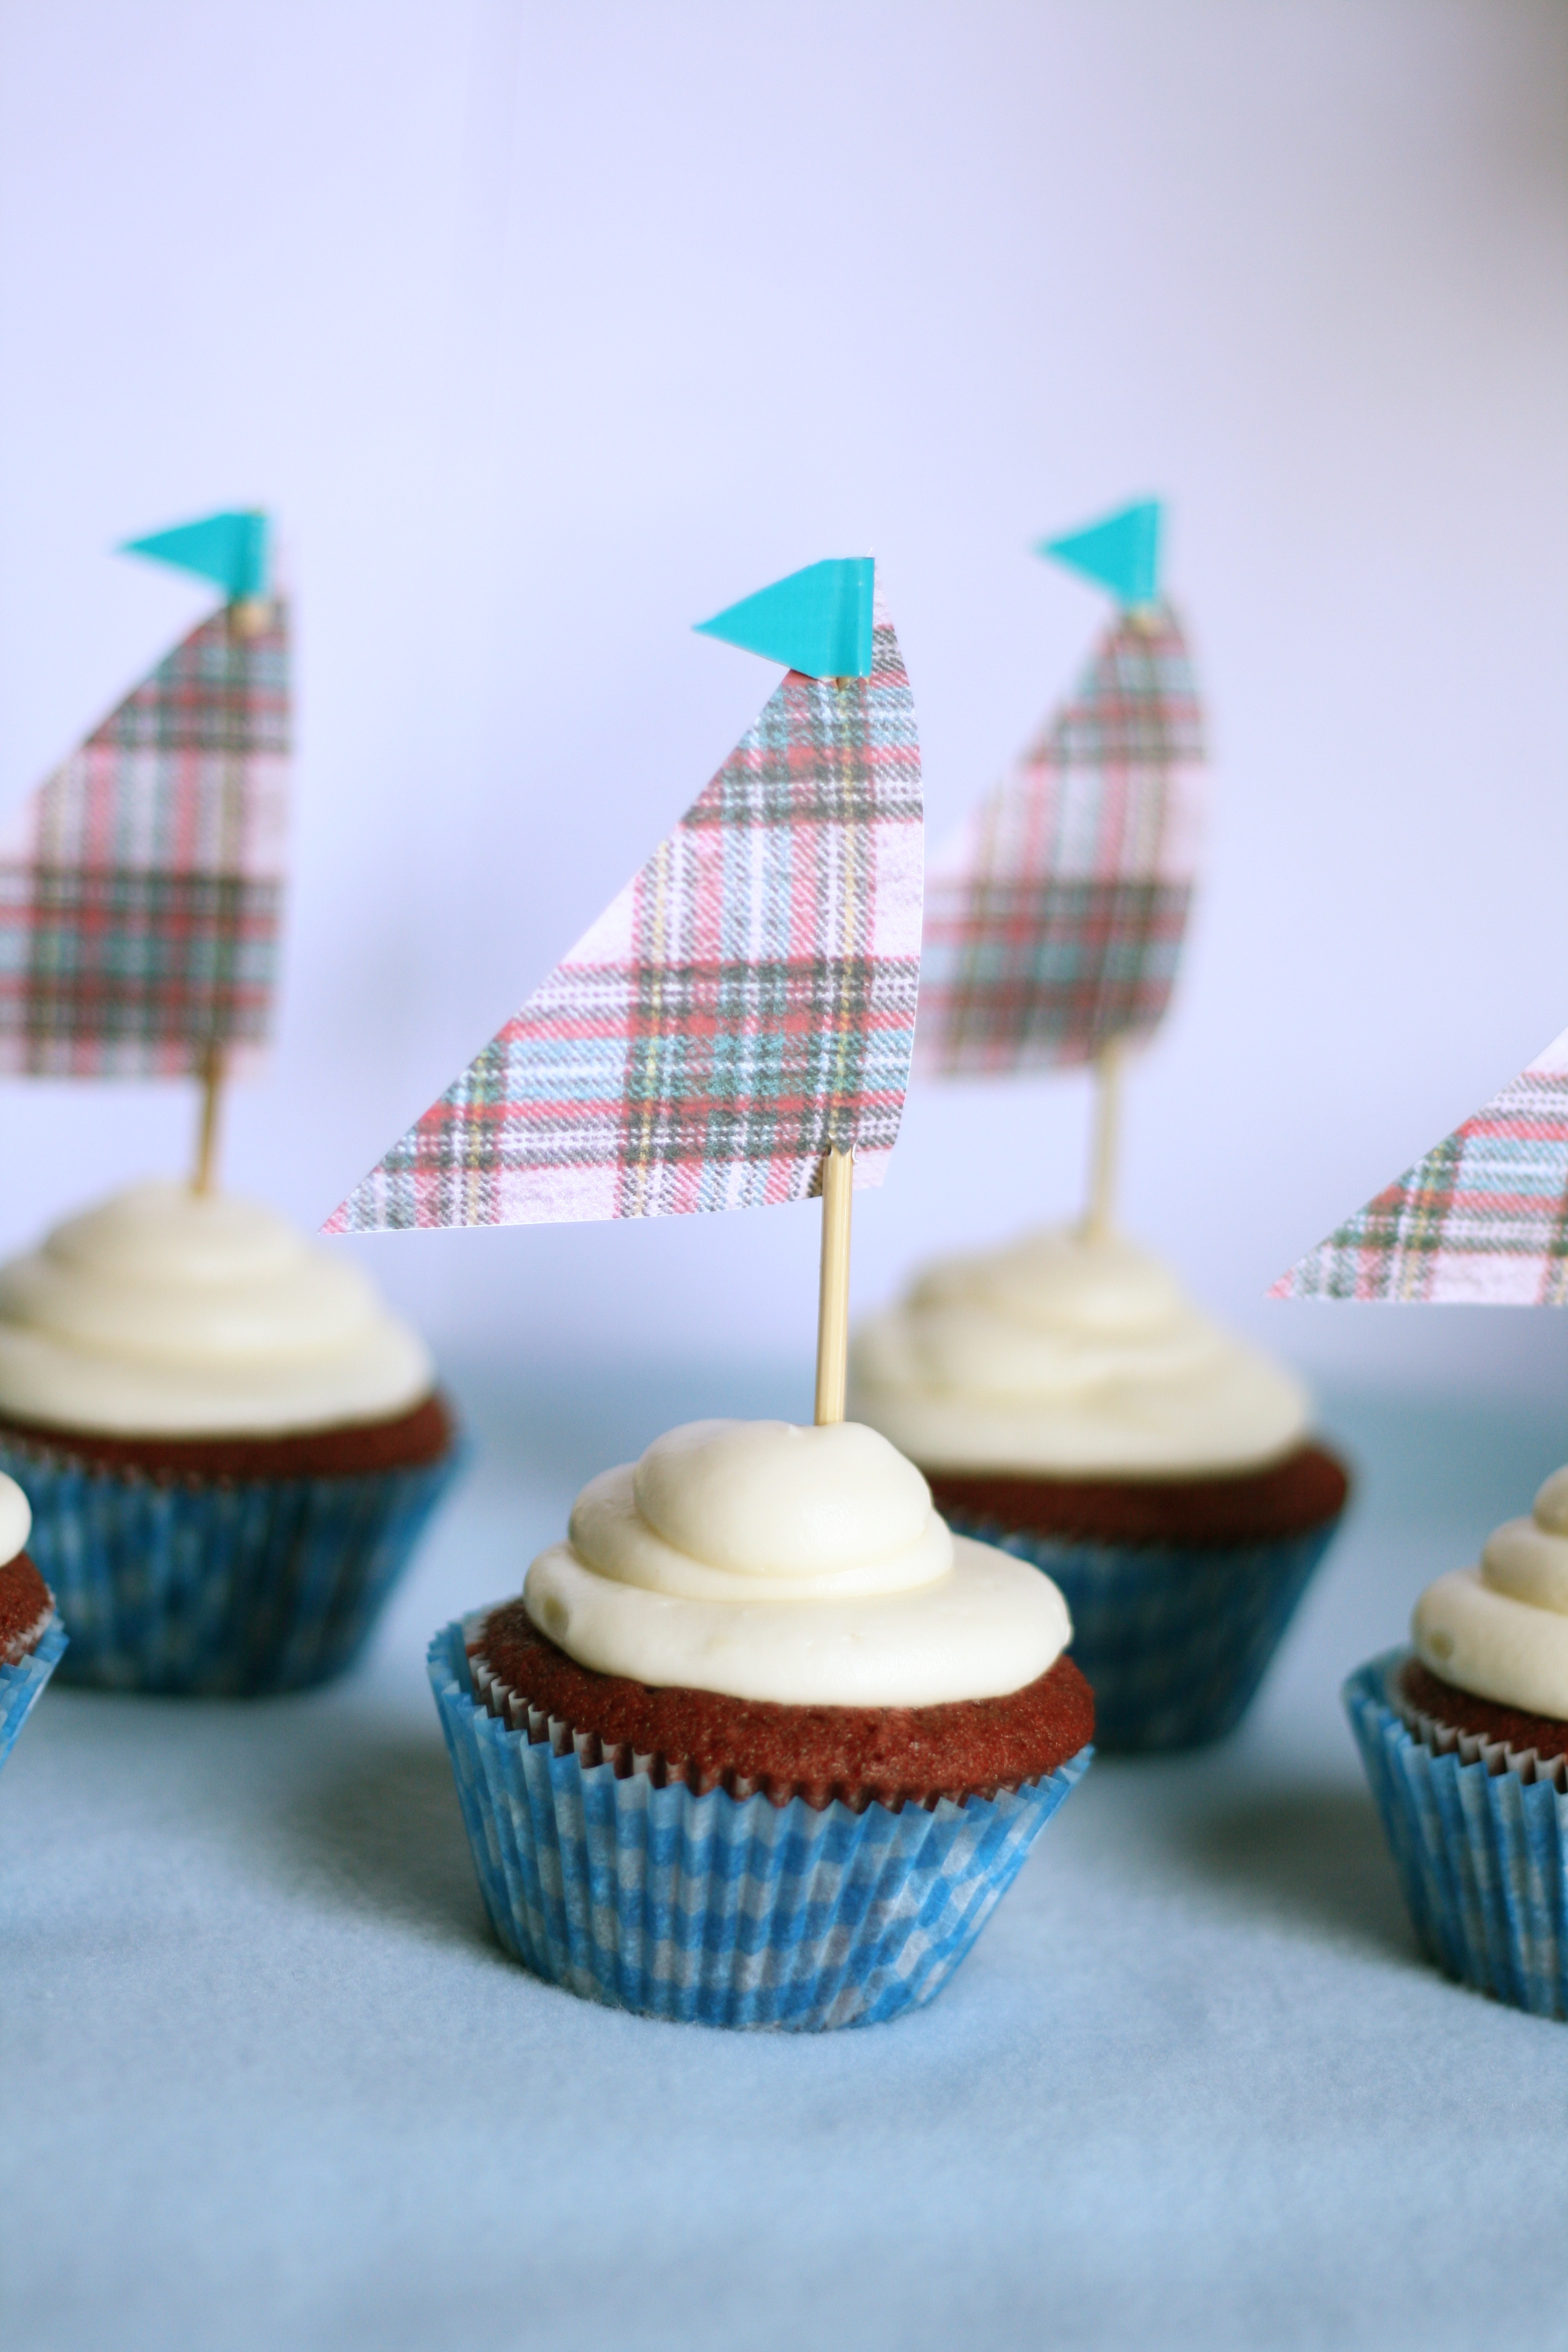
Here’s how to achieve the look (pictures below):
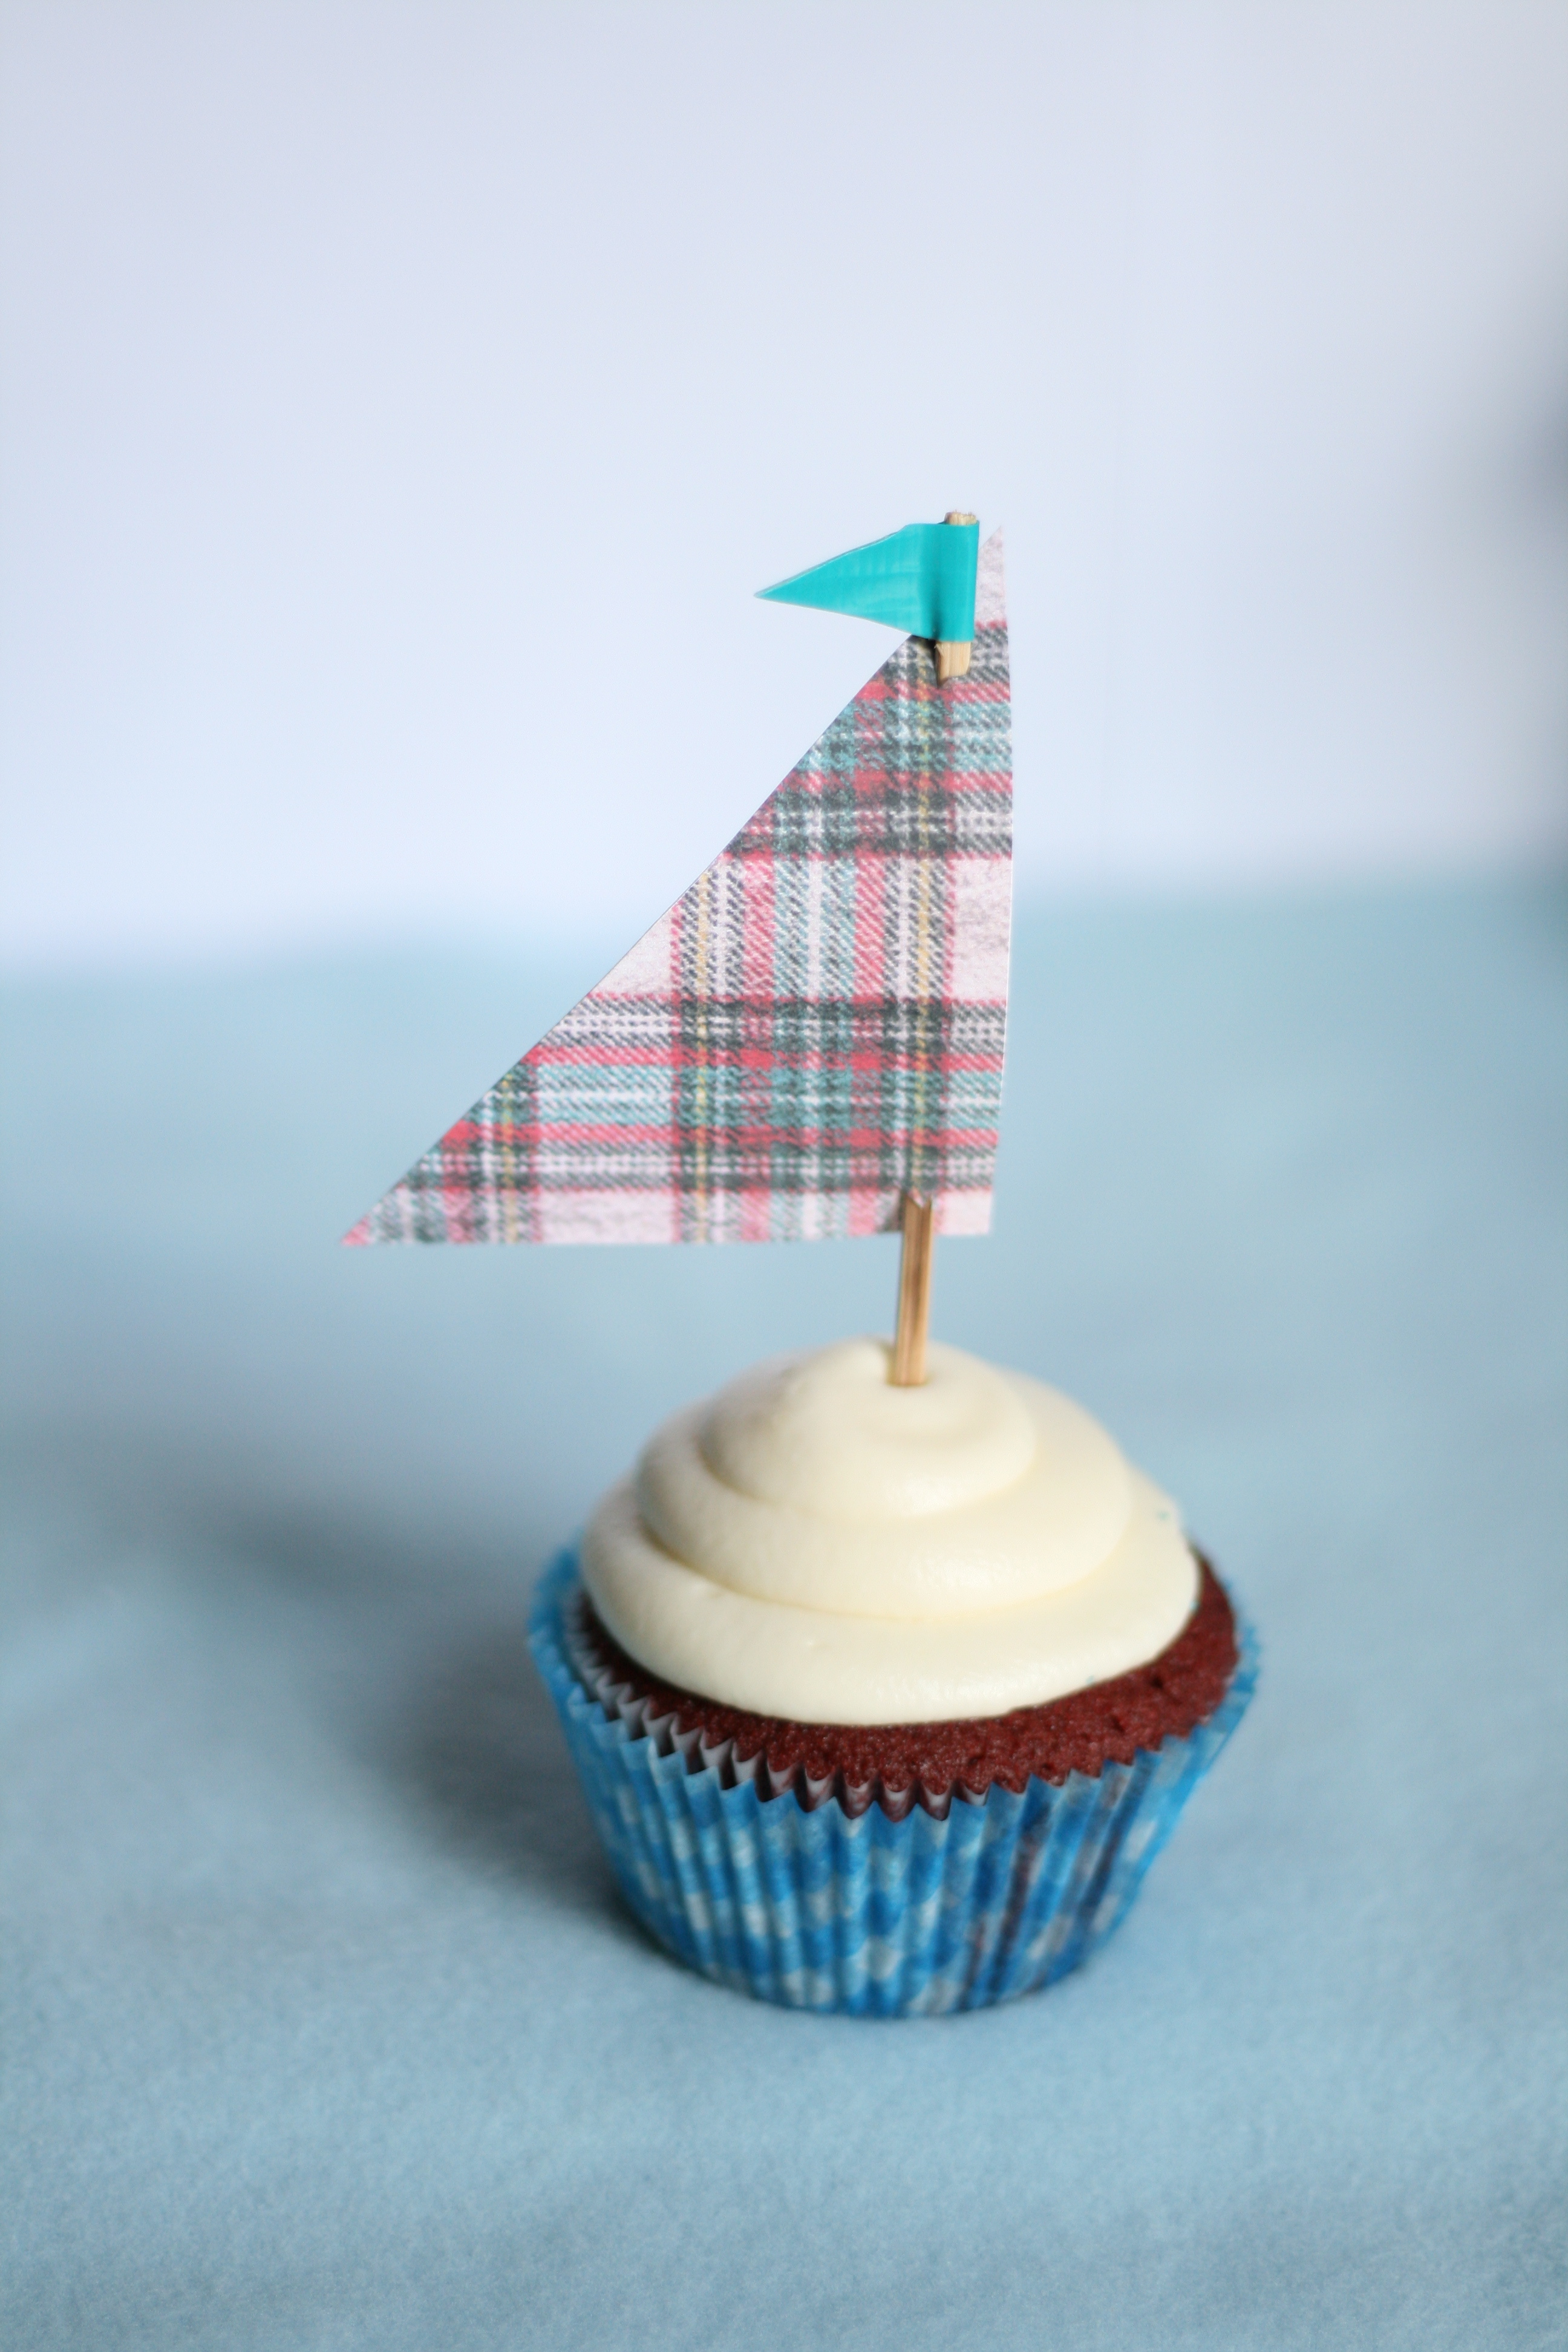
1. Make and bake your cupcakes, using a recipe of your choice. Remember to use 2 liners. Place the white liner inside the plaid liner. Allow cupcakes to fully cool before icing and decorating.
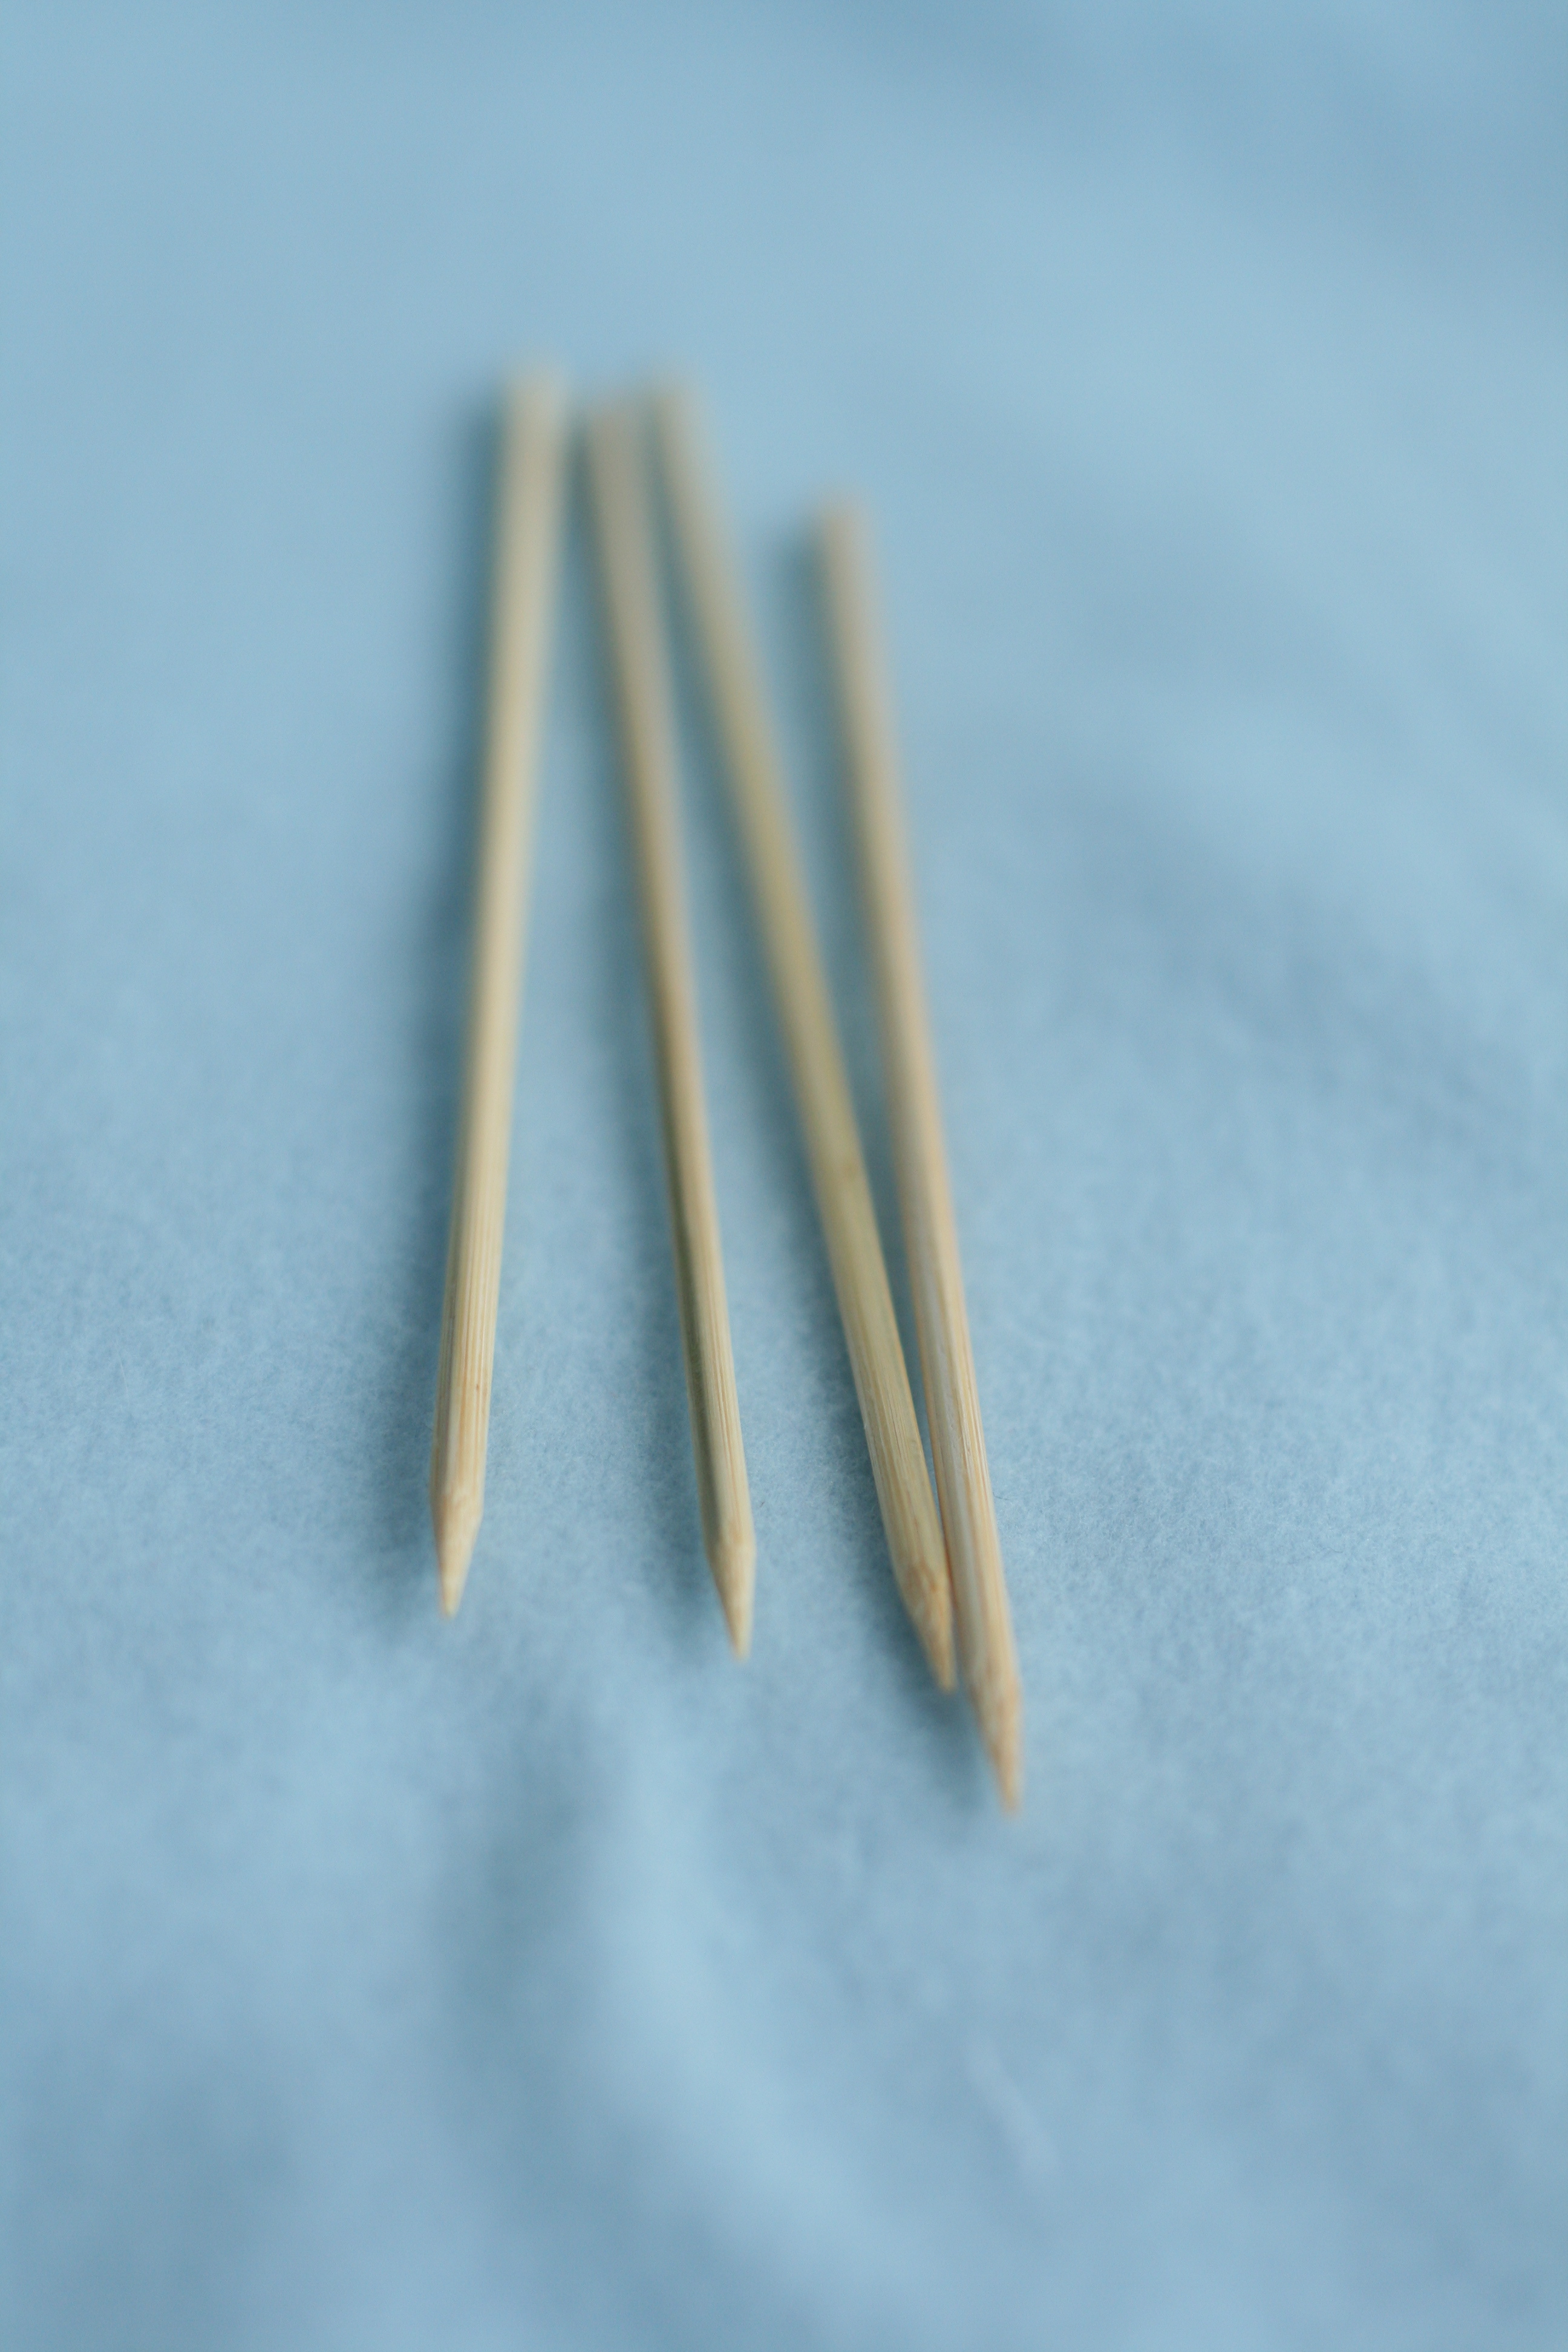
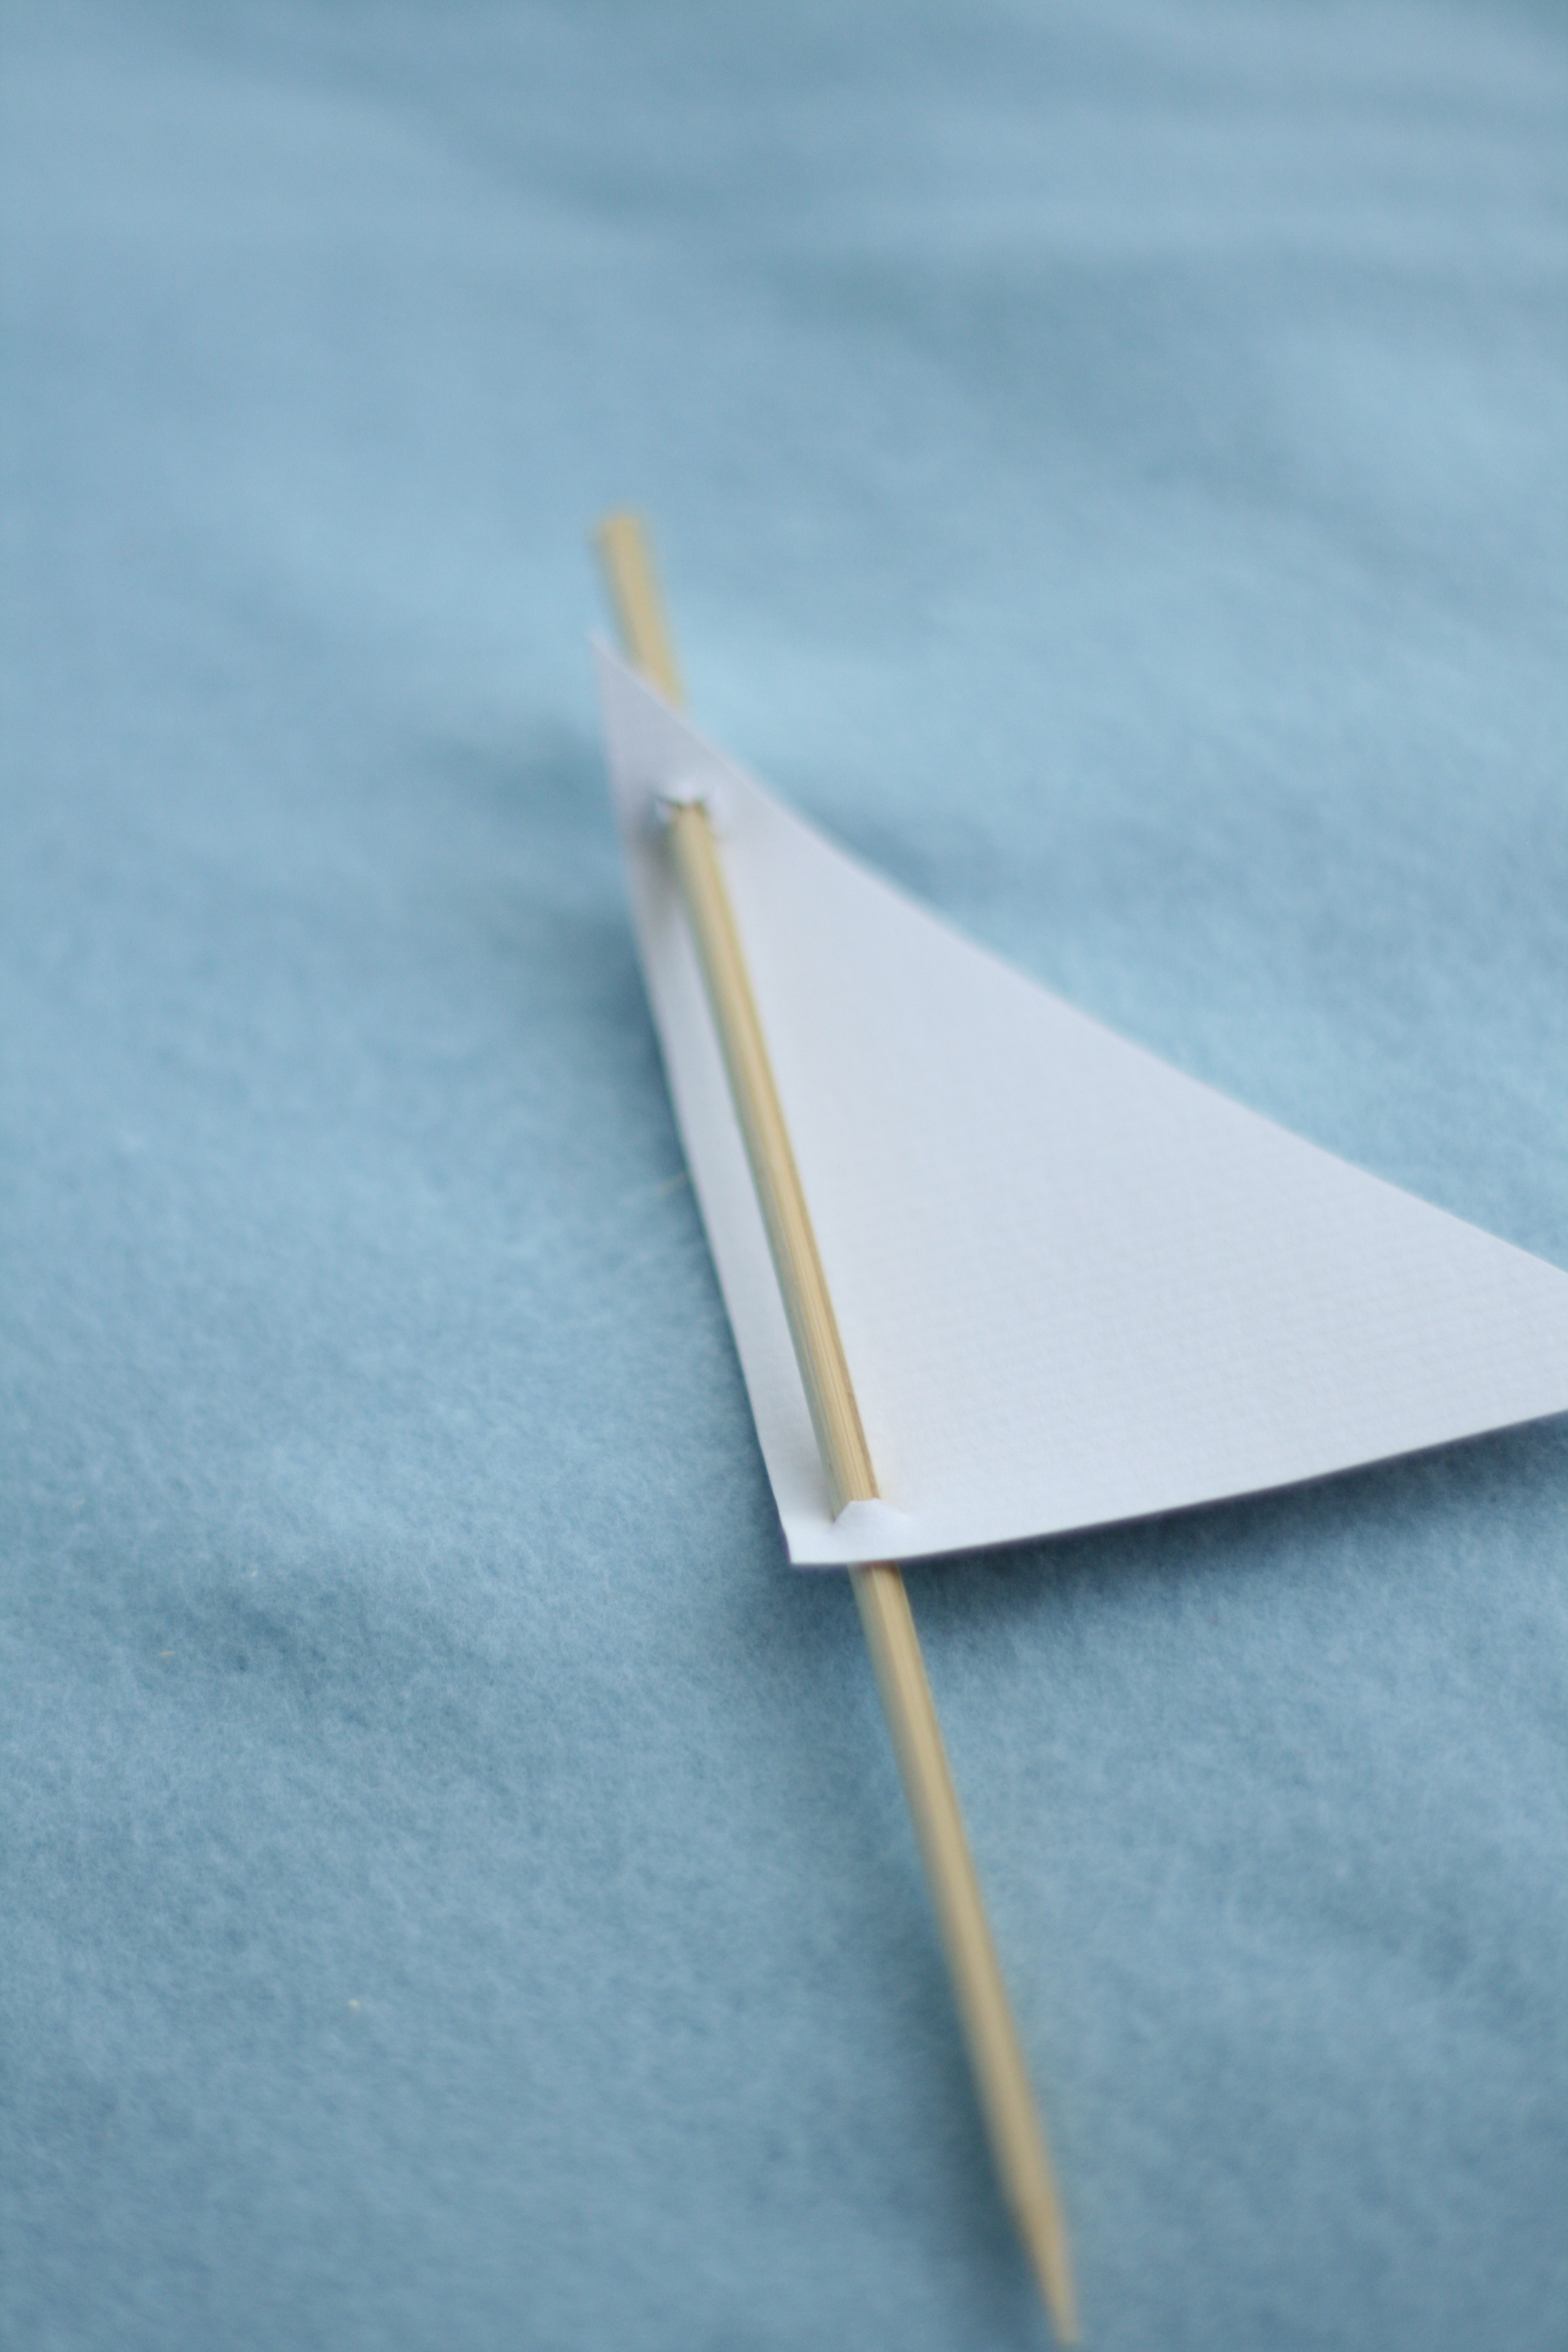
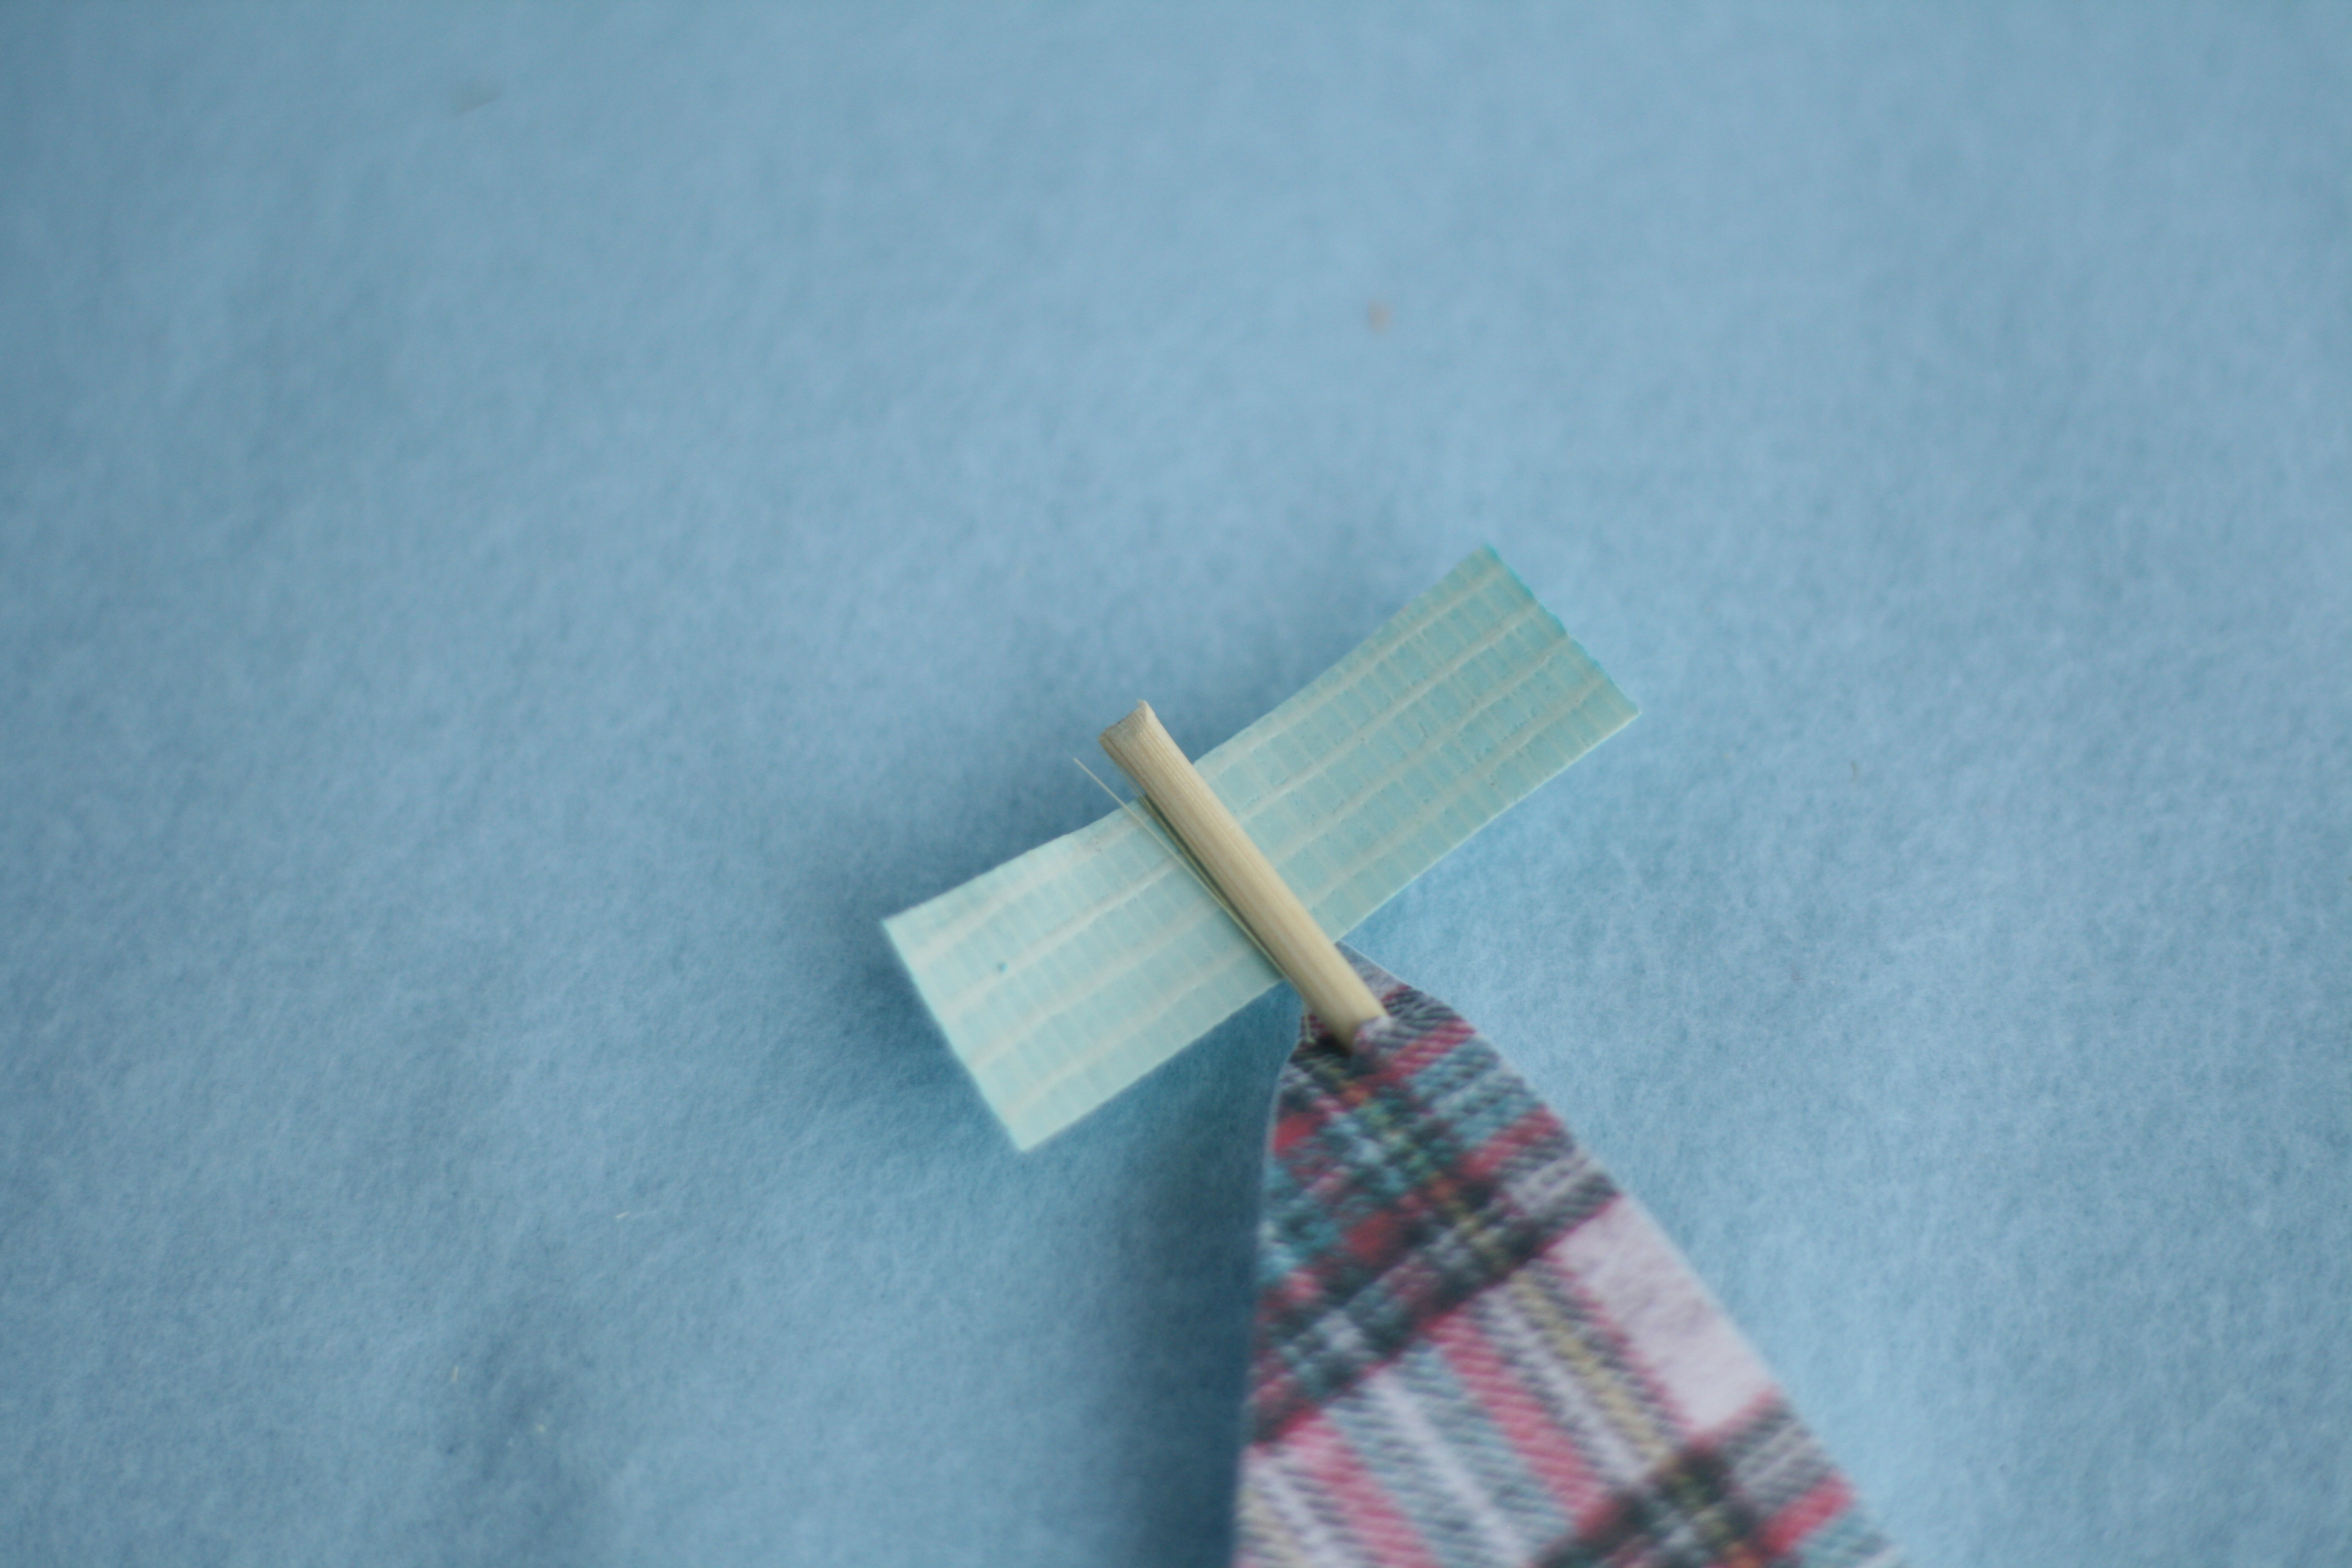
2. Meanwhile, cut wooden skewers about 5″ long using wire cutters or some other cutting utensil. Keep the side with the pointed end. Don’t worry if the wood begins to fray where you made the cut. We will cover that up shortly.
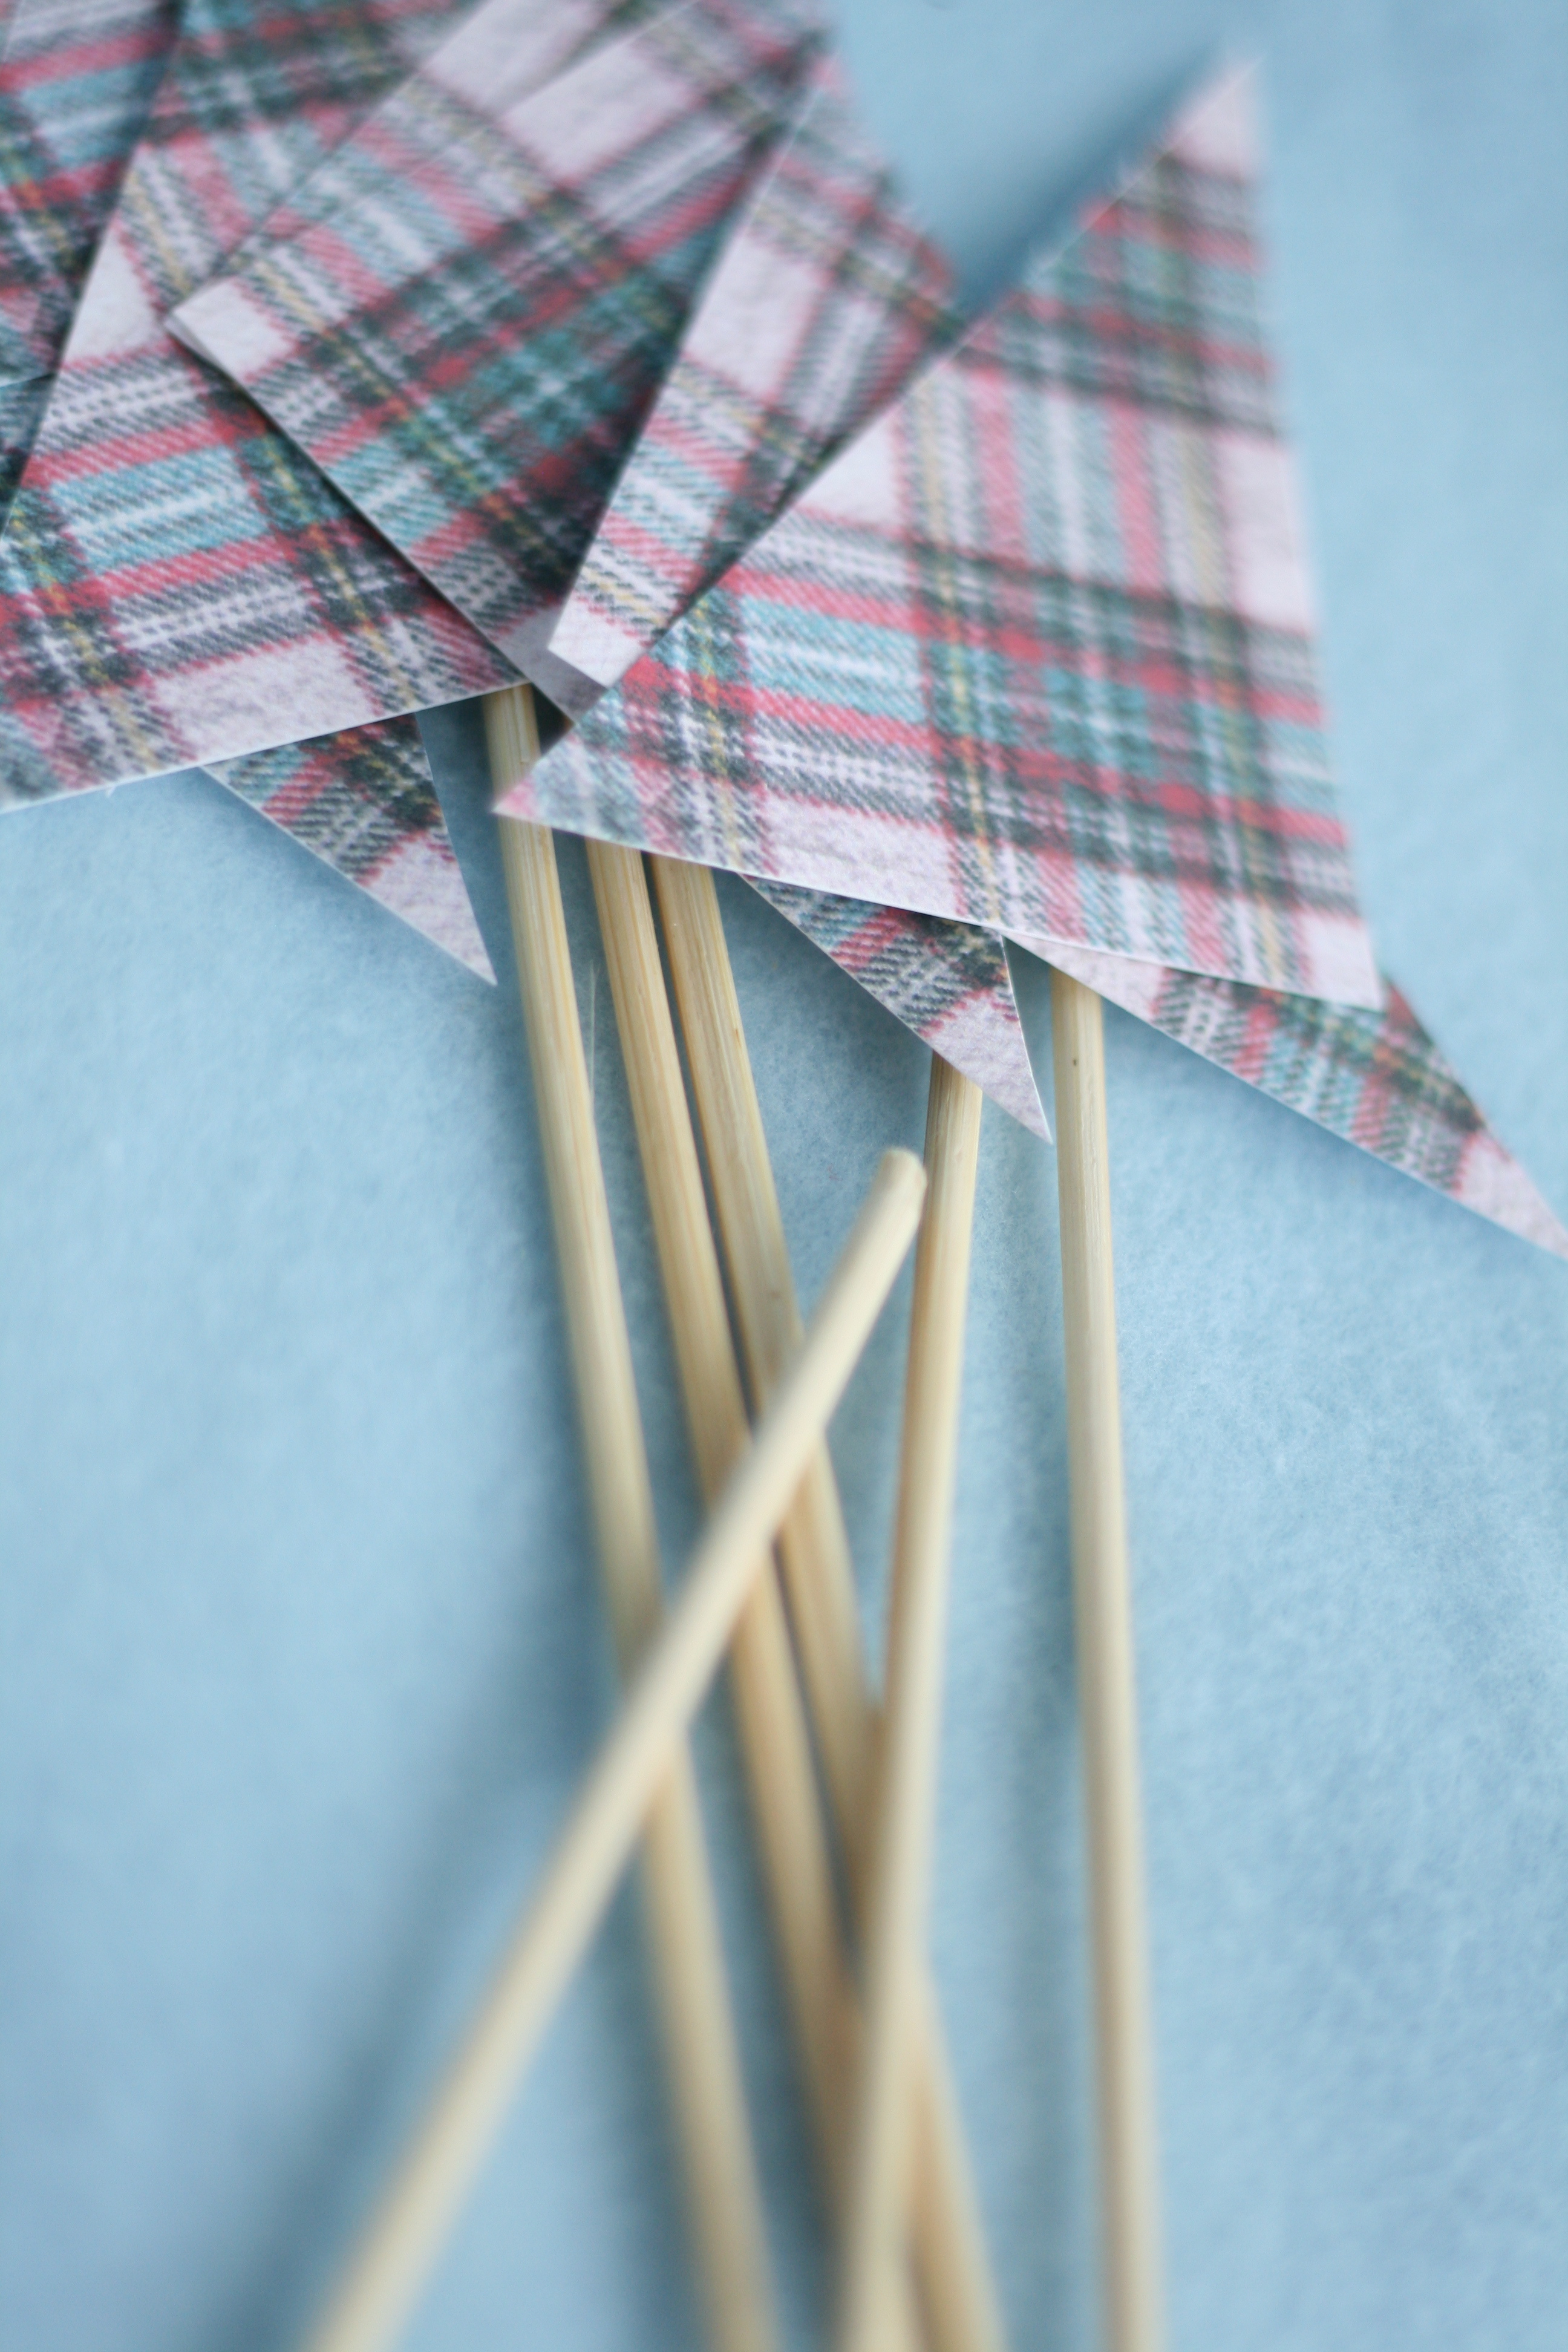
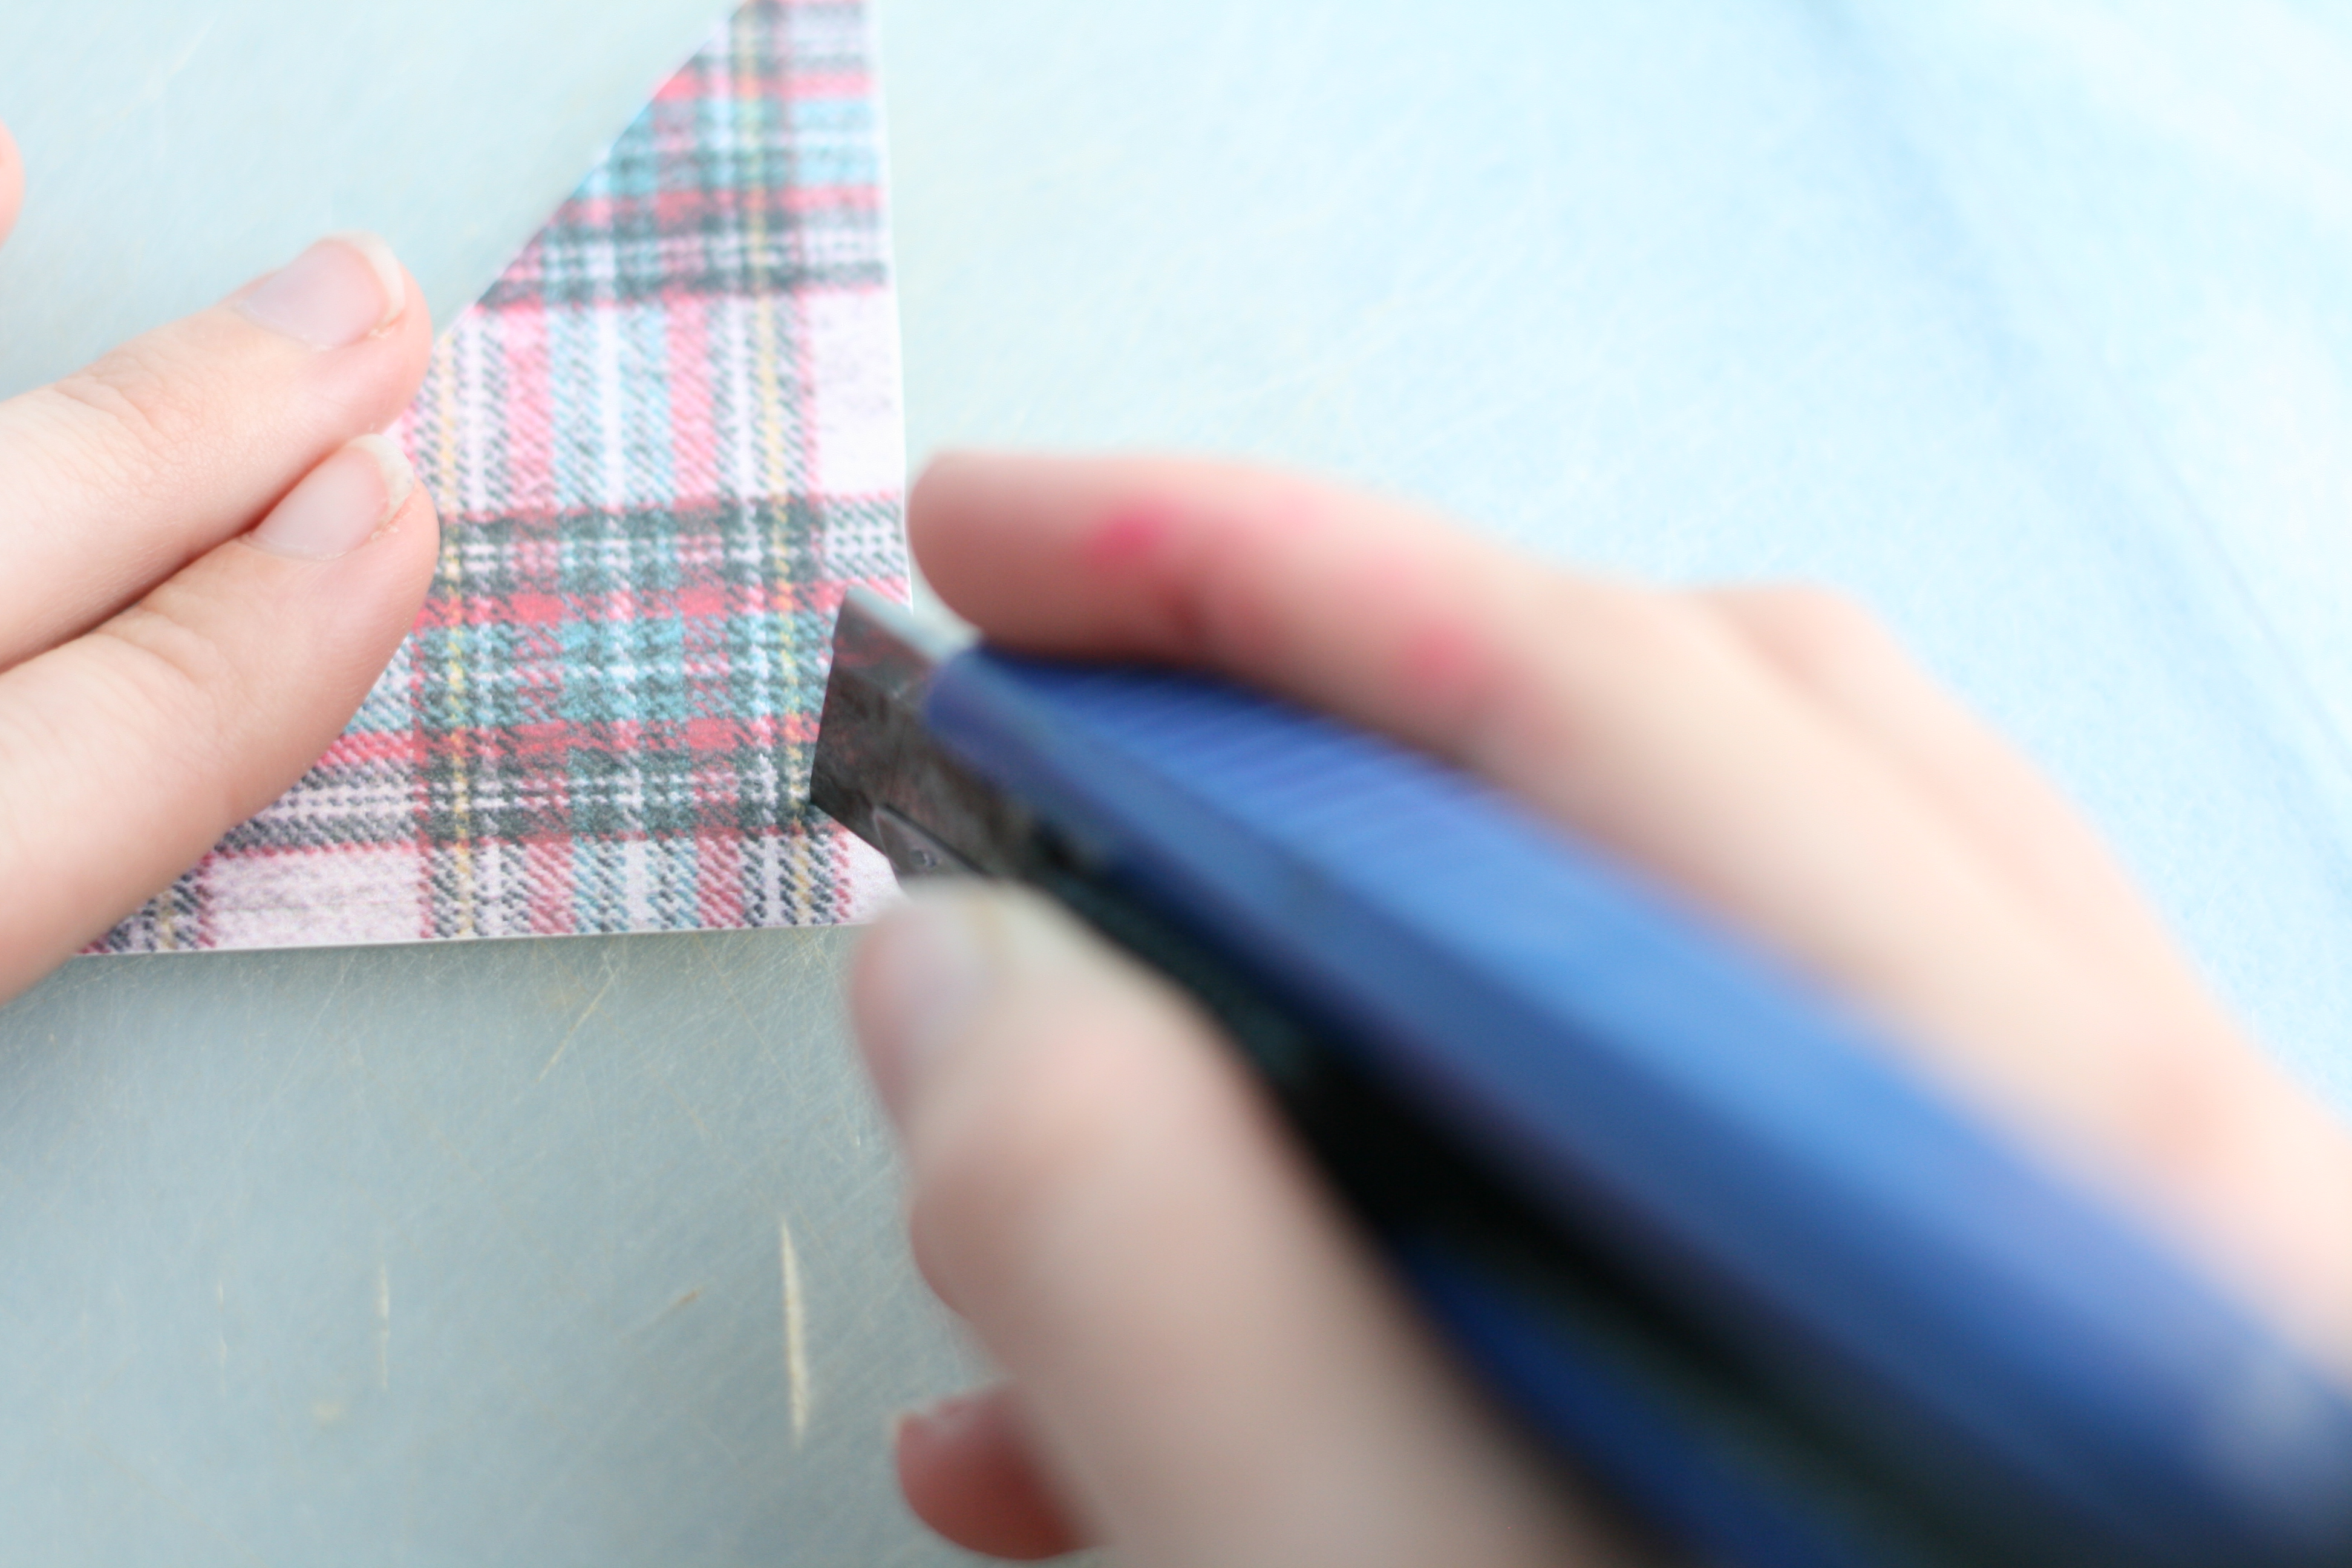
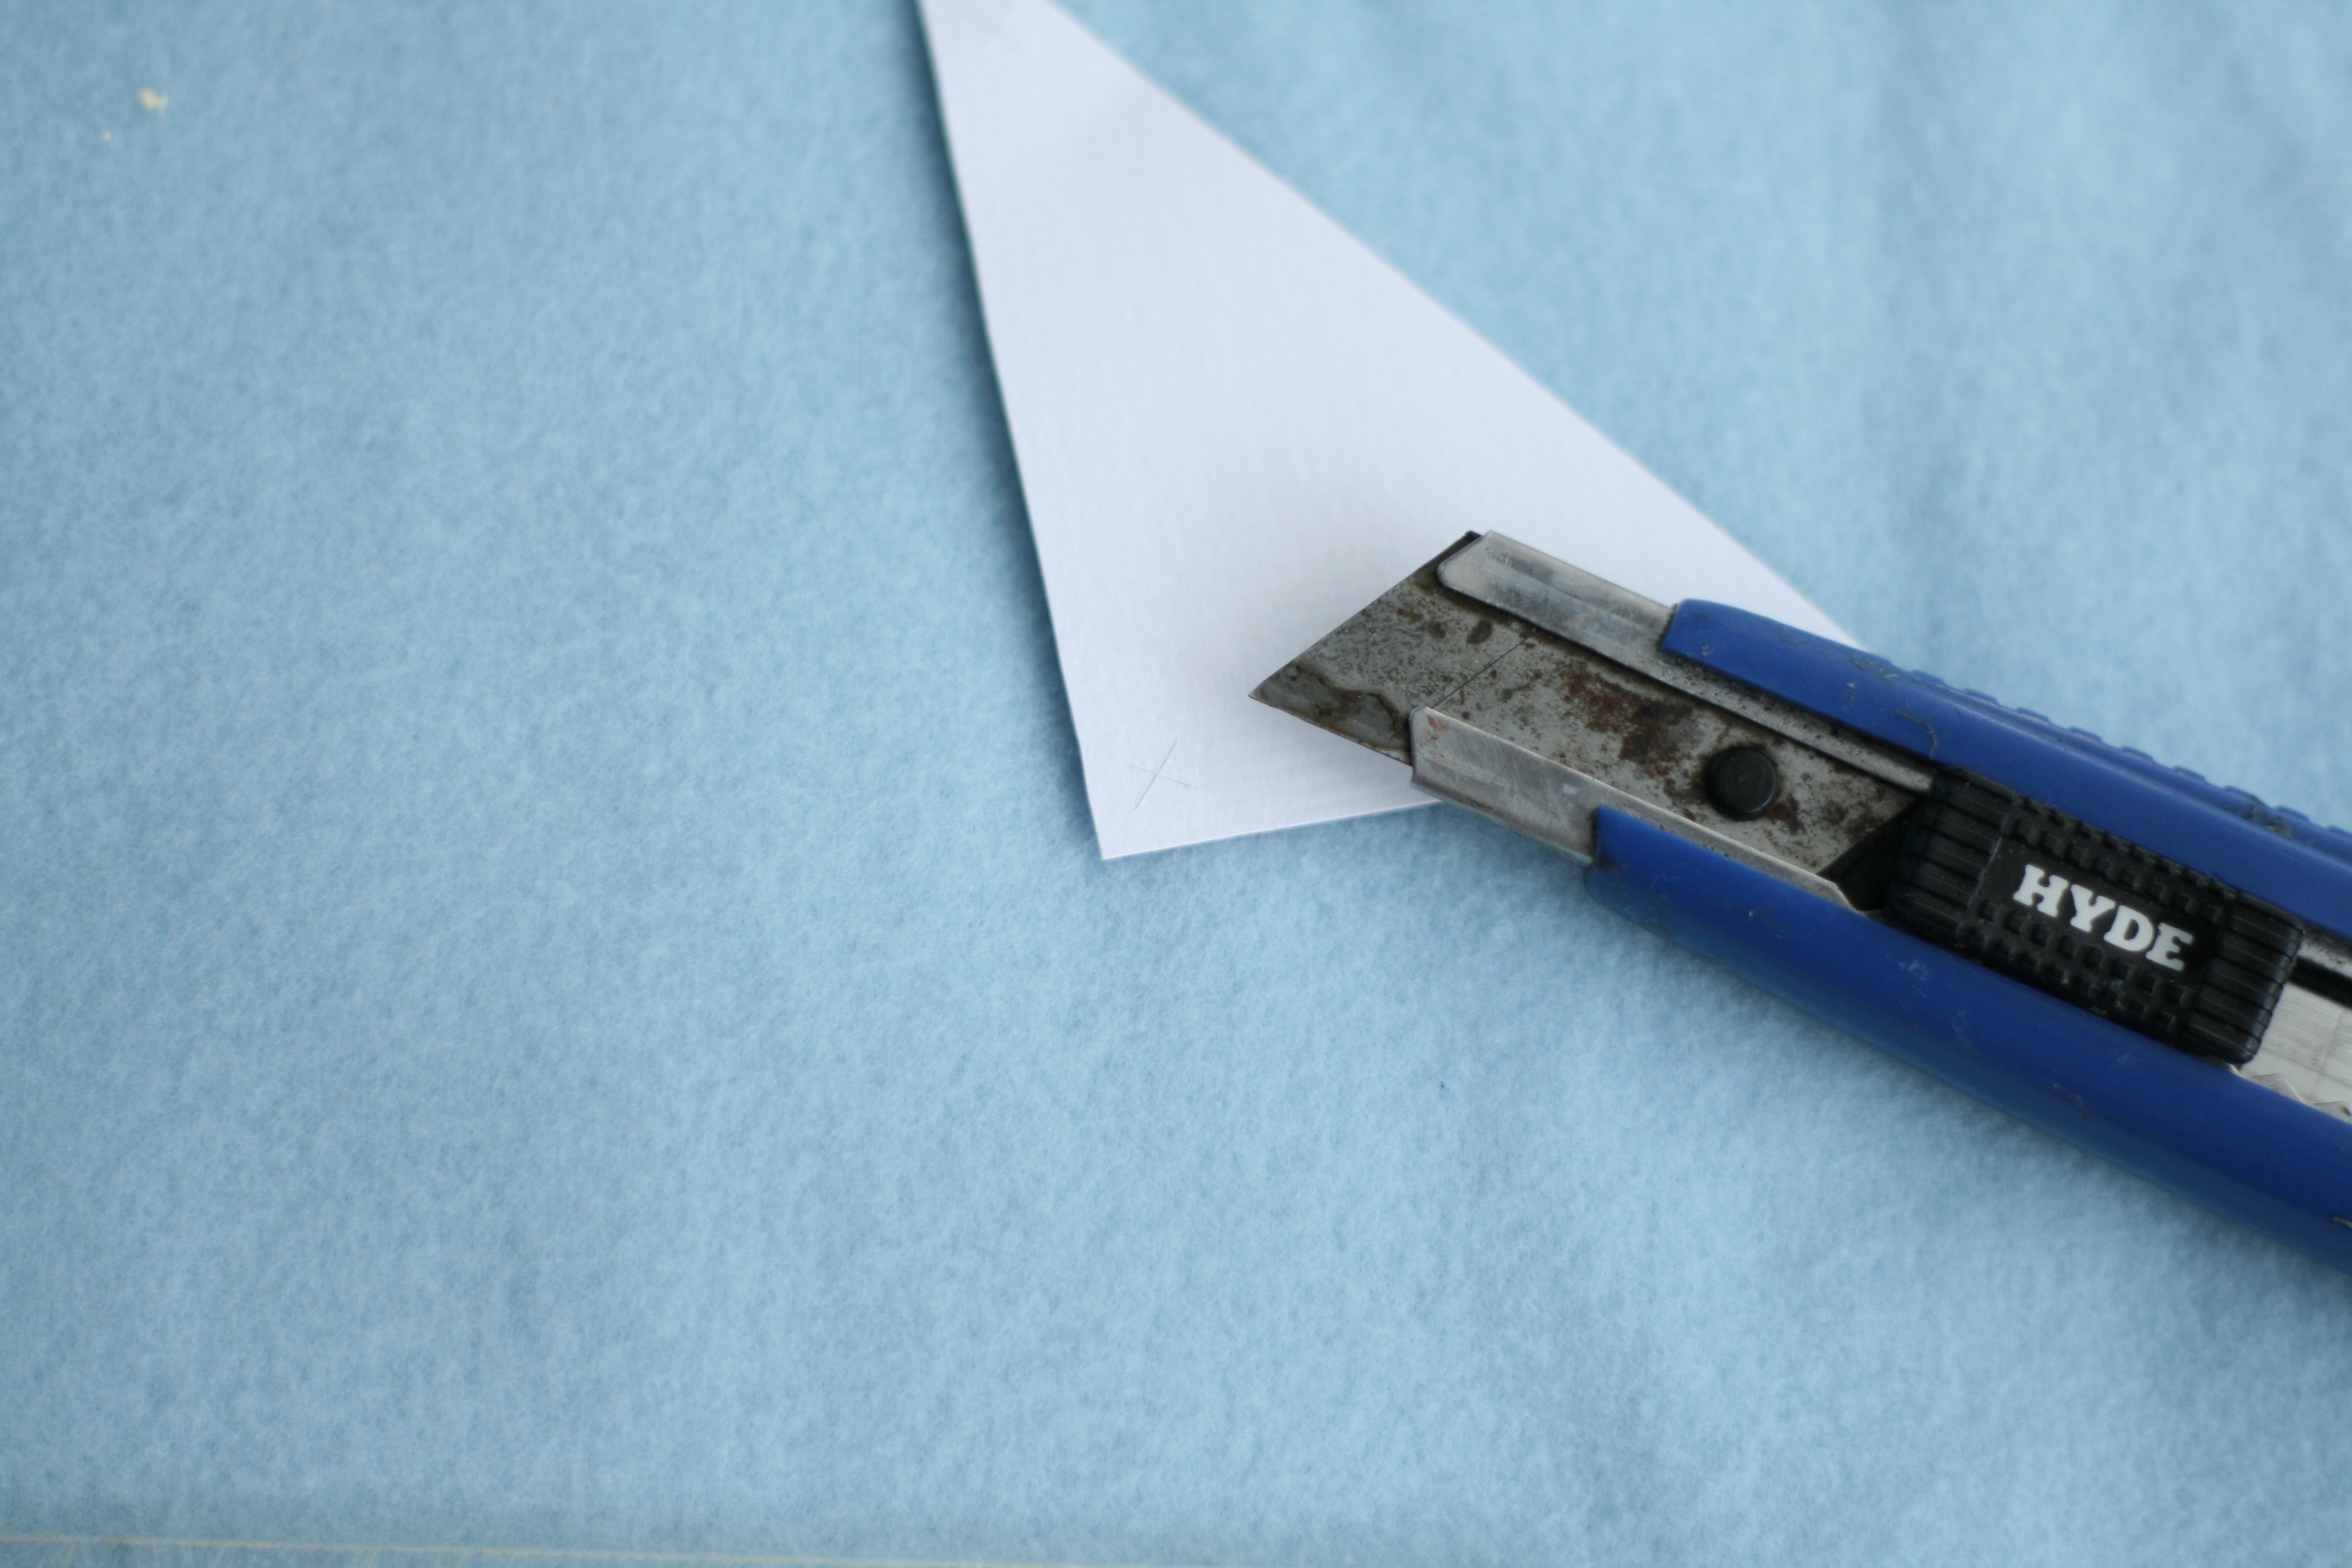
3. Print out the FauxMartha Cupcake Sail Pattern on textured cardstock. Cut out each sail. Using the longest side of the triangle (not the angle), cut an “x” at the top and bottom on a cutting board. Insert pointed end of wooden skewer into the top “x” on the printed side. Continue to insert the skewer through the second “x”.
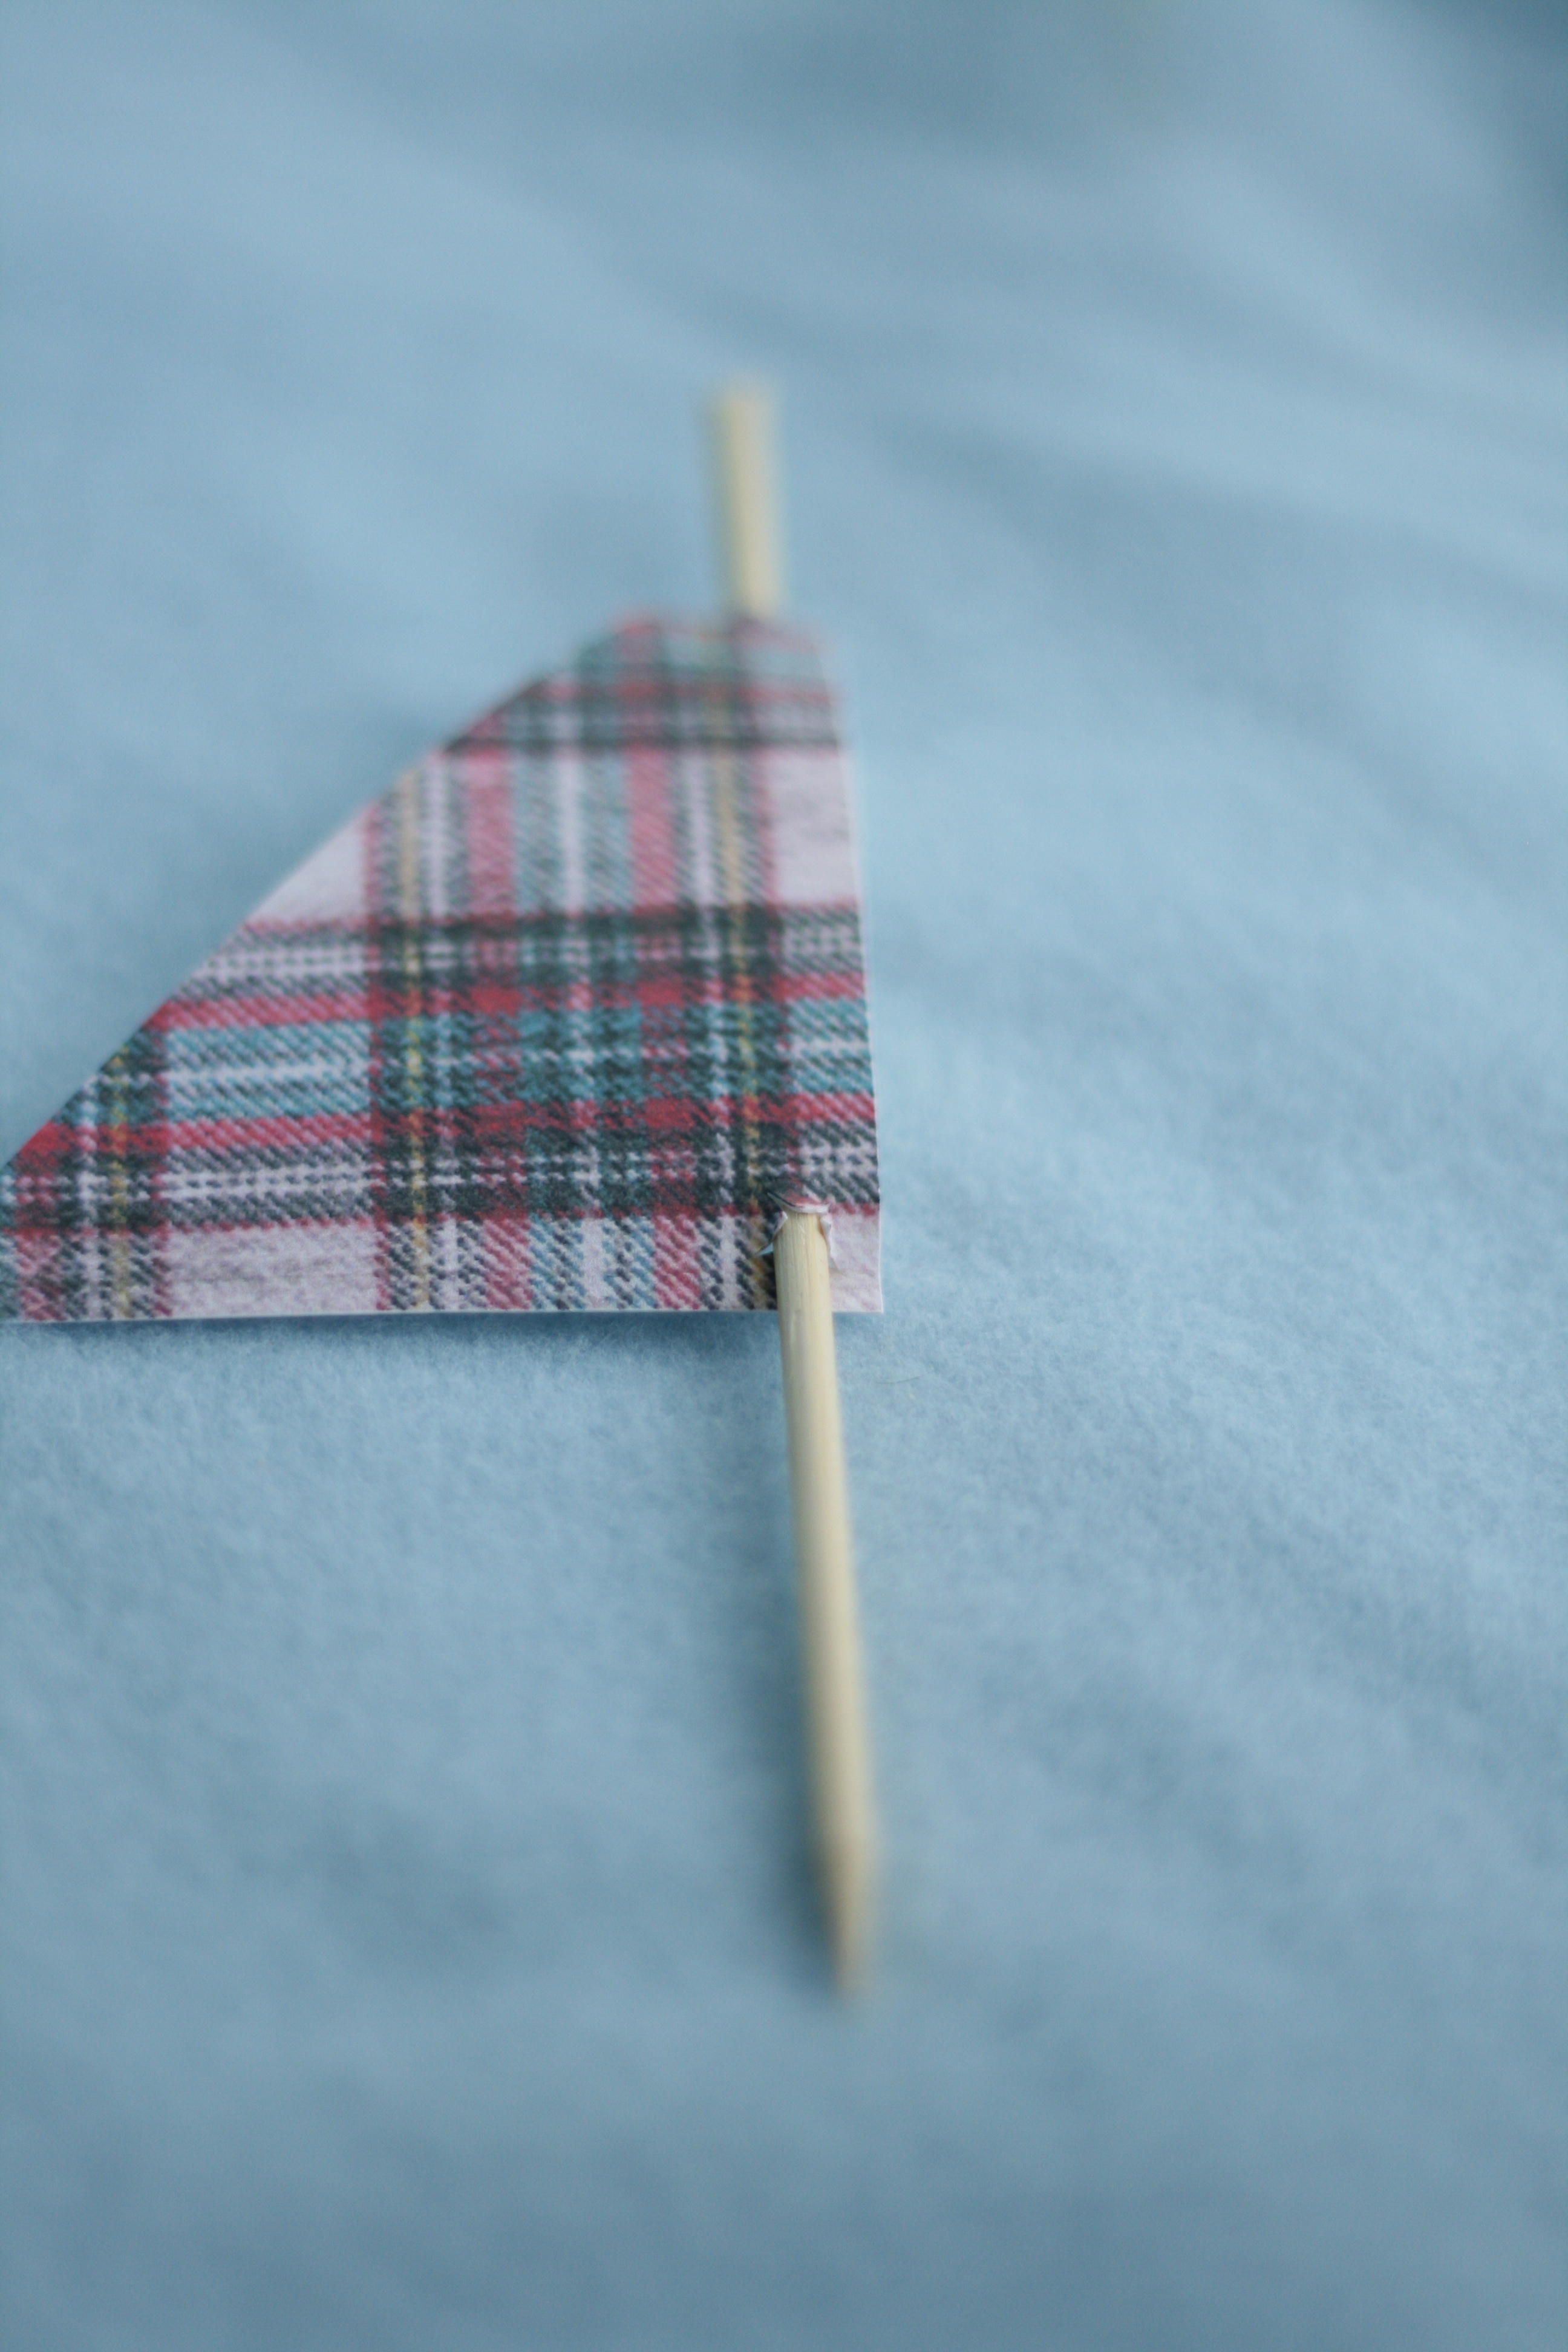
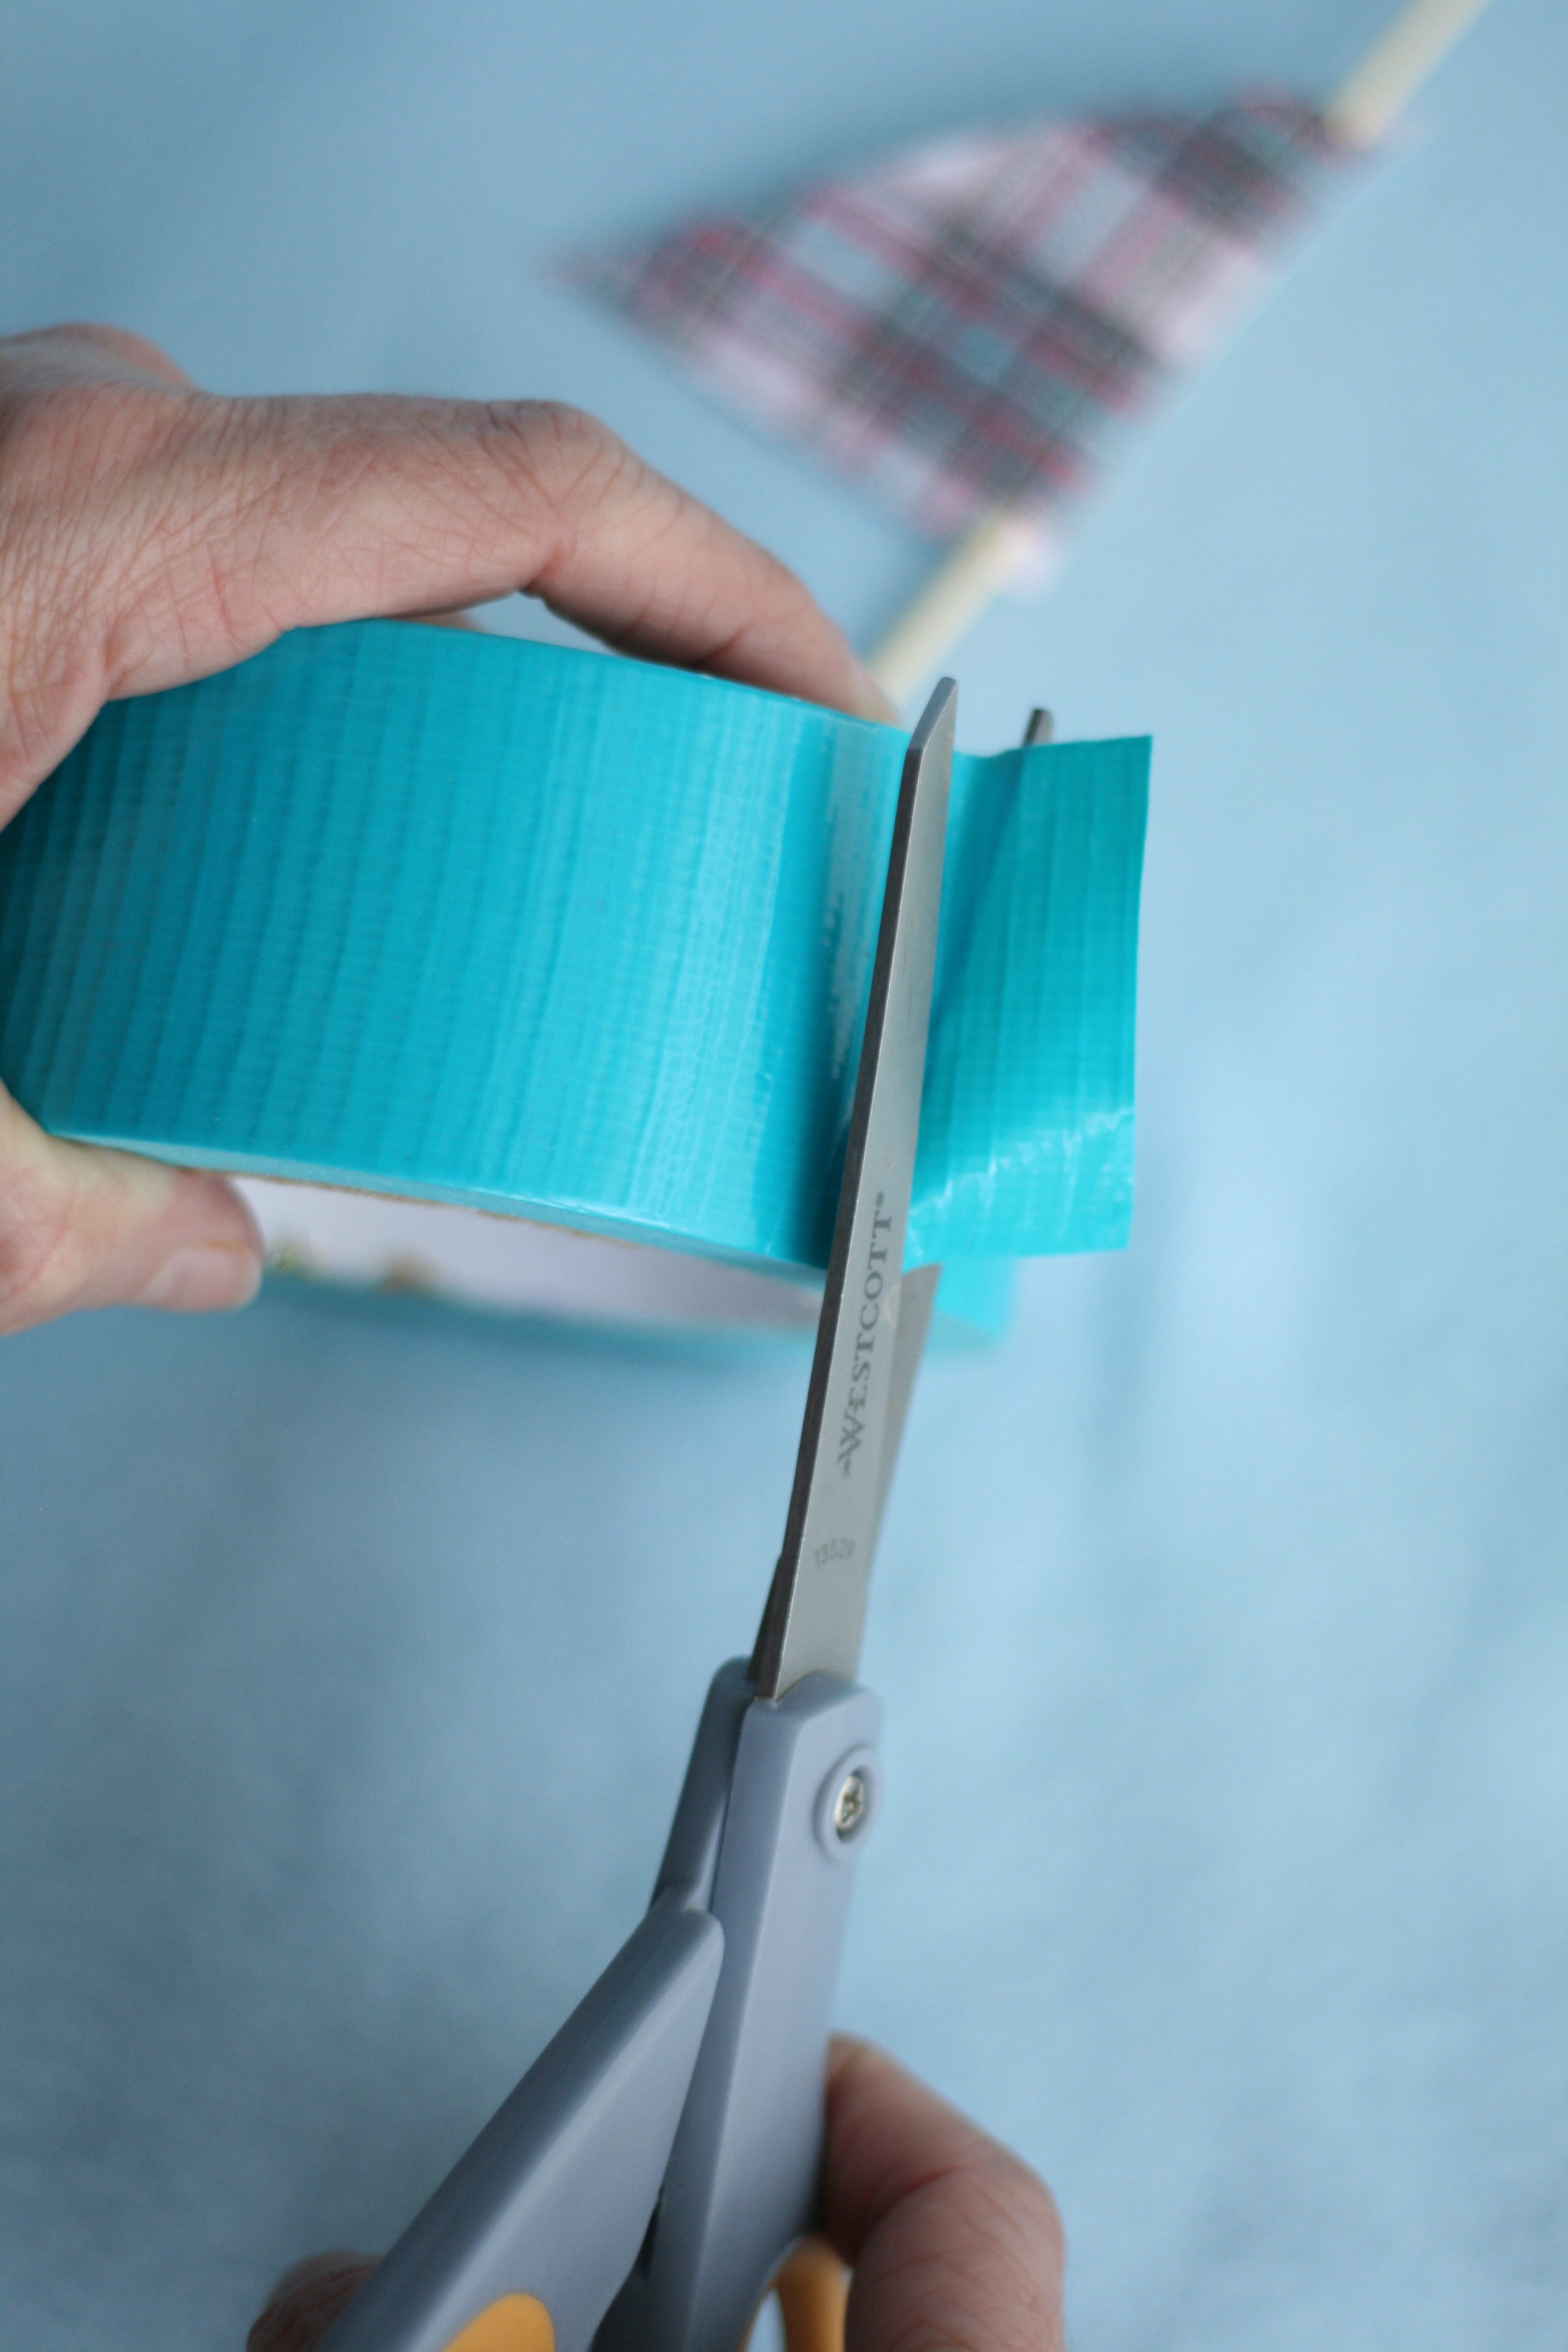
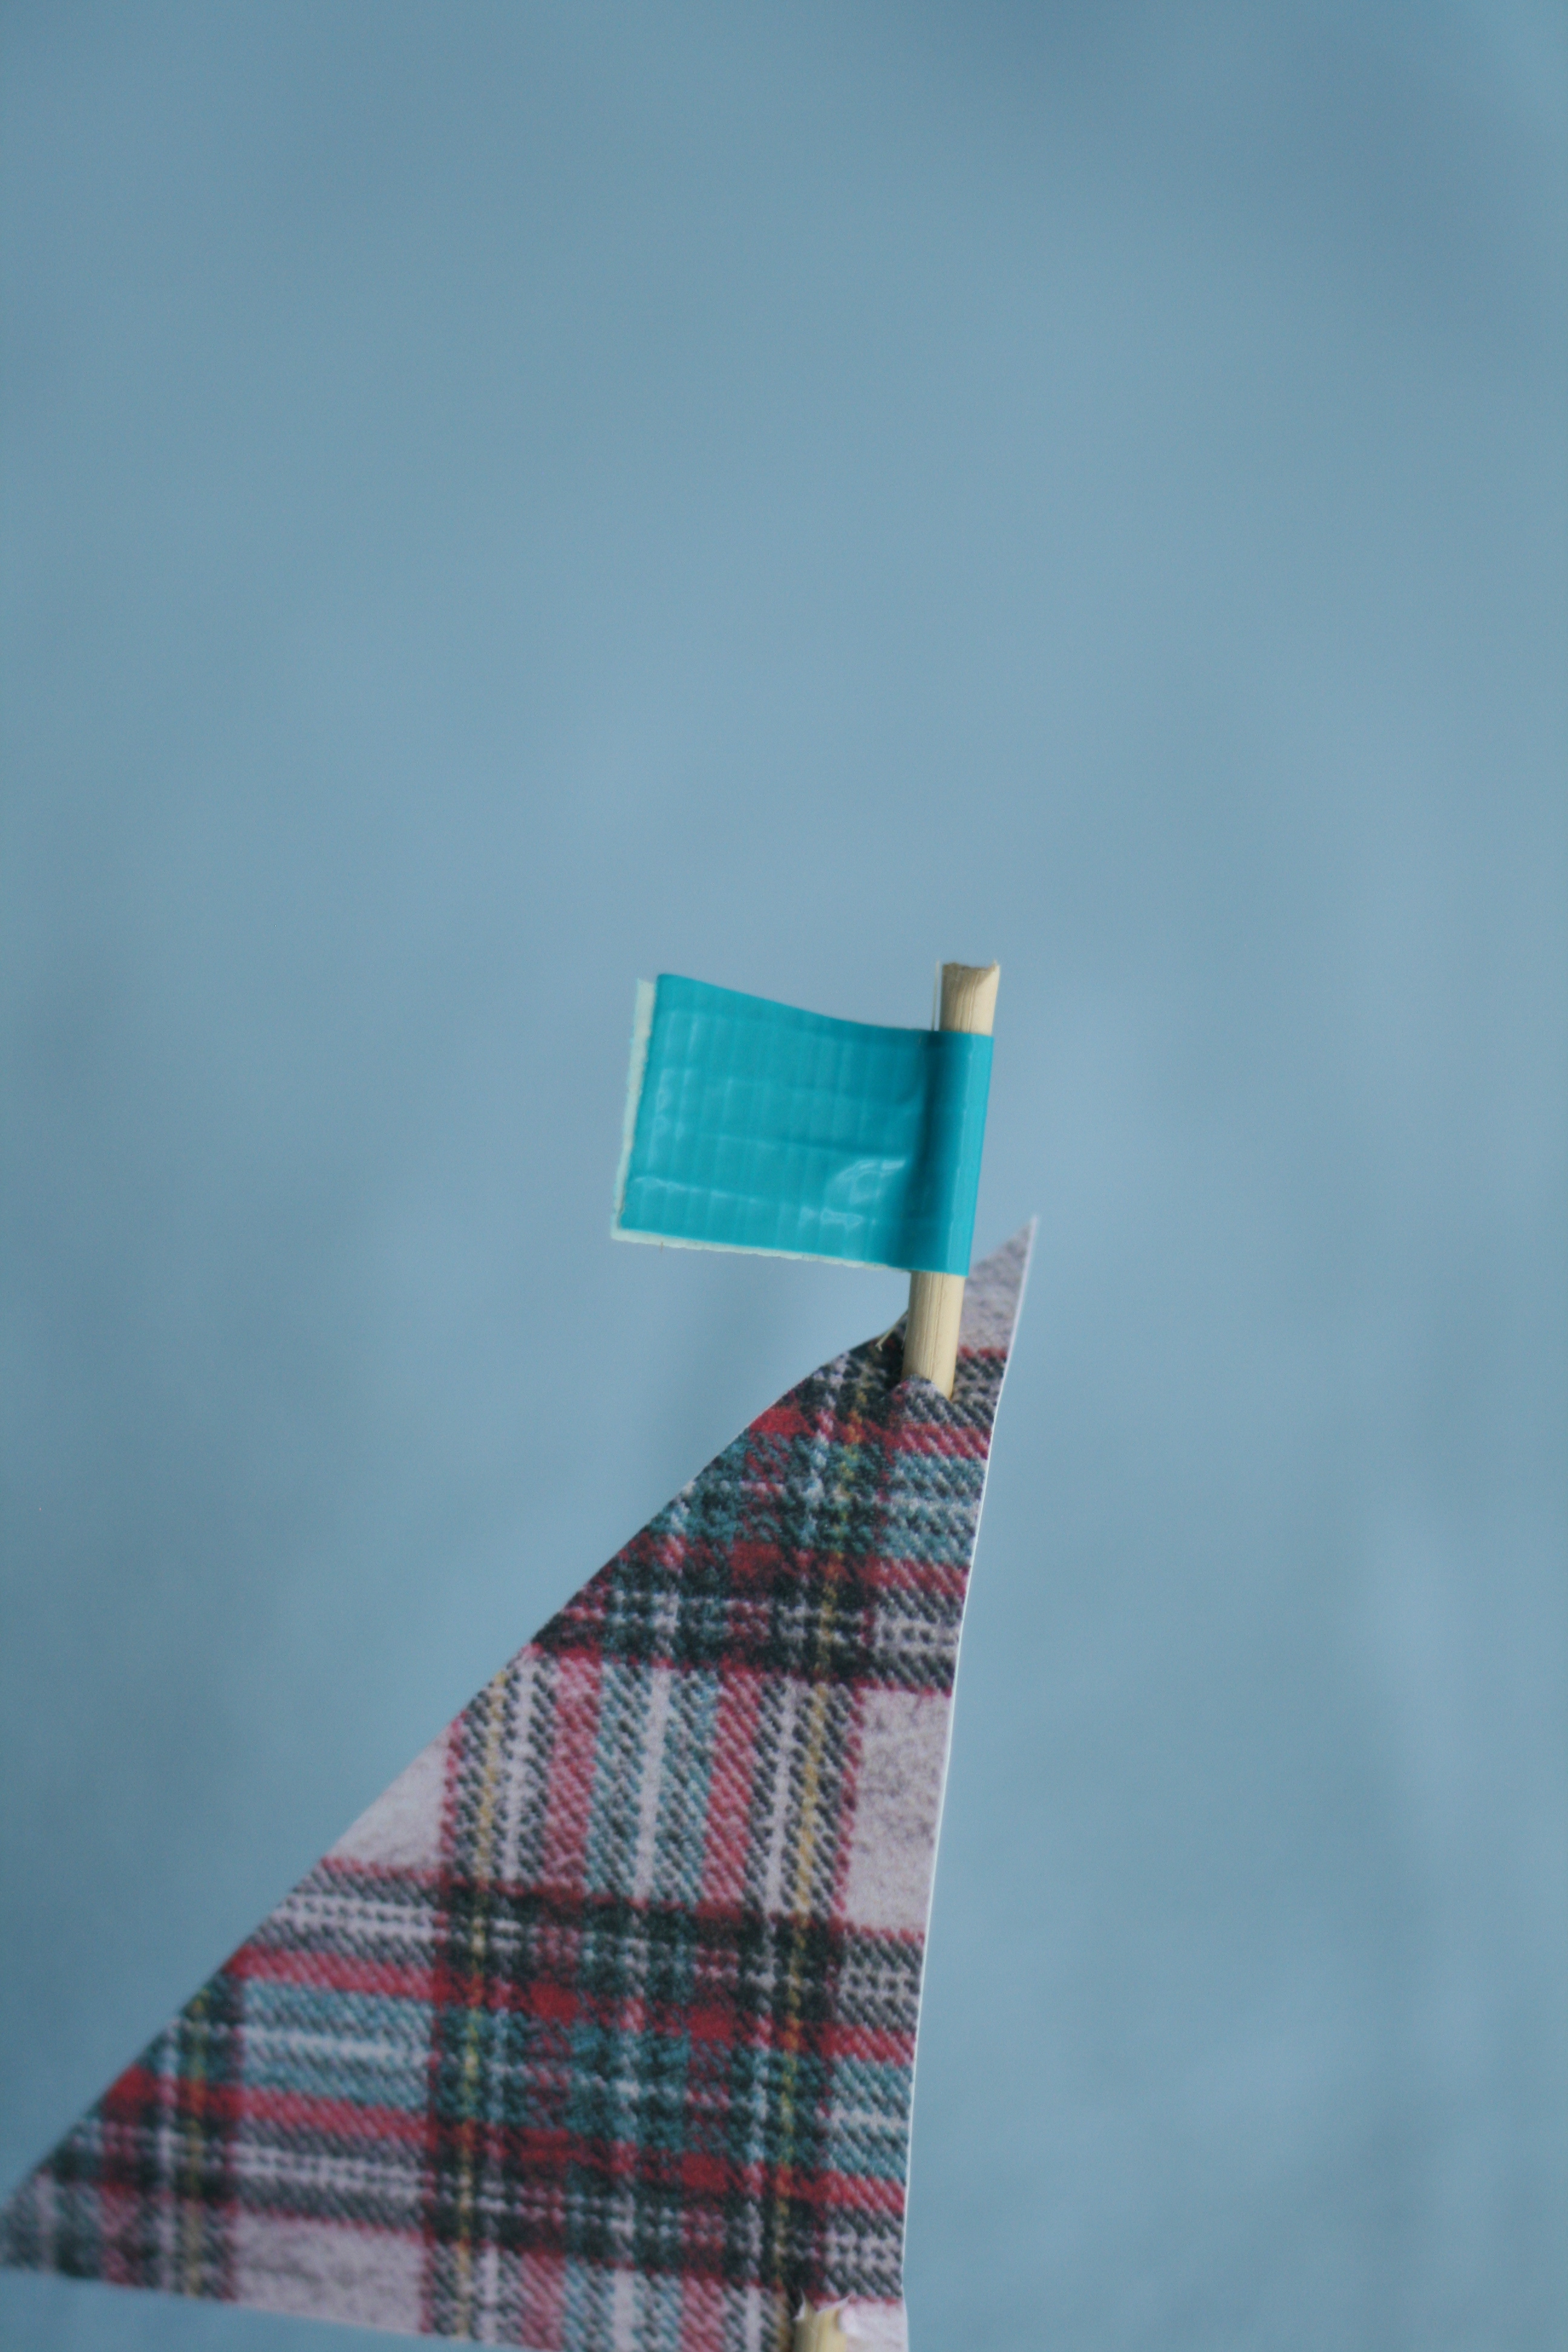
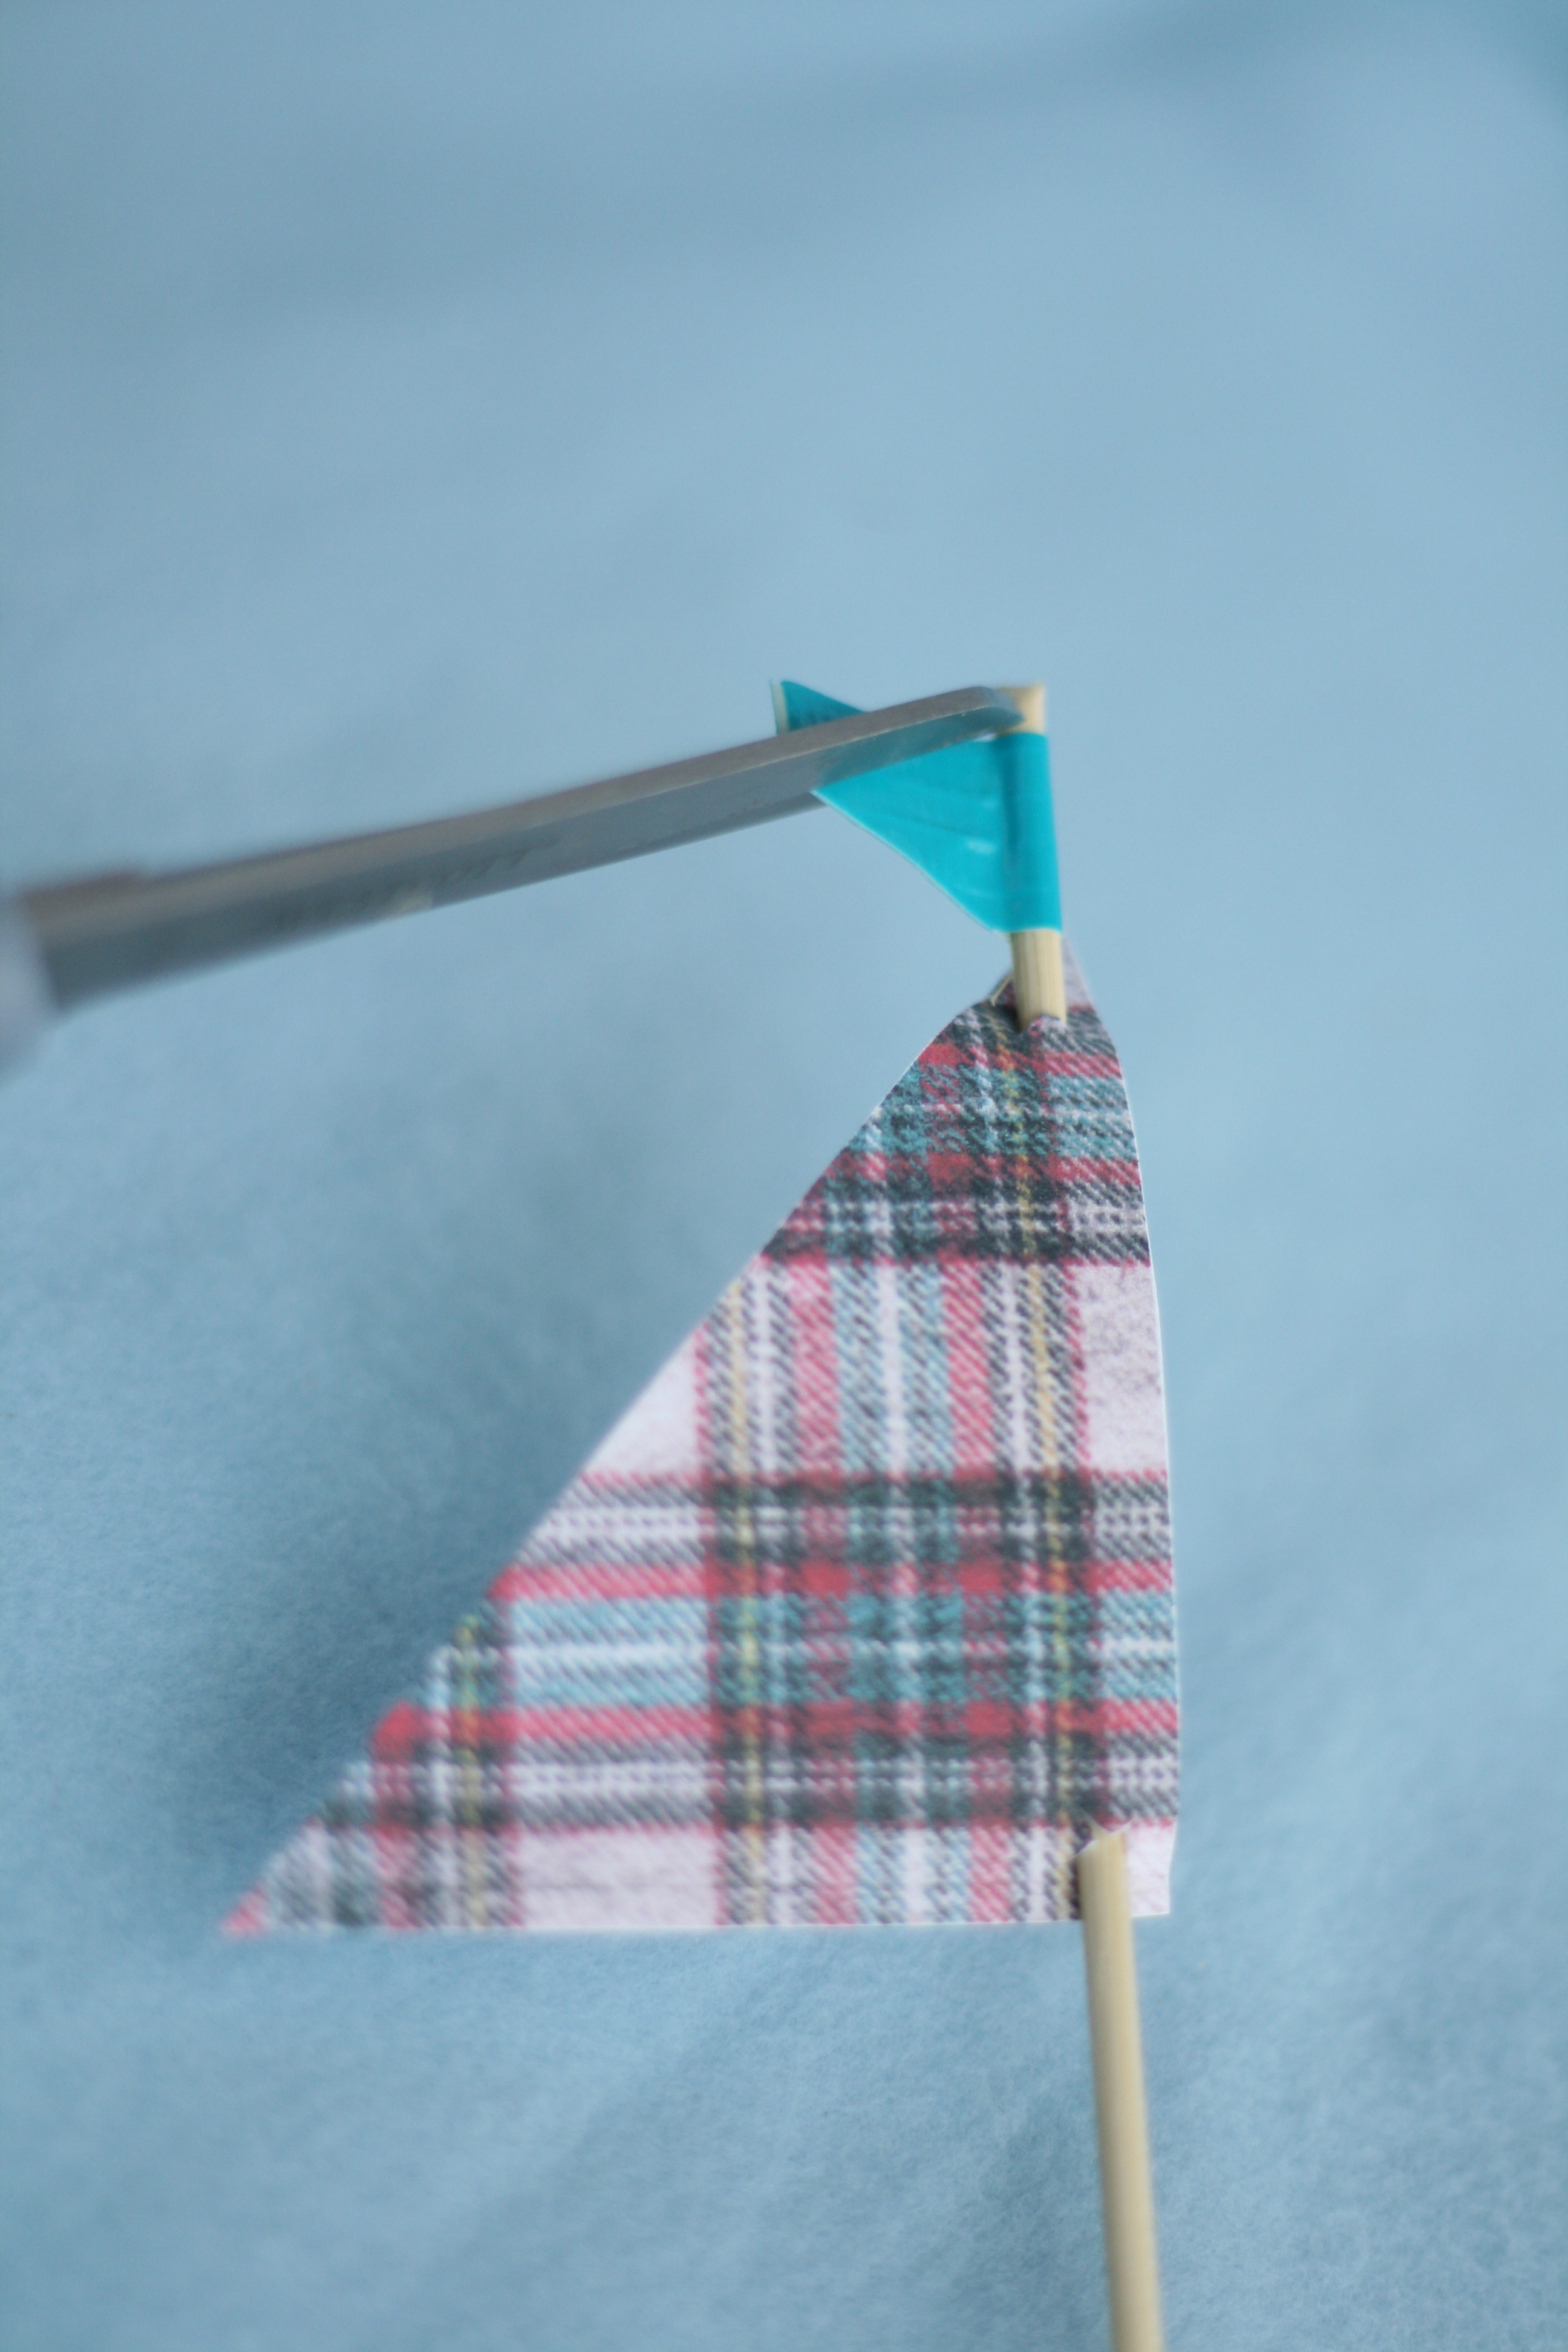
4. Cut thin 1/2″ strips of duck tape. Place tape on the top of skewer where you made your original cut. Evenly fold over. Make 2 diagonal cuts to achieve a flag. Push sail up to give it that curved wind blown look.
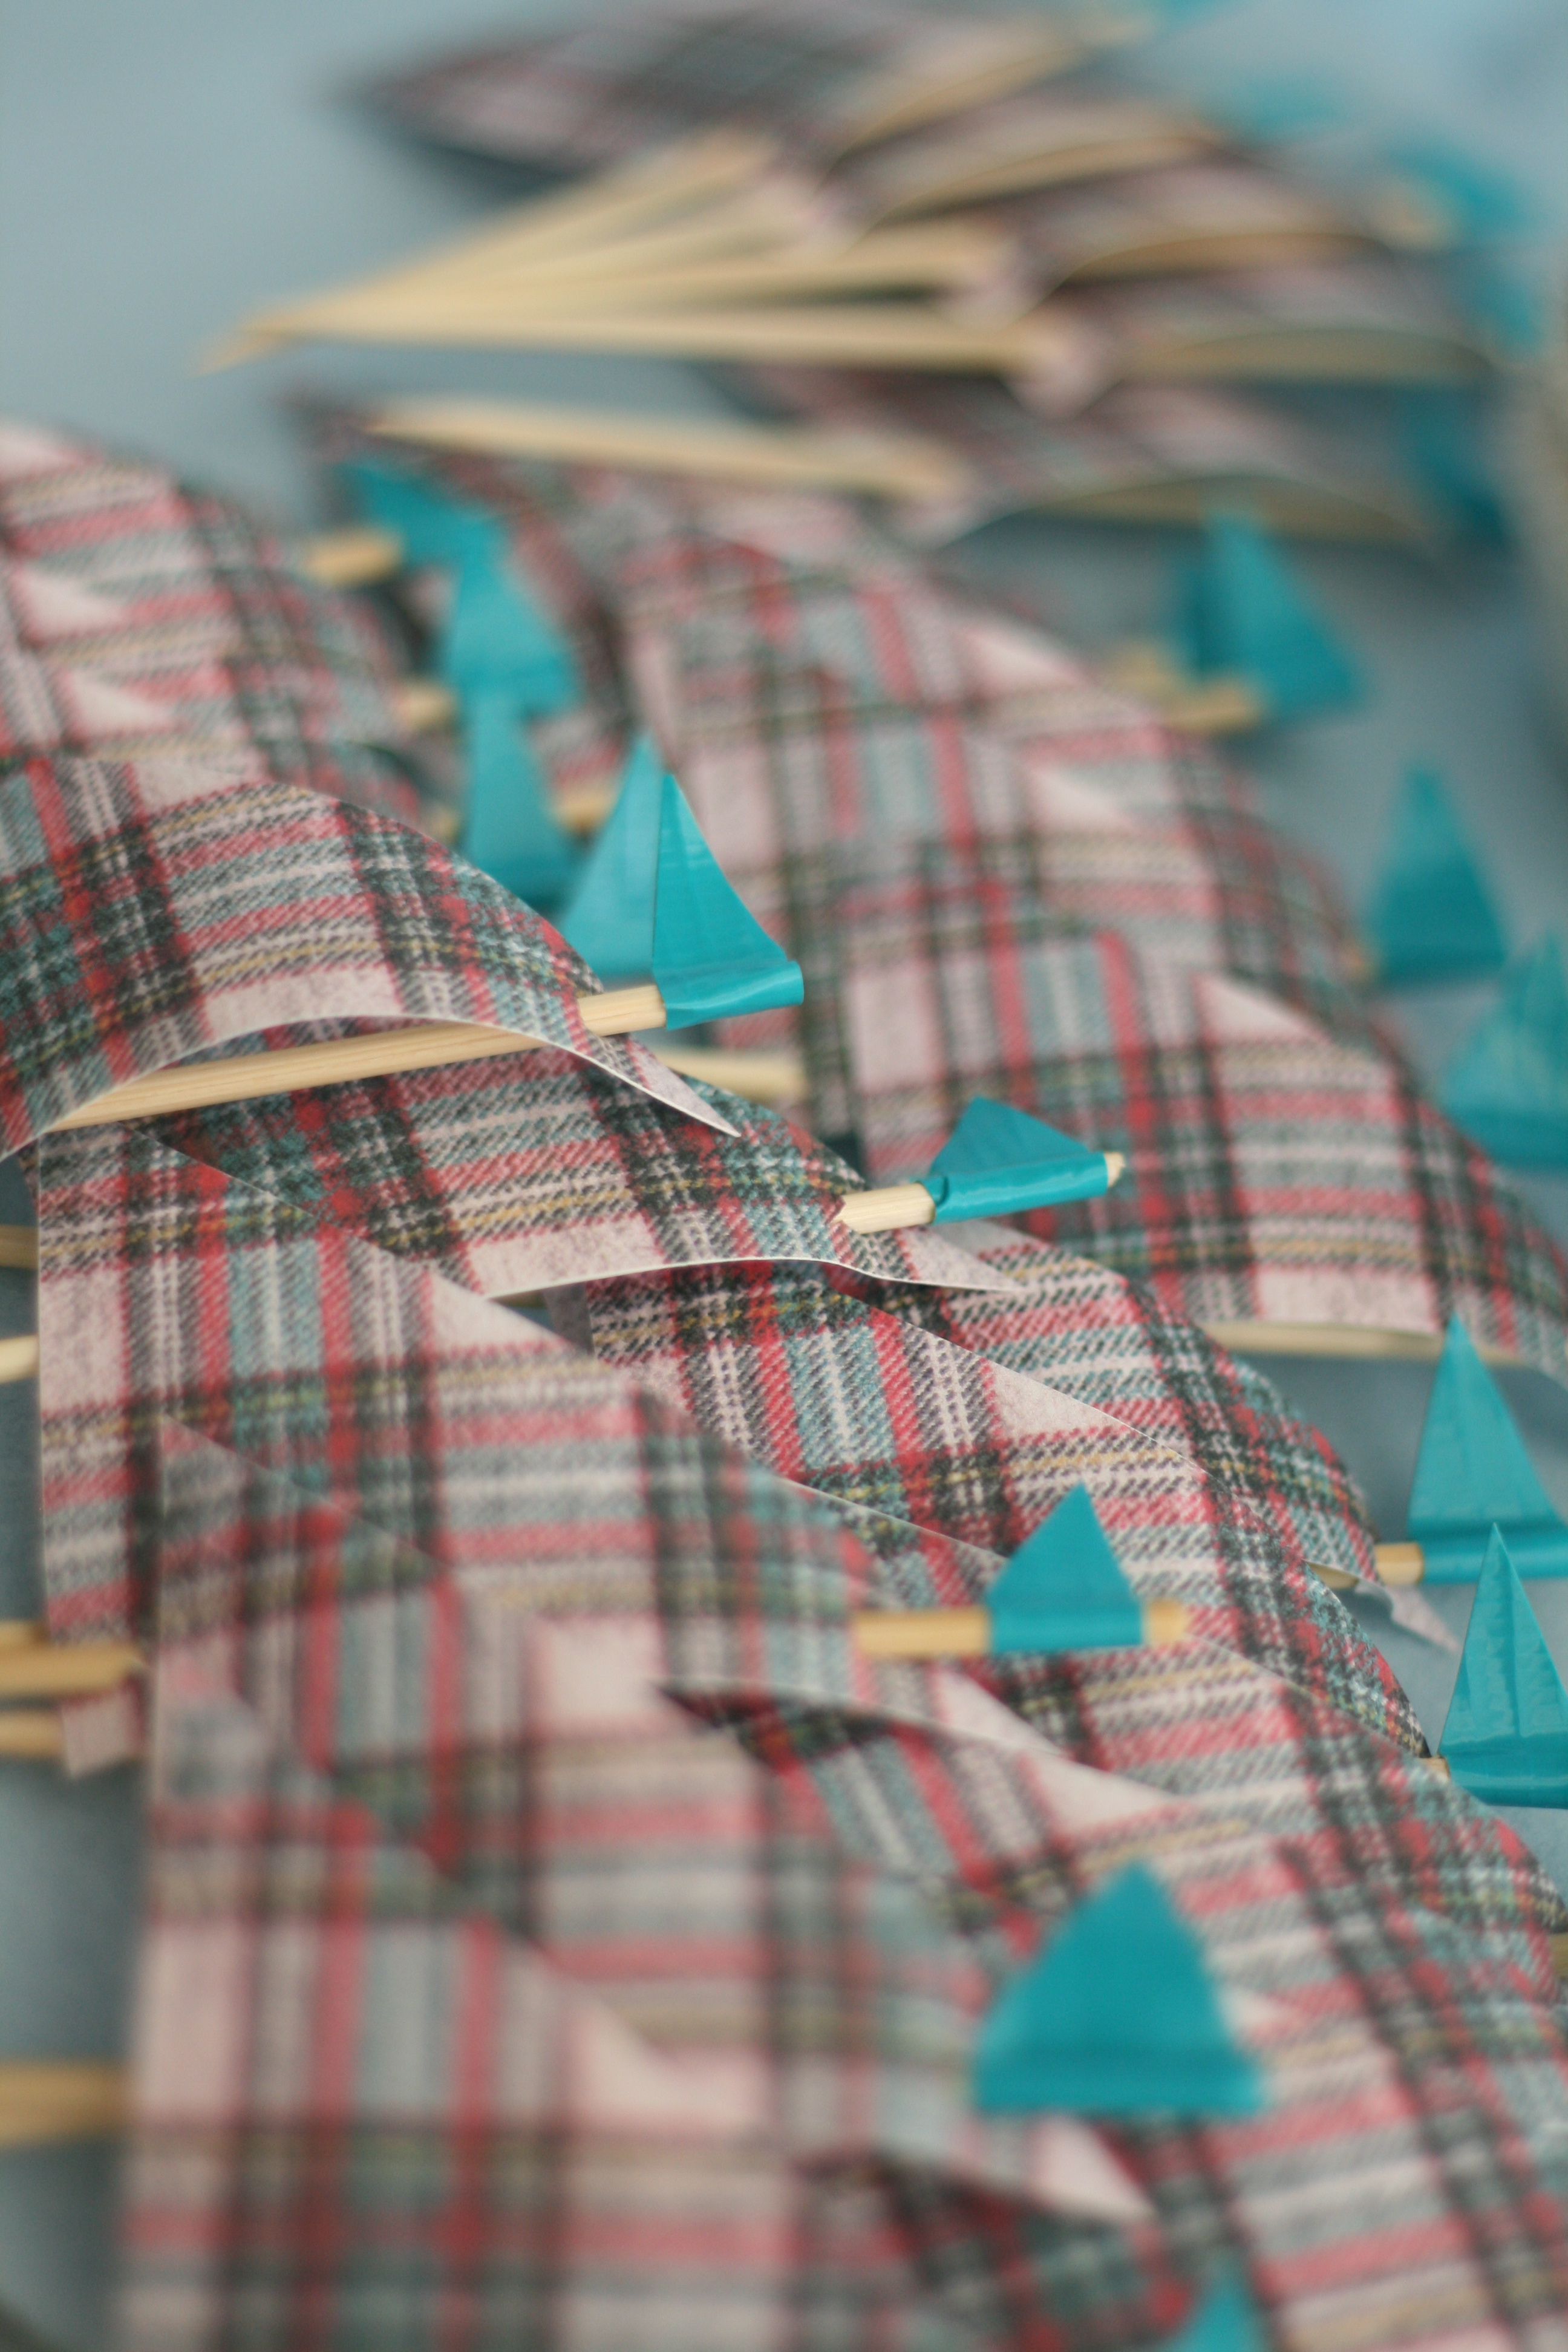
5. Ice your cupcakes with the frosting of your choice. I use the Wilton Dessert Decorator Pro to ice my cupcakes. In order to get the thick swirls, I don’t use a tip. Place pointed end of the sail into cupcake and you’ve got yourself a cute sailboat cupcake!

If your visual, like me, these should help:

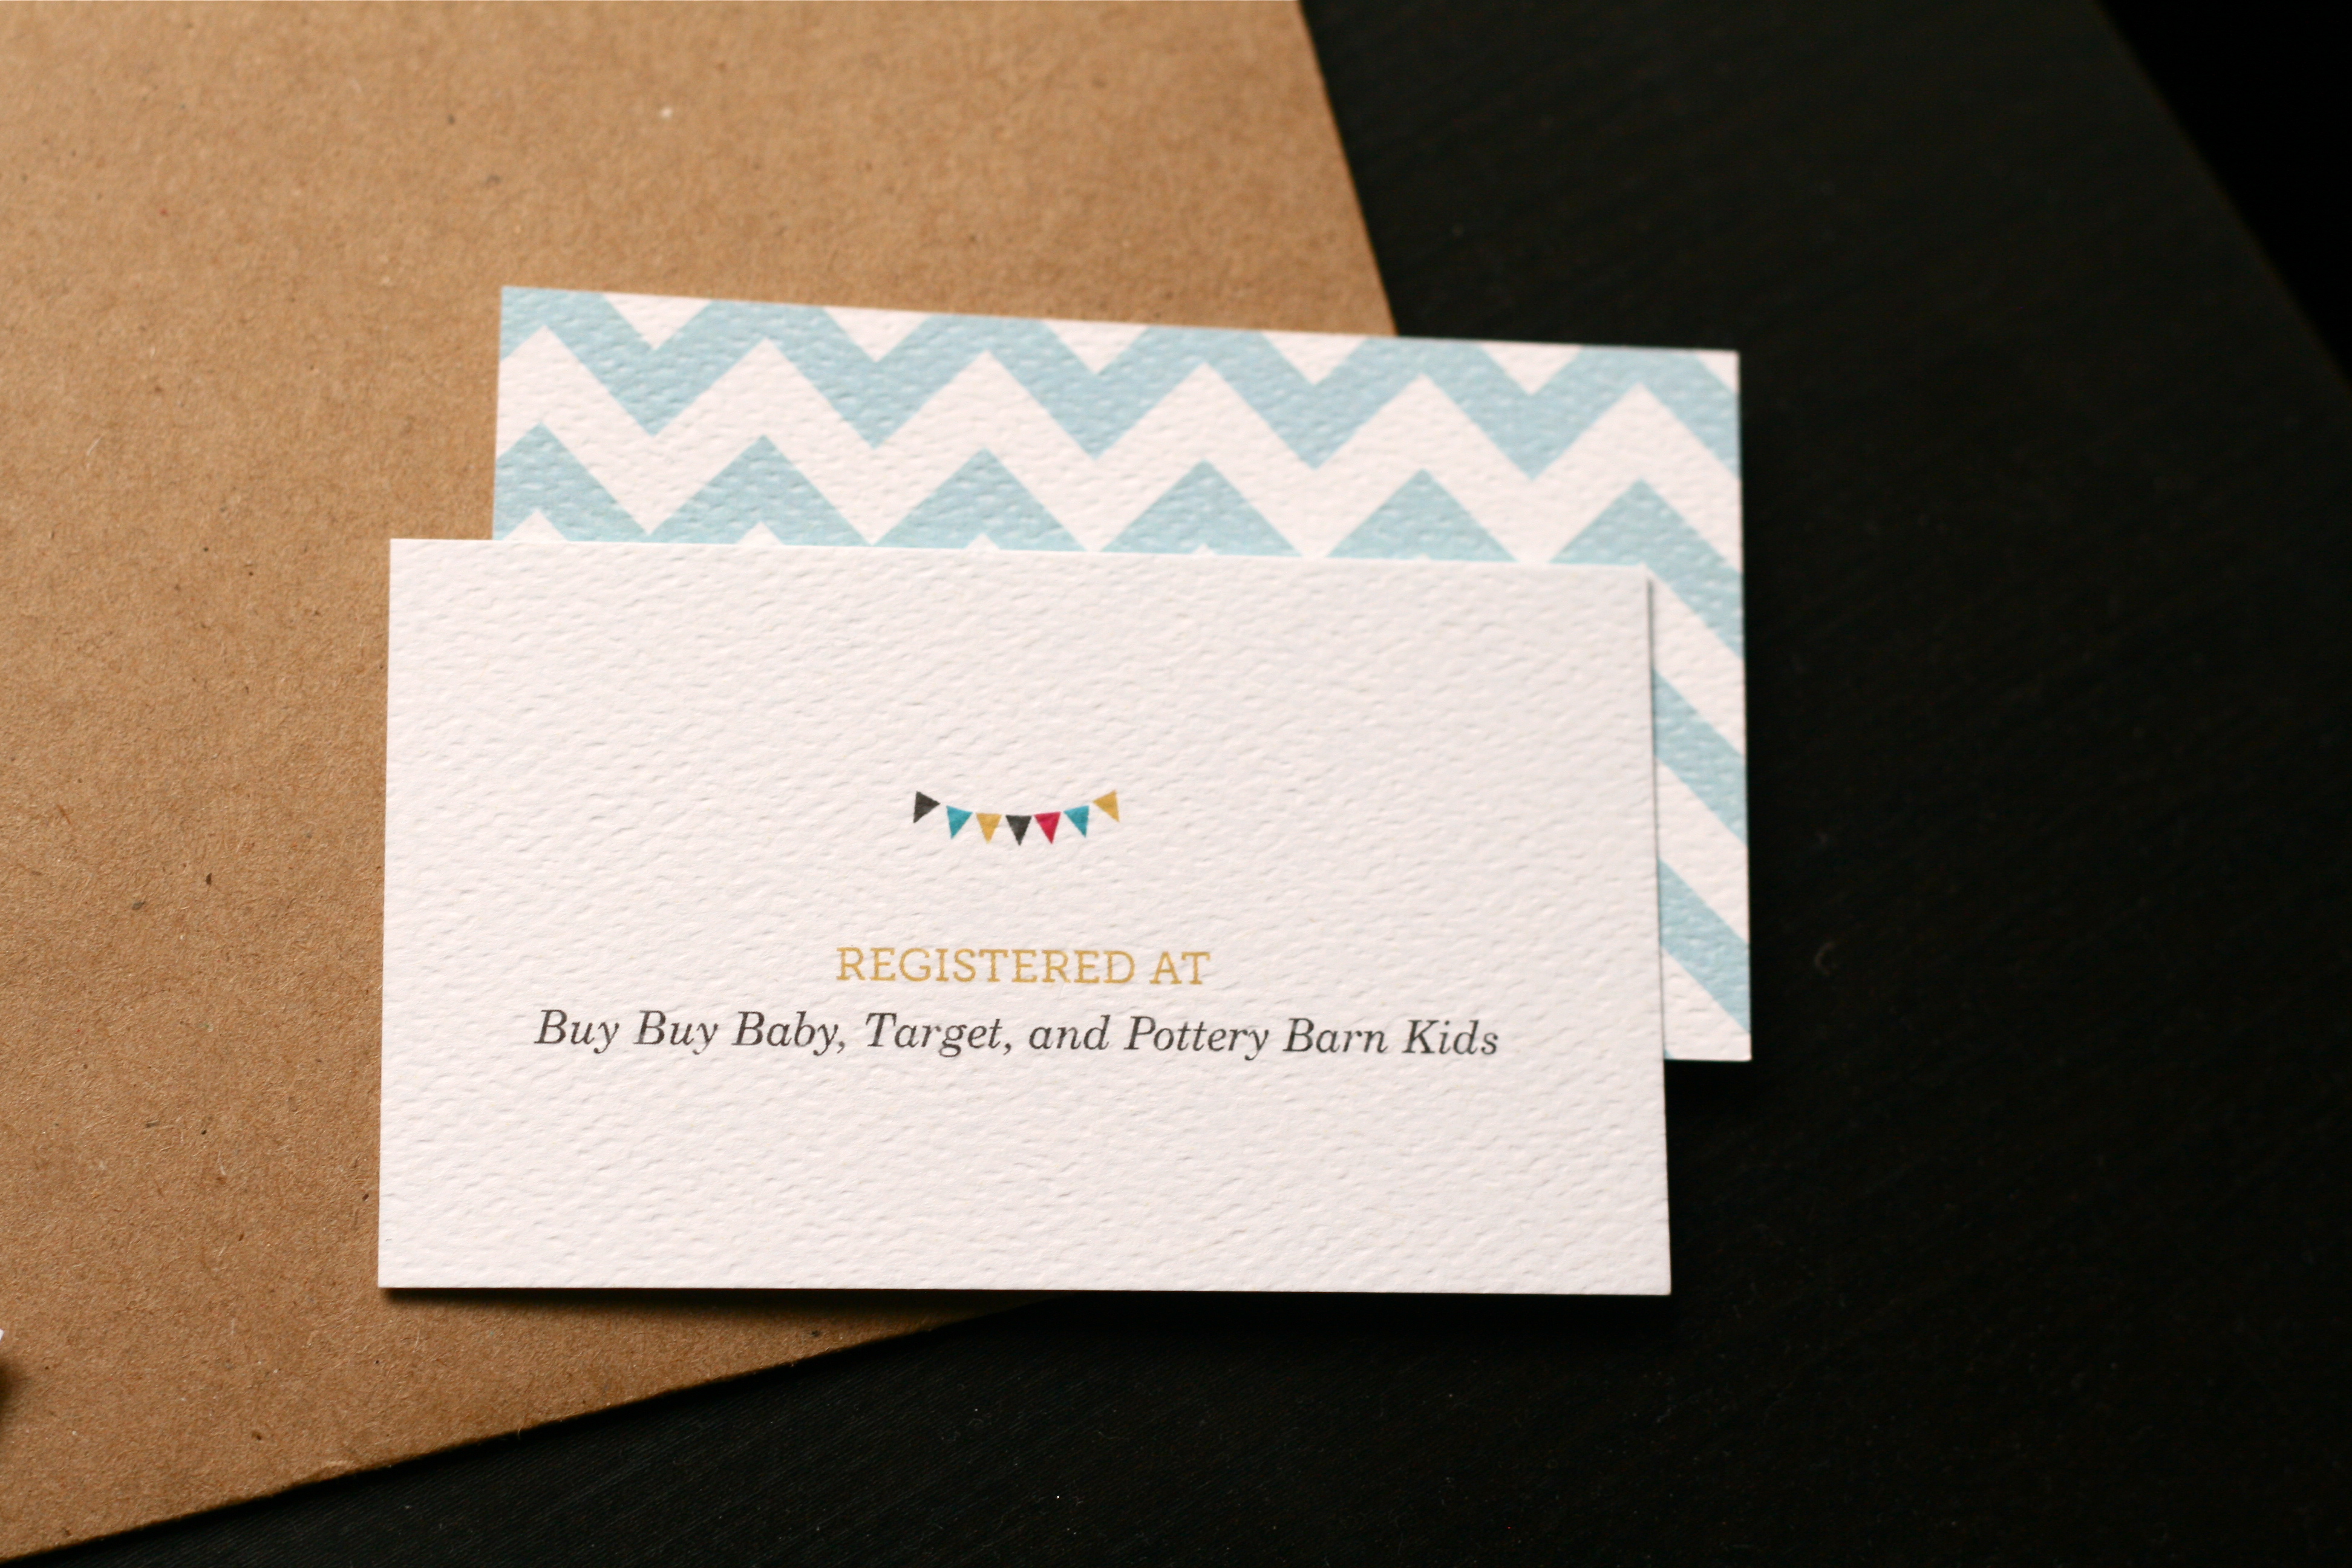
If you missed them, click here for the matching baby shower invites. Now that you have everything you need to get started, happy baby shower planning!

I’m headed out of town to help throw a baby shower for a good friend from home. But before I leave, I want to share these “Ahoy! It’s a boy!” invites with you. And by share, I mean free download. Keep reading…

Chevron, plaid, craft paper. Oh my!

Tiny, cute flags. Yes please!

Whoever said a slight shade of pink is not welcome at a baby boy’s shower?

Free fonts are a budget’s dream.

Since you kept reading, it’s time for the good stuff! Here’s how to create this same look yourself:
1. Order A-7 Craft Paper envelopes from Envelope.com.
2. Download the 5×7 invite! (The PDF is designed with 2-invites up on a page; front/back.)
3. Download the free font, Museo Slab, to help complete the look. You’ll also need a nice italic font to accompany it that can be found on your computer. (I used Century Schoolbook Italic).
4. Use an editing program to fill in your specific information.
5. Print the invites on a thick, textured white paper. (I used a Neenah paper—Sundance Felt.)
6. Finally, mail those cute suckers out, and plan the party!

Stay tuned for a post on the food portion of the shower. I may or may not be making cupcakes with a cute DIY topper.

This week—I was a graphic designer by day and a baker by night.

I dream of being a full-time baker. Especially after this week, where I made 120+ cookies for a friend’s wedding shower. It wore me out, no lie. But I loved every last second of it. If only I didn’t have to work 8-5.

In regards to most recipes on this blog you’ve probably heard me say—This is easy, I promise. Not the case with these little guys. They are hard work. Back breaking work. And they take tons of practice. So, now that I’ve scared you away, let me also say, You can do it. It will be so rewarding. I promise.

Before you get started, I recommend watching this clip from The Martha Stewart Show (the video is on the lefthand side of the page). The trickiest part about these cookies is working with the royal icing. This segment will teach you how to make the royal icing, as well as all the important lingo like damming and flooding. Best of all, it will teach you how to achieve the chevron-like pattern I did on several of the cookies.

You’re also going to need a couple of tools before you get started, such as a condiment bottles. I found mine in the baking section at Michael’s.

Food coloring is a must. I recommend investing in the all-natural kind although it is a couple dollars more. I went with India Tree (sold at Whole Foods). They make their food coloring out of vegetable pigments. You can still achieve beautiful colors with it, and it doesn’t pepper your icing with a bad aftertaste like so many do.

Now on to the good stuff—the recipes! I made these cookies as all-natural as possible. Usually these types of cookies scream fake and over processed to me. But it doesn’t have to be the case, especially if you make them yourself.

Vanilla-Almond Sugar Cookies
recipe from Bake at 350, with slight changes
amount of cookies will vary based on size

3 c. unbleached, all-purpose flour
2 tsp. baking powder
1/2 tsp. sea salt
1 c. cane sugar
2 sticks unsalted butter, cold
1 egg
1/2 tsp. pure vanilla extract
3/4 tsp. pure almond extract

1. Preheat oven to 350°.
2. Combine the flour, baking powder and salt. Set aside.
3. Cream the sugar and butter. Add the egg and extracts, and mix.
4. Gradually add the flour mixture, and beat just until combined, scraping down the sides of the bowl.
5. Knead dough together with hands as it will be crumbly.
6. Place dough on floured surface and using a rolling pin, roll out to 1/4″ thickness or thicker. Cut into desired shapes.
7. Place cookies on parchment lined baking sheets or Silpat and freeze for 10 minutes before baking.
8. Bake for 9 minutes. (I pull the cookies out before they begin to golden for a softer texture.) Let sit for a few minutes on the baking sheet, then transfer to a cooling rack. (Make sure cookies are completely cool before icing. I usually wait overnight.)

Royal Icing
recipe from Dani Fiore via Martha Stewart, with slight changes
makes about 2 1/2 cups

1/4 c. meringue powder
1 pound confectioners’ sugar (about 3 1/2 to 4 c.)
1/2 c. water

1. Using a hand mixer with the whisk attachment, mix together meringue powder with 1/2 cup water until soft peaks form, about 1 minute. Using the beater attachments, add sugar one cup at a time; continue mixing until well combined, scraping down the sides of the bowl as necessary. Icing will become thick and glossy in appearance.
2. Ice cookies.* (Do not cover or stack until completely dry. I usually wait overnight.)

*Throughout the decorating process, you will need different consistencies of royal icing. Writing icing will need to be thick while “flooding” icing will need to be a bit thinner. To do this, add more water. If frosting becomes to thin, add more powdered sugar.

Below are pictures of the process with a couple decorating how-to’s.

Royal icing: When beating, it will go from soft peaks, to stiff glossy peaks as you add in the sugar.

Applying Icing: In a seperate bowl, add a tiny bit of water to icing. Add food coloring if necessary. Dam, flood, watch it flood, fill in any blank areas, let dry.

Decorating: HEARTS—use original icing (not thinned icing). Pipe 2 circles. Pull the icing down with tip to form a heart. DOTS—while icing is wet, place nonpareils on cookie using tweezers. CHEVRON PATTERN—while the base icing is still wet, draw horizontal lines with original icing (not thinned). Using a toothpick, lightly pull icing down in a vertical manner. Make sure to wipe off toothpick each time. Pull up to create zig-zag effect. FLOWER—much like the heart, use original icing and pipe 5 circles. Using the tip, pull in to center. Place nonpareil in center with tweezers.

They are hard work. Back breaking work. And they take tons of practice. But, you can do it. It will be so rewarding. I promise.


© The Faux Martha 2024. Privacy Policy. An exclusive Member of Mediavine Food.