
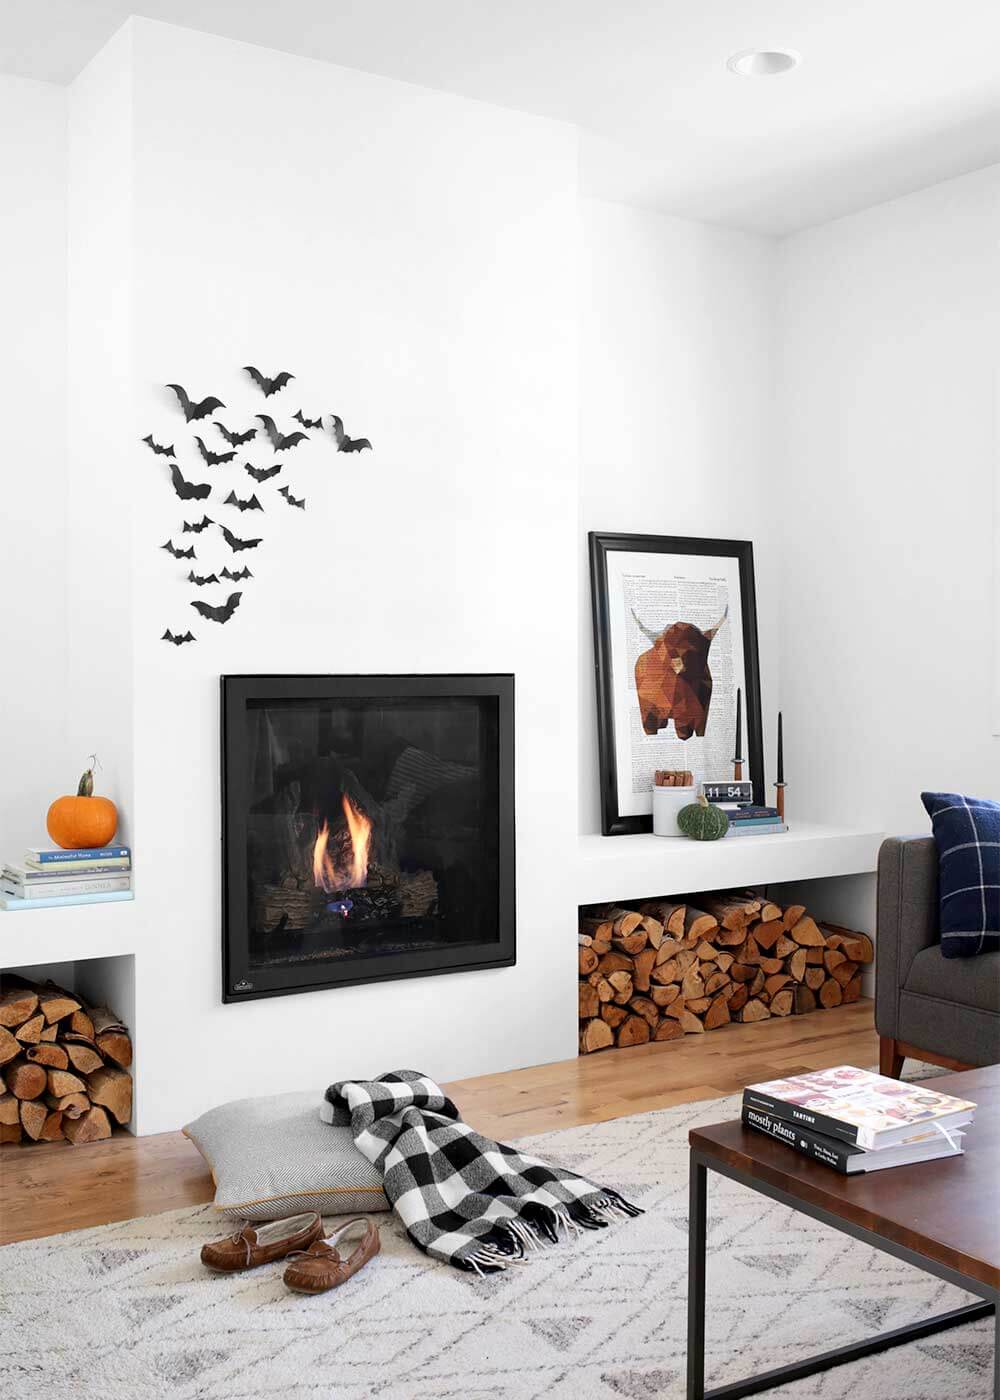
The last couple of years, we’ve gotten by with pumpkins for fall decorations and an annual leaf wreath, too. At the age of six, with ideas growing as tall as her height, Hal wanted to take our decorations closer to spooktacular. Her word, not mine. “Spooky like bats, Mom.” Thank goodness the bats are out on Instagram. I knew just what to do— make fall fireplace bats.
So, on a rainy fall Saturday, preceded by a week of rainy days, we made bats out of what we had, from construction paper in the craft cabinet. I made templates from a couple of tries and the thick backing of the construction paper pad. When you’re six and your mom draws bats with lots of curves, it takes all afternoon to cut. So we cut and we cut and we folded and we rejigged the layout and curled the wings back and called it a day. A very fun day that totally took our house to spooktacular level. Her words, not mine.
How to Make Fall Fireplace Bats
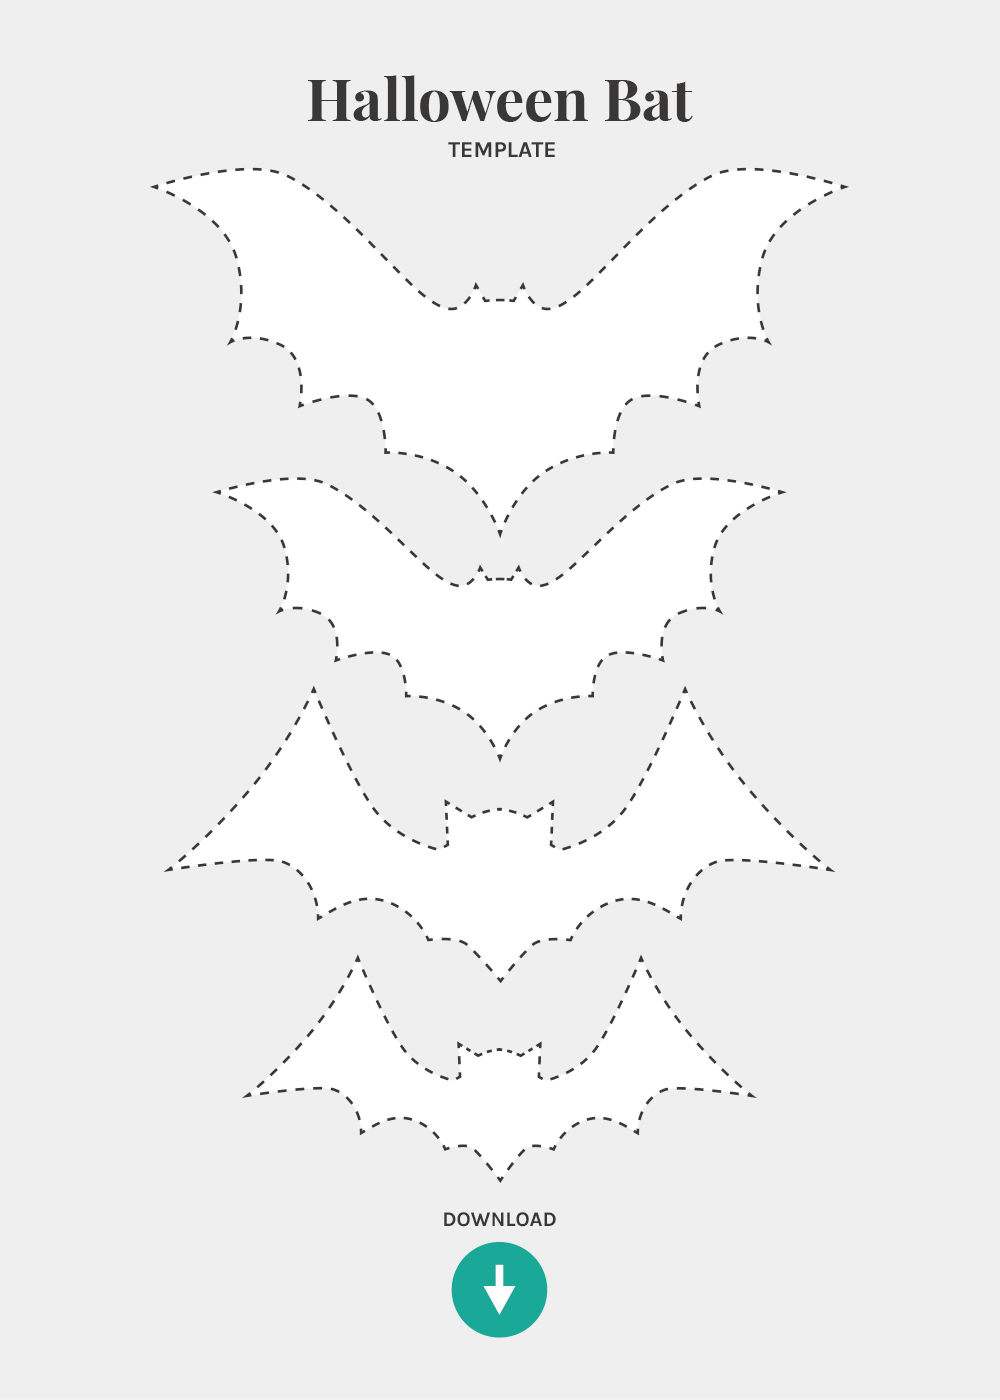
A couple people asked for the bat template, so I made one for you and included simple steps for getting these bats on your wall. If you want to skip the activity of it all, you can buy these paper bats instead.
Step 1
Download the Halloween Bat template and either print on thick paper or regular weight paper. If printing on regular weight paper, cut out the bats and trace them onto thick paper to create a sturdy template. Cut the templates out.
Step 2
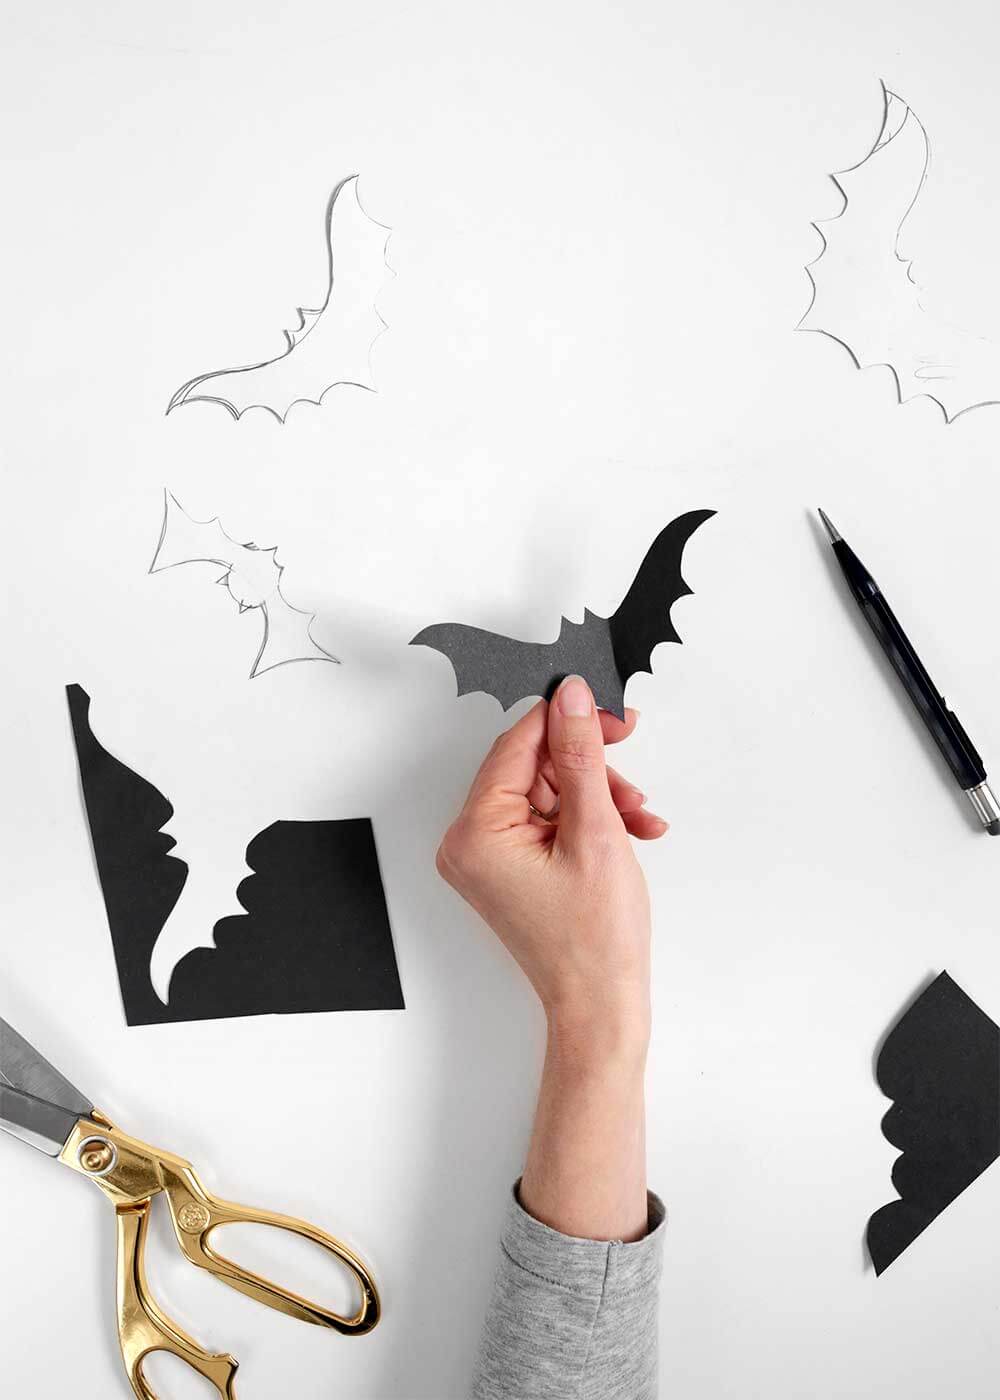
Using a pencil, trace the bats on black construction paper. Lightweight construction paper is fine here. Keep an overhead light on to help make the pencil visible on the black paper for cutting.
Step 3
Slowly cut out the bats. Make an afternoon of it. I love the variation of bat-cutting from Hallie, though it did take some encouragement as hers looked different from mine. Encourage the variety if crafting with tiny humans. Speaking of variety, a great arrangement comes from a variety of sizes. Use all 4 sizes and feel free to cut outside or inside the lines to create more size variations.
Step 4
Flip the bat pencil side down so you’re seeing the side without any leftover trace lines. Gently fold each wing over the body to create a slight bend in the paper. Then, hold the body down with one hand while curling the wing with your thumb underneath the wing and your pointer finger on top, curling in a curved motion, like the sun on the horizon. I prefer my bats to have a lightly pronounced wing bend and curve, so I’m gentle here.
Step 5
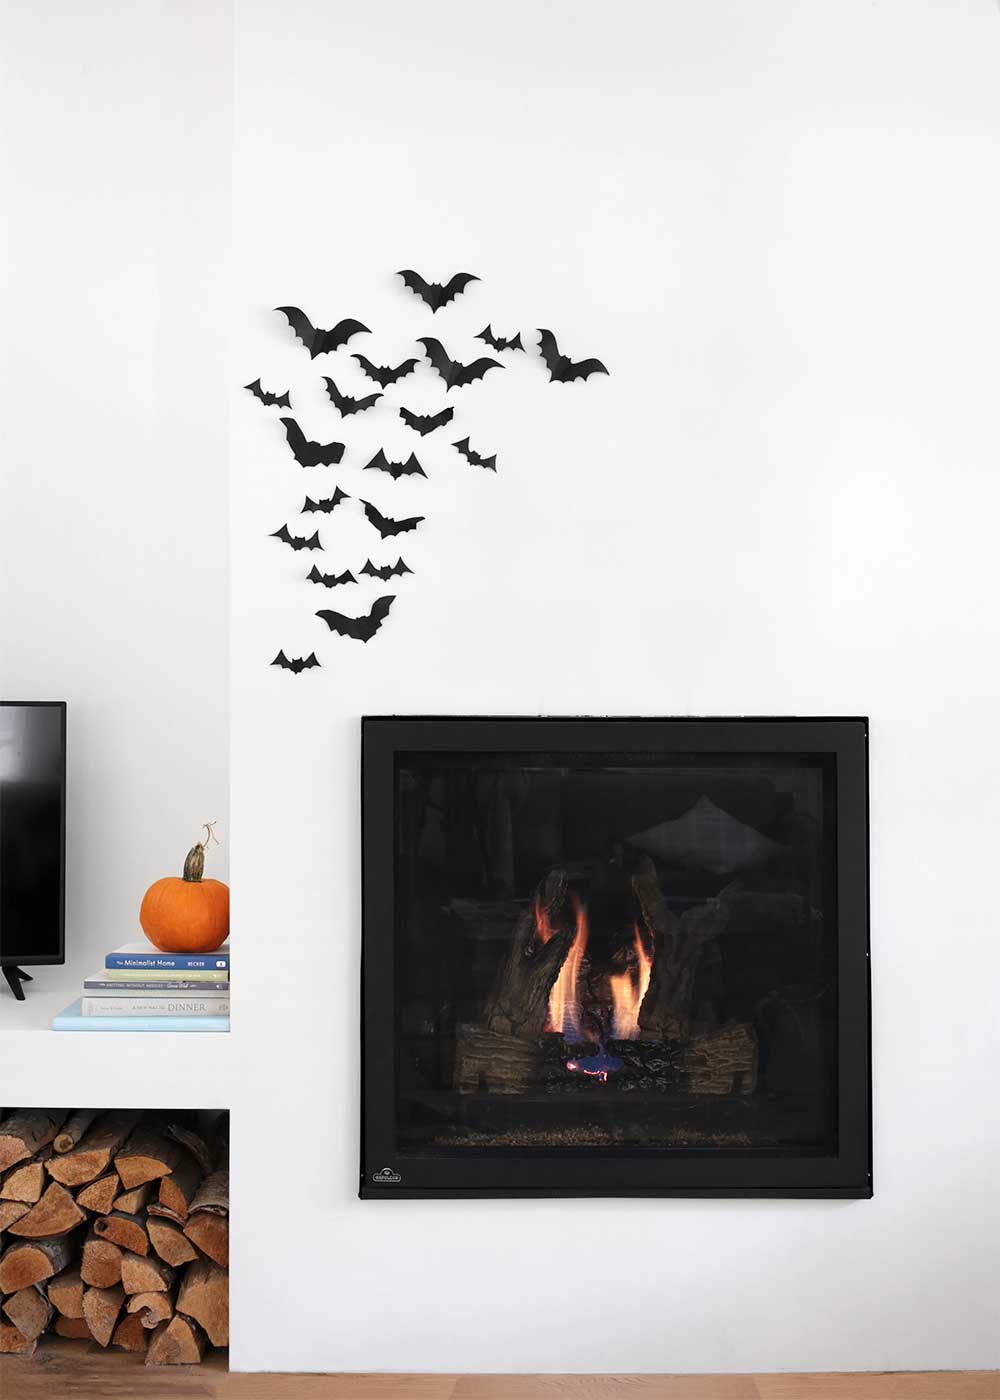
Roll a tiny piece of wall-safe tape, and tape it to the back of the body (pencil side). Place on the wall. Arrange and rearrange, making sure to keep things organic and not so perfect. For your overall shape, try starting small and ending larger, like the shape of a tornado. Use smaller bats down low and larger up high, adding in a variety of sizes all the way through.
To clean up after Halloween, remove the tape and discard in the trash. Recycle the bats. How’s that for a zero storage, low waste, lotsa fun, spooktacular decoration?
PS—If you have pumpkins outside standing in as decoration, be sure to try this trick (see fall bucket list) to keep the squirrels away.


This was such a fun art project for us! We are also a family of 3 and we all enjoyed tracing and cutting them out. My 4 year old daughter was so excited that she brought one in to her preschool class and her teacher put it up for display.
Thanks so much for the downloadable template! You can buy ready-made bats on Amazon, but I hated that they were all made from plastic and it takes some of the joy out of the whole process if you buy them already cut! We’ve been planning to do our own, but hadn’t gotten around to it yet and your pre-made bat silhouettes will make it even easier 🙂
I hope this makes for a fun afternoon!