We celebrated my husband’s birthday last weekend. We’re now closer to 30 than 20. Kind of weird. In normal fashion, I asked him what kind of cake he wanted. Without hesitation, he said Lemon Raspberry Cake.

I was so excited he knew what he wanted, I made the cake without hesitation hoping he wouldn’t change his mind. As I was putting the final touches on the cake, I realized something. The cake was pink. Pale pink. I had just made my husband a pale pink birthday cake. I never considered that raspberry icing would produce a pink cake. Happy birthday little girl husband!

Luckily, he ate it in all it’s pale pink glory. I guess I could have done raspberry on the inside and lemon on the outside. The scarecrow said it best—If I only had a brain.

Speaking of lemon, this graced the inside of the cake.

Between all four layers.

Mini Lemon Raspberry Cake
Yellow Butter Cake + Lemon Curd + Raspberry Italian Meringue Buttercream

Yellow Butter Cake
I halved the Yellow Butter Cake recipe from a couple posts back. Bake in a square pan. Follow recipe as directed. Check cake at 20 minutes. Allow to cool. Cut cake into fourths to achieve mini square cake as pictured.

Lemon Curd
recipe from Cake Love by Warren Brown; yields 2 cups

1 c. fresh squeezed lemon juice
2 1/4 c. sugar
2 tsp. cornstarch
4 large eggs
4 egg yolks
1 1/2 sticks unsalted butter, chilled

1. Squeeze lemon juice making sure to strain out seeds. Measure sugar and cornstarch into a heavy bottomed saucepan. (I use my Le Creuset for this.) Crack eggs and yolks into a separate bowl and set aside.
2. Whisk lemon juice into sugar mixture, followed by the eggs and yolks.
3. Whisk in cold butter one tablespoon at a time.
4. Set saucepan over medium heat and bring to simmer, whisking continuously.
5. When you begin to see lava bubbles—large, slowly forming bubbles that burp steam—reduce the heat to the lowest setting and whisk briskly for 1 minute to pasteurize the lemon curd. (Lava bubbles usually appear 10 minutes in.)
6. Pour directly into bowl, and cover with plastic wrap pressed to surface to keep a skin from forming.
7. Immediately refrigerate for at least 3 hours before using.
Note: I halved the recipe for the mini cake. 

Raspberry Italian Meringue Buttercream
I halved the Italian Meringue Buttercream recipe from a couple posts back and added raspberries. Make recipe as directed. If you are making a full recipe, you’ll need 1/2 c. raspberries. If you are making a half recipe, you’ll need 1/4 c. raspberries. Puree raspberries in food processor. Using a fine mesh sieve, strain the puree into a bowl to remove seeds. Add puree to buttercream and whip until combined.

Ice the Cake
For a quick tutorial, click here. Serve cake at room temperature.

Can I let you in on a little secret? I wanted to show you a slice of the cake, but I wasn’t serving the cake until later that evening. So, I cut the cake. Took some pics. And put the cake back together. The Italian Meringue Buttercream is very forgiving like that.

Still pink, but good as new!

Oh nuts! I’ve been keeping a secret from you. A good kind of secret. Not the bad kind. Who am I kidding? I’m no good at keeping secrets. I’ve already spilled the beans. Can you guess what it is?

Drum roll please…Oh! Nuts. That’s my secret! Or should I say, my secret weapon. I’ve been dying to try a couple new recipes that call for almond flour, and they were nice enough to send me some. I’ve made my own almond flour before, but let me tell you, it’s tedious. Blanch almonds. Peel off skins (this takes forever!). Blend up finely. Who knew you could buy almond flour? This stuff is a time life saver! And it makes some darn good tarts.

Mini Almond Tarts with a Strawberry on Top
yields 12 3-inch brioche molds

Almond Tart Dough
recipe from Martha Stewart
1/2 cup (1 stick) unsalted butter, room temperature
2 tablespoons confectioners’ sugar
1/2 large egg, beaten
1 cup all-purpose flour
1/2 cup plus 1 tablespoon almond flour

1. In the bowl of an electric mixer fitted with the paddle attachment, beat together butter and sugar until well combined. Add egg and mix, scraping down the sides of the bowl as necessary.
2. In a medium bowl, combine both flours. With the mixer on low speed, add flours all at once; mix until well combined.
3. Turn dough out onto work surface and form into two disks. Wrap with plastic wrap and refrigerate until chilled, at least 4 hours and up to overnight.
4. Once dough is ready, preheat oven to 350°.
5. Place dough on a floured work surface, sprinkle dough with flour, and roll out to 1/4-inch thick. (You may have to wait until dough comes closer to room temp in order to roll out.) Cut out 12 circles using a 3 1/4-inch round cutter, re-rolling dough if necessary. Place each circle in a mini 3″ brioche mold, gently pressing down on the bottom and sides. Place filled molds on a baking sheet; transfer to a freezer for 20 minutes.
6. Transfer baking sheet to oven and bake tart shells until just golden brown, 12 to 15 minutes. Transfer tart shells, in their molds, to a wire rack to cool completely.

Almond Pastry Cream
recipe adapted from America’s Test Kitchen
2 c. half and half
1/2 c. sugar
Pinch of salt
5 egg yolks
3 tbsp. cornstarch
4 tbsp. unsalted butter, cut into 1/2″ pieces and chilled
1 tsp. almond extract

1.Bring half and half, 6 tablespoons of the sugar, and salt to a simmer in a saucepan over medium-high heat, stirring occasionally.
2. In a separate bowl, whisk together egg yolks, cornstarch, and remaining 2 tablespoons of sugar until smooth. Once half and half begins to simmer, slowly whisk one cup of the simmering half and half into the egg yolk mixture to temper, stirring constantly. Once combined, slowly whisk mixture back into the simmering sauce pan. Turn heat down to medium, and whisk constantly for about 30 seconds. Lava like bubbles will begin to burst on surface.
3. Remove pan from heat, and stir in chilled butter and almond extract. Transfer to bowl, and place plastic wrap directly on surface. Refrigerate until firm, about 3 hours.
4. After pastry cream is chilled, pipe or scoop into prepared almond tarts.
5. Prepare strawberries by chopping off end with stem. Set strawberry up on flat side, and make thin slices almost cutting to bottom. Squeeze strawberry in center to fan out and set in pastry cream.
6. Cover and refrigerate. Serve chilled.

TIPS
• Tart dough and pastry cream can be made up to 2 days in advance.
• Tart shells can be cooked one day in advance. Cover and leave at room temperature.
• Assemble tarts day of serving, no earlier.

Can you tell I’m a little obsessed with almonds right now? Last post—almond sugar cookies. Next post—it’s a secret (I guess I’m full of secrets these days, good ones though). But I can tell you, almond flour will be present.

Don’t wait. Check out Oh!Nuts, get your almond flour, and make tarts!

I’ve been a big lazy bum this weekend. Reason being—Broomball.

We played Broomball Friday night, and it did me in for the whole weekend. After all the years of playing competitive soccer, I don’t think my body has ever hurt this bad. Maybe I’m getting old. In hindsight, I should have come armed with knee pads, elbow pads, and a helmet. Speaking of helmets, I took a nasty spill about 10 minutes into playing, hitting my head on the ice. A goose egg bump ensued. Being the competitive kamikaze athlete that I am, if you can even still call me an athlete, I kept playing. But, oh, I payed for it the rest of the weekend.

You’re probably thinking—”Does she want some cheese, with that whine?” I’ll pass on the cheese, but I’ll take a cookie instead. And that’s exactly what I did yesterday. I soothed my soul with a healthy chocolate chip cookie. I wasn’t about to try making a new recipe to blog about with my head being a little more foggy than normal. There’s no telling how it would have turned out. So I stuck with what I knew—an oldie but a favorite.

This little gem of a cookie will delight your palette. It’s tiny. Cute. With hints of maple. Filled with dark chocolate. And hidden with healthy morsels of whole wheat flour, oats, walnuts, and honey. Even college students, known for their fast food pizza eating habits, love these cookies.

Print
clock clock iconcutlery cutlery iconflag flag iconfolder folder iconinstagram instagram iconpinterest pinterest iconfacebook facebook iconprint print iconsquares squares iconheart heart iconheart solid heart solid icon

Healthy Chocolate Chip Cookies


5 Stars 4 Stars 3 Stars 2 Stars 1 Star

No reviews

  • Yield: 3 dozen cookies 1x

Ingredients

Scale
  • 1/2 c. (1 stick) unsalted butter, melted
  • 1 c. white whole wheat flour
  • 1/2 c. unbleached all-purpose flour
  • 1/2 tsp. aluminum-free baking powder
  • 1/2 tsp. baking soda
  • 1/2 tsp. sea salt
  • 1 c. old-fashioned rolled oats
  • 1/2 c. walnuts
  • 1 c. pure cane sugar
  • 1 tbsp. honey
  • 1 large egg
  • 1 1/2 tsp. vanilla extract
  • 2/3 c. dark chocolate chips
  • 1/4 c. turbinado (coarse sugar)
  • 1 tsp. cinnamon

Instructions

  1. Preheat oven to 350°.
  2. In a sauce pan, melt butter and allow to cool for about 15 minutes.
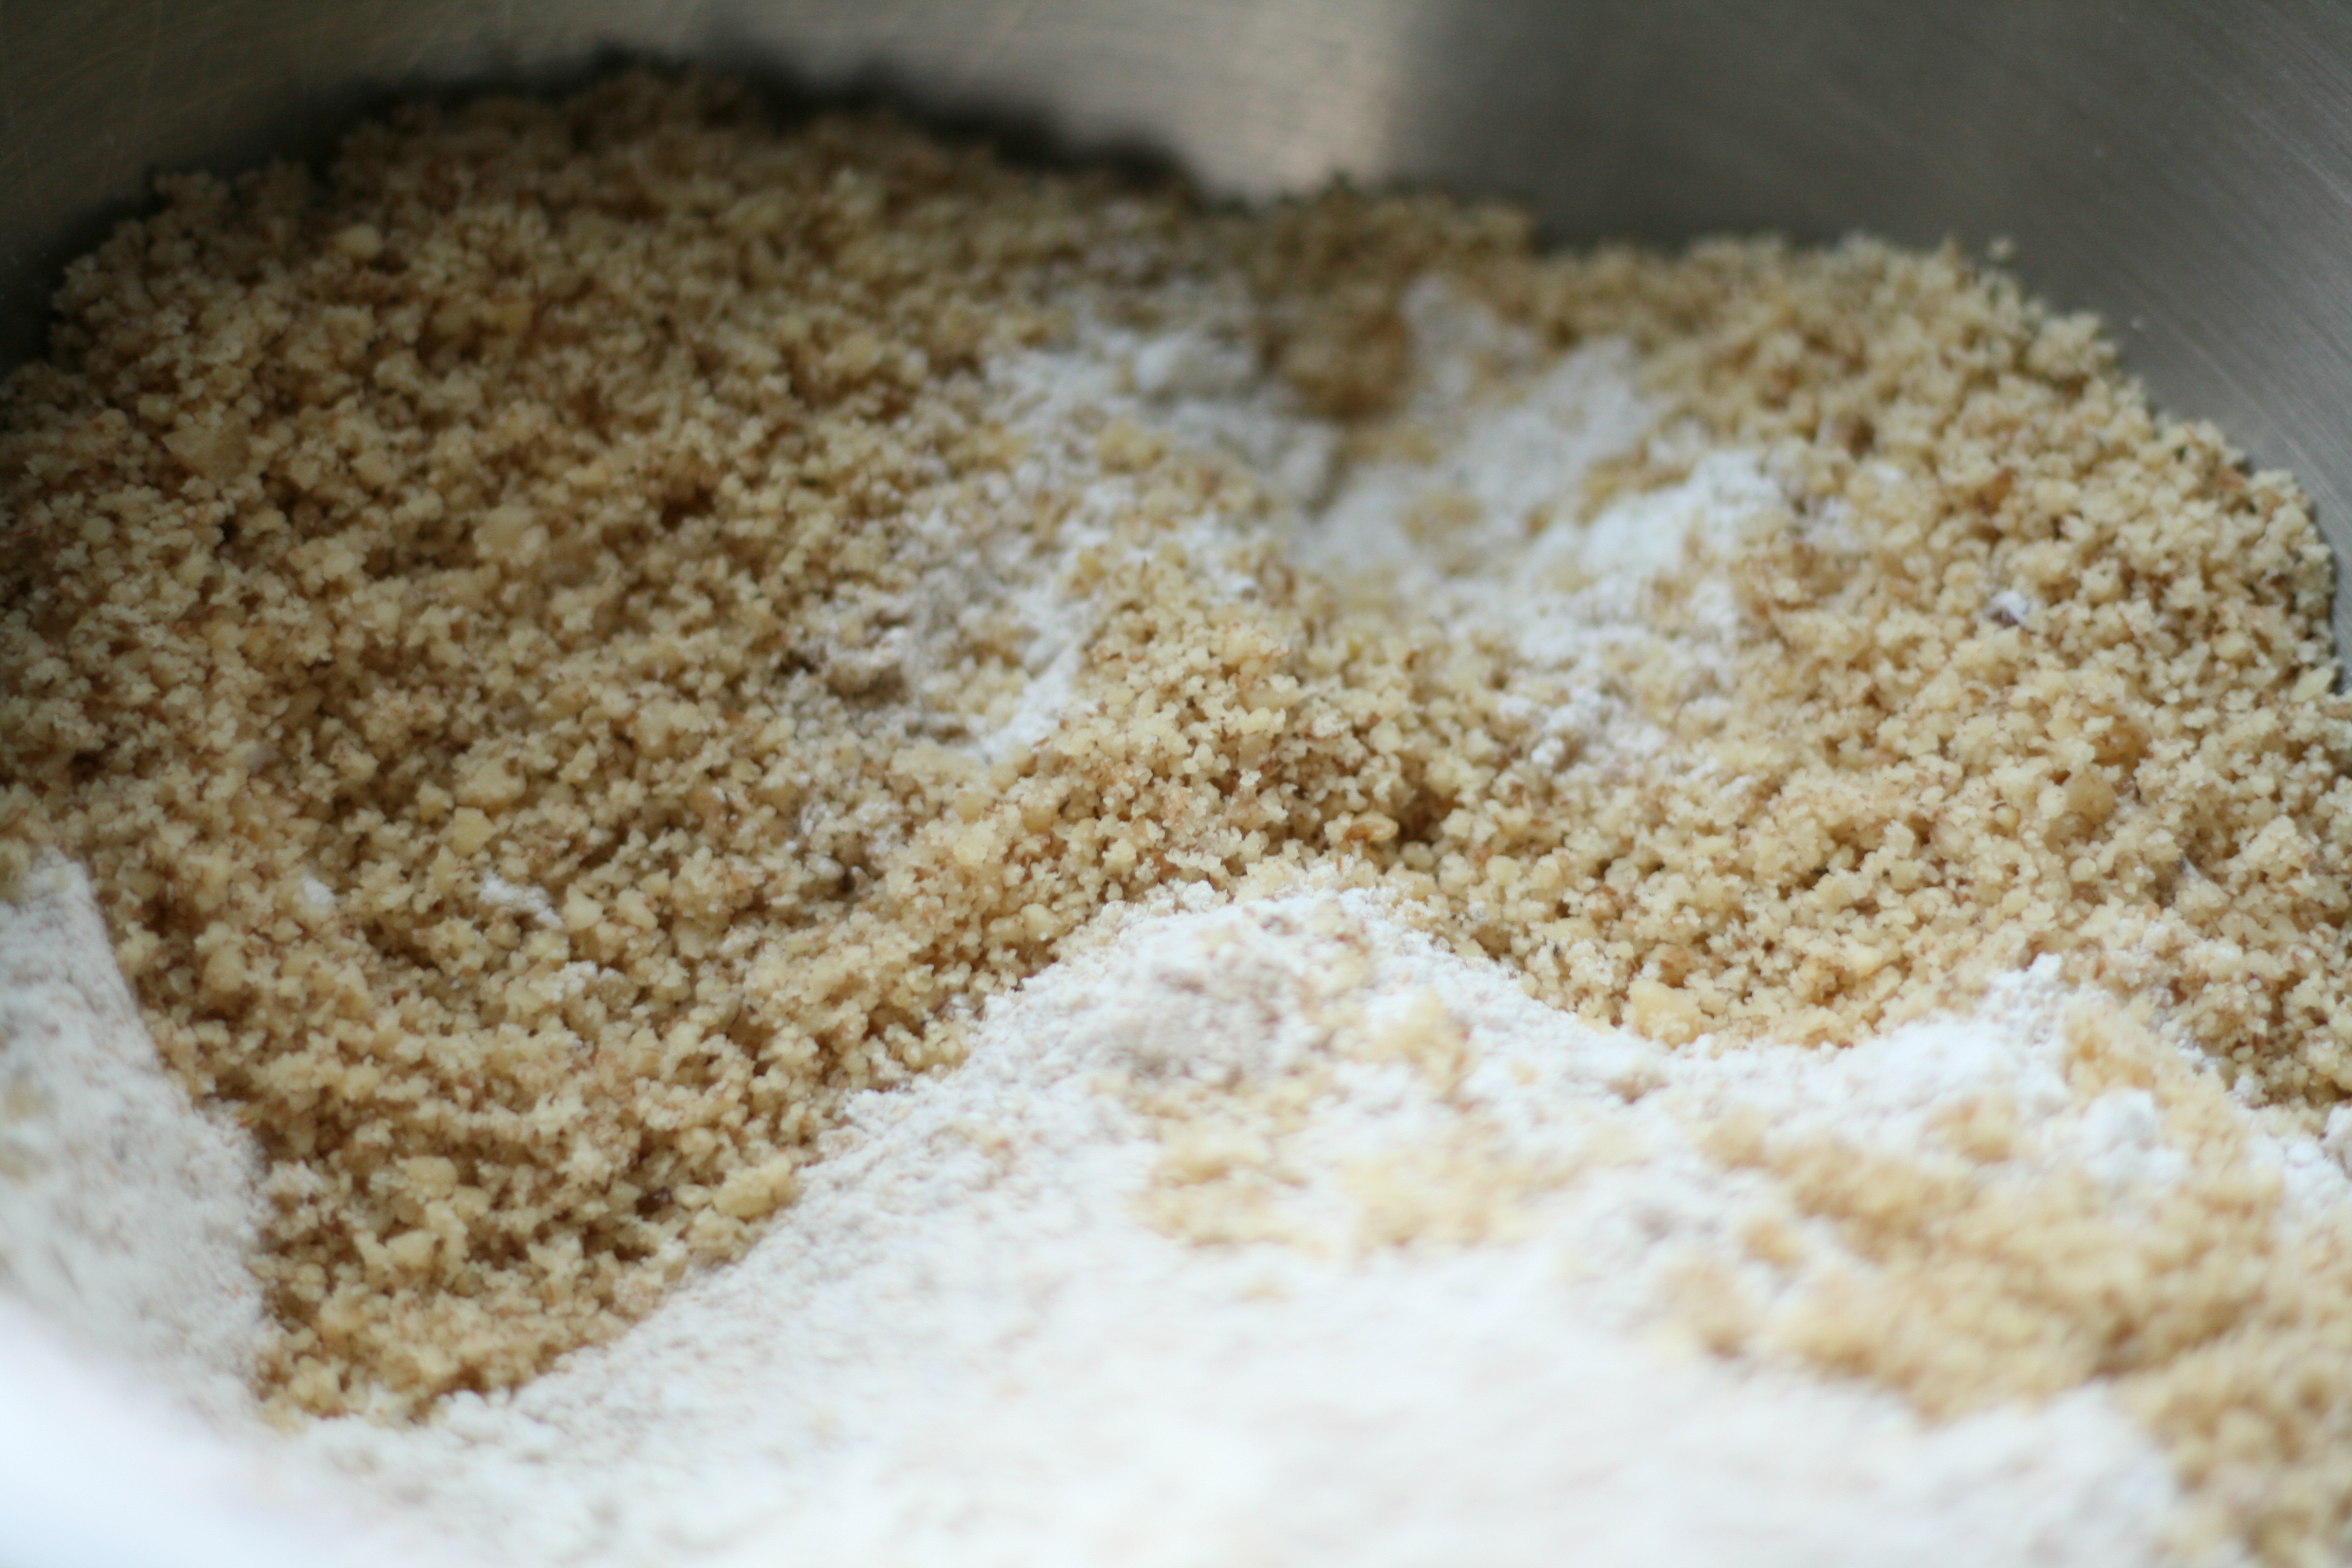
  3. Meanwhile, Whisk together flours, baking soda, baking powder, and salt in bowl.
  4. In food processor or high-powered blender, finely grind oats, and add to flour mixture. Then finely grind walnuts. add to flour mixture.
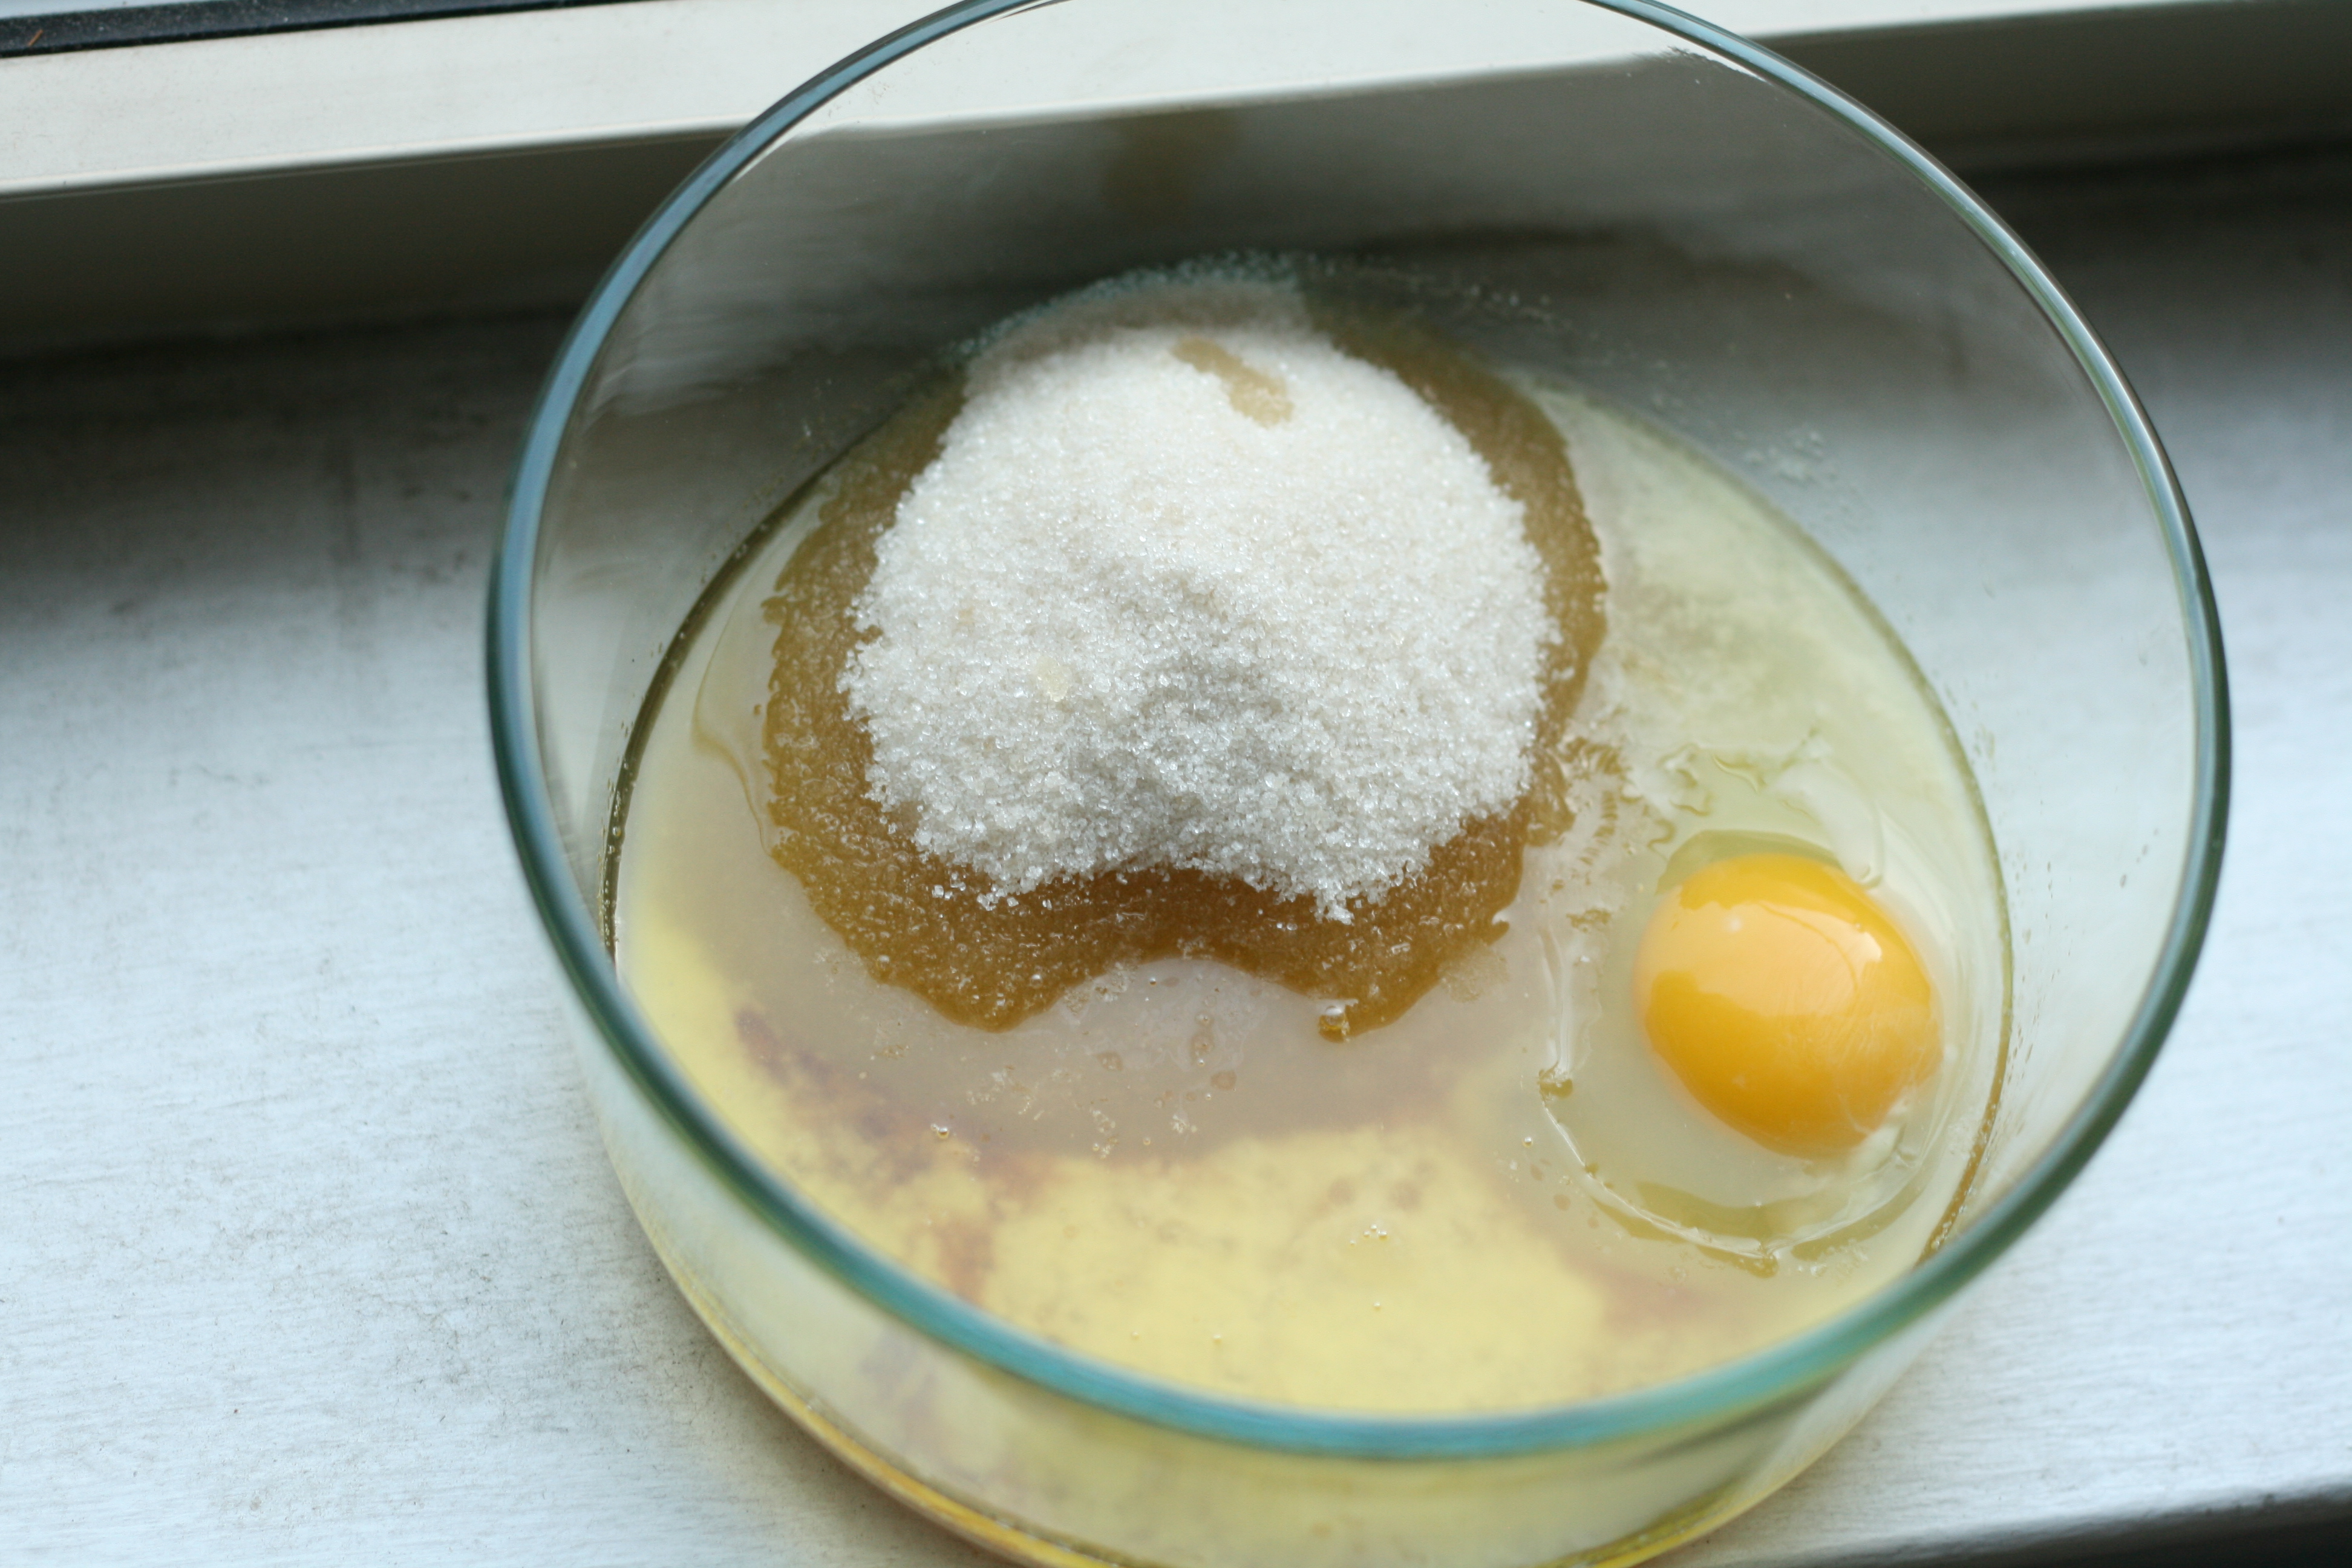
  5. Into cooled butter mixture, whisk in sugar, honey, egg, and vanilla extract until sugar is dissolved and all ingredients are well combined.
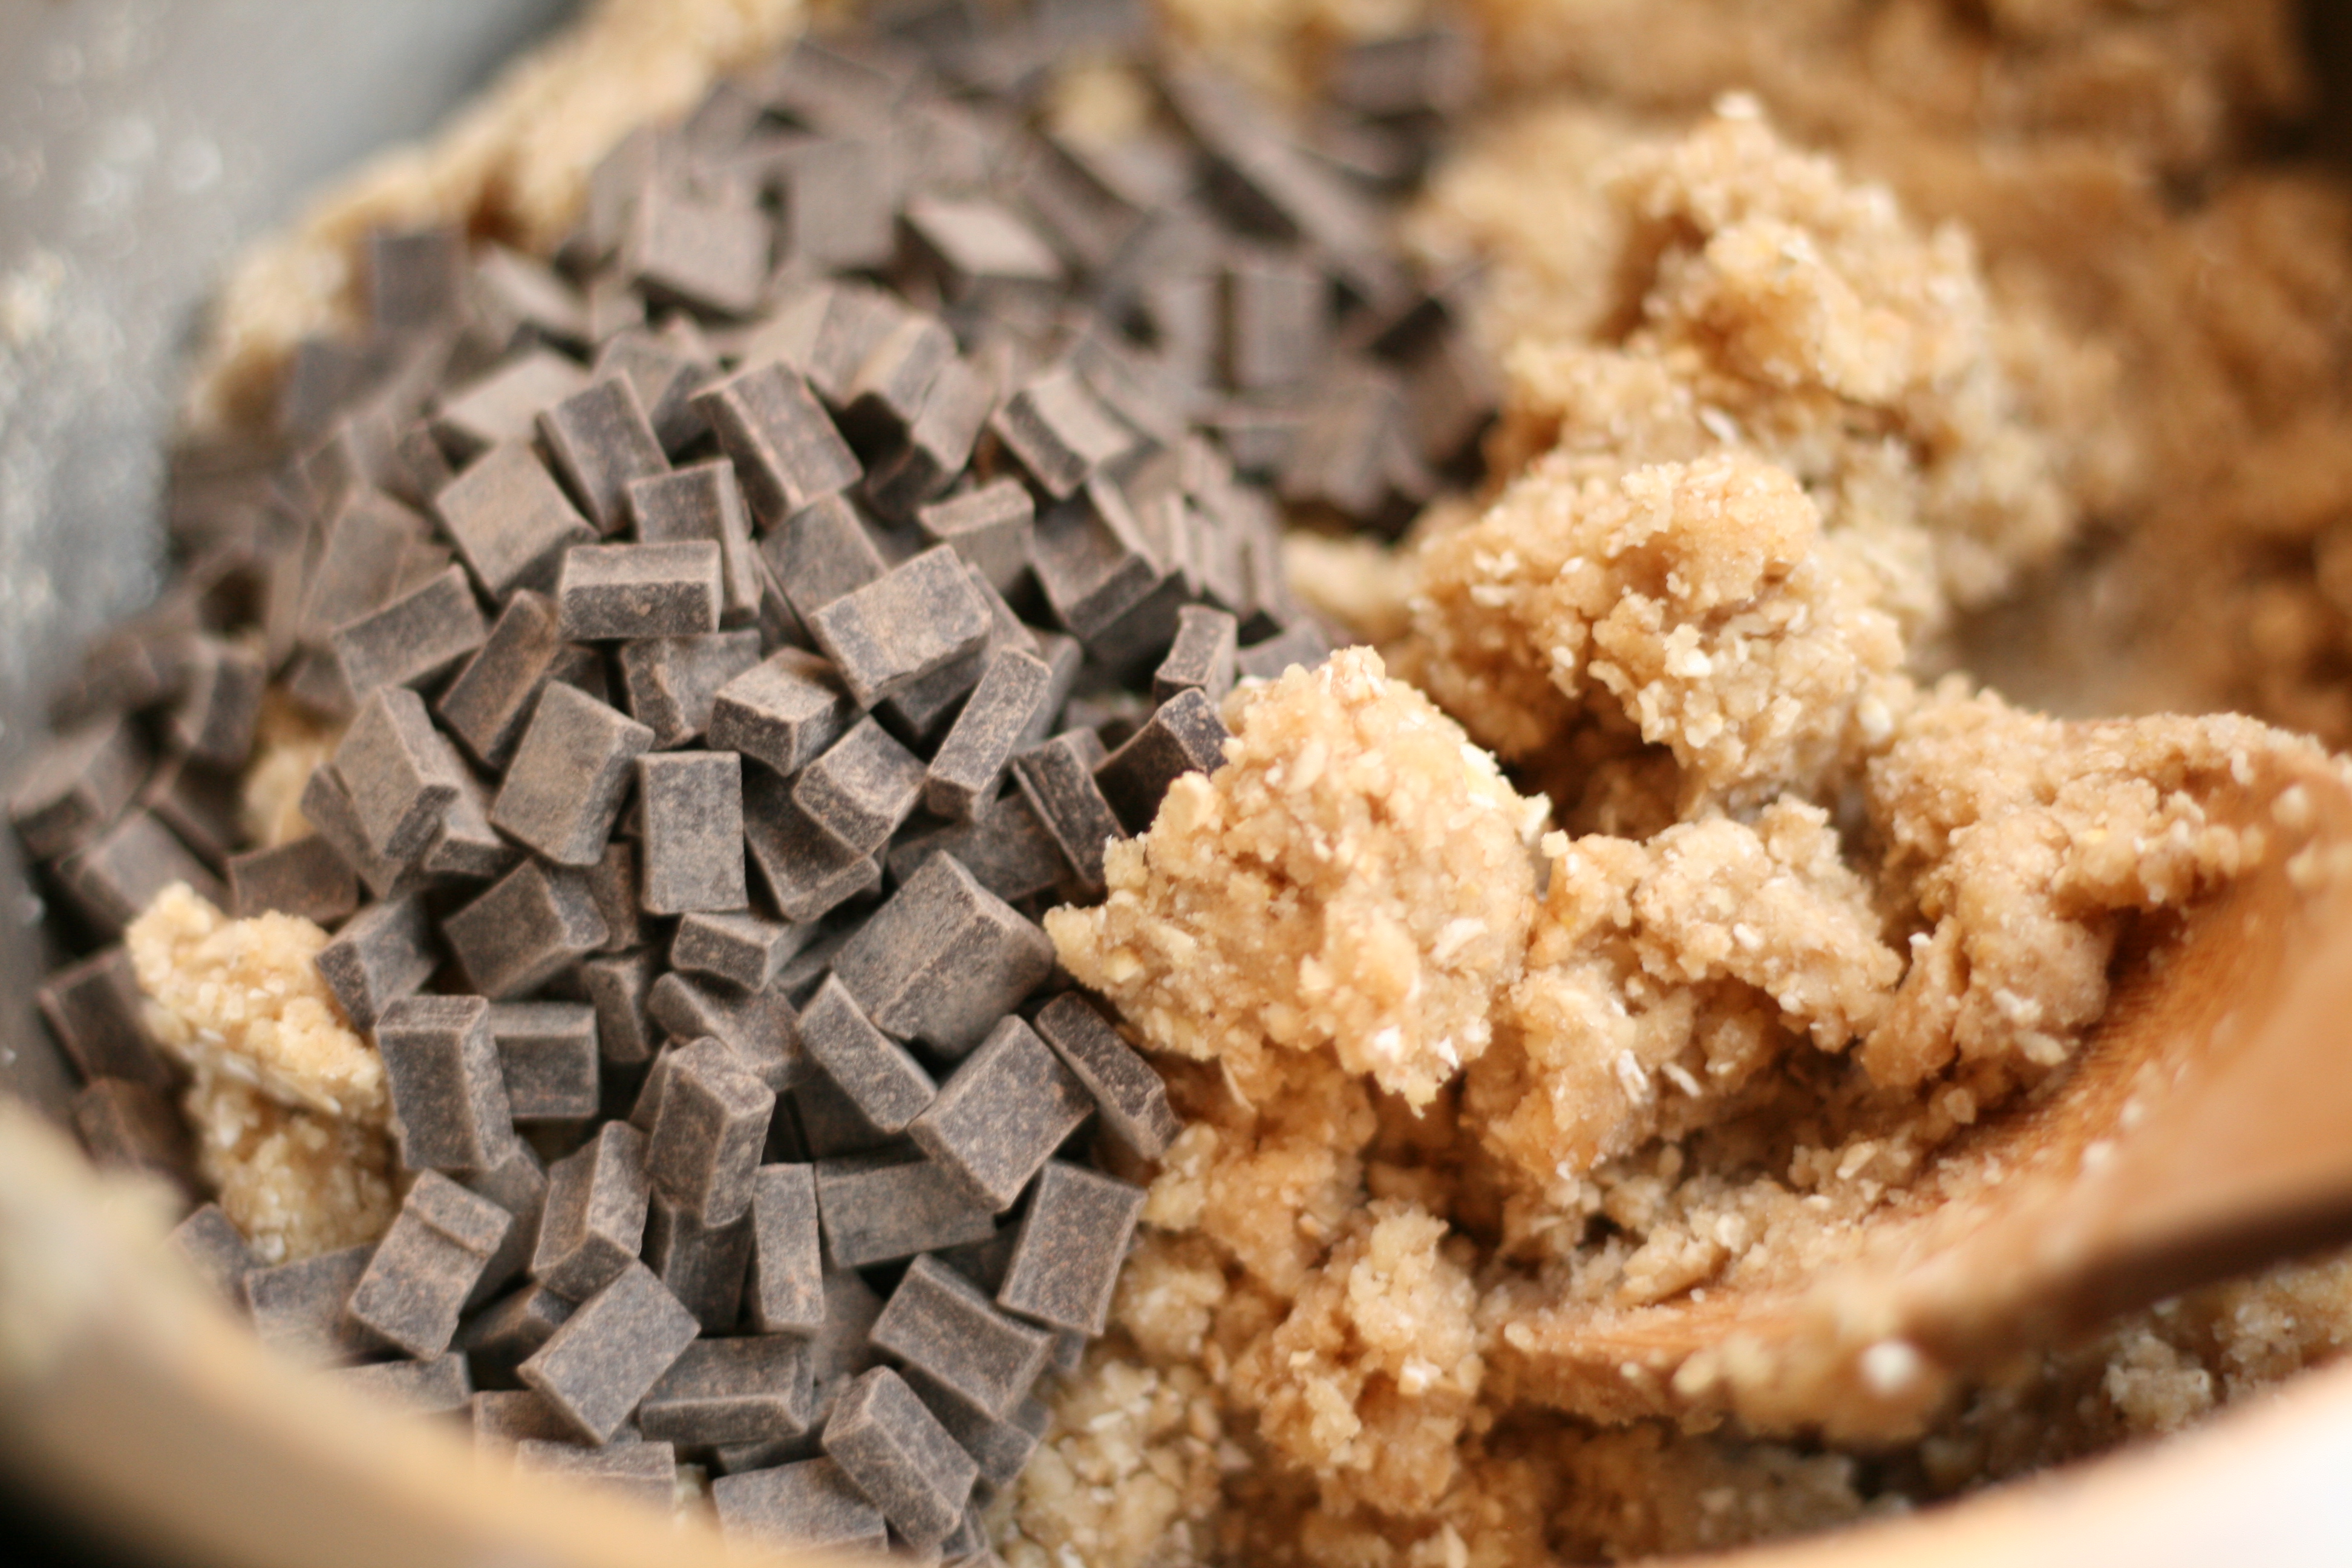
  6. Pour butter mixture into flour mixture, and mix until just combined. (Dough will be somewhat dry.)
  7. Mix in chocolate chips.
  8. Scoop cookies with a spring release scoop or roll in ball by hand. Chocolate chips will have a nasty tendency to drop out of the cookies. Give them a little nudge to stay inside. Roll cookies in turbinado and cinnamon mixture and place on silpat or parchment paper lined pan. Do not flatten.
  9. Bake for about 10 minutes. Let cool on pan for 5 minutes.

Notes

You can also freeze these cookies before baking. Do everything up to step 9. Instead of placing the cookies in the cookies in the oven, place them in the freezer on the cookie sheet for 10-15 minutes. This process is called flash freezing. Once they are frozen or hard, you can put them in a freezer proof bag and store up to 2 months in freezer. When you are ready for a cookie or two, set the cookie(s) out on your pan while preheating the oven. Bake for the same amount of time. You may have to add 2 minutes or so. With this method, you can have a freshly baked cookie instead of eating a week old cookie.

Recipe Card powered byTasty Recipes

Go ahead and treat yourself to a cookie. A healthy(ish) one at that!


© The Faux Martha 2024. Privacy Policy. An exclusive Member of Mediavine Food.