There are two types of pie makers—people who make pie and people who don’t. There’s good reason to skip pie-making altogether, as it comes with a whole lot of issues—like shrinking pie crust and uncooked filling and soupy filling and overcooked crust and mushy filling and soggy-bottom-crust-syndrome and no insurance that your hard work will be worth it. I made this pie for the people who don’t make pie. I also made this Doable and Delicious Almond Apple Pie for the people who need a little extra pie insurance, like me.
By calling this pie doable, you might think I compromised on delicious. Doable sounds utilitarian and bland, not delicious and notable. But 15 pounds of apples later and a lot of testing, I can assure you this Almond Apple Pie is both doable and delicious, built with a simple oil pie crust, one that holds its shape and rolls out easy, with a filling that’s cooked through and set by the time the crumble is sufficiently browned. It’s a pie that’s best made in advance, because when have you ever needed a pie in a hurry? And if there is a time, maybe just buy it? Stick with me; I’ll break down the variables that make pie-making tricky and turn it into doable.
What is an Oil Pie Crust?
My friend Sarah brought an apple pie over a couple years ago. It was so memorable, Kev and I still talk about it. The crust was unlike anything I’d ever had. It was flaky and tender, sturdy and flavorful, but it didn’t have the hallmark traits of an all-butter crust, my favorite type of crust. After a couple of failed attempts at a doable butter crust for this pie, I sent an SOS to Sarah. She delivered her grandma’s oil pie crust recipe. (Thank you, Sarah!)
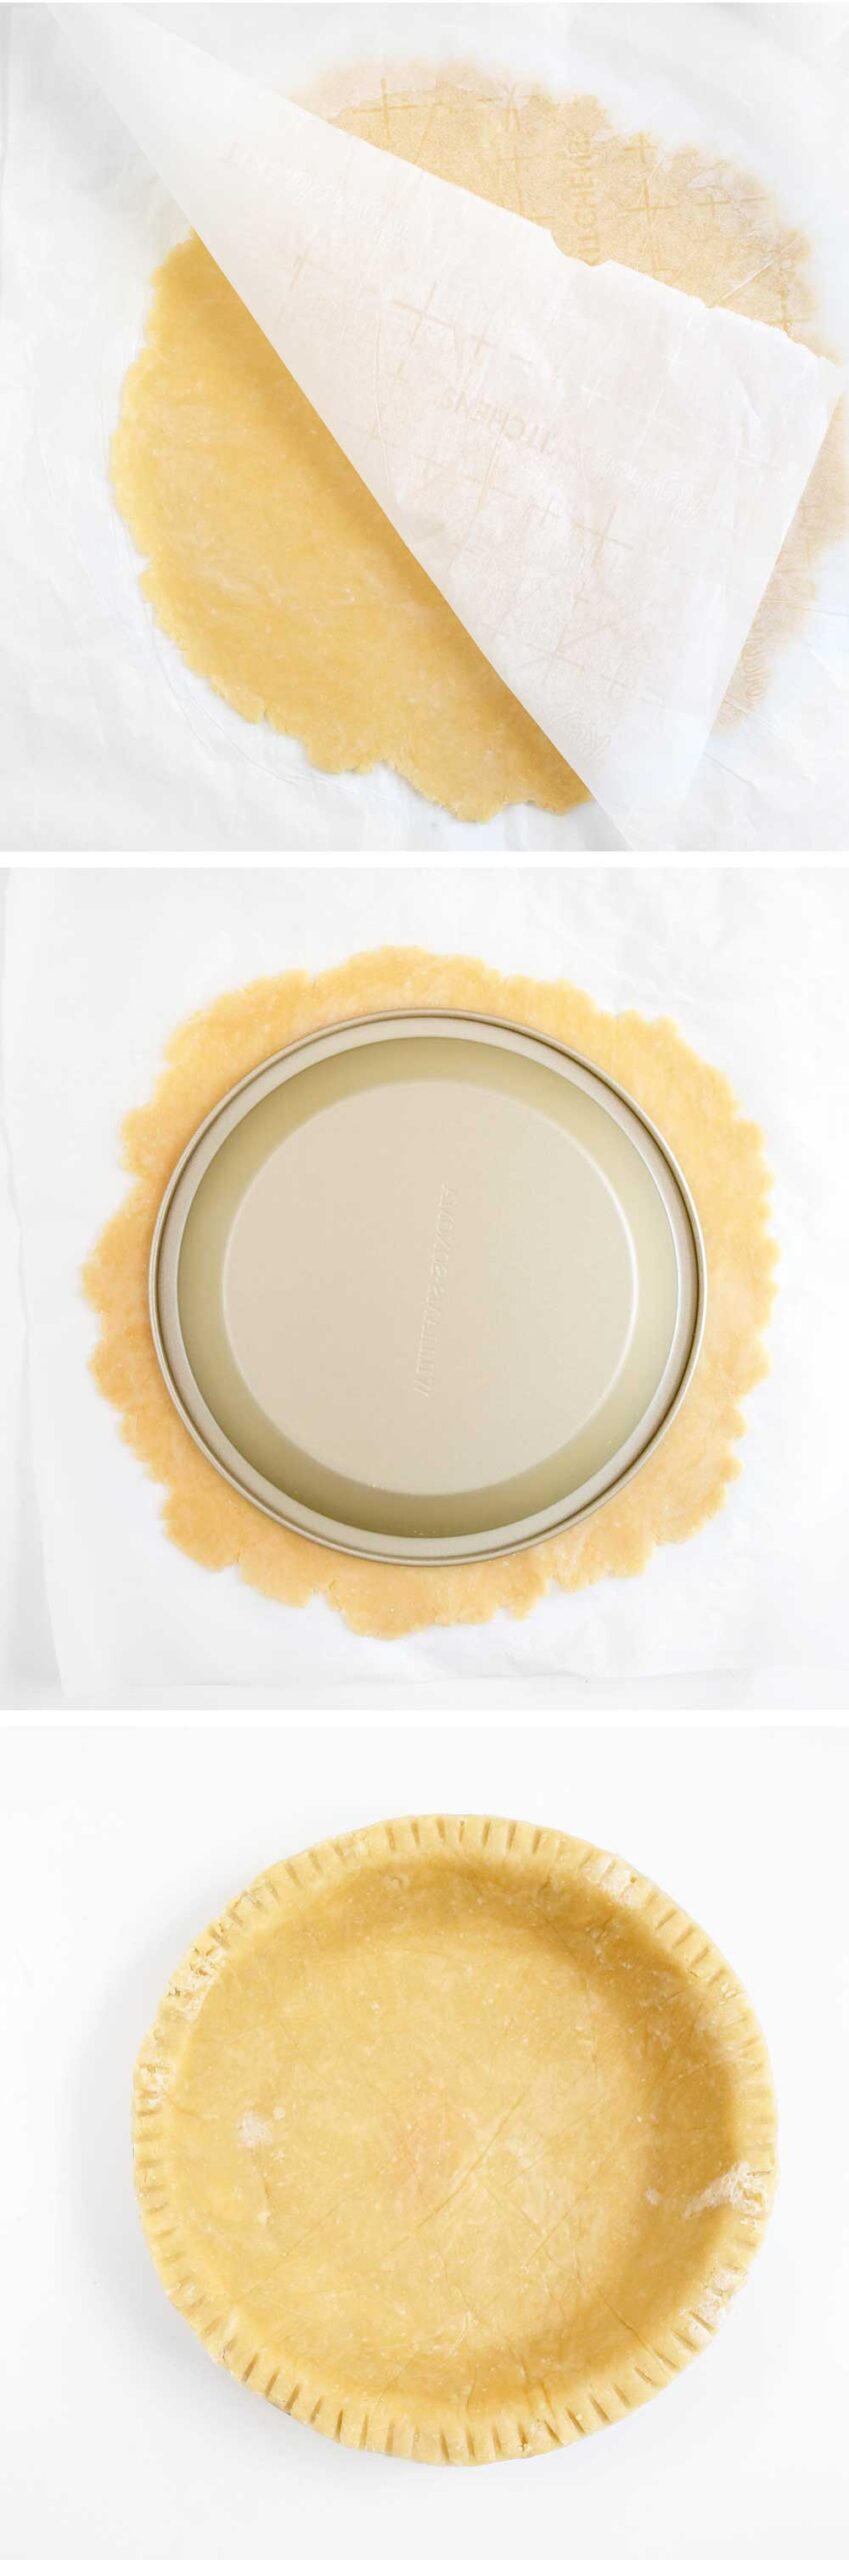
If you’ve never had an oil pie crust, you’re in for a treat made from flour, oil, milk, salt, and the smidge of sugar that I added. The dough feels a whole lot like playdoh and rolls out between two sheets of parchment paper, no extra flour needed. After transferring it to your pie tin, it might crack a little. That’s to be expected. A little bitta water on your forefinger will press that crust back to smooth.
To ensure no soggy bottomed pie crusts, we’re going to par-bake and blind bake this crust. Par-bake means to partially bake and blind bake means to bake the crust without a filling. One of the best parts about this crust—it doesn’t shrink much. Some, but not much. I’ve baked it with and without pie weights, but prefer weights for added insurance. This helps to keep the pie right where it is and not shrink back while baking.
How to Make the Apple Pie Filling
Not all apples are created equal. Under heat and sugar, some will mush to applesauce, which is great for applesauce. But for apple pie, we’re looking for a sturdy apple that will hold its shape and offer a toothsome texture with each bite. For those reasons, I prefer Honeycrisp apples. They are naturally a touch sweet, so less sugar is needed to get them tasty, and they stay sturdy after a bake. They aren’t crazy juicy either, which helps to combat an overly soupy filling. And, if you have any leftover, they’re just as good eaten on their own.
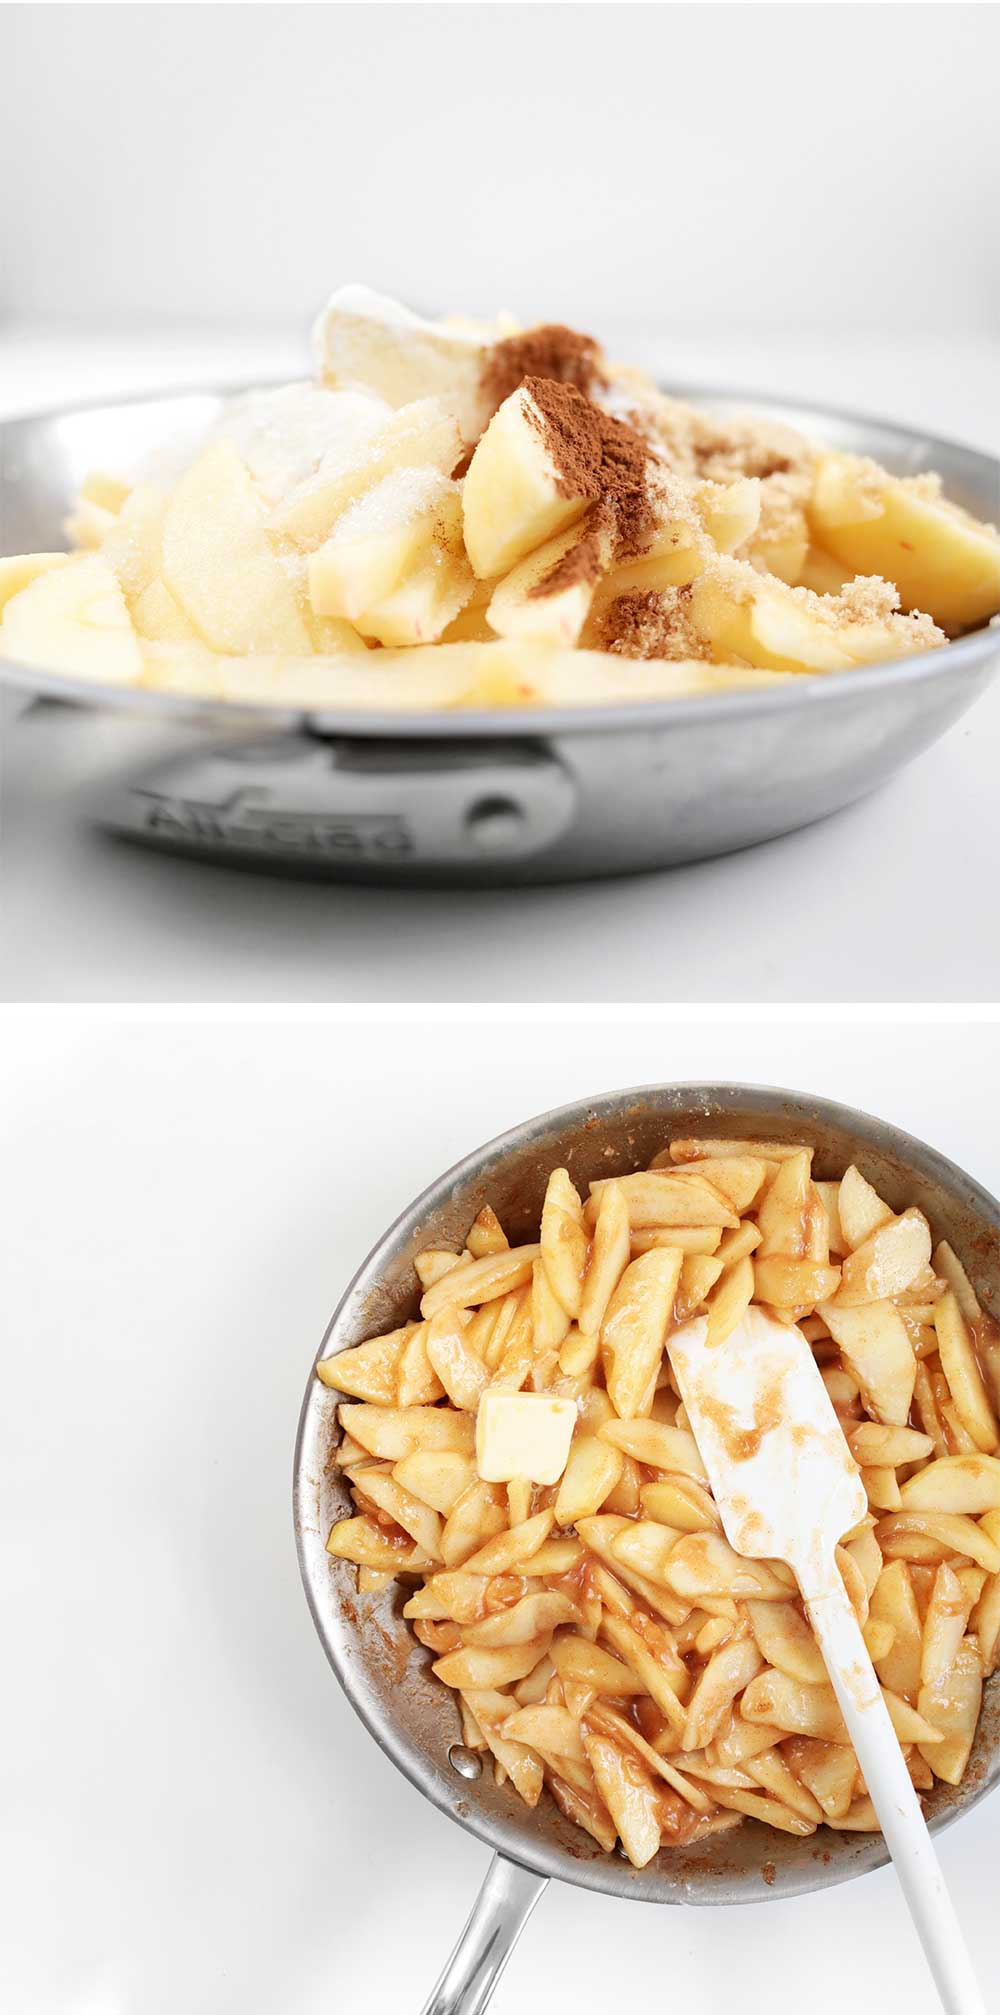
Now, how do you ensure the apples are cooked to perfection? You cook them first. At least that’s what I do. While the crust bakes and firms up on the bottom, cook the apples on the stovetop. This allows you to check for doneness, sweetness, and consistency before tossing them into the pie and hoping for the best. (Gimmie all the extra insurance.) So if the apples aren’t sweet enough (because we’re working with nature here), you can toss in a little extra sugar. If they’re extra juicy, you can scale back on the water or add more flour. And if they’re extra firm, you can cook them a touch longer.
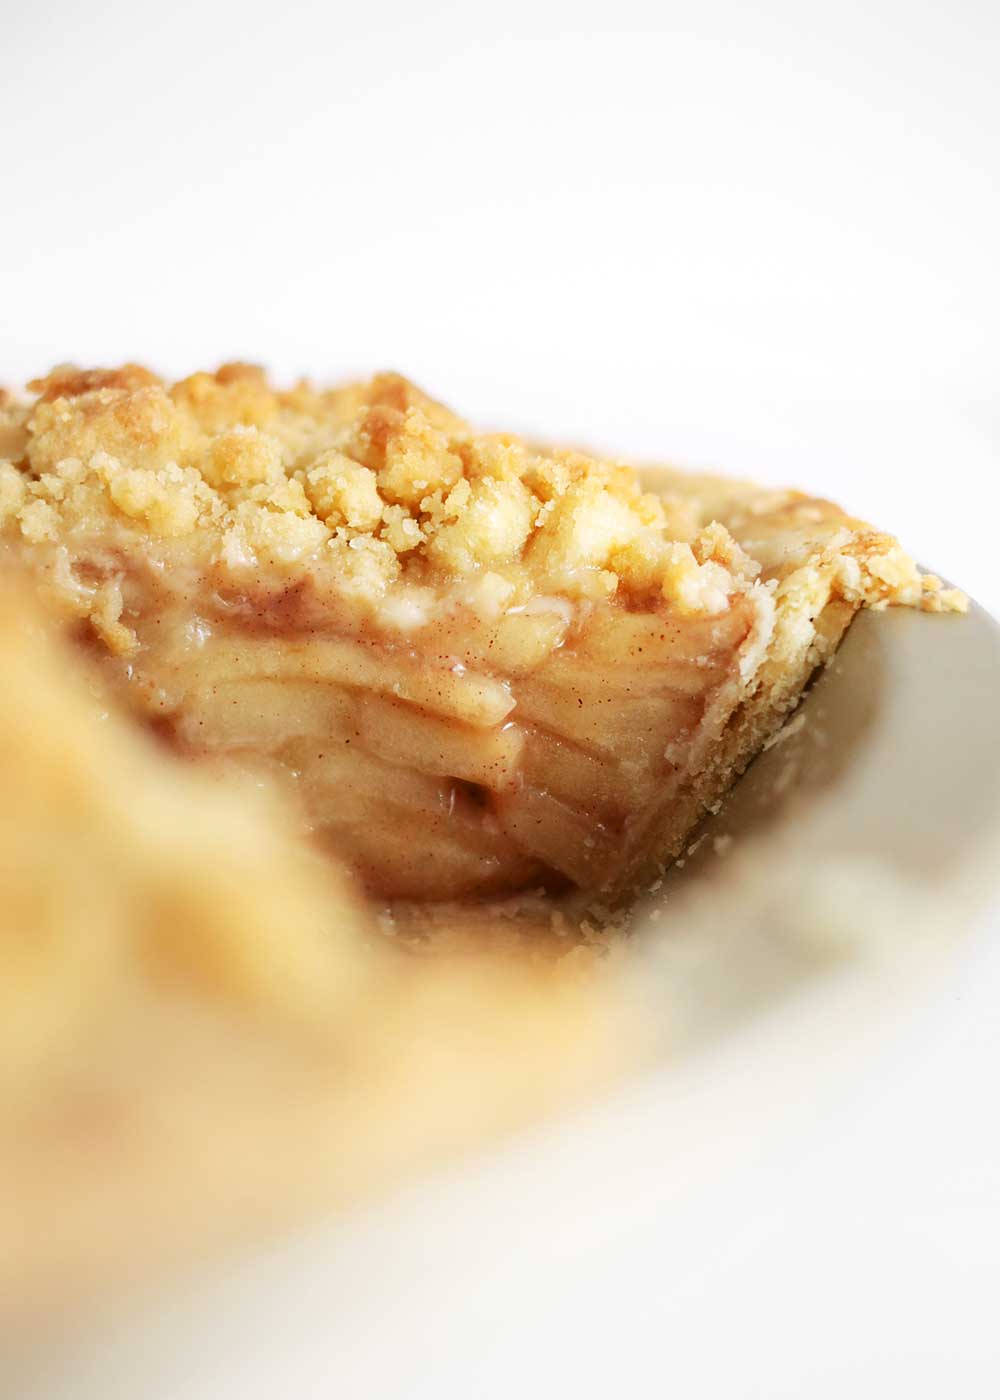
When cutting apples, cut them thick enough that you can’t see light through them, but thin enough that a fork will break through during dessert, about 3/16″ thick, which is less than 1/4″ thick.
Don’t Skip the Crumble on Top
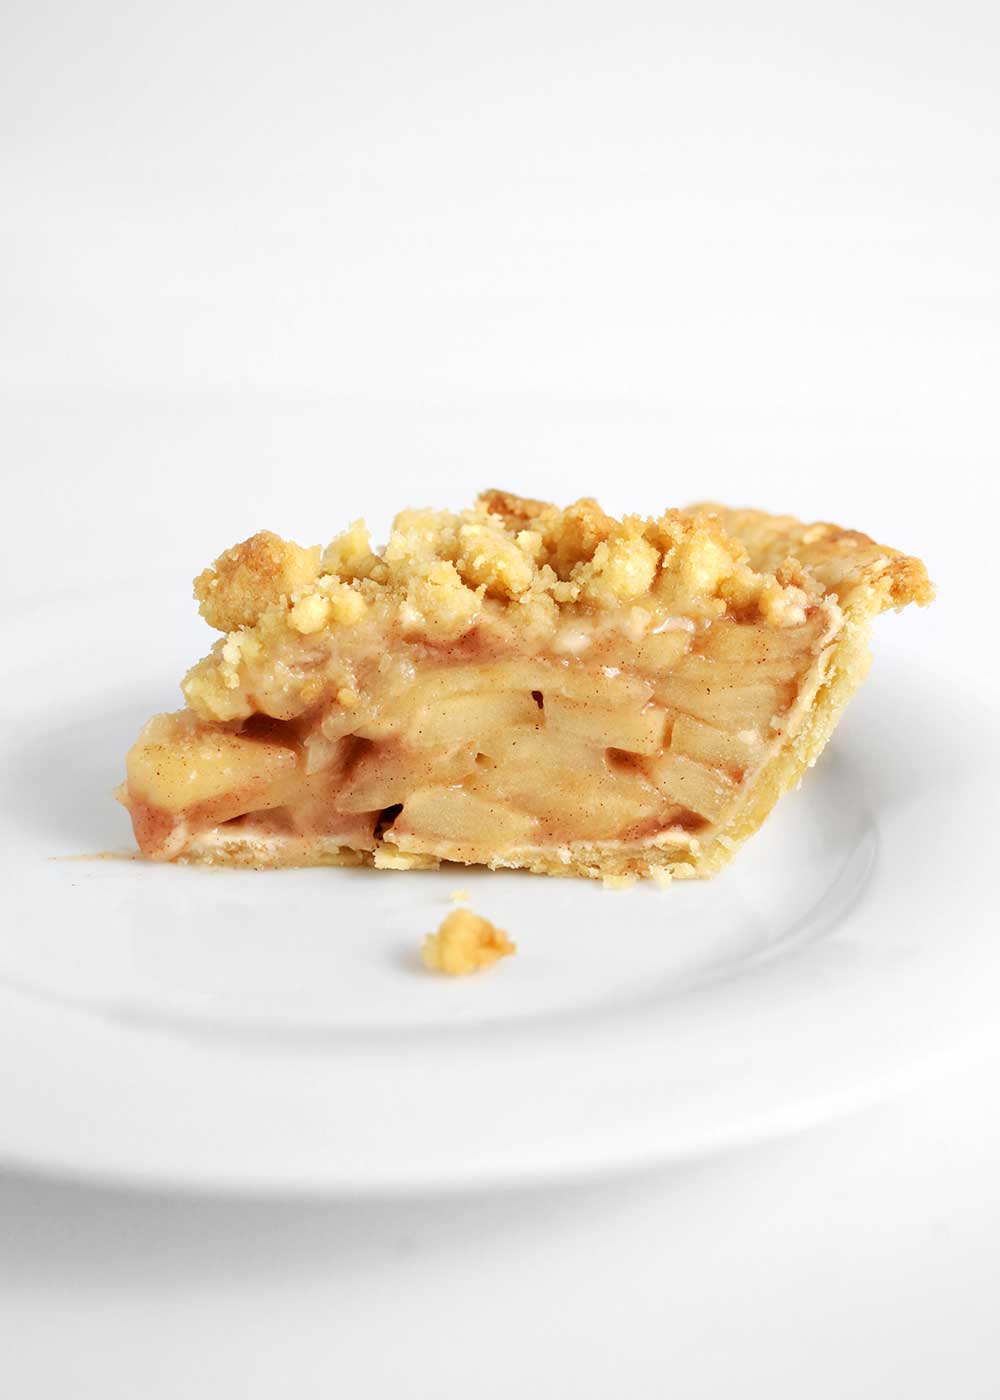
The crumble on top is a real highlight to this pie, but it serves another purpose too, taking the place of needing a double crust. A double crust, as opposed to a single crust, lines both the bottom of the pie tin and the top of the filling. This method creates steam to cook the fruit filling without drying it out. While necessary, adding that top crust can also be a big hang-up when making pie. So I stole the crumble from this Tart Cherry Pie to use as the lid to our Almond Apple Pie. It also adds some necessary texture. (Note: We’re cooking the apples first, but only partially, much like the par-baked crust. They’ll finish in the oven and need a way to steam, a very delicious way to steam. It had to be a crumble.)
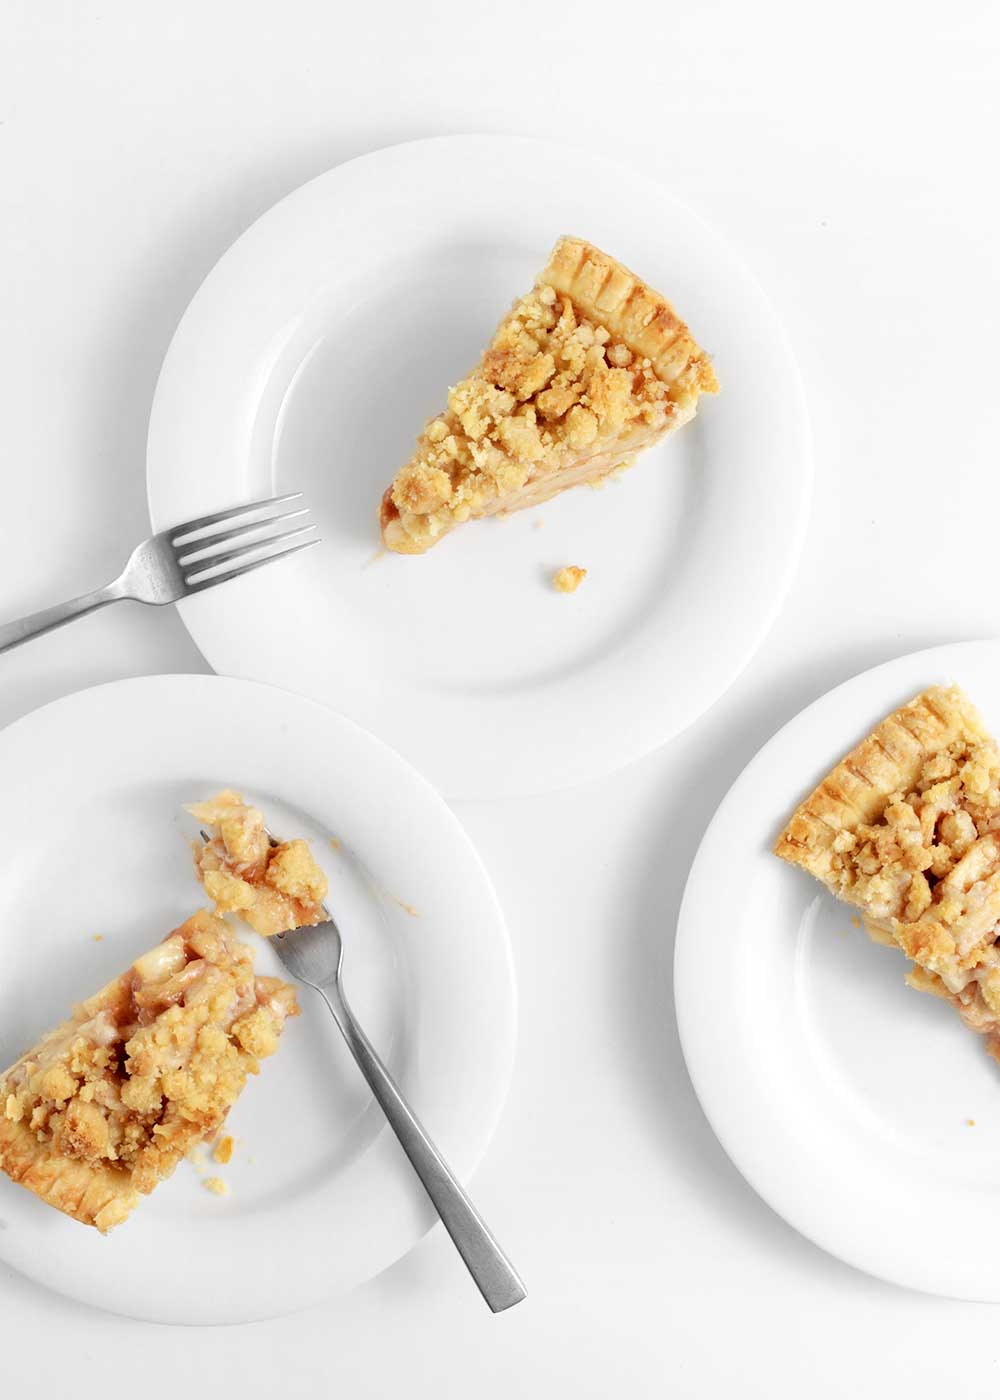
Easy as pie? I hope so. May this Almond Apple Pie be doable and delicious; may it be your gateway drug into the wonderful world of pie making; and may it save you on a day when you need extra pie insurance. Amen.
This Doable and Delicious Almond Apple Pie has built-in insurance with a trusty oil crust, an almond apple filling partially cooked on the stovetop, and a crumble topping for extra flavor and texture. This pie can be made in tiny chunks of time or in one fell swoop, but it’s best made in advance—the day before or the morning of.
Ingredients
Scale
Oil Pie Crust
1 1/2 c. all-purpose unbleached flour
1 tsp. pure cane sugar
1/2 tsp. kosher salt
1/4 c. + 2 tbsp. neutral-tasting oil (like grapeseed)
3 tbsp. whole milk, plus more as needed
Apple Filling
7 c. sliced Honeycrisp Apples, 3/16″ thick (about 10 medium apples)
1/4 c. all-purpose unbleached flour
1/4 c. pure cane sugar
1/4 c. brown sugar, lightly packed
1 tsp. ground cinnamon
pinch of kosher salt
2–4 tbsp. water
1 tbsp. unsalted butter
1 tsp. almond extract
Crumble
5 tbsp. unsalted butter, melted
1/8 tsp. almond extract
1 c. all-purpose unbleached flour
1/4 c. pure cane sugar
1/4 c. brown sugar, lightly packed
pinch of kosher salt
Instructions
Make the crust. Either just before baking the pie or up to a day in advance, make the crust. Preheat oven to 375°F. In a large bowl, add the flour, sugar, and salt. Using a large fork, whisk together. Add in the oil and whisk together with the fork until mostly incorporated. Add the milk to bring everything together, using your hands to bring it into a flat ball. The dough will feel a bit like playdoh, neither crumbly or sticky. If the dough is crumbly, add a touch more milk, about 1 teaspoon at a time until it just comes together. If the dough is too wet, add a touch more flour until it just comes together. (Watch this video for guidance.)
Between two pieces of parchment paper or wax paper, roll out the dough, first lightly wetting the counter to hold the paper in place. Rotate the paper every so often for even crust thickness. Roll until the dough is about 1″ wider than your 9″ pie tin. (See picture above.) Remove the top sheet of paper and carefully place the crust in the pie tin and center within. Now remove the top sheet carefully. Don’t worry if some tearing occurs. We’ll fix that. Press the dough into the bottom corners of the tin. Add a little water to a bowl and use to wet your finger to repair any tears or gaps in the crust. Use the back of your nail to smooth over. Trim the edges of the pie using kitchen shears or a paring knife. Using that same large fork, press the prongs into the edge of the pie to create a pattern. Place the pie tin on a baking sheet. Before baking, lightly prick the bottoms and sides of the crust to keep from puffing while baking. For added no-shrink insurance, line the pie with the leftover piece of parchment paper and fill with pie weights or dried beans. Bake the pie for 15 minutes, removing the pie weights after 10 minutes. Meanwhile, make the filling.
Make the filling. Peel 8-10 apples first. Then cut hunks of the apple off to remove the core. Cut the hunks into 3/16″ thick slices. Measure and toss into a large skillet. Add the flour, sugars, cinnamon, salt, and 2 tablespoons of the water. Stir to coat. Turn heat to medium-low. Cover and cook for about 10 minutes, stirring occasionally. If the apples stick, add an additional tablespoon of water, but do so sparingly, or lower the heat. The apples are ready when they have soften to a bend and the sauce has thickened to coat. Remove from heat and stir in the butter and almond extract. Taste, adjusting flavor if needed. Set aside.
Make the crumble. Melt the butter. Once melted remove from heat, add in the almond extract. Meanwhile, in a medium bowl, stir together the remaining crumble ingredients with a fork. Pour in the melted butter mixture and mix together with a fork until a crumble forms.
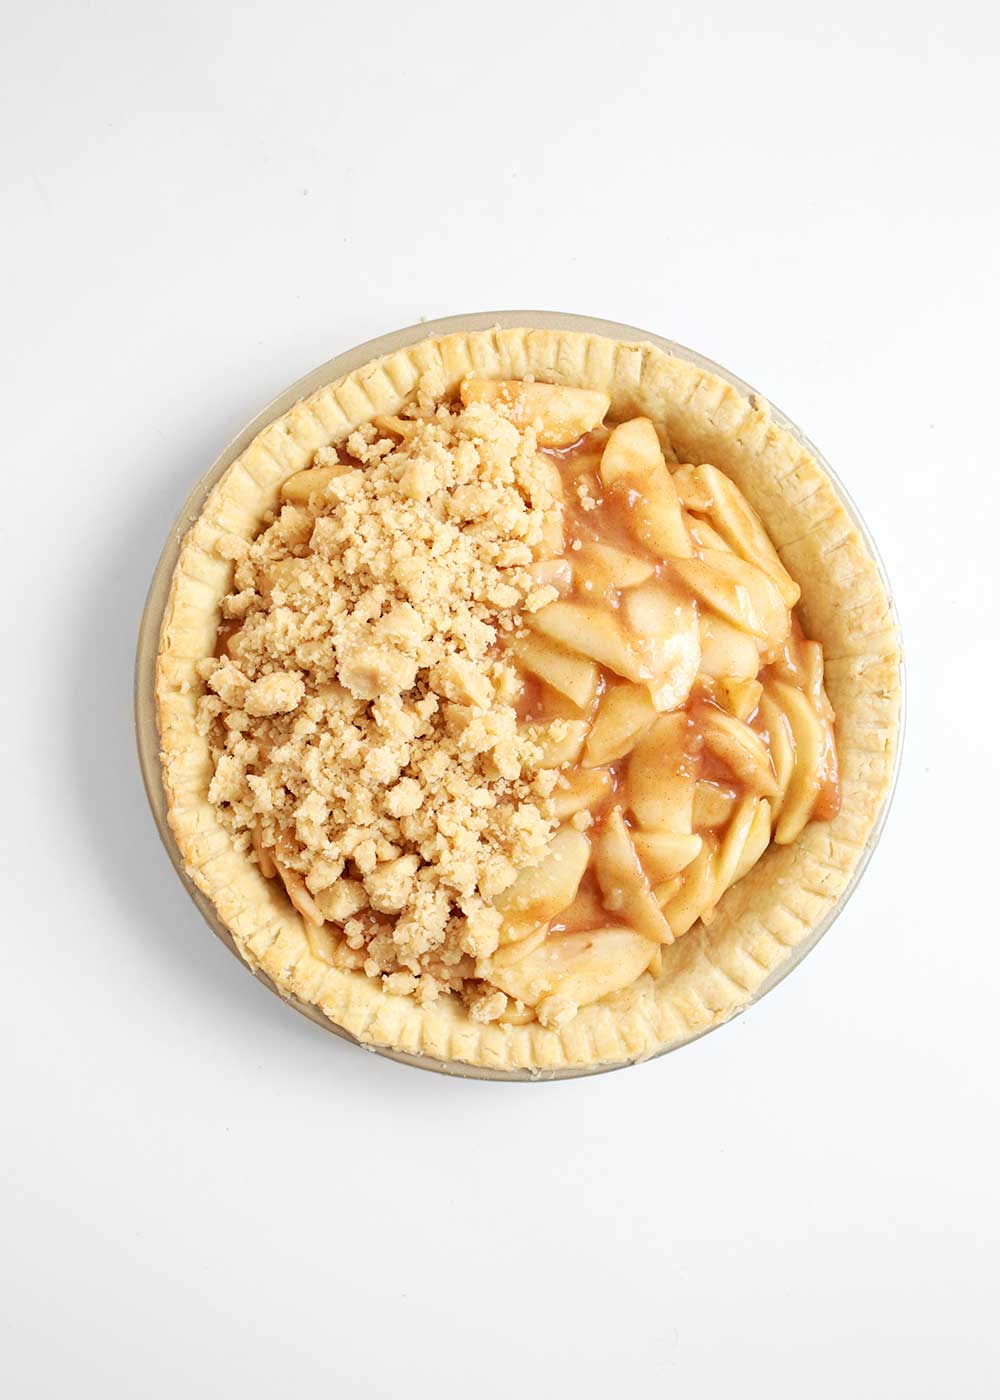
Assemble the pie. Pour the apples into the pre-cooked pie crust spreading out to an even layer. With your hands, crumble the crumble on top. Making sure the pie tin is still on the baking sheet, place back in the oven and cook for 20-22 minutes. The crumble will golden, and you may see some slight bubbling of the apples around the edges. If the crumble is browning too quickly, cover with foil to slow browning. Remove from oven and allow to cool completely. Once cooled, lightly cover with foil and store at room temperature. This will allow the crumble to soften a bit before serving and the apples to set and continue soften. This pie is best made in advance—the day before or the morning of. To save leftovers, store in the fridge to stop the crumble from melting into the apples.
Notes
For additional guidance, read the blog post and use the pictures as guidance.
The oil pie crust recipe is lightly adapted from my friend Sarah’s grandma.
Prep Time:30 min.
Cook Time:35 min.
Recipe Card powered by
This blog is made possible by your support (thank you), select brand partnerships, advertisements, and affiliate links to items I love and use. READ MORE >
Happy Thanksgiving, Melissa!! Just re-watched Nana’s video for the first time this year 😉 And ready to make this for our family. This is our very favorite apple pie recipe, thank you again!! XO
Happy Thanksgiving to you too, Alison! We’re living parallel lives. I just finished making ours too! I’m so so happy to hear you guys like this one as much as we do!
I’m giving this one a whirl over Christmas break. I may not brave making the pie crust though. I’ll just doctor up a store bought this time around. LOL!
THANK YOU THANK YOU THANK YOU. I have been in apple pie paralysis for a few years now. This is exactly what I needed to inspire and give me courage! Happy Thanksgiving, too!!


Happy Thanksgiving, Melissa!! Just re-watched Nana’s video for the first time this year 😉 And ready to make this for our family. This is our very favorite apple pie recipe, thank you again!! XO
Happy Thanksgiving to you too, Alison! We’re living parallel lives. I just finished making ours too! I’m so so happy to hear you guys like this one as much as we do!
I’m giving this one a whirl over Christmas break. I may not brave making the pie crust though. I’ll just doctor up a store bought this time around. LOL!
I hope you like it!
THANK YOU THANK YOU THANK YOU. I have been in apple pie paralysis for a few years now. This is exactly what I needed to inspire and give me courage! Happy Thanksgiving, too!!
I feel you! It always gives me trouble. Happy Thanksgiving to you guys too, Alison!