
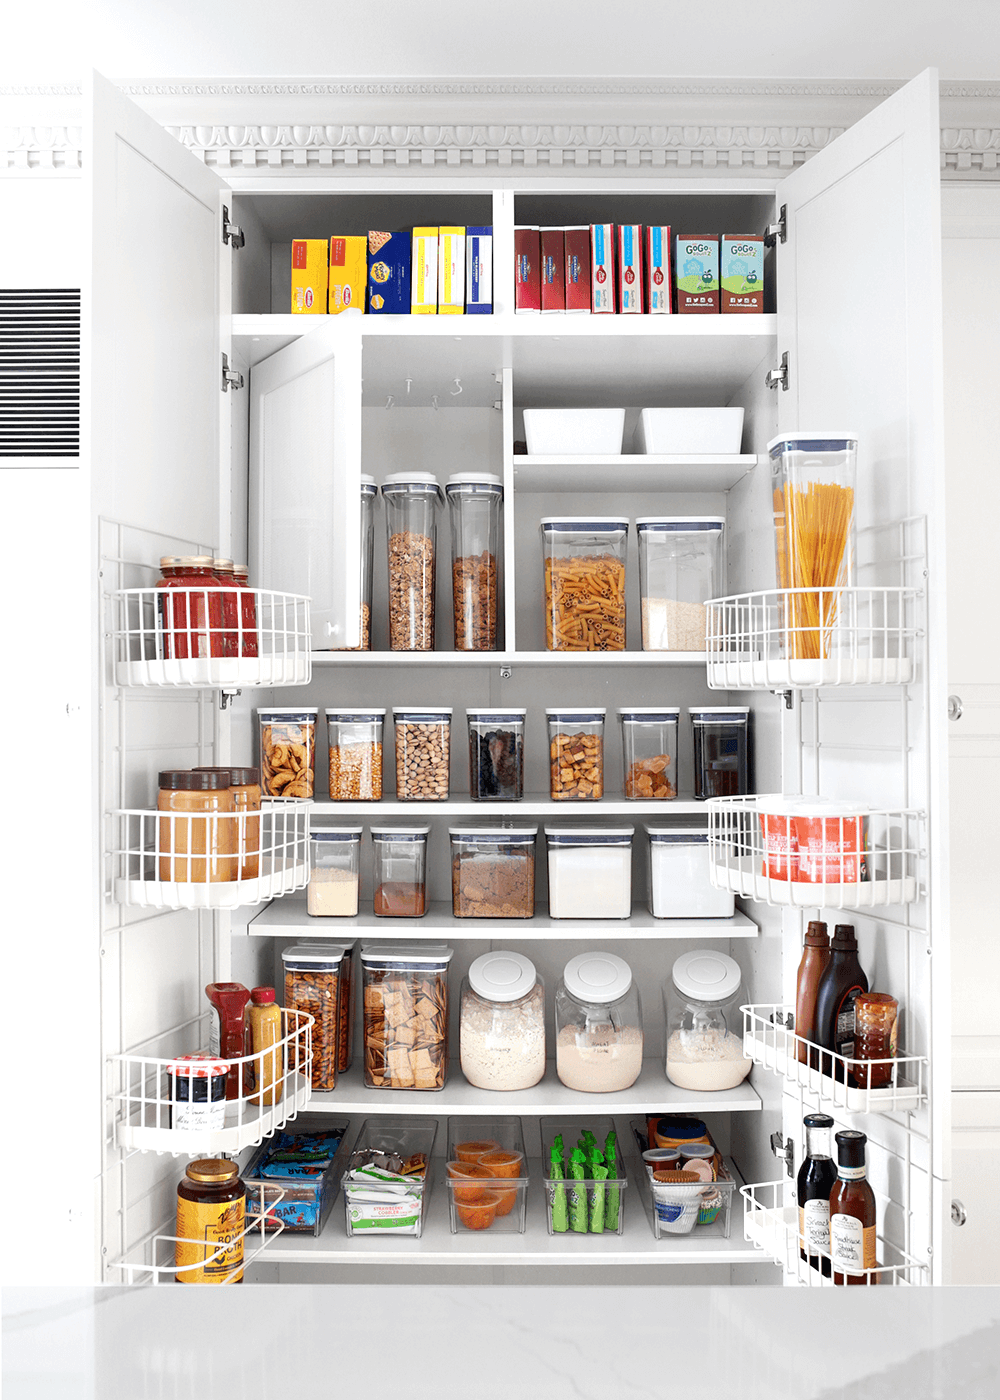
Ahh, it’s reveal day for Tara’s Pantry Makeover. I wish I could have captured the excitement in the air and the long exhale out we felt during this process. But maybe you can feel it by looking through the pictures? Pantry Peace. You can see everything at once, retrieve something easily, and put it back without having to dig or think. We’ve handled Tara’s pantry, so she has the bandwidth to handle the bigger, more uncontrollable parts of life. It’s one of the best gifts you can give yourself, in my opinion. And all the people said amen. Amen. To Tara, thank you for having me in your home and being willing to share it here.
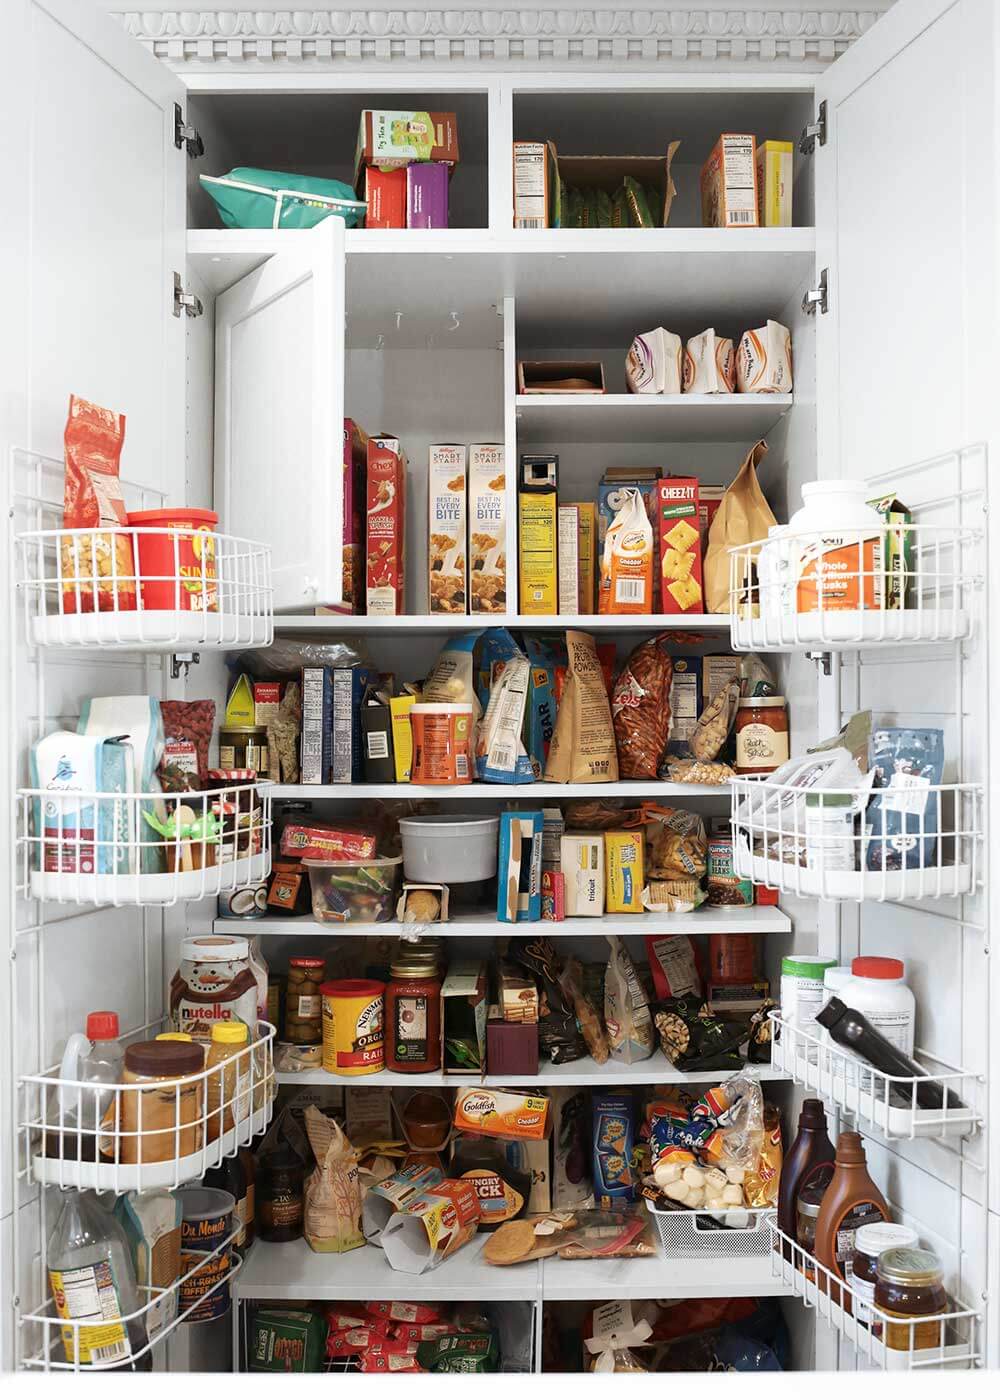
Before we dive too deep, let’s take a quick walk down memory lane with a before of Tara’s Pantry. Like so many pantries, it was overcrowded and hard to quickly find what you’re looking for. Items were getting lost and buried and going stale way too fast. Their pantry wasn’t working for them, mostly against them, adding unwanted frustration to their day.
Last week, we walked through Steps 1-6 in paring down Tara’s pantry. Head this way to read about it. Today, we’re wrapping up the process with Steps 7-10.
Step 7: Order the Pantry Supplies
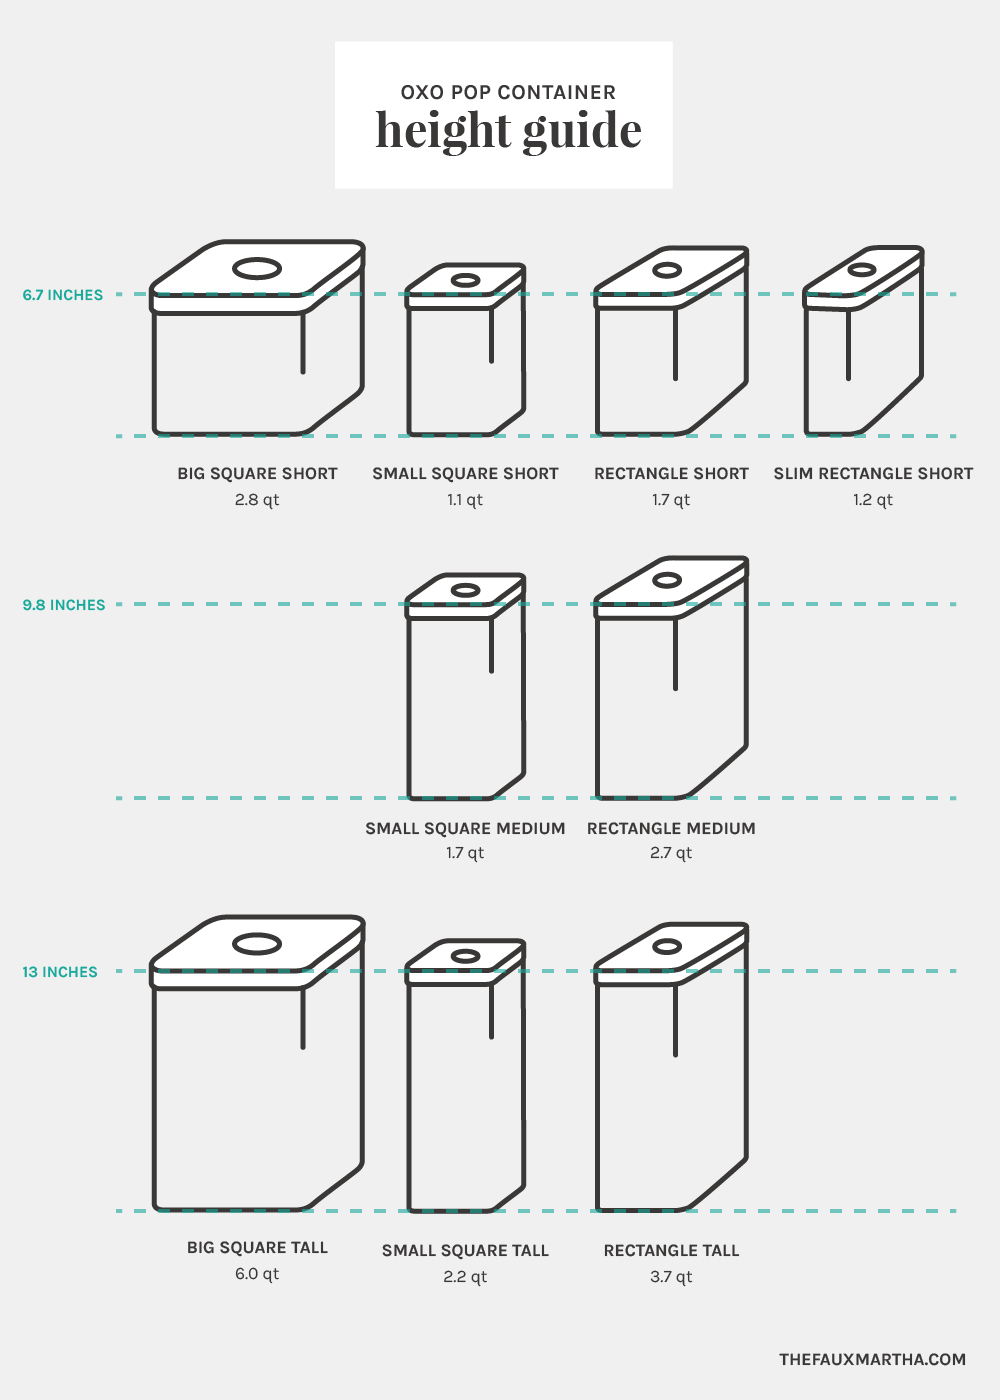
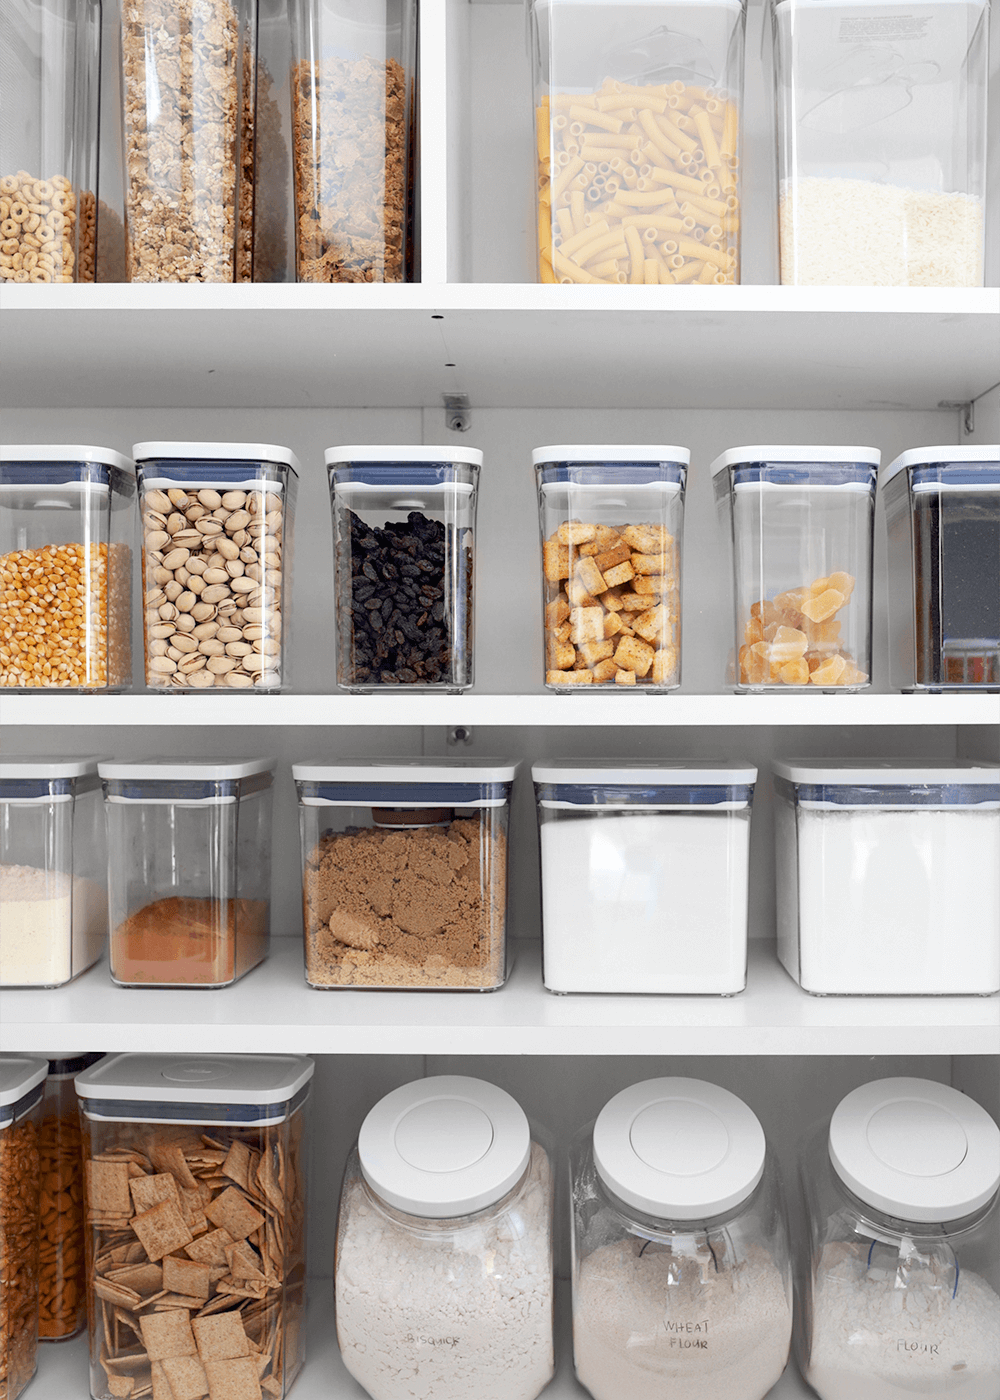
After deciding what items Tara wanted to stock permanently in her pantry and where, I pared the items to the best container to match both the pantry shelf height and the ingredient amount. I’ve used the OXO POP Containers in my pantry for years, so I’ve become an expert about what item fits best in which container. If you’re new to this system, you might find this to be the hardest part. To see everything we ordered for Tara’s Pantry, as well as all of the container sizes, download this list. OXO also has a great sizing resource post here. And, just in case you need a little extra guidance, I’ve created a little visual guide below so you can see which containers share the same height.
We also used these long clear bins perfect for deep shelves and corralling multiples, like snack bars. And this series of white bins that coordinate well with the POP Containers and come in a variety of sizes to store the overflow items.
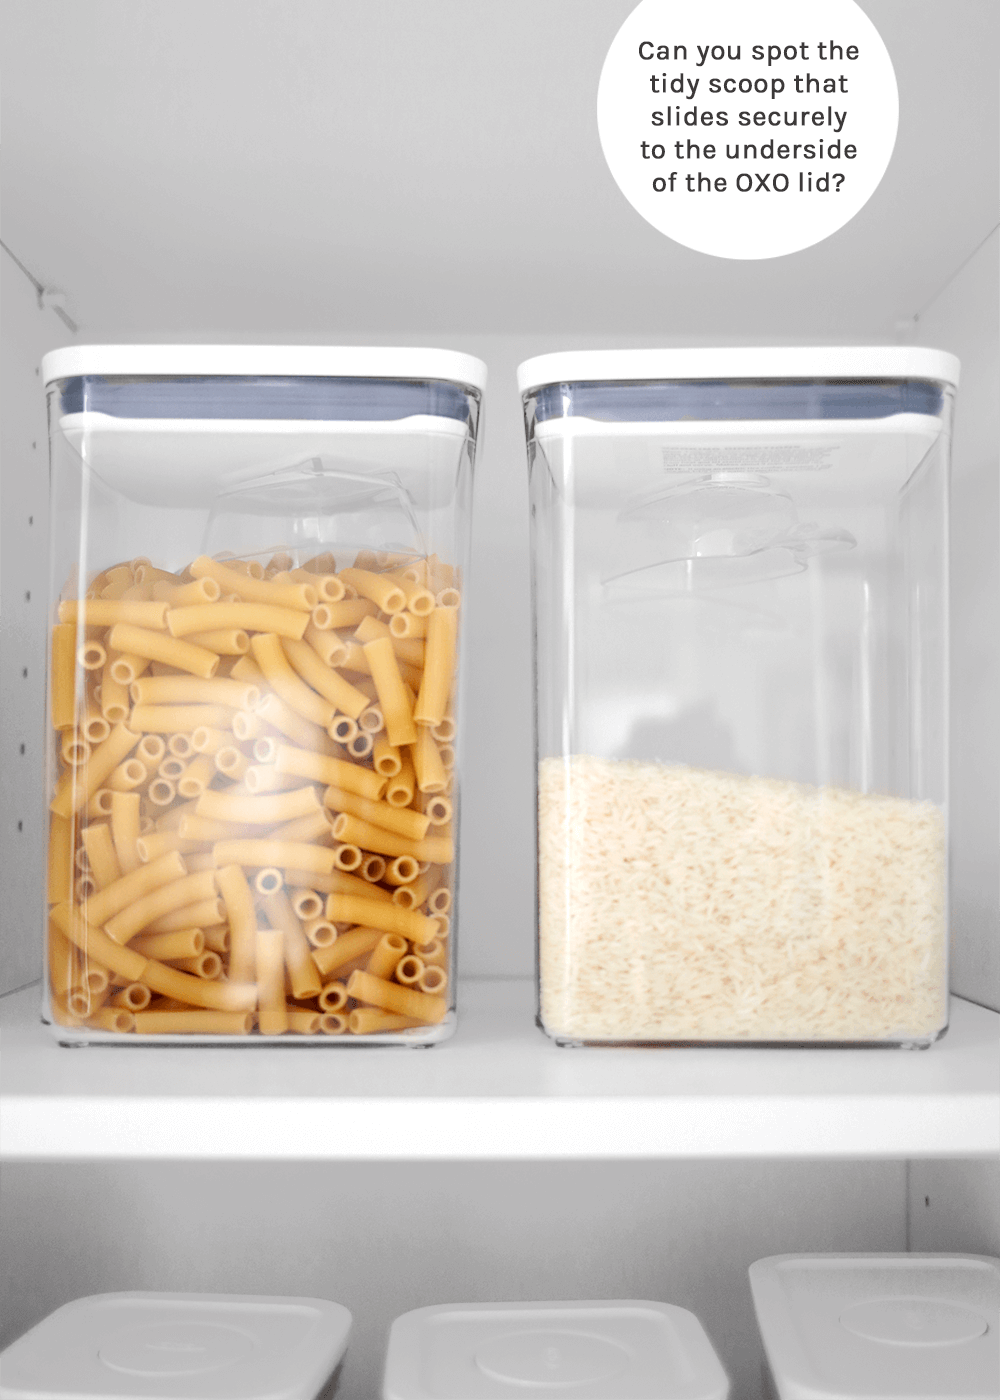
By the way, OXO just launched their updated POP Container line. It carries the same footprint as their previous line, so your old containers fit with your new ones, with a couple new sizes as well. The new lids are more sleek in design but have the same thick seal for freshness. They also created a line of accessories that slide or clip into the underside of the POP container, like brown sugar savers, scoops, measuring scoops, and sifters. So smart.
Step 8: Paring Down
There’s no one right way to pare down. You can read my gentle approach here, an approach that works well for my personality and for the pantry. Do what works best for you. Due to time constraints, we had to makeover Tara’s pantry in a matter of hours. Hours! Thankfully, we had an organizational plan in place (see here) with containers washed and at the ready, knowing what we were putting in each one. We pulled it off in 3 hours with 3 people. It was one part gentle, another part ruthless, plus a sliver of magic.

First, we started by removing everything from her pantry, placing it on her dining room table. A blank slate. Next, we placed the OXO POP Containers on the counter with the item that belonged inside the container. Then, we transferred the contents to the containers, using a wipeable China Marker to label when necessary. This is one area I wanted Tara to be able to customize with her own labels or handwriting once I moved out. I love these 1/4″ vinyl black letters or these new labels from OXO.
Step 9: Putting it Back Together Again
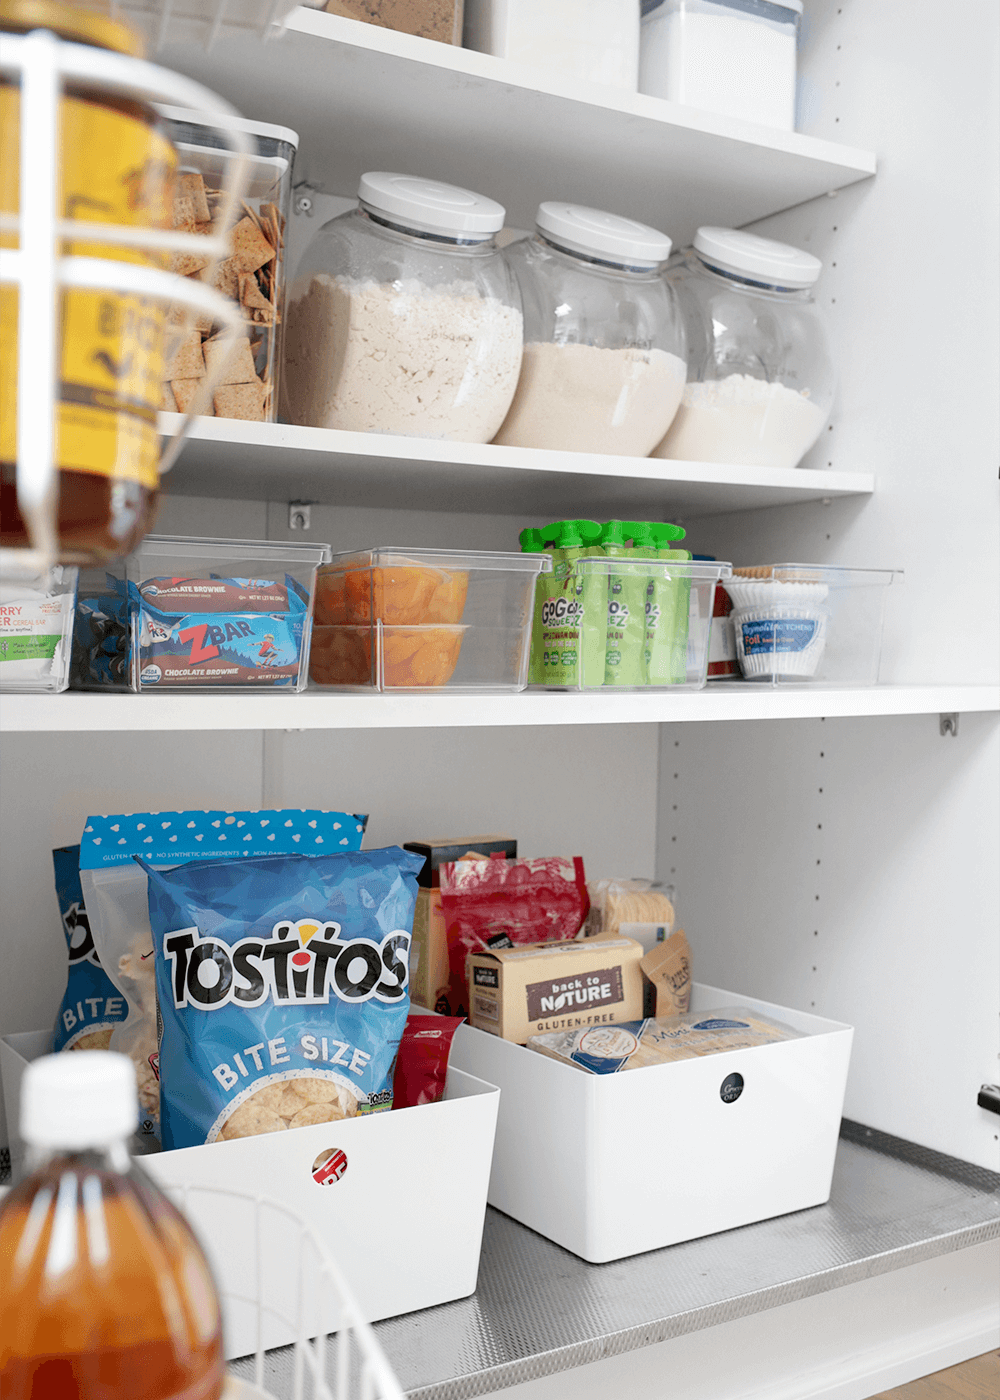
As Chief Pantry Peacemaker, a title I just gave myself, I executed the organizational plan, placing the containers on the shelves, making live edits as needed. The shelves looked as good as they function. With the containers in place, we moved on to the overflow areas, adding things like the extra cracker boxes and applesauce, etc, to a large bin down low and up high, to the hard to reach shelves that don’t need to be accessed on the everyday. We added the cans of beans, the jars of tomato sauce, and boxes of mac and cheese to the Lazy Suzan in the corner cabinet, stacking 1-item deep, like a grocery store.

This got Tara’s pantry to a really good place. However, there were things left on the dining room table she had to handle. Some things were an automatic giveaway or throw-away (expired). But there were other things she realized she wanted to keep. So, she made a list of additional containers to buy. The good news—we created plenty of space in her pantry to store a couple extra items as needed. I, too, recommend doing this process in layers. Your pantry is like an onion. Once you peel back the top layer, you can see the layer underneath. It’s to be expected. To the remaining leftovers on the table, I recommend trying the 3-month rule. You can read more about it here.
Step 10: Edit
On my way out the door, lingering, as usual, I reminded Tara to edit her pantry. Notice the new problem areas that pop up, and create solutions around them. If something isn’t working, it can most likely be solved with a simple solution. It’s really hard, no, impossible, to get everything right all at once—in the pantry and in everyday life. Let it be.
OXO Pop Container Giveaway
Thanks for tuning into Tara’s Pantry Makeover. OXO is also giving away a makeover to you! One lucky winner will receive a 20-Piece POP Set and all 8 of the new accessories! To enter, sign up below to receive the OXO newsletter.


The “not-Oxo” bins for flour – what are they?
Those are also OXO POP containers in the 5qt variety.
Thank you for our new pantry! We have continued to keep the organization and the whole family is a part of it. Just as you advised, it is easy for the kids to grab snacks and especially easy for them to grab the ingredients for their baking weekends. I find it so simple to do the quick inventory before heading off to the store. My goal is to now tackle every cabinet to streamline the whole kitchen. Thank you!
Tara, you guys were rock stars! I love getting the updates from Kimberly. Thanks for letting me into your home and share you beautiful kitchen. Let me know if any problems areas pop up and I’ll help troubleshoot if I can!
I love Melodie’s idea of doing a freezer organizing post! Both for the fridge freezer and the stand alone upright freezer. Keeping them organized is really difficult for me.
I really enjoy the organizing posts, would you consider doing a freezer post. The fridge freezer can be a puzzler!
The shelving unit on the doors, where is it from? I like how they seem to have trays on the bottom instead of just wires.
Hi! I just asked Tara, the homeowner. They were there when they moved in over a decade ago, so not sure!