
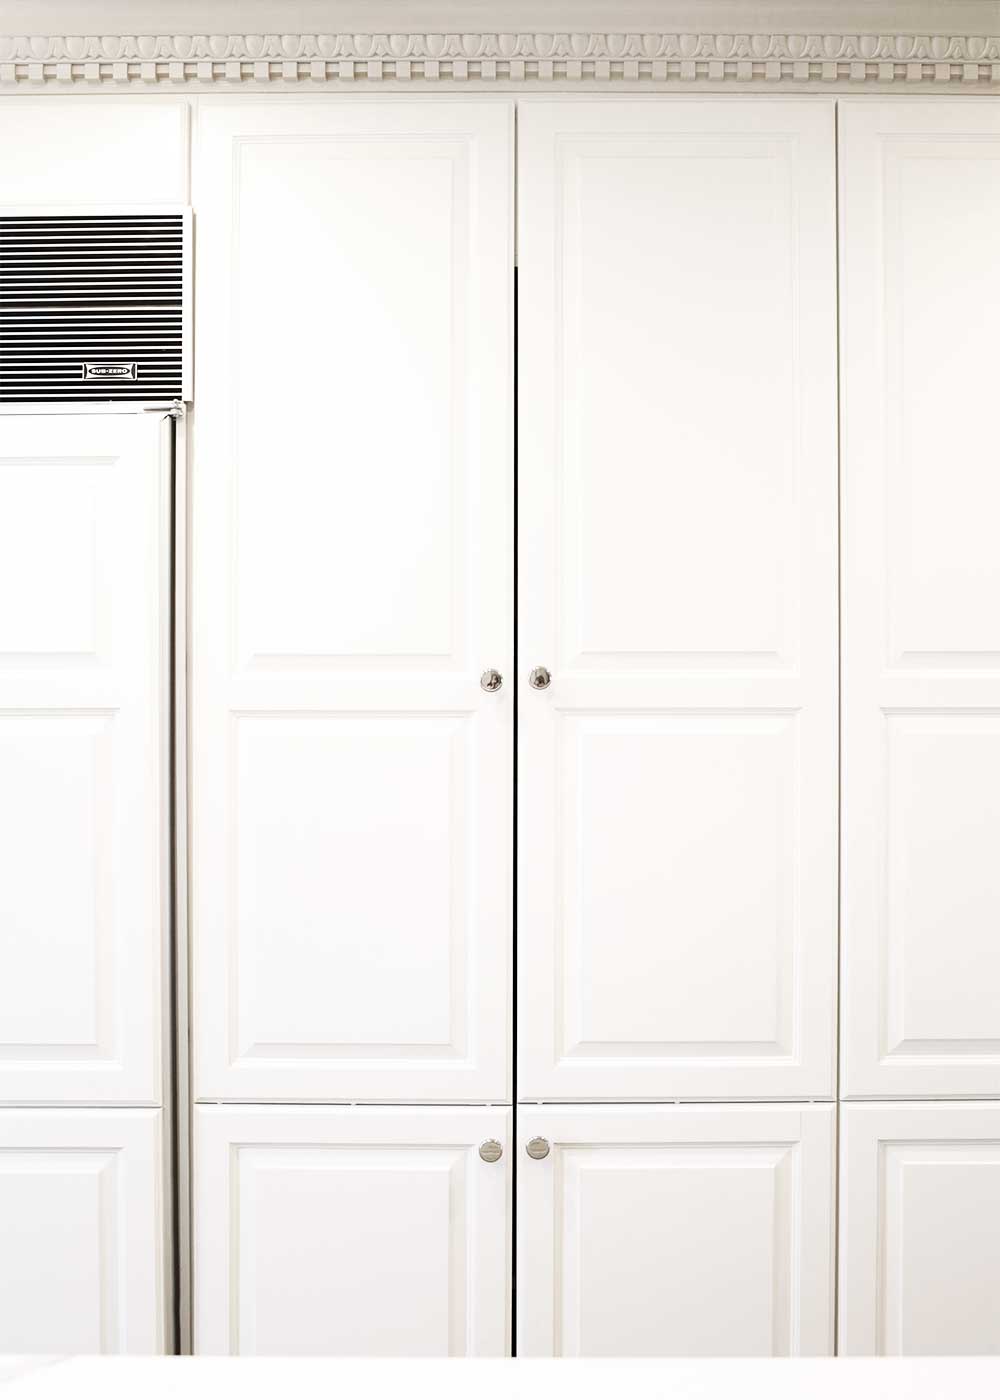
There’s nothing quite as intimate as opening your pantry doors to a group of strangers on the internet. When I first shared the before of mine a couple of years ago, I would have preferred to open my underwear drawer instead. Today, another brave soul is opening wide her pantry doors to the internet. I’d like to introduce you to Tara and her pantry. It’s a very familiar pantry to me, a whole lot like the one I grew up with and the one I created as an adult. Most of us think the pantry is a problem exclusive to our home. Well, maybe we shouldn’t think too highly of ourselves; it’s a pretty universal problem. Pantry items look great on the shelf at the grocery store and not so great at home. It’s to be expected. It’s also to be expected that the little cardboard flap on the top of the box won’t keep your items as fresh as promised after opening. So we say, “Why bother?” This is a mindset that carries over to the pantry. It’s a beast too crazy to control. Or maybe it’s not?
Tara was incredibly kind to let me and The Minimalist Kitchen Course into her pantry for a good old fashioned makeover. As someone hesitant towards change, I’m always a little nervous to be directly involved in this process in someone else’s kitchen. It’s an intimate space. Tara not only embraced the change with a big smile, she helped a friend makeover their pantry, too. She’s a believer. I took Tara through The Minimalist Kitchen Course, a course I designed to create a pared-down, user-friendly kitchen custom to your kitchen, not necessarily my kitchen. You can take this free, 4-part course here. Here’s how we did it.
Step 1: Define the Objective
Tara’s objective was to end up with a pared-down pantry where everything could easily be found and seen. She also wanted to cut down on buying duplicates and waste from pantry items going stale. Both Tara and her husband work, so they needed the pantry to work efficiently for them, something they’ve successfully integrated into other parts of their home. They also have two children in middle school who love to bake. Tara wanted to make sure the pantry was conducive to her kids as well, giving them the ability to make their own lunches, grab their own snacks after school, and easily access the baking items (and put them back too).
Step 2: Take a Space Assessment
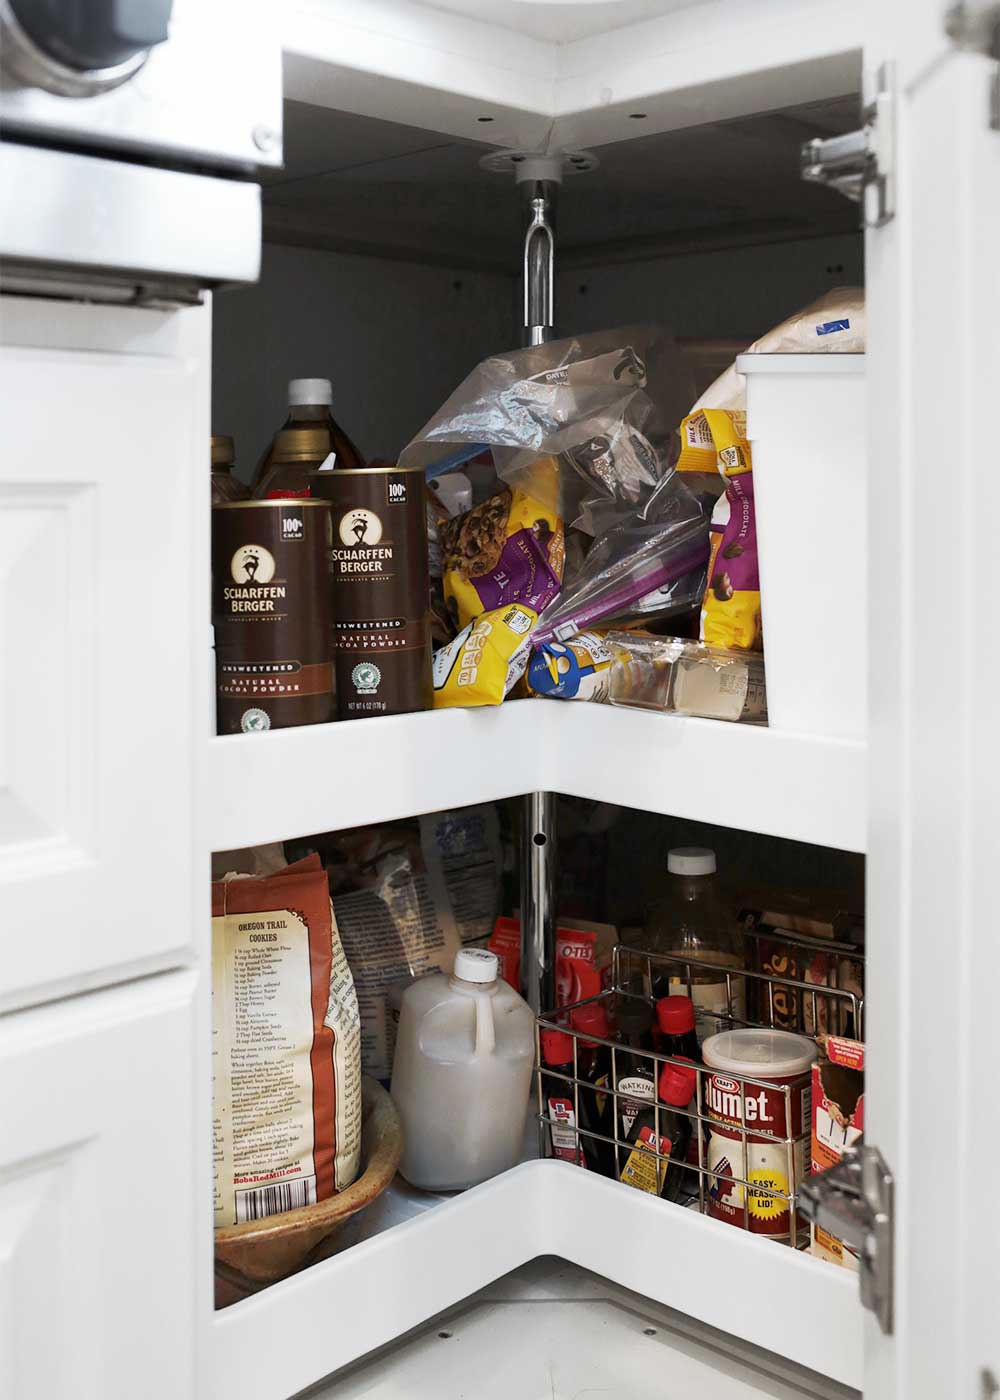
Good news. Tara has plenty of great pantry storage, and it’s mostly confined to one area, so she’s not hopping all around her kitchen to gather ingredients before cooking. They also have a Lazy Susan corner cabinet across the kitchen next to the stove used to store pantry items. When starting on her pantry makeover, we didn’t have to add any additional storage. If you find yourself needing more pantry storage, check out this post on how to add more without a remodel.
Step 3: Identify Problem Areas
- Crackers and chips going stale too fast.
- Things get lost on the deep shelves.
- Baking items hard to access in the Lazy Susan.
- Hard to find things.
- Buying duplicates at the store.
- Having too much of one thing and not enough of another.
- The special occasion pantry items were creeping into the everyday.
Step 4: Take Inventory
Tara took inventory of her kitchen using this worksheet. This allowed her to decide which items she wanted to stock permanently in her pantry, thus giving them a permanent home. It also allowed her to see the things she no longer wanted to keep. We then were able to create an informed initial order for the New OXO Pop Containers we’d be using to makeover the pantry.
While it may feel too confining to permanently stock certain pantry staples in your kitchen, you’re probably already doing it. That’s just what Tara confirmed. They were always buying the same type of crackers, cereals, flours, etc. To all of those things, we wanted to give them a permanent home to increase visibility, preserve freshness, decrease decision making at the store, and tidy up.
Step 5: Take Note of Recipes and Hobbies
I’m a huge advocate of preserving your personality and tastes (and your family’s too) in the pantry. There is no one size fits all solution for every pantry. I had Tara make notes of the recipes they most often make, the ones that dress their dinner table on a weekly basis. We needed to make sure to preserve the ingredients needed to make those recipes and look for overlap in ingredients. If a lot your everyday recipes call for rice, let’s say, then stock enough rice for a couple of weeks to accommodate those recipes.
As for hobbies, Tara’s daughters love to bake. And they have a lot of baking ingredients. Our goal wasn’t to get rid of the robust baking supplies. Instead, we needed to save enough space for the baking items on a shelf the girls could easily access, not the lazy suzan that they found hard to access. My favorite saying is from Leonard Koren. He says this, “Pare down to the essence but don’t remove the poetry.” In Tara’s home, the poetry looks like a plethora of sprinkles, chocolate chips, and cocoa powder. Let it be.
Step 6: Create a Rough Organizational Plan
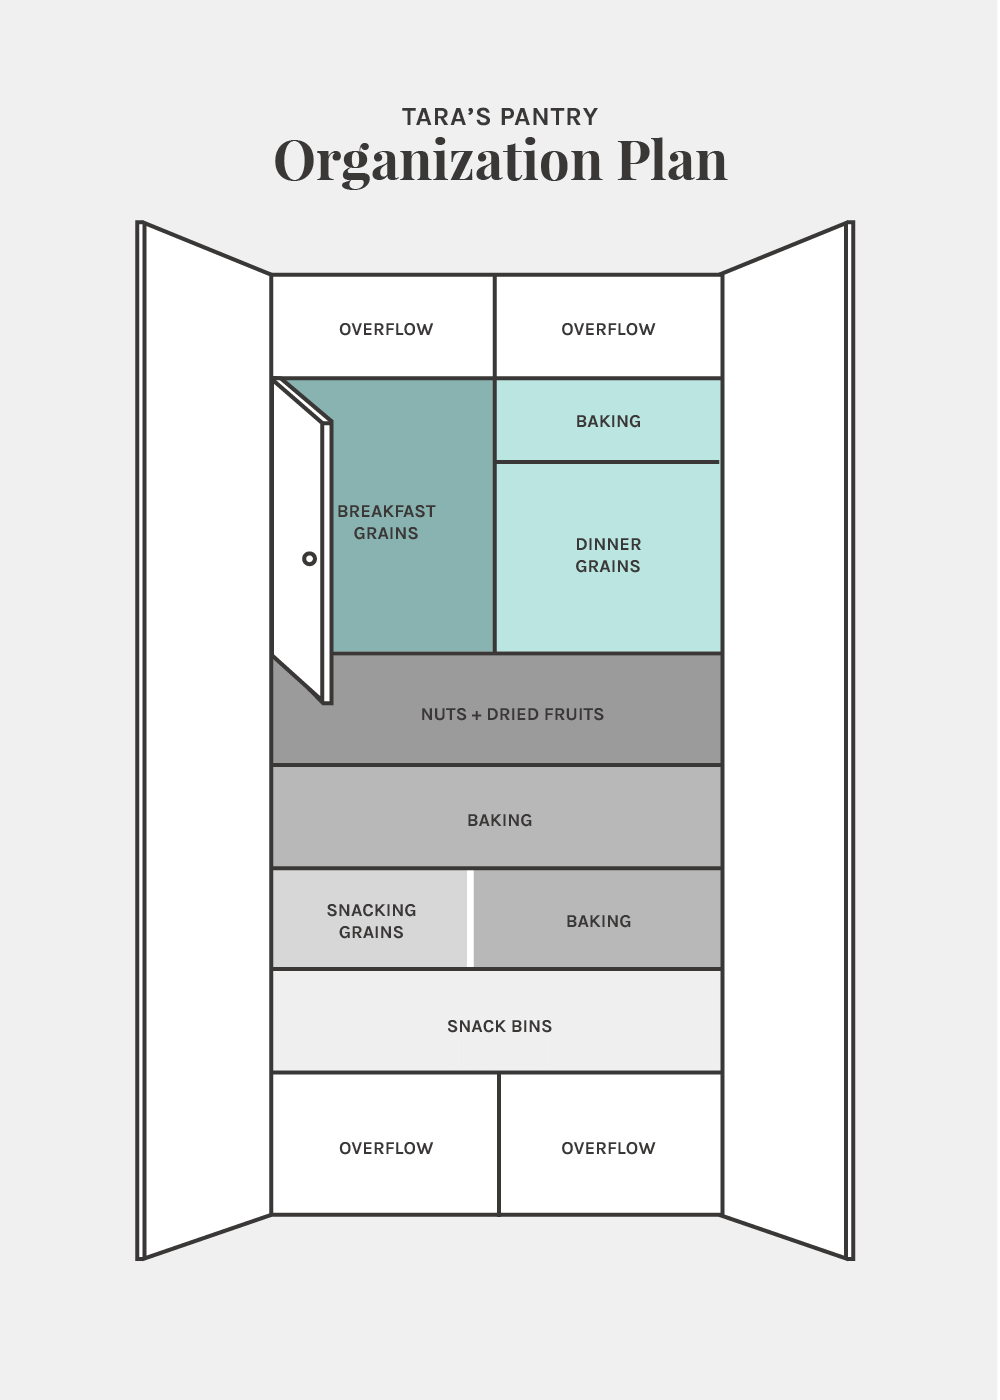
The organizational plan isn’t in the course, nor is it necessary, but you may find it extremely helpful. A common question I got during the course—how do you organize your shelves? This may be incredibly intuitive for some and rocket science for others. I like to think of pantry organization in these general categories:
- Breakfast Grains
- Dinner Grains
- Baking
- To-Go Snacks
- Chips and Crackers
- Nuts and Dried Fruit
- Canned Goods
- Nut Butters
- Overflow
Note: overflow is for back-up supplies. I like to keep extras of things we go through quickly so that I’m not constantly at the grocery store. With that said, I suggest designating space, either high up or down low, for the overflow. Using this method, we want to give everything a home. If it doesn’t have a home, it will quickly make one in the common spaces, and usually, it will make a mess.
Make your list exclusive to your pantry, using my list as a guide. Thinking about pantry ingredients in these categories helps not only to group similar items within the pantry, but also helps to give you answers about where to put what.
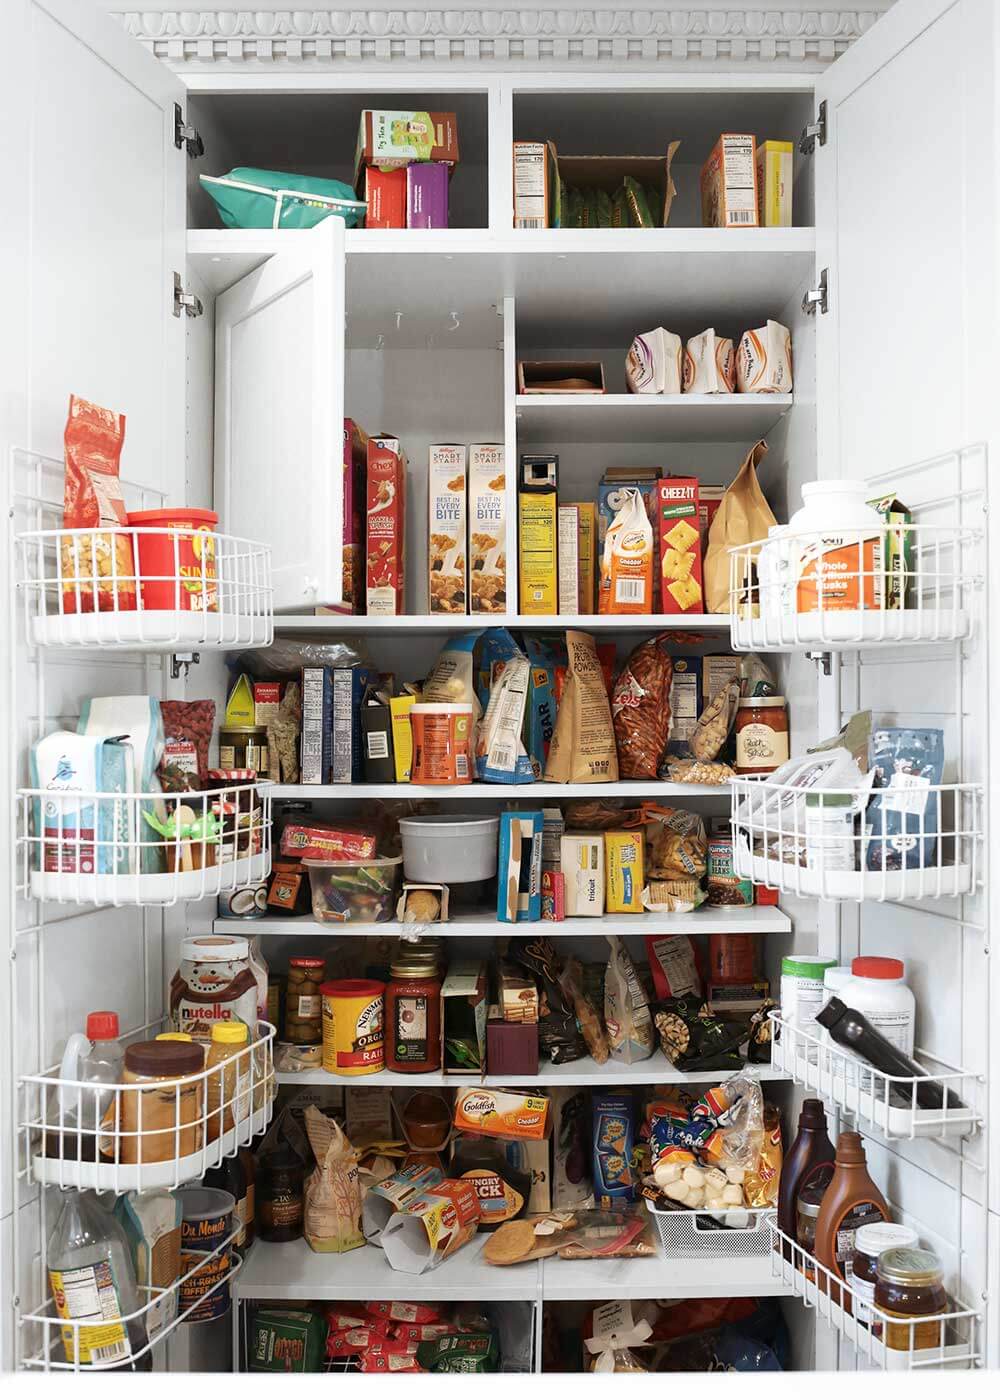
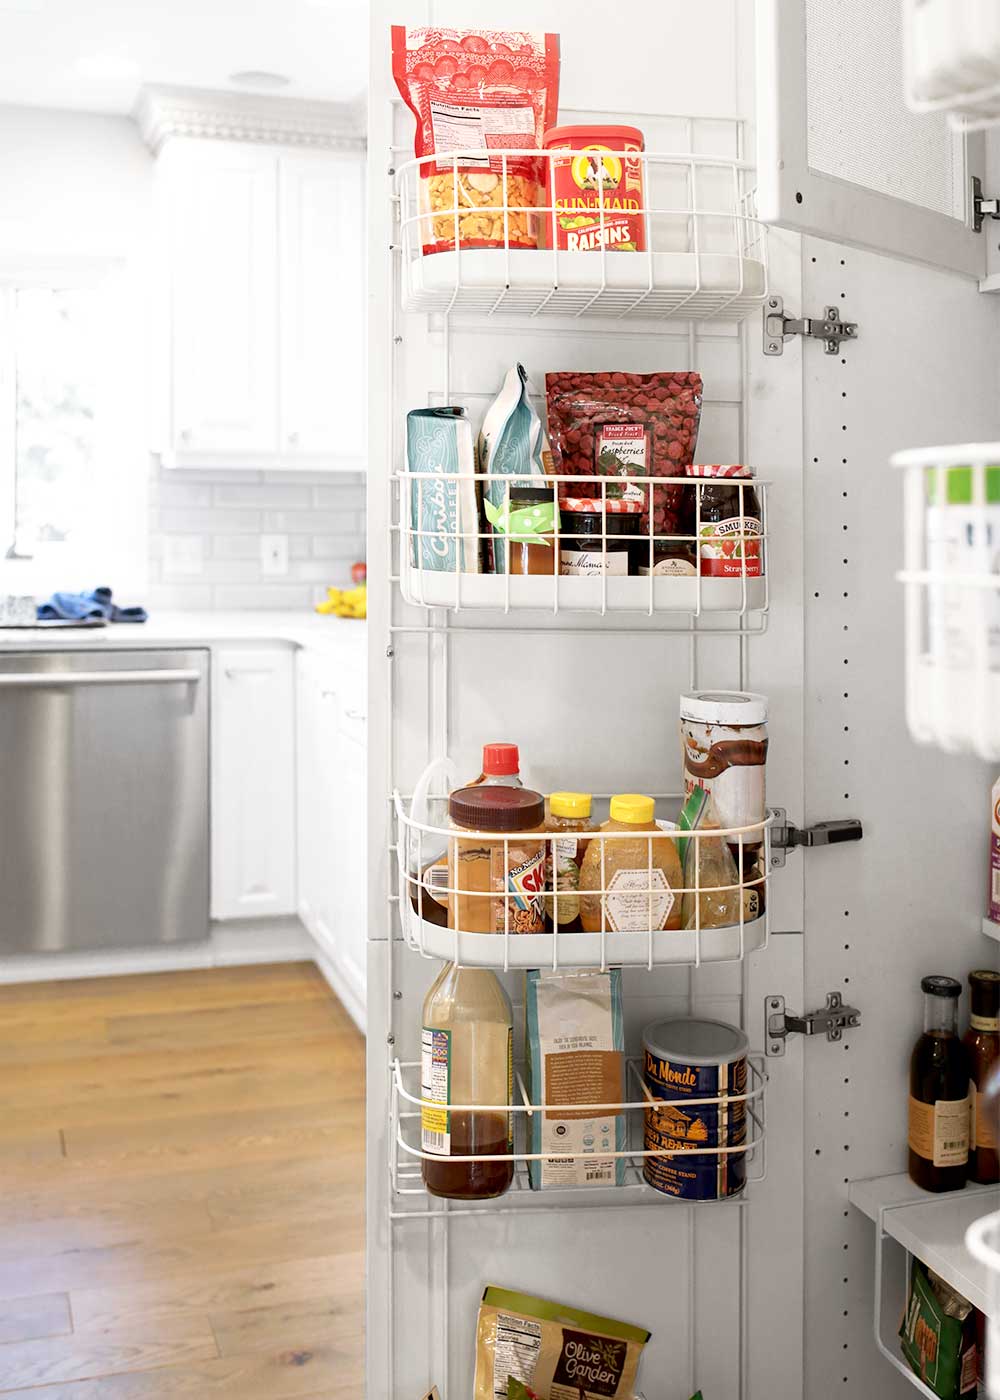
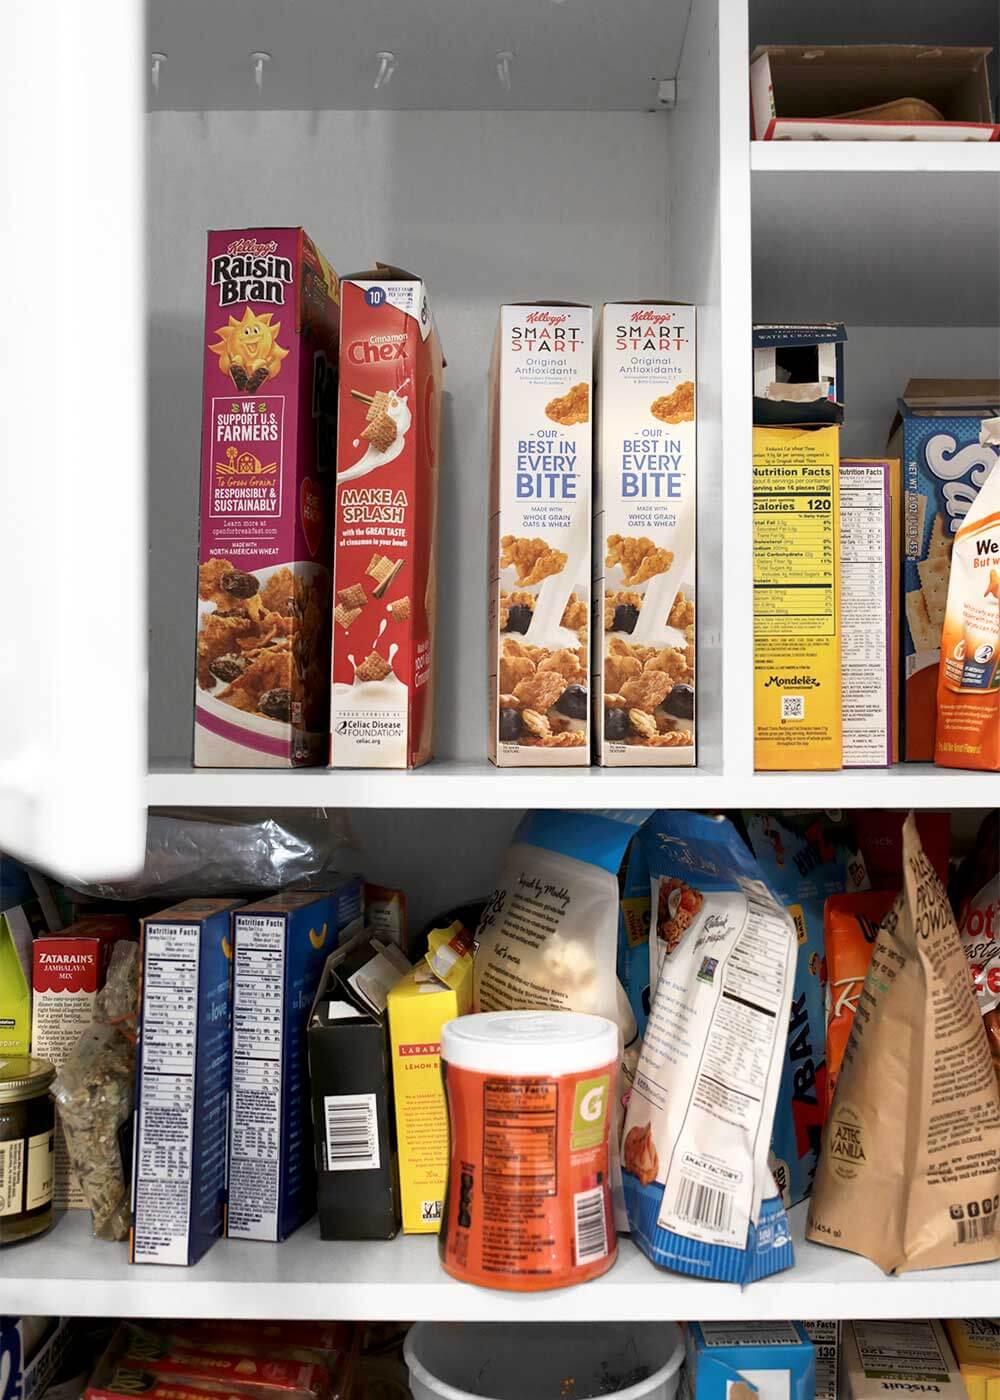
For example, Tara has one deep shelf. Deep shelves are known for being troublemakers. Things get lost way in the back. So, we honored the nature of the deep shelf by planning to add deep bins to store on-the-go snacks and lunch items. She also has a tall square shelf with a door on it, probably once used to store produce. The height makes it the perfect spot to store tall containers of breakfast cereal. We also knew we needed to save a shelf for middle schoolers to be able to reach the baking items. Already, we’ve begun to organize the pantry given the natural parameters of the pantry and the parameters of the people using it. Now that we have an informed start, it’s not so hard to fill in the rest. With that said, prioritize the necessary first and then fill in the rest. And if it helps to sketch it out first, do it.
See Tara’s Kitchen all put it all back together again. It’s so happy!


As one who benefited greatly from the Minimalist Kitchen course, but had issues with organization, I am delighted to see this post. I did come up with an organization system at the time of the class, and have been very happy with it. Life is so much easier with a well-organized pantry! My pantry area is small, so I have a separate shelf unit in our garage where I keep my extras and appliances I rarely use. I would recommend the Minimalist Kitchen course to anybody. It’s the most significant class I’ve taken.
I love before and after stories. Looking forward to it. 🙂