
If I ever share another home DIY, you can trust that it’s easy and foolproof. Because Kev and I are the least handy people on planet earth. Now, about this DIY mirror frame. A couple days before moving into the house, I happened to stop by while they were glueing mirrors to the walls of the bathrooms. The mirrors! Did we talk about the mirrors?! Our lack of budget by that point probably left no room for talking about mirrors. But there they were. Glued to the wall. Frameless and unfinished.
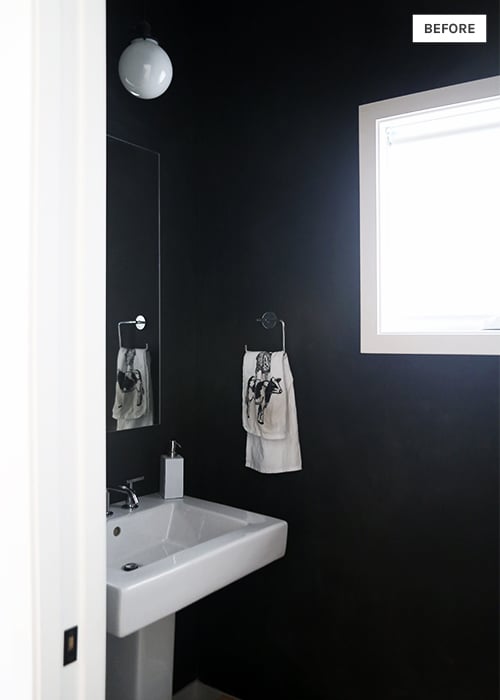
A couple weeks after moving in, I painted the powder bath chalkboard black and thought I’d draw a frame around the mirror like this pin. It’d be inexpensive and add that pop of quirk I like to have in every room. Turns out the pin was way cooler online than the real life application in our bathroom. Back to the drawing board.
I found a couple places online that sold both ready-made and custom stick-on frames. I wasn’t in love with the options, but I loved the idea of a stick-on frame. It’s not as tacky as it sounds and felt like a much safer adhesive option compared to the permanent glue holding those mirrors to the wall. And then it hit me. Stikwood! We almost did a wall of it in our house, so I was familiar with the product—a thin, lightweight piece of wood with adhesive strips on the back.
The rest is history. It came together so easily and at the hands of a non-DIYer. Here’s how.
How to make a Mirror Frame:
TOOLS: Stikwood, Measuring Tape, Cutting Mat, Utility Knife, Wood Glue
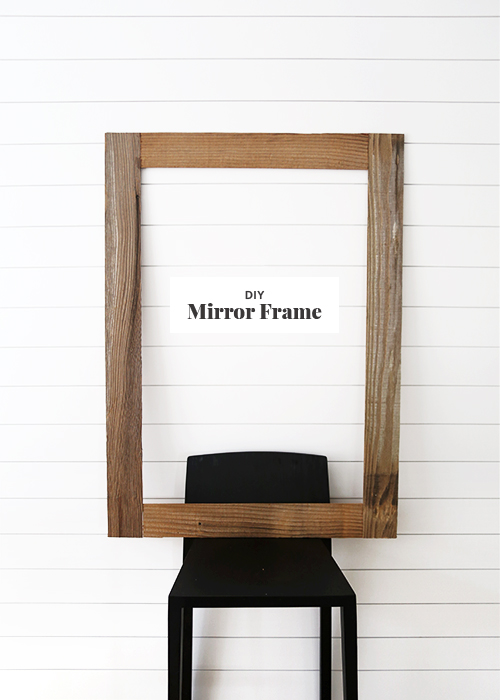
1. Order your wood. We went with Reclaimed Sierra Silver Stikwood. It’s worn looking with a warm tone.
2. Measure your mirror. To come up with the frame measurements, make sure there’s about 1″ overhang on all sides of the mirror. You’ll also want to make sure there’s about 1/8″ clear space from the edge of the board to the start of the adhesive tape. (But why? The back of the frame will reflect about 1/8″ onto the mirror. You’ll want the wood reflecting, not the adhesive strip.) Draw pencil cut lines on the back of the wood.
3. Decide on how to handle your corners. If you want a mitered corner, you’ll have to hop over to a more involved tutorial. That’s out of my league. I decided to go with a butt corner (two long slats of wood glued to two short slats at a perpendicular angle) for ease. In this case, the butt corner went with the informal but clean look I was going for.
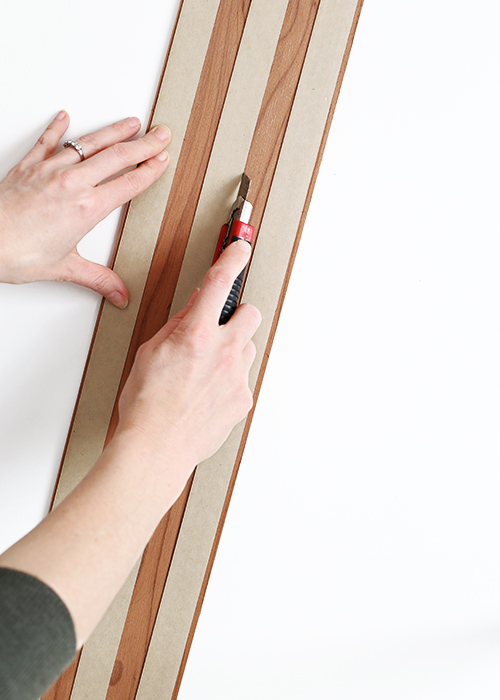
4. Trim out your wood. I went with a 3 1/2″ width frame to give the mirror a little more impact. Using a cutting mat, trim the wood with the utility knife. The wood is thick and strong in the center. It’ll take a couple cuts to get the wood trimmed. I imagine an electric saw would be much quicker, but we don’t own one.
5. Glue the mirror together. I started by glueing two separate angles together, letting them dry, then glueing the entire frame together. I used heavy books on top and at the angle to hold the frame together. No clamps. Nothing fancy.
6. Once the frame is completely dry, it’s ready for hanging. Remove the adhesive strip. If the strip is too wide for your application, cut the adhesive cover before removing to the desired width and only peel off that portion. If possible, use two people to hang—one to guide and the other to hang and press.
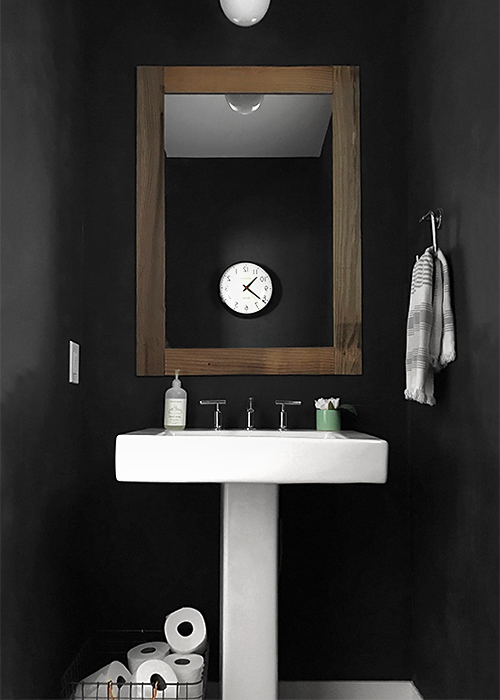
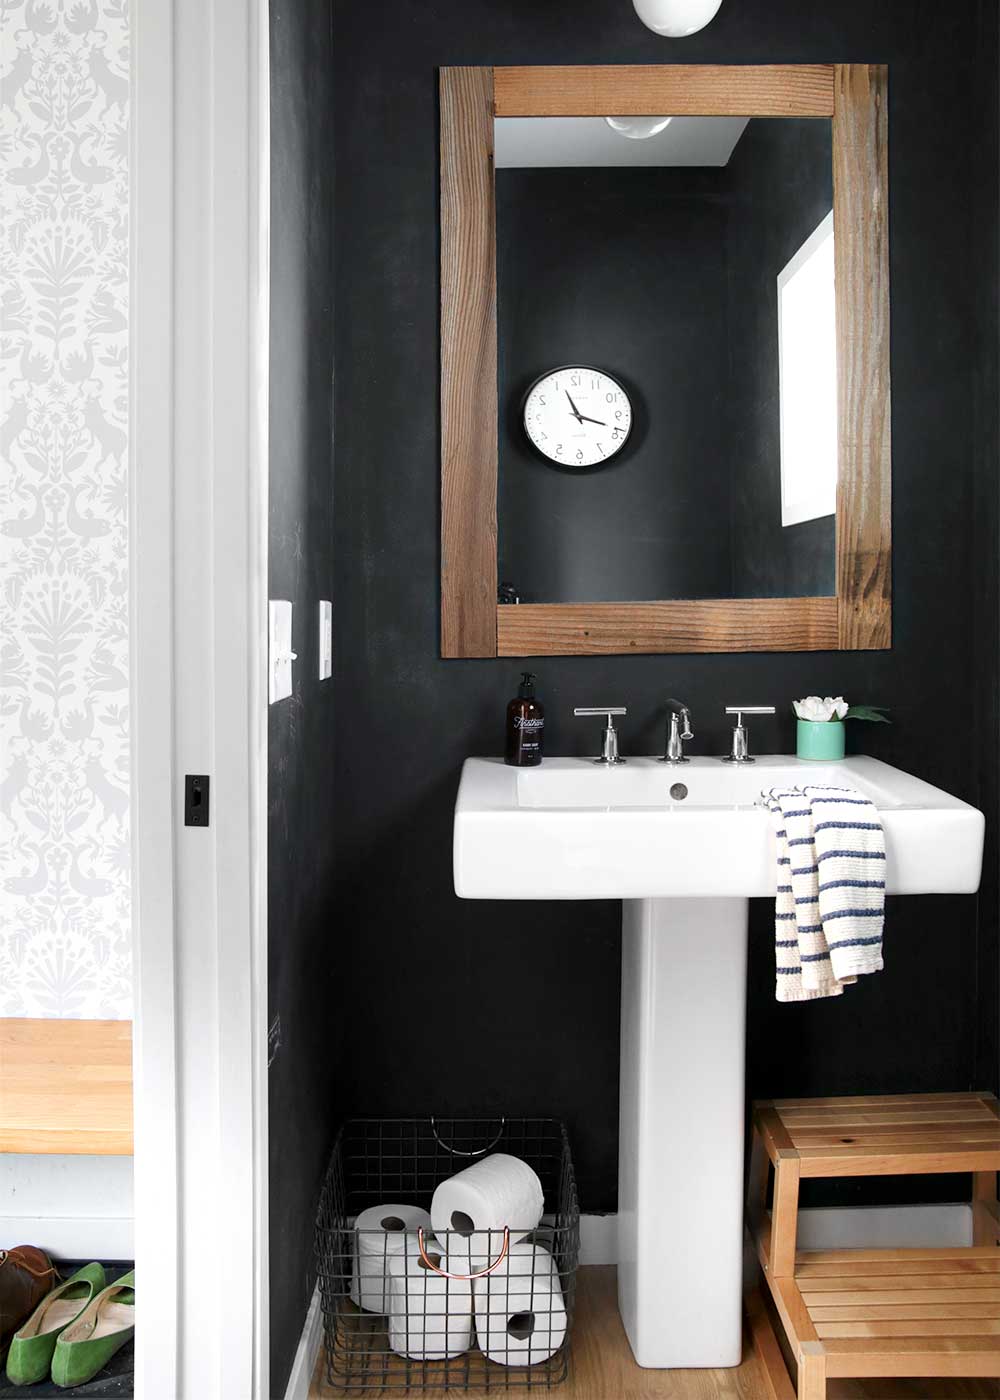
About the rest of the tiny powder bath. We only use the chalk walls to measure Hal’s height. I finally decided to erase the backwards written quote I drew. When reflected in the mirror it read, “Oh the places you’ll go. —Dr. Seuss.” My bathroom humor is a bit of an acquired taste.
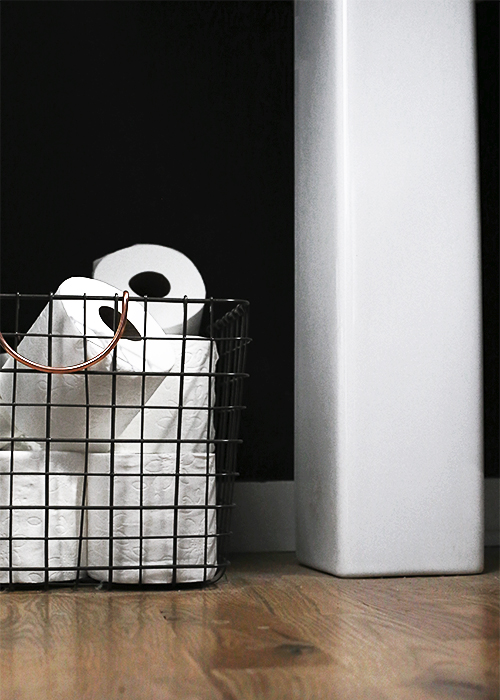
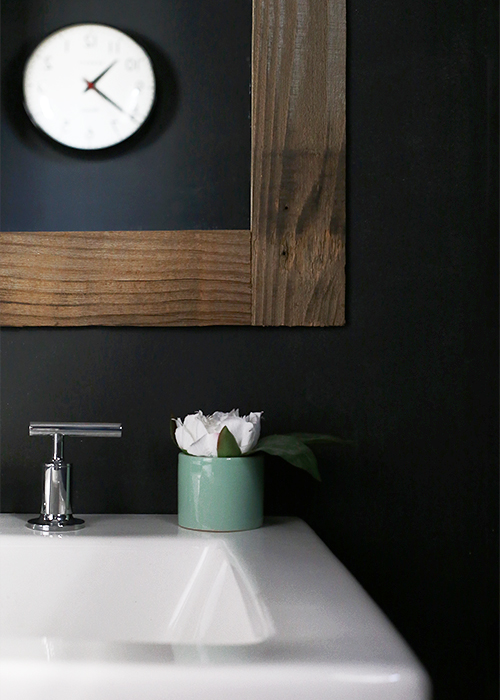
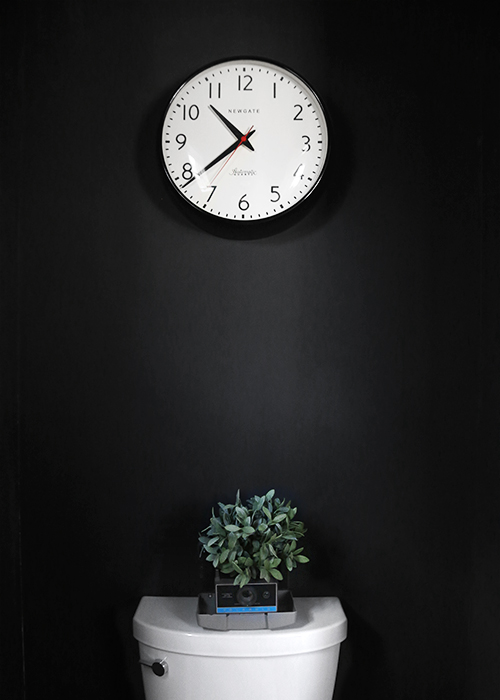
For functionality, I added a black wire basked with a copper handle to house the extra toilet paper. To the back wall, I hung a clock and added a vintage polaroid camera acting as a vase. There’s the pop of quirk!
I know you’ve been wondering—what does her powder bathroom look like? Now you know. It’s minimal, with warm wood tones, a pop of quirk, and an easy DIY mirror frame.
Sources
Reclaimed Sierra Silver Stikwood* | Pendant (oil rubbed bronze/ 6” opal ball shade/ black cord)* | Faucet* | Towel | Clock* | Polaroid Vase (thrifted) | Wire Milk Crate | Black Chalk Paint | Wallpaper | Lavender Soap


Is it possible to just put the entire stikwood flush with the mirror? Why does there need to be overhang?
You can totally do that if you don’t mind shrinking the reflective area of your mirror. I wanted to keep my mirror as large as possible, so I went with an overhang.
I usually don’t like dark walls, but I love this. It’s clean, and minimal with a touch of rustic. I found this great wood shop near my place, and will definitely try this out once I find the wood I like -I have some mirrors around the house with no frames.
What was your total DIY cost for the stikwood to frame the mirror? Trying to compare pre-framed mirrors for our new farmhouse but this does look easy!
This is such a cute bathroom! I love the way you decorate! I have a quick question- are you still planning to do a post to share the layout of your home? Or would that be something I could beg you for? We are in the process of looking to build and I think I’d really love at least a similar layout/feel. Just thought I’d give it a shot to check.
It looks great, congrats! 🙂
One quick question, didn’t you have a whole post about a Spices Cabinet (DIY)? I was sure you did and have been searching your website like a crazy lady, but couldn’t find it anywhere.
Hey Sara! I did this DIY from Almost Makes Perfect.
Love the rustic look! Where did you get the basket?
It’s from Target. I think they still have them!
What a great way to “frame” the mirror. 🙂 Quick question: Which brand is your pedestal sink? I didn’t see it in the Sources list. Thanks you so much!
We got the sink from All Modern. It’s made by Toto but no where to be found on their site anymore ?! I’ve found the white on plumbtile.com. I’ve seen it in beige on a couple sites but the white seems to be harder to track down.
Ok. Thanks! I did some searching and it looks like Toto discontinued it. 🙁
Gorgeous frame!
Kari
http://sweetteasweetie.com/