Grab a glass of wine or a cup of coffee and your favorite spot on the couch, the spot that leans in. I wrote a novel on how to make really good homemade pizza. It’s quite simple once you get the hang of it and collect the necessary tools. But after making pizza in three apartments, a house, and two states, I’ve come to recognize the amount of nuances in making pizza—a novels worth. We’re going to talk about the essential tools for making pizza at home, how to make a good dough (plus some for the freezer too), how to assemble the pie, plus some general pizza making tips. I’ve included step-by-step pictures as well as a video. If you want this to be your thing, then lets make it your thing.
Pizza has always been an important meal in my life. Growing up, we ordered thin crust, extra-cheese pizza from Pizza Hut on Friday’s and gathered around the living room to watch TGIF. Three years ago I inserted that same ritual into our grown-up lives with homemade pizza. I knew little to nothing about making pizza at home. In fact, I remember the first time I sent a picture of a “good” homemade pizza to my sister. There were plenty of “bad” ones prior to. The crust had charred bubbles. The pizza was round but irregular enough to look authentic. I was so proud. Early on in my pizza making journey, I landed on 101 Cookbooks Neapolitan-style dough. Crisp with a short chew and plenty of flavor. Two summers ago, I went to a pizza party at theZoë François’s house. That’s where I gathered techniques for making good pizza at home. Zoë is a magician and has books to prove it. It was there that I learned to toss pizza and use a steel instead of a stone. Make no mistake, making really good pizza at home is an art. Thankfully, I get the opportunity to hone it every Friday(ish).
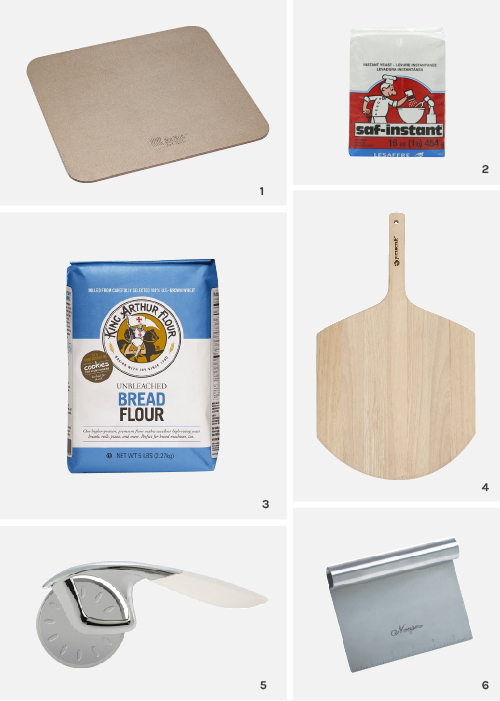
Instant yeast is just as it sounds, instant. It doesn’t need any activation. It, too, is nearly fool proof. Are you catching a pattern? I buy a bag of this from Amazon and store it in the fridge for at least a year, probably longer. Before switching to instant yeast, I ruined so many doughs in the yeast-proofing stage. This is a no-brainer purchase.
This type of flour has a higher protein amount compared to all-purpose flours. It yields higher lifts and longer gluten webs to the final outcome. Since we make pizza regularly, we keep this type of flour in our pantry. The recipe below calls for quite a bit of flour. You’ll wipe out the bag fast. If not, you can store it in your freezer.
If there’s one thing you can skip, it’s this. A large knife will do. But as you move forward in your pizza making, this is the best way to cut a pizza and keep everything in tact. When using a knife, the cheese tends to grab on for dear life.
I use my pastry bench for everything from scones to pizza. The dough we’re working with is on the wet side. We want to add just enough flour and no more. A pastry bench is a perfect utensil for both cutting and moving the dough around the work surface. No additional flour needed.
Make the Pizza Dough
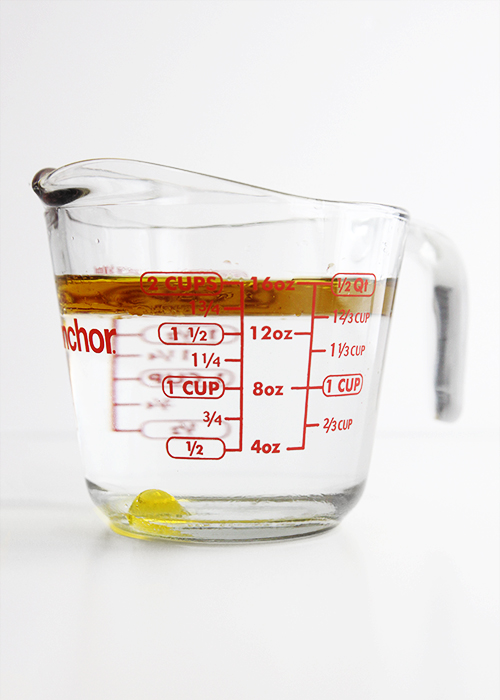
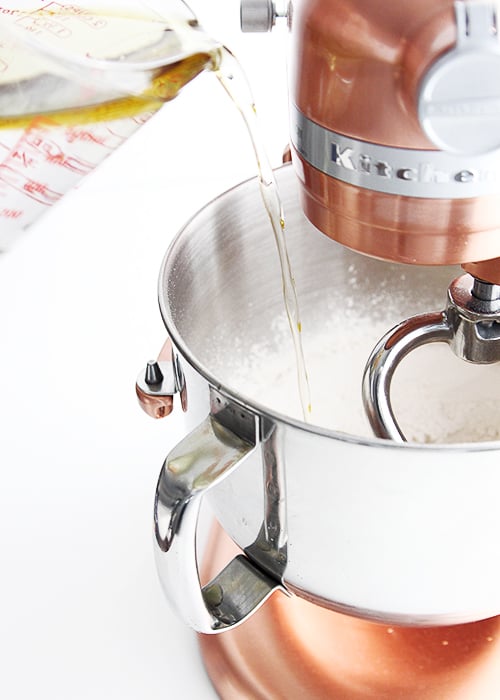
Add 1 3/4 cups cold water to 1/4 cup olive oil in a liquid measuring cup.
Into a stand mixer, add 4 cups bread flour, 2 teaspoons flaky kosher salt, and 1 teaspoon instant yeast. Stir to combine. Turn the mixer to low and slowly pour in liquids.
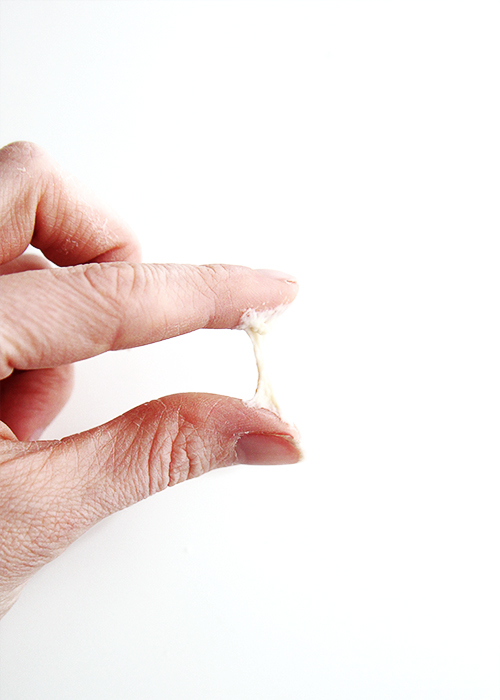
Slowly add flour (up to an additional cup) until dough begins pulling away from the sides of the bowl. We want the dough to be tacky but not sticky. Here it's too sticky.
Just right. Tacky but not sticky. We don't want a dry dough but it shouldn't be wet either.
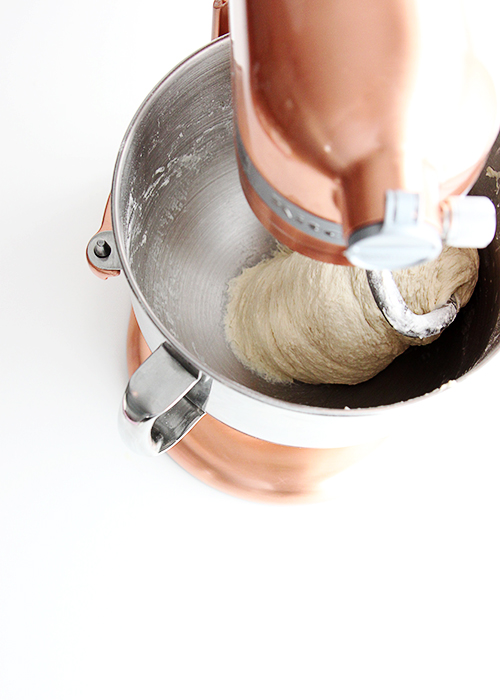
When the consistency is just right, the dough will stick only to the bottom of the bowl. It will look like a fat tornado. Once there, continue mixing/kneading on low speed for another 10 minutes.
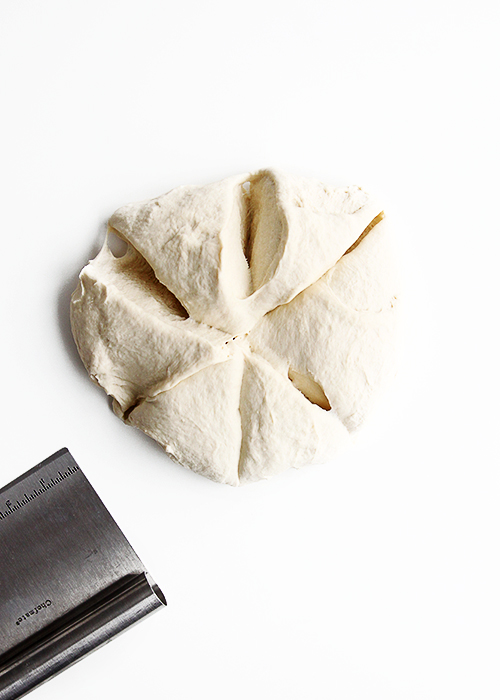
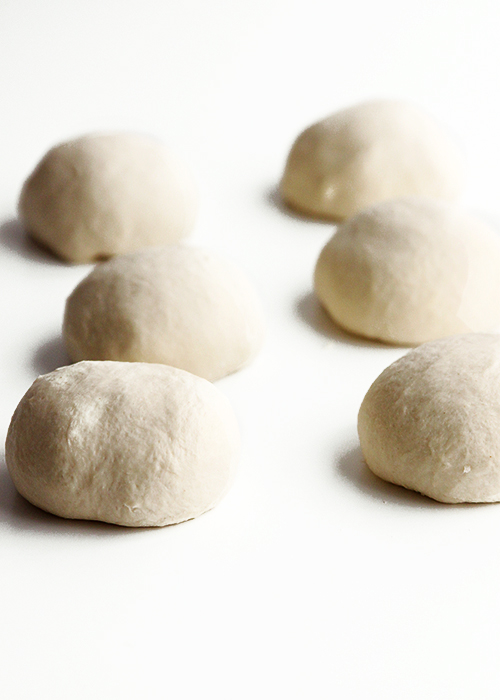
Turn dough out onto a surface. If the texture is right, you wont need any additional flour. Using a pastry bench, cut the dough into 6 equal parts. Use the pastry bench to scrape it off the surface.
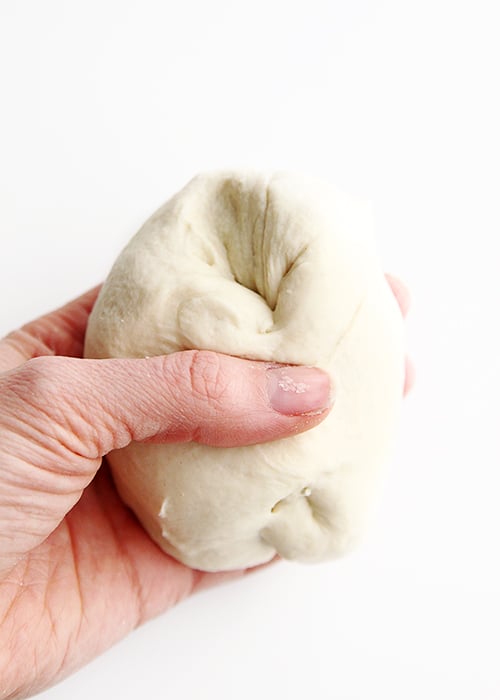
Assemble dough into a ball by pulling polar ends over your thumb and pinching together. Repeat 2-4 times until dough is shaped into a ball. Pinch the bottom together to create a seal.
To freeze dough, place each ball in a separate ziploc bag. Place a straw in the bag and zip up until the straw. Suck as much air out as possible and quickly finish zipping close. Place in freezer for up to 2 months.
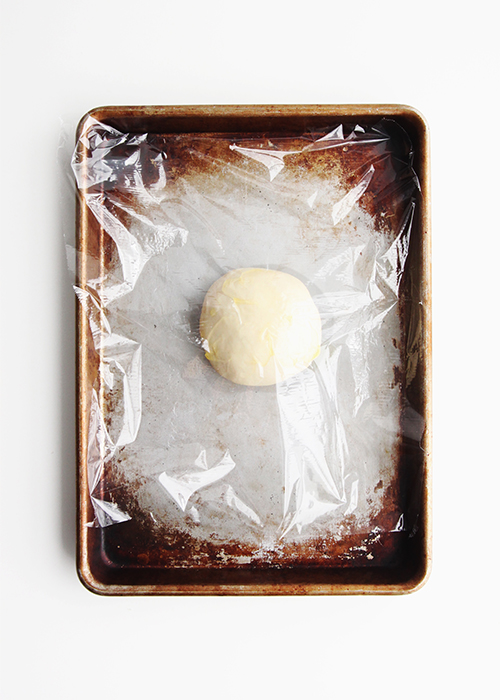
If making same day, place dough on a pan, drizzle lightly with olive oil, and cover with plastic wrap. Allow to rise at room temperature for 4-8 hours.
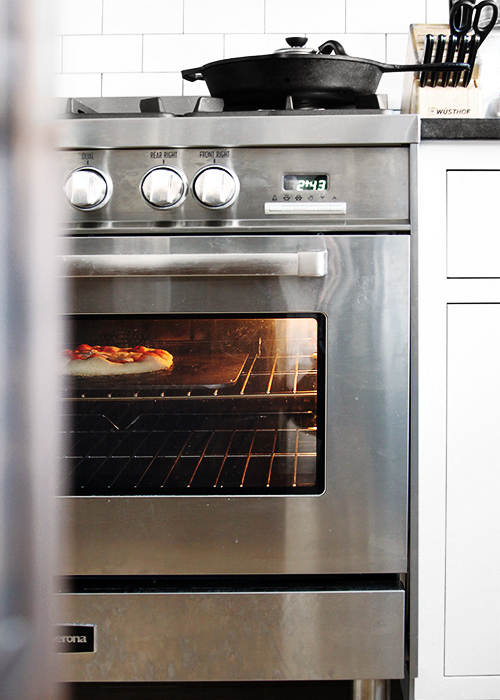
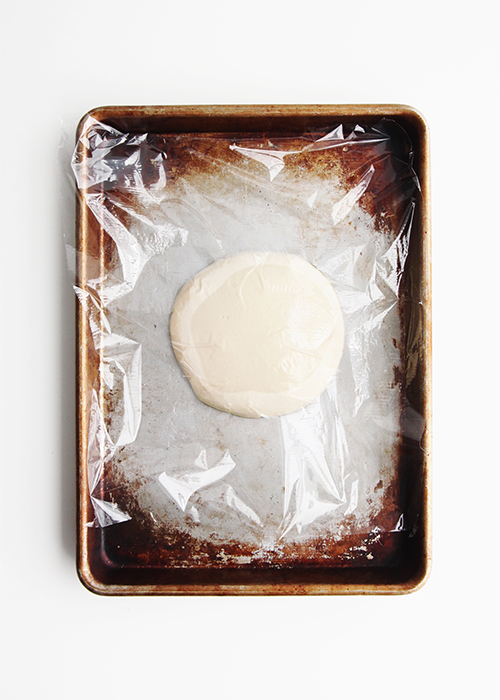
Dough will double in size. One hour before baking, place Baking Steel in oven and preheat at the hottest temperature (not broil).
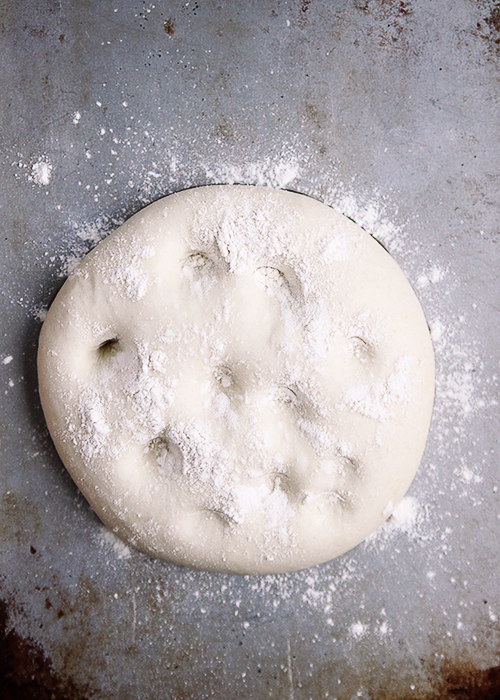
Sprinkle prepared dough with flour on all sides, making sure to dough is not sticky in any areas. Press your fingers in the dough a couple times.
Assemble the Pizza
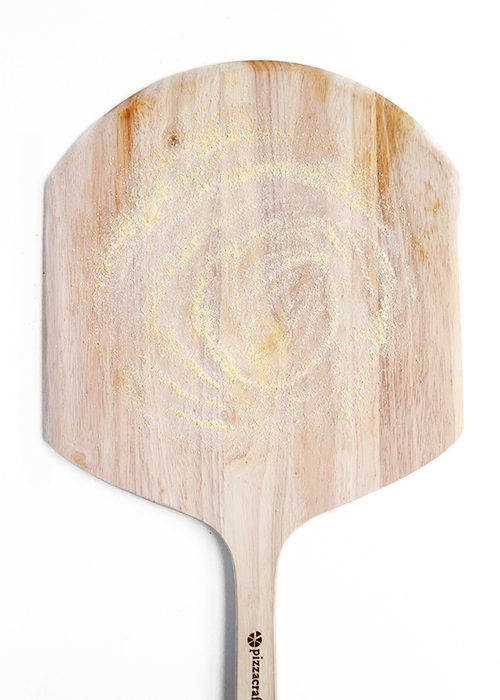
Spread cornmeal over the surface of the peel to keep crust from sticking.
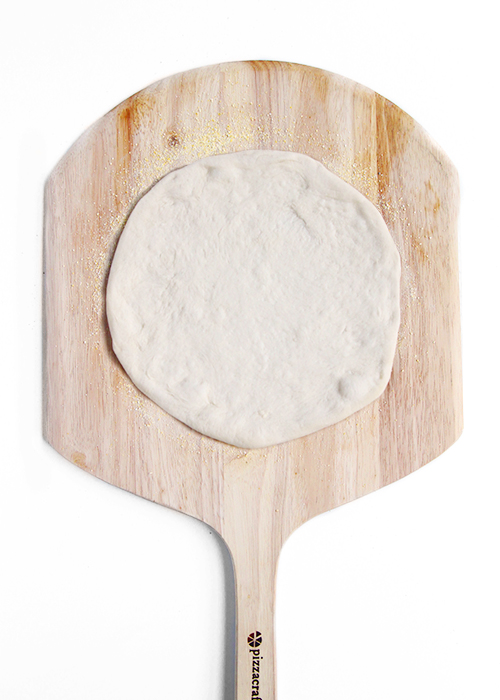
Toss, roll out, or shape dough into a circle and place on peel.
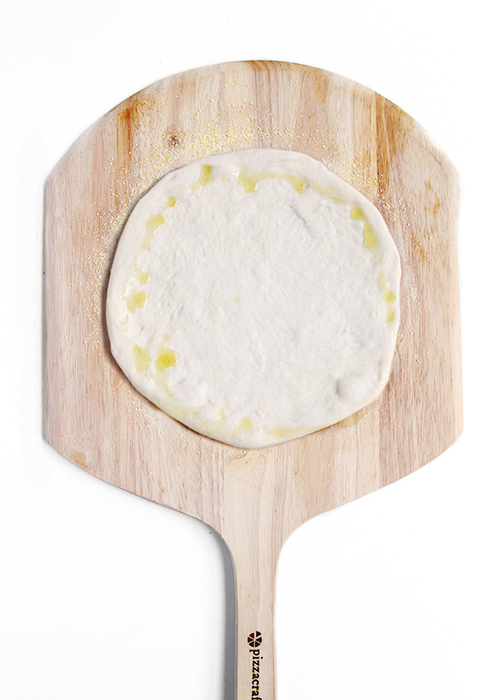
Drizzle olive oil around the edge of crust and gently rub to edge to evenly distribute.
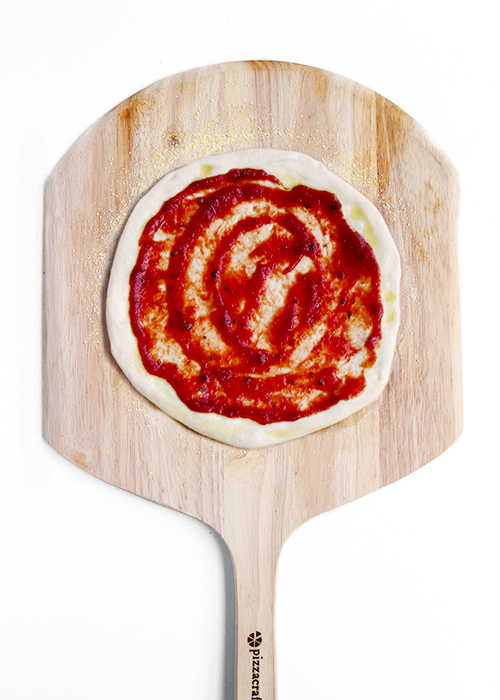
Add a couple plops of sauce and spread around the dough using the back of a spoon.
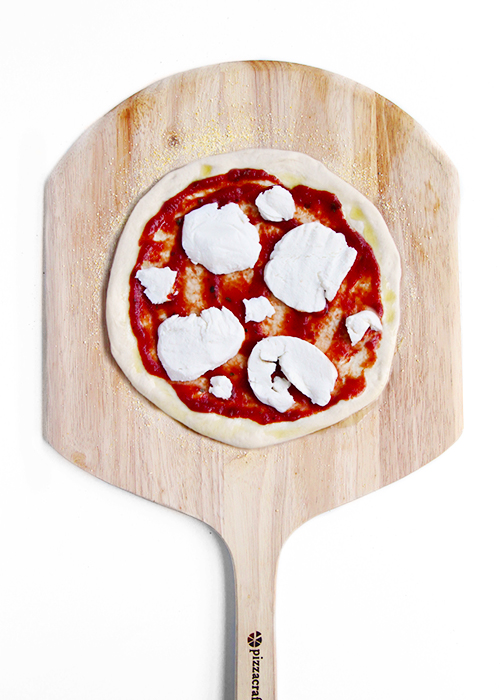
Add thinly sliced fresh mozzarella around the pizza being sure not to weigh it down too heavily.
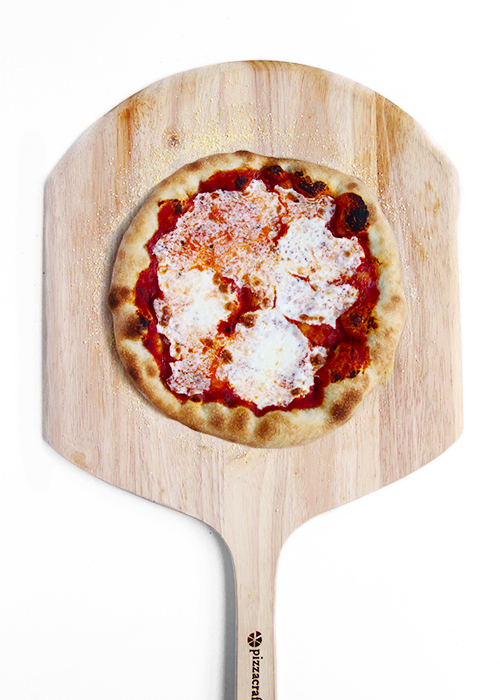
Slide pizza onto the baking steel and bake for 5-15 minutes depending on the heat of the oven. Remove pizza using the peel.
Tips
Marry a recipe. If not this one, then another one. After making the same recipe for 3+ years, I saw so many varying results when I’d do something slightly different or when the weather would change from humid to dry. In a lot of ways, making pizza at home is like living with a toddler—finicky. Marry a recipe and get to know it really well in the context of your kitchen.
In the same vein, be prepared for some failures before you get to the successes.
Before adding sauce and toppings to the pizza dough, make sure it can slide on the peel. It’s the worst when you go to slide the pie into the oven and it stays put.
When choosing cheese, start with a fresh ball of mozzarella. It’s a pain to slice, so pop it into the freezer about 30 minutes to an hour before assembling. This will make slicing much easier. But too much longer in the freezer will turn it into a rock.
Try not to weigh down the dough too much with cheese and toppings. It’ll yield a floppy crust.
Confession: I love the texture of the frozen and thawed dough compared to the fresh dough. If I plan ahead enough, we only cook from the frozen dough. I’ve tried putting the fresh dough in the fridge overnight a couple times, and it’s never as good. Never. I’m a believer in the method below.
You know you’ve figured out the perfect oven configuration once the bubbles on your crust char.
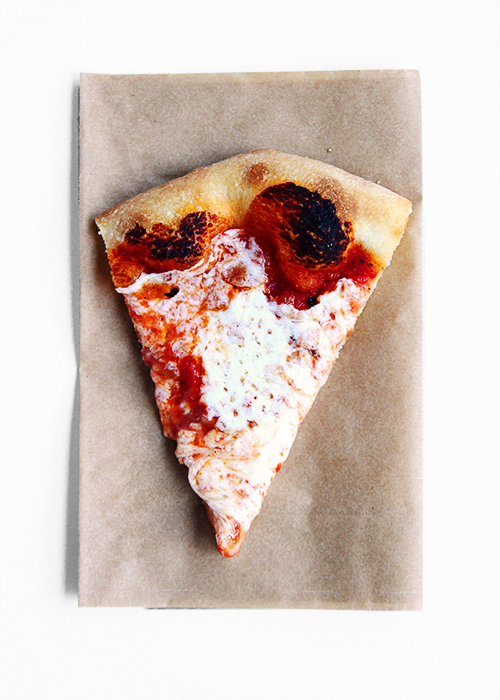
How to make really good pizza at home. Crisp edges and lofted insides. See images above for a complete step-by-step tutorial. This recipe will give you enough for tonight and plenty for the freezer.
Ingredients
Scale
4–5 c. bread flour
2 tsp. flaky kosher salt
1 tsp. instant yeast*
1 3/4 c. cold water
1/4 c. olive oil
cornmeal, for dusting
Instructions
Into a stand mixer fitted with the dough hook, add flour, kosher salt, and yeast. Mix together.
Pour water and oil into a liquid measuring cup. With the mixer on low, slowly pour in liquids until combined. Stop the mixer every so often to help incorporate all the flour.
Once all the flour is incorporated, continue adding in flour a couple tablespoons or so at a time, about an additional cup in total. The dough should be tacky but not sticky. The dough will begin pulling away from the sides, only sticking to the bottom. Once the texture of the dough is just right, it will look like a fat tornado. Continue mixing/kneading the dough on low speed for another 10 minutes.
Remove dough to a surface. You shouldn’t need any additional flour, only a pastry bench. Using the pastry bench, cut the dough into 6 equal parts. Shape dough into a ball (see tutorial above).
If freezing dough for later, place individual balls in a ziploc bag. Place a straw into the far side of the bag and zip closed to the straw. Suck out all remaining air. Quickly remove straw and zip close. Place in freezer for up to 2 months.
Allow dough to rise. If starting with frozen dough, remove from the freezer the morning before cooking. Open bag and allow to rise in the bag on the counter all day. If using freshly made dough, drizzle with a bit of oil and cover with plastic wrap. Allow to rise on the counter for 4-8 hours. (It takes dough in my kitchen far less time to rise in the summer because of a warmer house.)
One hour before baking, place Baking Steel in oven. Turn oven to highest temperature and allow to preheat. See placement in oven tips in the notes. In the meantime, assemble sauce or pesto as well as toppings. Place fresh mozzarella ball, if using, in the freezer to make slicing easier.
About 30 minutes before baking, assemble the pizza. Pull out your pizza peel. Lightly spread cornmeal on the surface to allow an easy slide into the oven. Set aside. Using a bit of extra flour, coat the outside edge of the dough to absorb any wet areas. Gently use your fingers to press into the dough a couple times. We don’t want to break the outside seal of the dough. This will help to create those picture perfect charred bubbles once cooked. Pick up dough, adding additional flour if necessary and either toss or press out the dough into a 10-12″ round. (See video for tossing how-to. You’ll use the tops of your fist to toss and catch the dough. Do this 2-3 times.)
Place shaped dough onto the peel. Drizzle the outer edge of the crust with olive oil for flavor. Gently rub in. Add a couple dollops of prepared sauce around the pizza. A little goes a long way. Use the back of a spoon to spread around evenly. Remove mozzarella from freezer and thinly slice. Place on top of pizza as well as any additional toppings.
Carefully slide pizza onto the steel. Bake for 5-15 minutes. This will vary greatly from oven to oven.** Remove onto peel. Slice and serve.
*This recipe is written specifically for instant yeast. No temperature activation is required. If using dry active yeast (or another form), use warm water instead of cold as listed. Please note, this recipe has been tested over the years using instant yeast only.
**Ovens vary from machine to machine. I’ve made this in an electric and gas oven. Either way, I turn the oven up to the hottest temperature (not broil). The first couple of times, I play around with placement in the oven. I one oven, I placed the baking steel on the very bottom, though that always made me very nervous. In my current oven, I place the steel on the second rung down from the top. That seems to work best in getting a nice crunch on the crust and melty cheese. It’s 100% trial and error. Because of this, baking times will vary immensely.
Recipe Card powered by
Recipe adapted from 101 Cookbooks. Video edited from the original version first published here. Produced by Caleb Theimer. Copper Mixer can be found here.
This blog is made possible by your support (thank you), select brand partnerships, advertisements, and affiliate links to items I love and use. READ MORE >
I’ve been married to this recipe for a few years now, after trying about 20 others. Just wanted to post for others who don’t have a mixer – I don’t either, and I can still rock this dough out for my family’s’ favorite pizza. I use a Danish Dough whisk to initially mix the liquids into the flour. Once I’ve got it incorporated (the dough is in small chunks), I remove from the bowl and hand knead for 10-15 min. It’ sounds like a long time, but is not taxing if you push with your whole upper body, not just your arms. (It’s actually quite relaxing and a great stress reliever too) Pizza turns out fantastic every time!
I love pizza. Going to try to convince my girlfriend to make one with your instructions. Thanks! Your page has been added to my site as one of the best.
Thank you sooooo much for this! I feel like I can cook just about everything- except homemade pizza (it always ends up saggy). I am going to try these tips (and change my yeast) to see if that helps. Thank you!
Hi! I used your recipe for my first time ever homemade pizza. I have a hand mixer not a stand one, which is a bit of a handicap. The dough rose really well but it was so fluffy that when i shaped it, some parts were really thin. Also my tomato sauce was too liquid (or i used too much). Despite all of this, the pizza tasted really good, my boys both ate two big pieces each which is more than with take out pizza, and they were super excited about putting their own toppings on. I’ll follow your advice and stick to this recipe, hoping I get better over time! thank you!
Hi Eva! So glad you wrote. A couple troubleshooting ideas: your kitchen may run a little warmer than mine. I’d try dropping the rise time by 2 hours to see what that does. With the tomato sauce, try using a little less water to thin and maybe try using a little less overall? I LOVE that your kids helped and actually ate it. That’s totally how it works at our house too. When Hal helps, she’s far more inclined to eat, especially new things. Will you let me know how it goes if you try it again? I’d love to help troubleshoot more. Every time we moved, I’d have to recalibrate my pizza again. It’s gonna get there!
You’ve inspired me to try instant yeast. I’ve had a dough recipe we love nailed for awhile, but I still lose a dough every once in a while to the trash can when my active dry yeast misbehaves. It’s infuriating!
And I agree, a pizza steel is the way to go. We recently switched from using a cast iron pizza pan. The end result is very similar since cast iron heats up great in the oven, but for ease of use, the steel wins. An easy trick for the pizza peel novice is to shape your pizza on a piece of parchment paper. Then all you have to do is pull it onto the peel and then easily scoot it onto the steel. Also makes for zero cleanup.
I have never attempted homemade pizza and dough. I’m waiting for my dough to rise. Thank you for the step by step directions. It made it look so easy and it was. Thankfully I had a baking steel and peel but had only used them to reheat pizza. Can’t wait for the results!
I have been making pizza every Friday since Charlie was little, probably 13 yer ago, and it is definitely an art form. I LOVE this post, and will be trying your recipe this friday 🙂
I’m laughing so hard at your “street cred” comment because it’s just…so true. Lmao. <3 Love this post and I'm going to make pizza tomorrow!! Thanks for always inspiring.
I love your straw trick for getting air out of the bag! Even though I have a dough I already like, I’m so tempted to try yours because your pizza looks so GOOD. 🙂 And thanks for inspiring me to toss my dough- looks super fun!
Yes! Yay! I have tried and failed so many times with homemade pizza over there years – it’s all in the dough. ‘Marry a recipe’ – perfect advice. You have just re-inspired me to try again. If only TGIF was still a thing 😉 xx
Amen to all THAT. I probably make more pizza at home than anything, and knowing how to confidently do it not only makes for pizza that’s a zillion times better than take-out, but–because I can control the cheese and load up on good quality ingredients–pizza becomes a regular occurrence instead of an occasional indulgence.
I’m not sure which is the bigger indulgence of take-out pizza–throwing in the towel on cooking or throwing in the towel on somewhat healthy eating! Sometimes it’s a good idea to do both, but homemade pizza skills make those times fewer and farther between, right? 🙂
Everything about this is incredible, Melissa. From your tossing skills to your DREAM of a kitchen to that beautiful bubbly pizza — I’m in love with all of this!
This is far and away the best and clearest instructions I have ever found for making pizza dough. I have even taken a class on pizza making and your post makes much more sense!
Melissa, I want to make this but don’t own a stand mixer (and don’t really want to). Right now I use the Dinner a Love Story method, with the Jim Lahey dough, and it’s good, but not great. Any thoughts?
Hey Erin! I’ve never made this without the mixer. I’m certain you can but it will take a lot of arm work. I wonder if you can finagle the Jim Lahey dough no-knead dough and add a little flavor? I’d add 1/3 cup olive oil in place of 1/3 cup of the water, nix the sugar, and bump the salt up to 1 teaspoon of kosher salt. The oil adds so much flavor to the dough! Let me know if you end up trying either method modified. I’d love to hear!
This is pure gold!!!! Almost exactly a year ago I shared my version of this post on my blog with my favorite method for making homemade pizza, so this is another way in which I feel like we are soul sisters. We have a pizza stone but don’t use it often, and I think we need to just bite the bullet and get the pizza peel so we can be real-timers over here. We’re content with our sheet pan pizzas, but whenever we break out the pizza stone we can absolutely tell a difference. Your method sounds great and I love that you make enough for 6 pizzas at once and just stock up in the freezer. I’m definitely going to give this a try soon. Thanks for sharing your method in such an easy to digest way.
I’ve been meaning to give homemade pizza another try… I have all the tools, but I’ve been missing all the “tricks” (until now). We’ll be following your steps this weekend! Thanks!
“Marry a recipe”–I love that concept! It is one I need to take to heart. I have used all the kinds of “no knead” recipes because I want one of them to be be “the one”, but instead of sticking with one I jump from recipe to recipe never really knowing what works in one but not the other.
Also, stone vs steel. I cracked three stones in one year and then found one I love that I’ve had for 3 years now. BUT I have been coveting the baking steel (and talking myself out of a purchase) ever since I heard about it. Maybe it’s time to get serious with a recipe and “cheat” on my stone. 🙂
Girl look at you throw that dough! But really, doing good homemade pizza has been a game changer for me. When you get down to it, it’s really not that hard (once you get a dough recipe nailed) and it’s a good clean out the fridge kind of meal 🙂 I need to invest in a pizza peel, it would make my life so much easier! (Currently using a cookie sheet to slide it, eek!
Perfecting homemade pizza is a pretty important life goal, in my humble opinion. I’ve made some pretty good ones, but that perfect slice still escapes me. Going to try out some of your tips next time! And I definitely need to get myself a baking steel. I use a pizza stone and I’m always terrified I’m going to break it (and break my foot in the process!).


I’ve been married to this recipe for a few years now, after trying about 20 others. Just wanted to post for others who don’t have a mixer – I don’t either, and I can still rock this dough out for my family’s’ favorite pizza. I use a Danish Dough whisk to initially mix the liquids into the flour. Once I’ve got it incorporated (the dough is in small chunks), I remove from the bowl and hand knead for 10-15 min. It’ sounds like a long time, but is not taxing if you push with your whole upper body, not just your arms. (It’s actually quite relaxing and a great stress reliever too) Pizza turns out fantastic every time!
I love pizza. Going to try to convince my girlfriend to make one with your instructions. Thanks! Your page has been added to my site as one of the best.
Thank you sooooo much for this! I feel like I can cook just about everything- except homemade pizza (it always ends up saggy). I am going to try these tips (and change my yeast) to see if that helps. Thank you!
If you freeze the dough, how should you thaw it and how long should it rise before you use it?
Hey Katherine! The directions will walk you through both routes. Let me know if any other questions come up!
Hi! I used your recipe for my first time ever homemade pizza. I have a hand mixer not a stand one, which is a bit of a handicap. The dough rose really well but it was so fluffy that when i shaped it, some parts were really thin. Also my tomato sauce was too liquid (or i used too much). Despite all of this, the pizza tasted really good, my boys both ate two big pieces each which is more than with take out pizza, and they were super excited about putting their own toppings on. I’ll follow your advice and stick to this recipe, hoping I get better over time! thank you!
Hi Eva! So glad you wrote. A couple troubleshooting ideas: your kitchen may run a little warmer than mine. I’d try dropping the rise time by 2 hours to see what that does. With the tomato sauce, try using a little less water to thin and maybe try using a little less overall? I LOVE that your kids helped and actually ate it. That’s totally how it works at our house too. When Hal helps, she’s far more inclined to eat, especially new things. Will you let me know how it goes if you try it again? I’d love to help troubleshoot more. Every time we moved, I’d have to recalibrate my pizza again. It’s gonna get there!
You’ve inspired me to try instant yeast. I’ve had a dough recipe we love nailed for awhile, but I still lose a dough every once in a while to the trash can when my active dry yeast misbehaves. It’s infuriating!
And I agree, a pizza steel is the way to go. We recently switched from using a cast iron pizza pan. The end result is very similar since cast iron heats up great in the oven, but for ease of use, the steel wins. An easy trick for the pizza peel novice is to shape your pizza on a piece of parchment paper. Then all you have to do is pull it onto the peel and then easily scoot it onto the steel. Also makes for zero cleanup.
Oh how I have waited for this recipe <3 so. so. excited to marry it. And pizza street cred is certainly something I desire.
I have never attempted homemade pizza and dough. I’m waiting for my dough to rise. Thank you for the step by step directions. It made it look so easy and it was. Thankfully I had a baking steel and peel but had only used them to reheat pizza. Can’t wait for the results!
I have been making pizza every Friday since Charlie was little, probably 13 yer ago, and it is definitely an art form. I LOVE this post, and will be trying your recipe this friday 🙂
13 years! Incredible and yes it’s such an art form. I don’t think I’ll ever stop learning about it.
I’m laughing so hard at your “street cred” comment because it’s just…so true. Lmao. <3 Love this post and I'm going to make pizza tomorrow!! Thanks for always inspiring.
Hope you love it! Please let me know what you think!
I am awwwwwwwwl over this.
I use scissors to cut our pizzas, never fails.
I love your straw trick for getting air out of the bag! Even though I have a dough I already like, I’m so tempted to try yours because your pizza looks so GOOD. 🙂 And thanks for inspiring me to toss my dough- looks super fun!
I think I learned that trick from Shaina. It’s brilliant and cheap!
Yes! Yay! I have tried and failed so many times with homemade pizza over there years – it’s all in the dough. ‘Marry a recipe’ – perfect advice. You have just re-inspired me to try again. If only TGIF was still a thing 😉 xx
I know 🙁 A couple years ago, we turned on Dinosaurs from Netflix to get the vibe.
It is hard to believe that was 2 years ago! Your tossing is perfect and the pizza is gorgeous!
Cheers, Zoë
I can’t even believe it’s almost been that long. I triple counted. Thanks for being such an excellent teacher. You are gold!
I just showed my man this post… we have been pizza obsessed lately and we are DEFINITELY trying this out at our next pizza night!!
Yes! Please let me know what you think and/or what questions come up!
Amen to all THAT. I probably make more pizza at home than anything, and knowing how to confidently do it not only makes for pizza that’s a zillion times better than take-out, but–because I can control the cheese and load up on good quality ingredients–pizza becomes a regular occurrence instead of an occasional indulgence.
That’s such a good point! We don’t consider pizza an indulgence when we make it but totally do when we order it out.
I’m not sure which is the bigger indulgence of take-out pizza–throwing in the towel on cooking or throwing in the towel on somewhat healthy eating! Sometimes it’s a good idea to do both, but homemade pizza skills make those times fewer and farther between, right? 🙂
Everything about this is incredible, Melissa. From your tossing skills to your DREAM of a kitchen to that beautiful bubbly pizza — I’m in love with all of this!
Thanks friend!
I love how thorough your post is with lots of tips and step by step photos. Knowing how to make good pizza is a super important skill!
I love this tutorial!! I need to step up my home pizza game for sure! Also, that copper mixer!!! <3
This is far and away the best and clearest instructions I have ever found for making pizza dough. I have even taken a class on pizza making and your post makes much more sense!
This is thee best compliment. Thank you!
Melissa, I want to make this but don’t own a stand mixer (and don’t really want to). Right now I use the Dinner a Love Story method, with the Jim Lahey dough, and it’s good, but not great. Any thoughts?
Hey Erin! I’ve never made this without the mixer. I’m certain you can but it will take a lot of arm work. I wonder if you can finagle the Jim Lahey dough no-knead dough and add a little flavor? I’d add 1/3 cup olive oil in place of 1/3 cup of the water, nix the sugar, and bump the salt up to 1 teaspoon of kosher salt. The oil adds so much flavor to the dough! Let me know if you end up trying either method modified. I’d love to hear!
This is pure gold!!!! Almost exactly a year ago I shared my version of this post on my blog with my favorite method for making homemade pizza, so this is another way in which I feel like we are soul sisters. We have a pizza stone but don’t use it often, and I think we need to just bite the bullet and get the pizza peel so we can be real-timers over here. We’re content with our sheet pan pizzas, but whenever we break out the pizza stone we can absolutely tell a difference. Your method sounds great and I love that you make enough for 6 pizzas at once and just stock up in the freezer. I’m definitely going to give this a try soon. Thanks for sharing your method in such an easy to digest way.
I’ve been meaning to give homemade pizza another try… I have all the tools, but I’ve been missing all the “tricks” (until now). We’ll be following your steps this weekend! Thanks!
This is such a beautiful and thorough post Melissa. Love it and love the Baking Steel shout out.
Thank you and happy pizza day!
andris
Thank you for upping my pizza game! I swear by that steel.
omg yes to all of this.
“Marry a recipe”–I love that concept! It is one I need to take to heart. I have used all the kinds of “no knead” recipes because I want one of them to be be “the one”, but instead of sticking with one I jump from recipe to recipe never really knowing what works in one but not the other.
Also, stone vs steel. I cracked three stones in one year and then found one I love that I’ve had for 3 years now. BUT I have been coveting the baking steel (and talking myself out of a purchase) ever since I heard about it. Maybe it’s time to get serious with a recipe and “cheat” on my stone. 🙂
Girl look at you throw that dough! But really, doing good homemade pizza has been a game changer for me. When you get down to it, it’s really not that hard (once you get a dough recipe nailed) and it’s a good clean out the fridge kind of meal 🙂 I need to invest in a pizza peel, it would make my life so much easier! (Currently using a cookie sheet to slide it, eek!
This has got to be one of my fav posts of all time that you’ve done!! Really thorough and totally helpful. Definitely trying!
Perfecting homemade pizza is a pretty important life goal, in my humble opinion. I’ve made some pretty good ones, but that perfect slice still escapes me. Going to try out some of your tips next time! And I definitely need to get myself a baking steel. I use a pizza stone and I’m always terrified I’m going to break it (and break my foot in the process!).