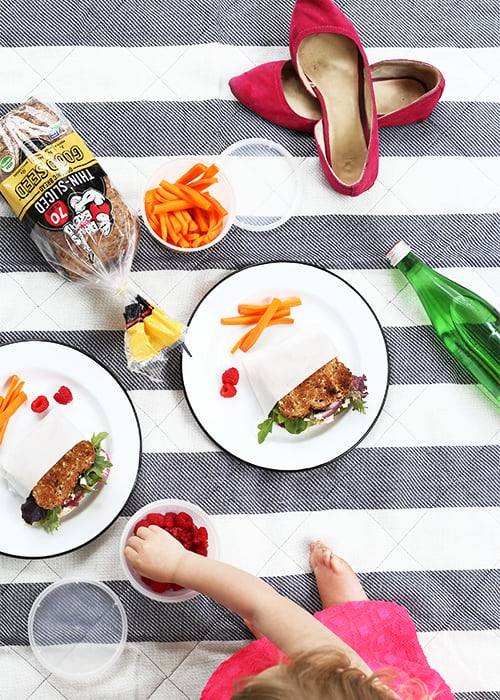
This is loooooong overdue! Remember last month when I was begging, no pleading you to vote for me for the MadHungry Game Grub Contest? Well, your efforts were not lost. I won! And only because of you. So, THANK YOU, THANK YOU, THANK YOU!

I didn’t walk away with a big fat check, but a did get—a MadHungry T-shirt, signed cookbook, and a portable Weber Grill!!


As you can see, the grill hasn’t quite made it out of the box yet. I live in the tundra where it’s currently snowing outside. But as soon as those temps perk up…

In the meantime, stay tuned because a giveaway is in order.

Did I mention yet—THANK YOU!

I’m eating a sliver right now. It’s only appropriate, ya know? Let me tell you, the crumb topping is a nice little surprise on the taste buds.

Last night, I came home from work, looked at TasteSpotting, and found this post—Banana Bread Day. I guess I missed the actual banana bread holiday. It was February 23. My bad. But I was inspired. There were 3 very ripe bananas sitting on my counter. “Perfect!” I thought to myself. And then I remembered, my husband loovvvees to put a banana in his protein smoothie after working out, which we were planning on doing later that night. He always tells me some mumbo jumbo about how the simple sugar in the banana helps your body to absorb protein faster. Yeah, yeah. Being the good wife that I am, I knew I couldn’t use all 3 bananas in the banana bread. But I’ve never made Banana Bread without using 3 bananas. And then I remembered seeing a recipe in my Mad Hungry cookbook that only called for 1 banana. (Yes I read my cookbooks cover to cover. Nerd alert!)


So, I tried the 1 banana, banana bread recipe. Not only was I a good wife for saving that banana for the husband, but also for having bread in the oven when he got home from work. (Patting self on back, someone’s got to do it.)

I shouldn’t go without mentioning—the 1 banana, banana bread recipe was great! I was worried, though. Would it even taste like banana bread? 1 banana! Really?! After comparing it to several other recipes, I noticed all the proportions were less. Less flour, less sugar, less eggs, etc, overall creating less batter. This is just what the doctor ordered. I have fought with quick breads and the oven for years now. I can’t seem to figure out how to get the bread cooked through in the middle without burning the edges and drying out 80% of it. Tips welcome. However, having less batter helped it to cook through without burning the edges. Hallelujah! The loaf isn’t as tall as I’m used to, but whoever said it needed to be? I’m down with short.

One Banana, Banana Bread

Yield: 1 loaf

One Banana, Banana Bread

Ingredients

1 c. all-purpose flour (or half regular and half wheat flour)
1/2 c. sugar
3/4 tsp. baking powder
1/2 tsp. baking soda
1/2 tsp. sea salt
4 tbsp. (1/2 stick) unsalted butter, melted
1/3 c. buttermilk (or 1 part plain yogurt and 2 parts milk)
1 large egg, lightly beaten
1 ripe banana, mashed
1 tsp. vanilla extract
Crumb Topping
1 tbsp. flour
1 tbsp. cold butter
1 tbsp. brown sugar
1/4 tsp. cinnamon
pinch of nutmeg
pinch of salt

Instructions

  1. Preheat oven to 300°. Some would butter their loaf pan now. I never butter my loaf pan.
  2. In a large bowl, whisk together flour, sugar, baking powder, baking soda, and salt.
  3. Stir in the melted butter and the buttermilk (or milk/plain yogurt combo). Add egg and stir until well combined. Add banana and vanilla. Stir until well combined. Spread the batter into pan.
  4. Make the crumb topping by mashing together butter, flour, brown sugar, cinnamon, nutmeg, and salt. Distribute topping evenly over batter. Bake for 40-45 minutes, or until a cake tester comes out clean. Cool in pan for 10 min, then allow to finish cooling on rack.

Notes

Now, I am a firm believer in letting your baked goods rest after they come out of the oven. Time after time, I eat treats right out of the oven and think "FAIL." I usually come close to burying them in the trash. Thankfully, I deny the impulse and wait until morning. Low and behold, it's wonderful. The flavors have settled in and the moistness has been restored. Rule of thumb: Exercise patience, and let your baked goods rest. Heck, I'm better well rested.

http://www.thefauxmartha.com/2011/03/02/banana-bread/

Recipe slightly adapted from Mad Hungry

First of all, I need to answer the cupcake trivia question: Can you guess what we are celebrating?

Our friends Rob and Emily had a celebration party last night. Interestingly enough, they both had something to celebrate! If you haven’t guessed it already, Emily just finished taking the Bar Exam and Rob just matched to a Clinical Psychology internship, both huge accomplishments. So in the name of celebration, they hosted a potluck where you had to bring something psychoLAWgy related. I combined some design and cupcake baking to meet the standards.

Adding adornment to cupcakes can make all the difference. It heightens the cuteness factor big time. And we all know that when it comes to food, presentation is everything.

Here’s what you’ll need:
• Your favorite cupcakes cooked, cooled, and iced (I use this to ice cupcakes.)
• Heavy paper (I used a white linen card stock.)
• 1″ round design (If you have the right software, you can design your own. If not, you can use a rubber stamp or cool craft paper, etc)
• Toothpicks
• Cute cupcake liners (I picked up mine at Crate and Barrel)
• Craft glue
• Martha Stewart 1″ round scalloped punch

Here’s how to do it:
1. Design a 1″ round circle. I’d link a PDF of my file, but I’d imagine there’s not too many people looking for a psychoLAWgy cupcake topper. Place the design on the page as many times as you can.
2. Print it out on 8.5″x11″ card stock.
3. Use your scalloped punch to cut around each circle.
4. With a little bit of craft glue on the top of the toothpick, place it on the backside of the cutout and let dry.
5. Adorn your cupcake, and up the cuteness factor by 100%.

Tip: When using cute cupcake liners, they often times don’t look so cute after cooking a cupcake in them. Instead, use a plain white cupcake liner. When the cupcakes come out of the oven, add the cute liner on top, giving you 2 liners.

Here’s what it looks like without the extra liner. Where’d all the polka dots go?

Adorn away!

I’ve been a big lazy bum this weekend. Reason being—Broomball.

We played Broomball Friday night, and it did me in for the whole weekend. After all the years of playing competitive soccer, I don’t think my body has ever hurt this bad. Maybe I’m getting old. In hindsight, I should have come armed with knee pads, elbow pads, and a helmet. Speaking of helmets, I took a nasty spill about 10 minutes into playing, hitting my head on the ice. A goose egg bump ensued. Being the competitive kamikaze athlete that I am, if you can even still call me an athlete, I kept playing. But, oh, I payed for it the rest of the weekend.

You’re probably thinking—”Does she want some cheese, with that whine?” I’ll pass on the cheese, but I’ll take a cookie instead. And that’s exactly what I did yesterday. I soothed my soul with a healthy chocolate chip cookie. I wasn’t about to try making a new recipe to blog about with my head being a little more foggy than normal. There’s no telling how it would have turned out. So I stuck with what I knew—an oldie but a favorite.

This little gem of a cookie will delight your palette. It’s tiny. Cute. With hints of maple. Filled with dark chocolate. And hidden with healthy morsels of whole wheat flour, oats, walnuts, and honey. Even college students, known for their fast food pizza eating habits, love these cookies.

Healthy Chocolate Chip Cookies

Yield: 3 dozen cookies

Healthy Chocolate Chip Cookies

Ingredients

5 ounces of dark chocolate chips
1 c. whole wheat flour
1/2 c. unbleached all purpose flour
1/2 tsp. baking powder
1/2 tsp. baking soda
1/2 tsp. sea salt
1 c. old-fashioned rolled oats (finely ground)
1/2 c. walnuts (finely ground)
1/2 c. unsalted butter, melted
1 c. cane sugar
1 tbsp. honey
1 large egg
1 1/2 tsp. vanilla extract
1/4 c. turbinado
1 tsp. cinnamon

Instructions

  1. Preheat oven to 350°.
  2. Melt butter in preheating oven (or microwave) and let cool for about 15 minutes.
  3. Whisk together flours, baking soda, baking powder, and salt in bowl.
  4. In food processor, finely grind oats, and add to flour mixture.
  5. In food processor, finely grind walnuts, and add to flour mixture.
  6. Whisk in sugar, honey, egg, and vanilla extract into butter mixture until sugar is dissolved and all ingredients combined.
  7. Pour butter mixture into flour mixture, and mix until just combined. (Dough will be somewhat dry.)
  8. Mix in chocolate chips.
  9. Scoop cookies with a spring release scoop or roll in ball by hand. Roll cookies in turbinado and cinnamon mixture and place on silpat or parchment paper lined pan. Do not flatten.
  10. Bake for about 10 minutes. Let cool on pan for 5 minutes.

Notes

You can also freeze these cookies before baking. Do everything up to step 9. Instead of placing the cookies in the cookies in the oven, place them in the freezer on the cookie sheet for 10-15 minutes. This process is called flash freezing. Once they are frozen or hard, you can put them in a freezer proof bag and store up to 2 months in freezer. When you are ready for a cookie or two, set the cookie(s) out on your pan while preheating the oven. Bake for the same amount of time. You may have to add 2 minutes or so. With this method, you can have a freshly baked cookie instead of eating a week old cookie.

http://www.thefauxmartha.com/2011/02/21/healthy-chocolate-chip-cookies/


Go ahead and treat yourself to a cookie. A healthy one at that!

You know what day tomorrow is. The day where you’re supposed to do something extra special for your honey. But it’s hard to be creative every year. If you don’t know how to out-do yourself from last year, look no further.

I’ve got two words for you—homemade pasta. And another three words—tomato cream sauce. Don’t get hung up on the first 2 words. If you don’t have a pasta maker, you can usually buy freshly made pasta from Whole Foods or from a specialty grocery store. If you do have a pasta maker, click here for a whole wheat pasta recipe. (Half the recipe, though, because you’ll only need dinner for two). And let me tell you, the tomato cream sauce is decadent. It’ll make you look good. Best part of all, it’s quick and easy to make.


Whole Wheat Pasta
Half the recipe for 2 servings
Click here for the recipe. I made bucatini noodles (they are hollow on the inside), but any type will do.

Tomato Cream Sauce
adapted from the Pioneer Woman

1 tbsp. Olive Oil
1 tbsp. Butter
1/2 Medium Sweet Onion, Finely Diced
2 cloves Garlic, Minced
1 can (15 oz.) Crushed Tomatoes
Salt and Pepper, to taste
Dash of Sugar
1/2 c. Heavy Cream (or 1/4 c. half and half and 1/4 c. heavy cream to cut down a little fat)
Handful of Grated Parmesan
Fresh Basil, Chopped

1. Cook pasta.
2. Heat butter and oil over medium heat. Add onions and garlic, and saute for a minute or so. Pour in tomatoes, and add salt, pepper, and sugar to taste.
3. Cook over low heat for 25 to 30 minutes, stirring occasionally.
4. Remove from heat and stir in cream. Add cheese to taste, then check seasonings.
5. Stir in pasta and chopped basil. Serve immediately.
6. Watch your significant other look to you in awe.

Now you’re probably looking for something to accompany this delicious meal. Get some asparagus, break the tough ends off, sprinkle with salt and olive oil. Bake at 450º for 10 minutes and serve. Don’t forget a glass of wine. Frank Sinatra. Candles. You know the drill. And to top the evening off, make some velvety dark chocolate pudding. We used Lucinda Scala Quinn’s recipe from Mad Hungry (link includes video). It did not disappoint. It’s quick and easy to make as well.

Hope your dinner for two is decadent. Happy Valentine’s Day.

UPDATE: I have tweaked the recipe to add more sugar. Click here for updated recipe. 

Big, fat chocolate chip cookies. Now that’s what I’m talking about!

When I first began this blog, I was on a hunt to find the best chocolate chip cookie recipe. I like them big and fat. Carol, from Carol’s Cookies, is my idol. She makes them just the way I like it. Problem is, no recipe out there can compete with hers. And you better believe she is tight lipped about her secrets.

Carol left me no choice but to figure this out the hard way. Trial and error, and lots of ‘em.

Enter Vanilla Sugar. I came across her blog the other day from Tastespotting. As I was scrolling through, I found cookies that look like the closest thing I’ve seen to Carol’s Cookies. Big, fat chocolate chip cookies. Funny thing is—she’s trying to reproduce her favorite cookie as well, only it’s from a different bakery, Levain Bakery in NYC. I made the recipe Friday night. They were close, but they weren’t Carol’s. (Now keep in mind, we are trying to reproduce two different cookies.) Carol’s Cookies are sweeter and not as doughy tasting. So I slept on it. I woke up. Read a thread about how to reproduce Carol’s Cookies. (Looks like I’m not alone in this endeavor.) Then, I made a POA (plan of action)!

POA—try Vanilla Sugar’s recipe again with some slight tweaks. More sugar. Regular butter instead of European butter*, although I love European butter. But, same technique. Speaking of technique, these are not your mom’s chocolate chip cookies. Throw everything you know about making chocolate chip cookies out the door. Let your butter come to room temp, forget about it. Cream your butter and sugar together until pale in color, think again. Preheat oven to 350° or 375°, not this time.


Big, Fat Chocolate Chip Cookies
recipe adapted from Vanilla Sugar

8 oz. (2 sticks) unsalted butter*, chilled
1 1/4 c. granulated sugar
3/4 c. packed light brown sugar
2 large eggs
1 tsp. vanilla extract
3 c. AP flour
3/4 tsp. sea salt
1 1/4 tsp. baking powder
1/2 tsp. baking soda
12 ounces (2 c.) good quality semisweet chocolate chips
1 c. crushed walnuts (optional)

1. Using a grater, grate chilled butter into a large bowl. Make sure to scrape out butter left on grater. If butter is too warm, stick it in the freezer for 5 minutes.
2. Add sugars to the butter. Using a mixer, mix until just combined. Do not over beat.
3. Add vanilla and eggs, and mix until just combined. Again, do not over beat.
4. In a separate bowl, whisk together flour, salt, baking powder, and baking soda.
5. Add flour mixture to butter mixture, and mix until just combined. Dough will look crumbly. You are right on track.
6. Stir in chocolate and crushed walnuts (optional).
7. Take off your rings—you’re gonna need your hands for this. Gather dough into a large ball, as you would if you were making a snow ball. Place on pan lined with a Silpat or parchment paper.
8. Preheat oven to 365°. Meanwhile, place cookies in the freezer for about 15 minutes.
9. Bake cookies for 18 minutes or until slightly browned around edges. Cookies will still be doughy in the middle.
10. Allow to cool completely before eating. The doughy center will stiffen up a bit.

*Note: In the pictures, I used European butter. However, I used regular butter the first time I made the recipe and the cookies held their shape much butter better. Therefore, I made the executive decision to go with regular butter in the recipe. A little tid-bit for you: according to Sunset Magazine, too low-fat butter (aka margarine) or too high-fat butter (aka European butter) can cause spreading. Go regular or go home.

Here’s the visual recipe.


Have I arrived? I don’t know. But I feel a lot closer than I did last week.