Remember that time I was going to start posting to Fauxmama? Well, I got cold feet about posting anything besides recipes. I’m a food blog. But I’m now also a mom. And mom’s love to share what works and what doesn’t since there’s no manual out there on operating these little pieces of machinery. But I felt far too faux to post anything to this mom space. While I love my little bean more than anything (and stay up late gawking at videos and pictures from the earlier months while she sleeps), the transition into motherhood has been rough. Most days I don’t have a clue what I’m doing. But I guess I started this blog when I didn’t have a real clue about baking. In case you ever wondered where the name came from—there you go. I’m so, so faux. Read more
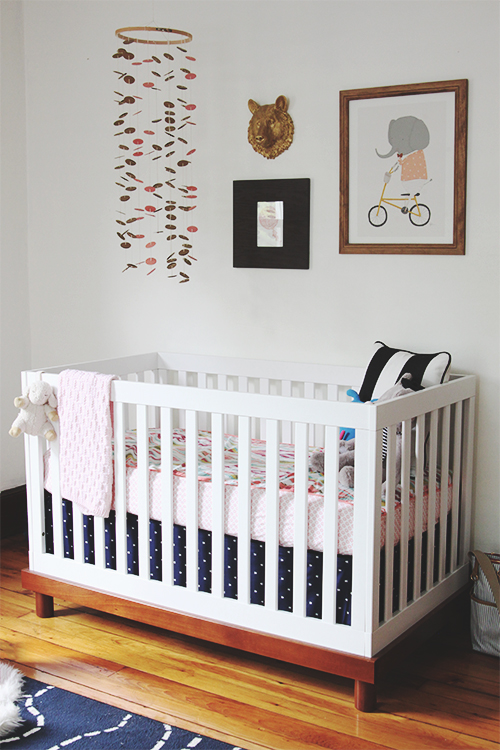
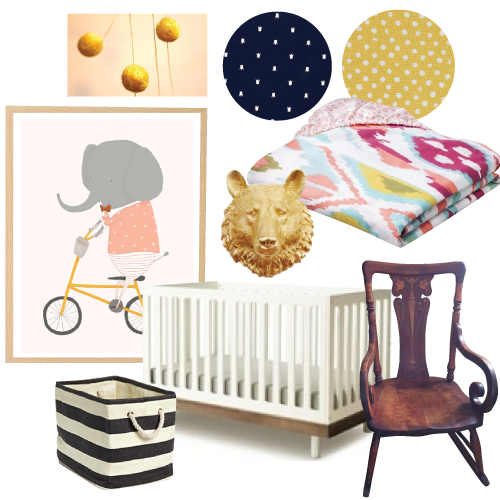
Before Hallie arrived, my only concept of motherhood was decorating her room. Three months before her due date, we found out we’d have to move within a months time. I was completely overwhelmed. Hindsight—we’re so thankful it happened. The move gave us an extra room just for Hal. So instead of packing up our old apartment like a wise person would do, I made an inspiration board for her room. After we settled into our new space, I did what I thought motherhood was—went into her room every morning, opened the blinds, pictured her giggling in her crib, and dreamed up more projects. Read more
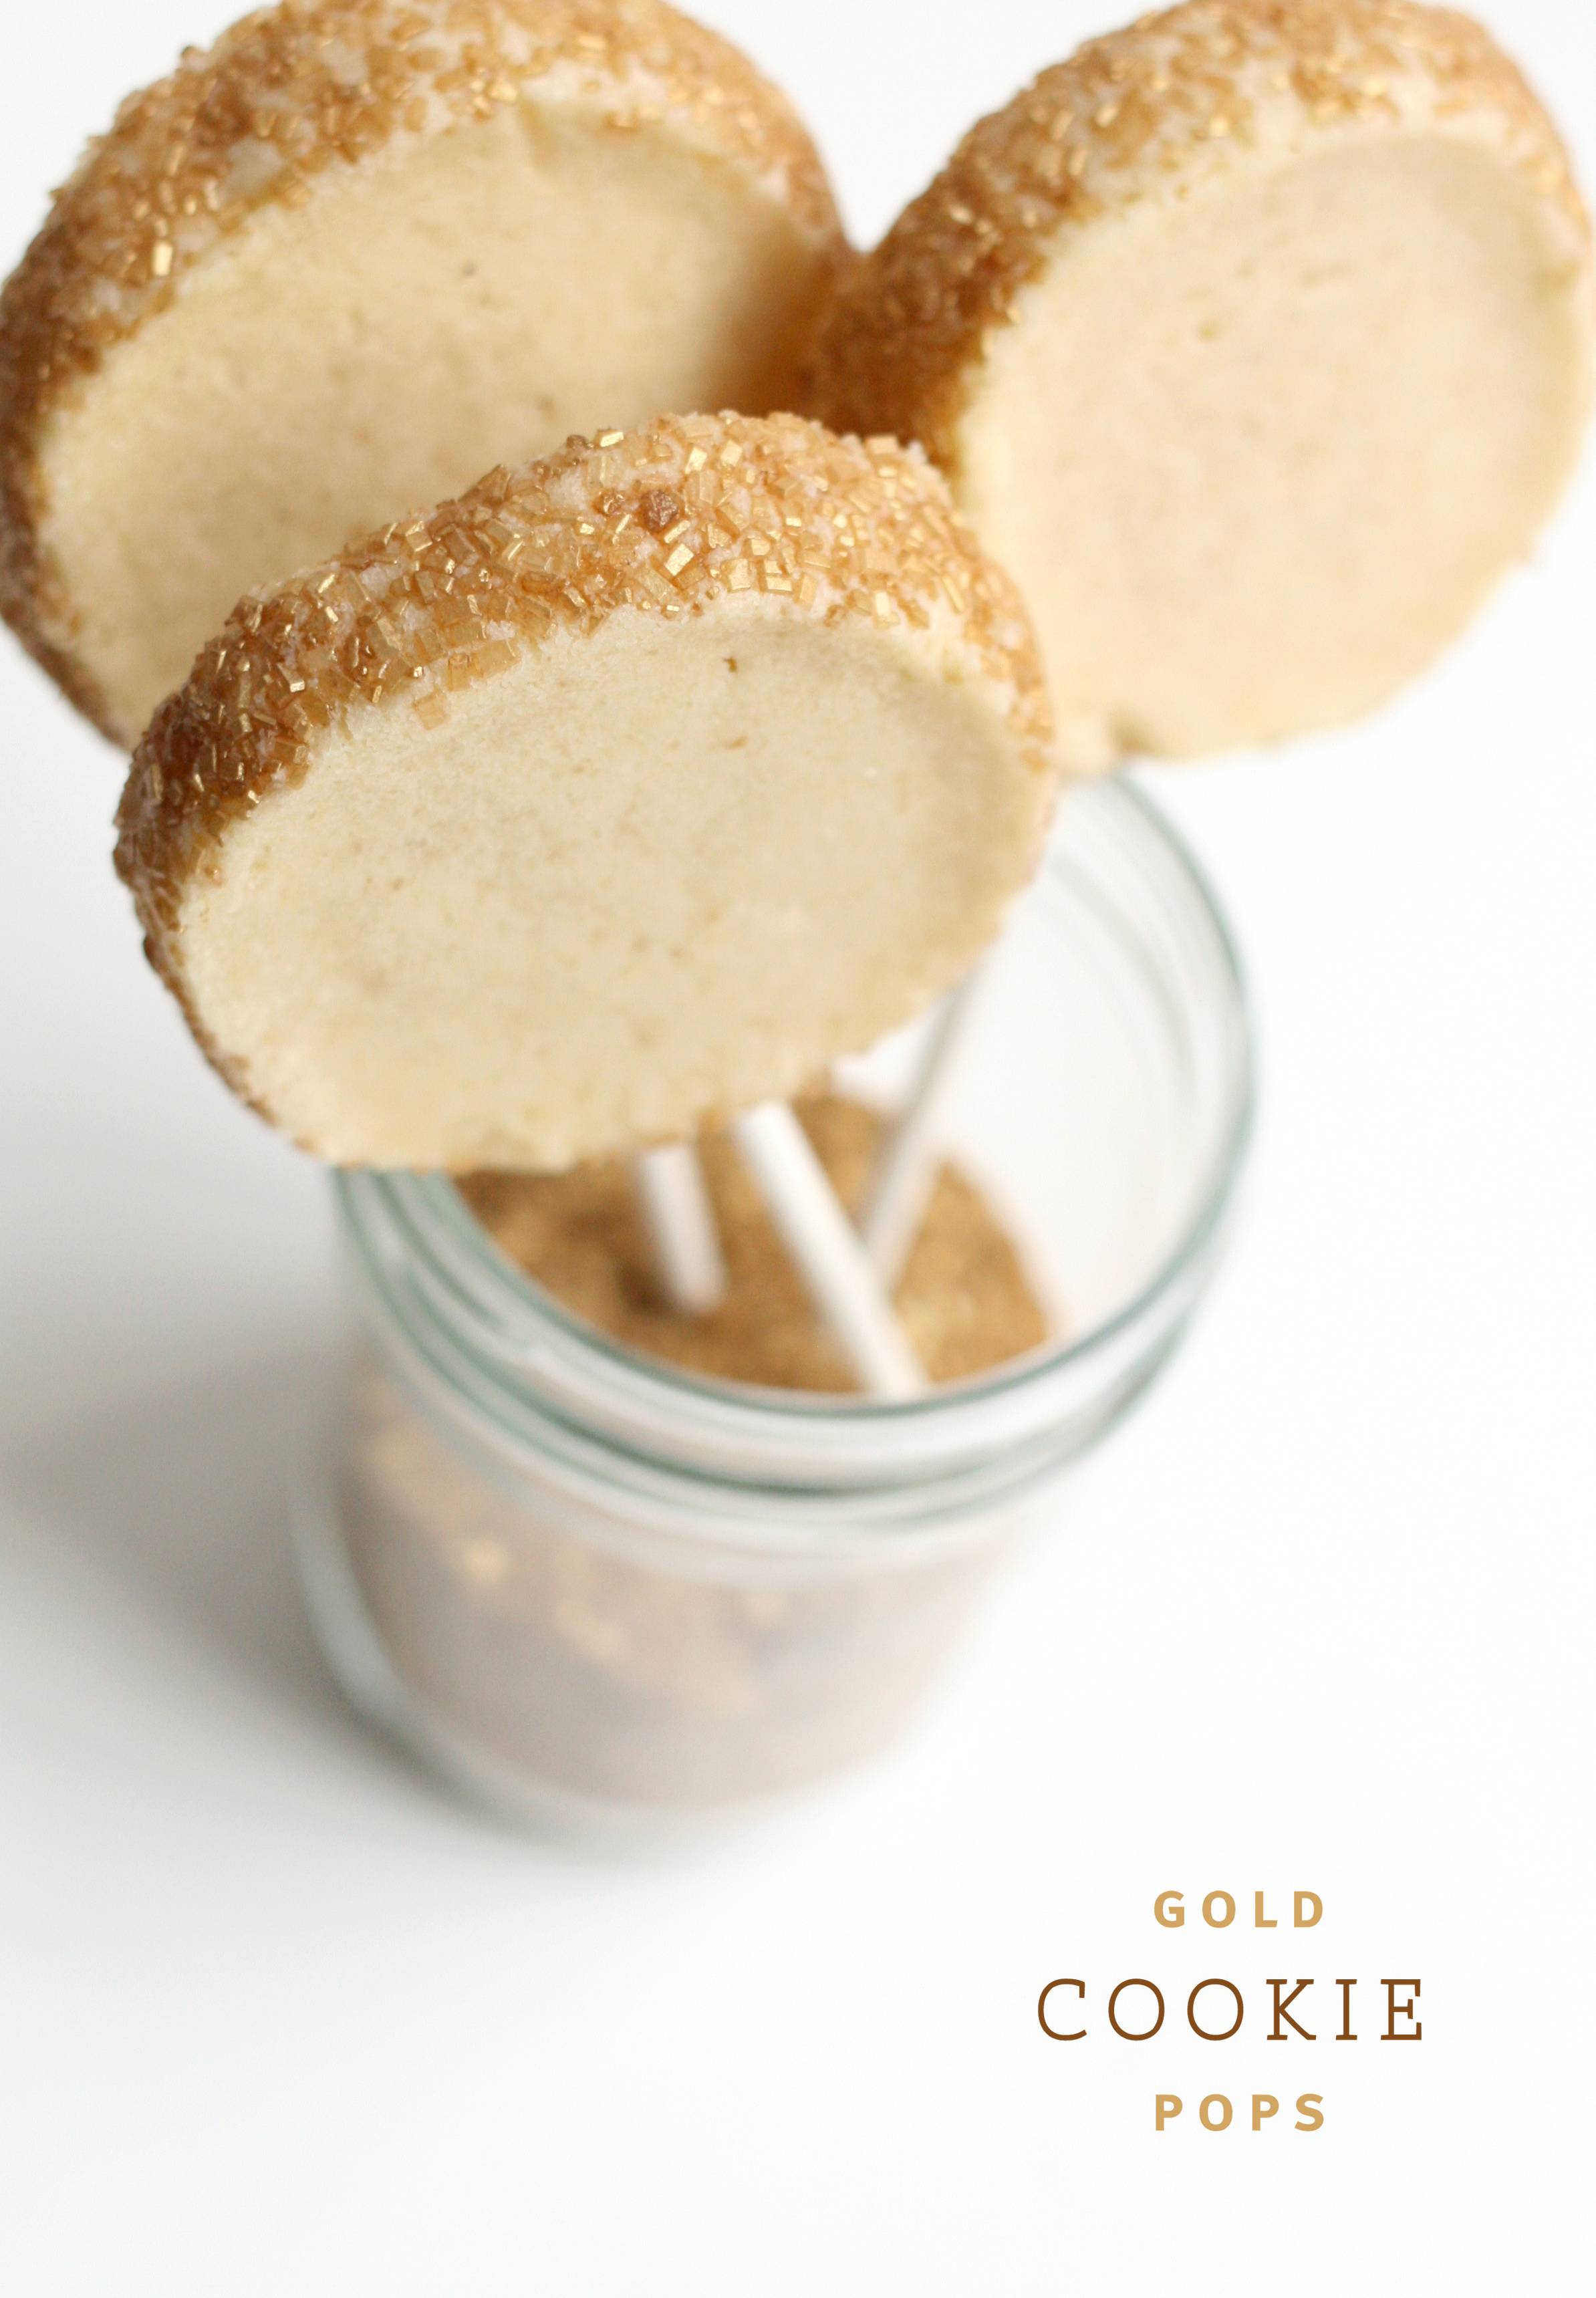
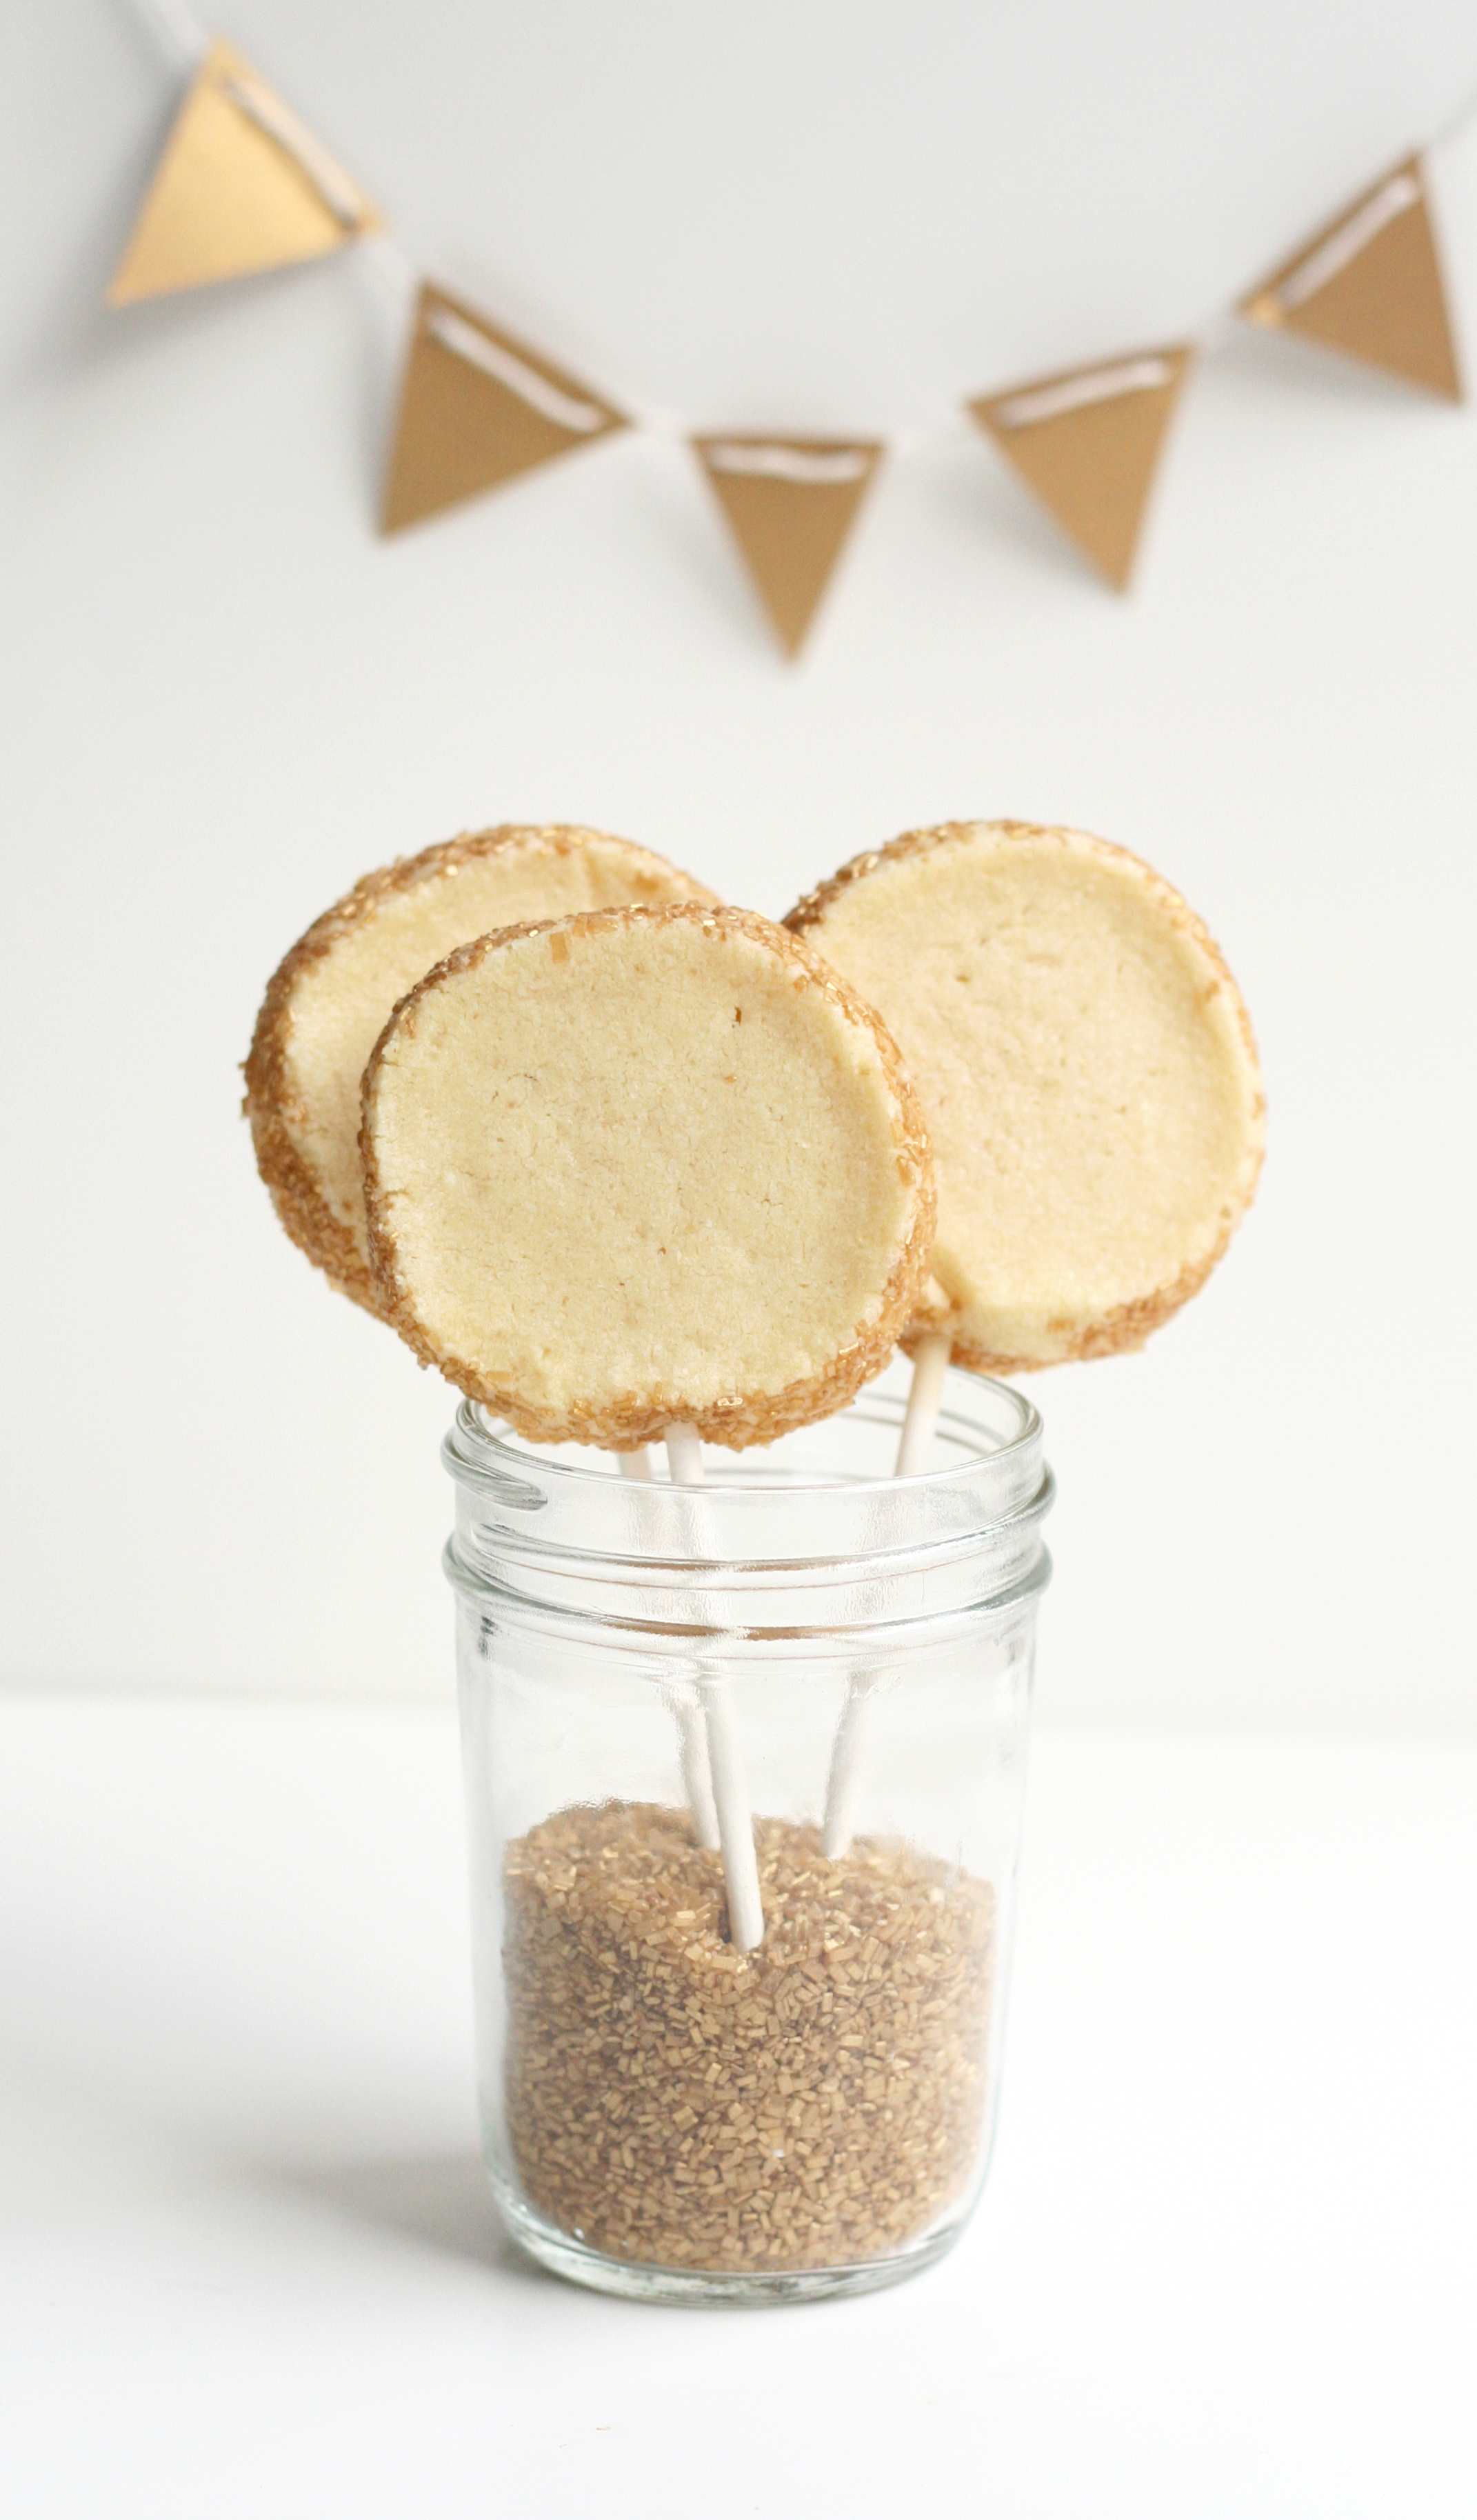
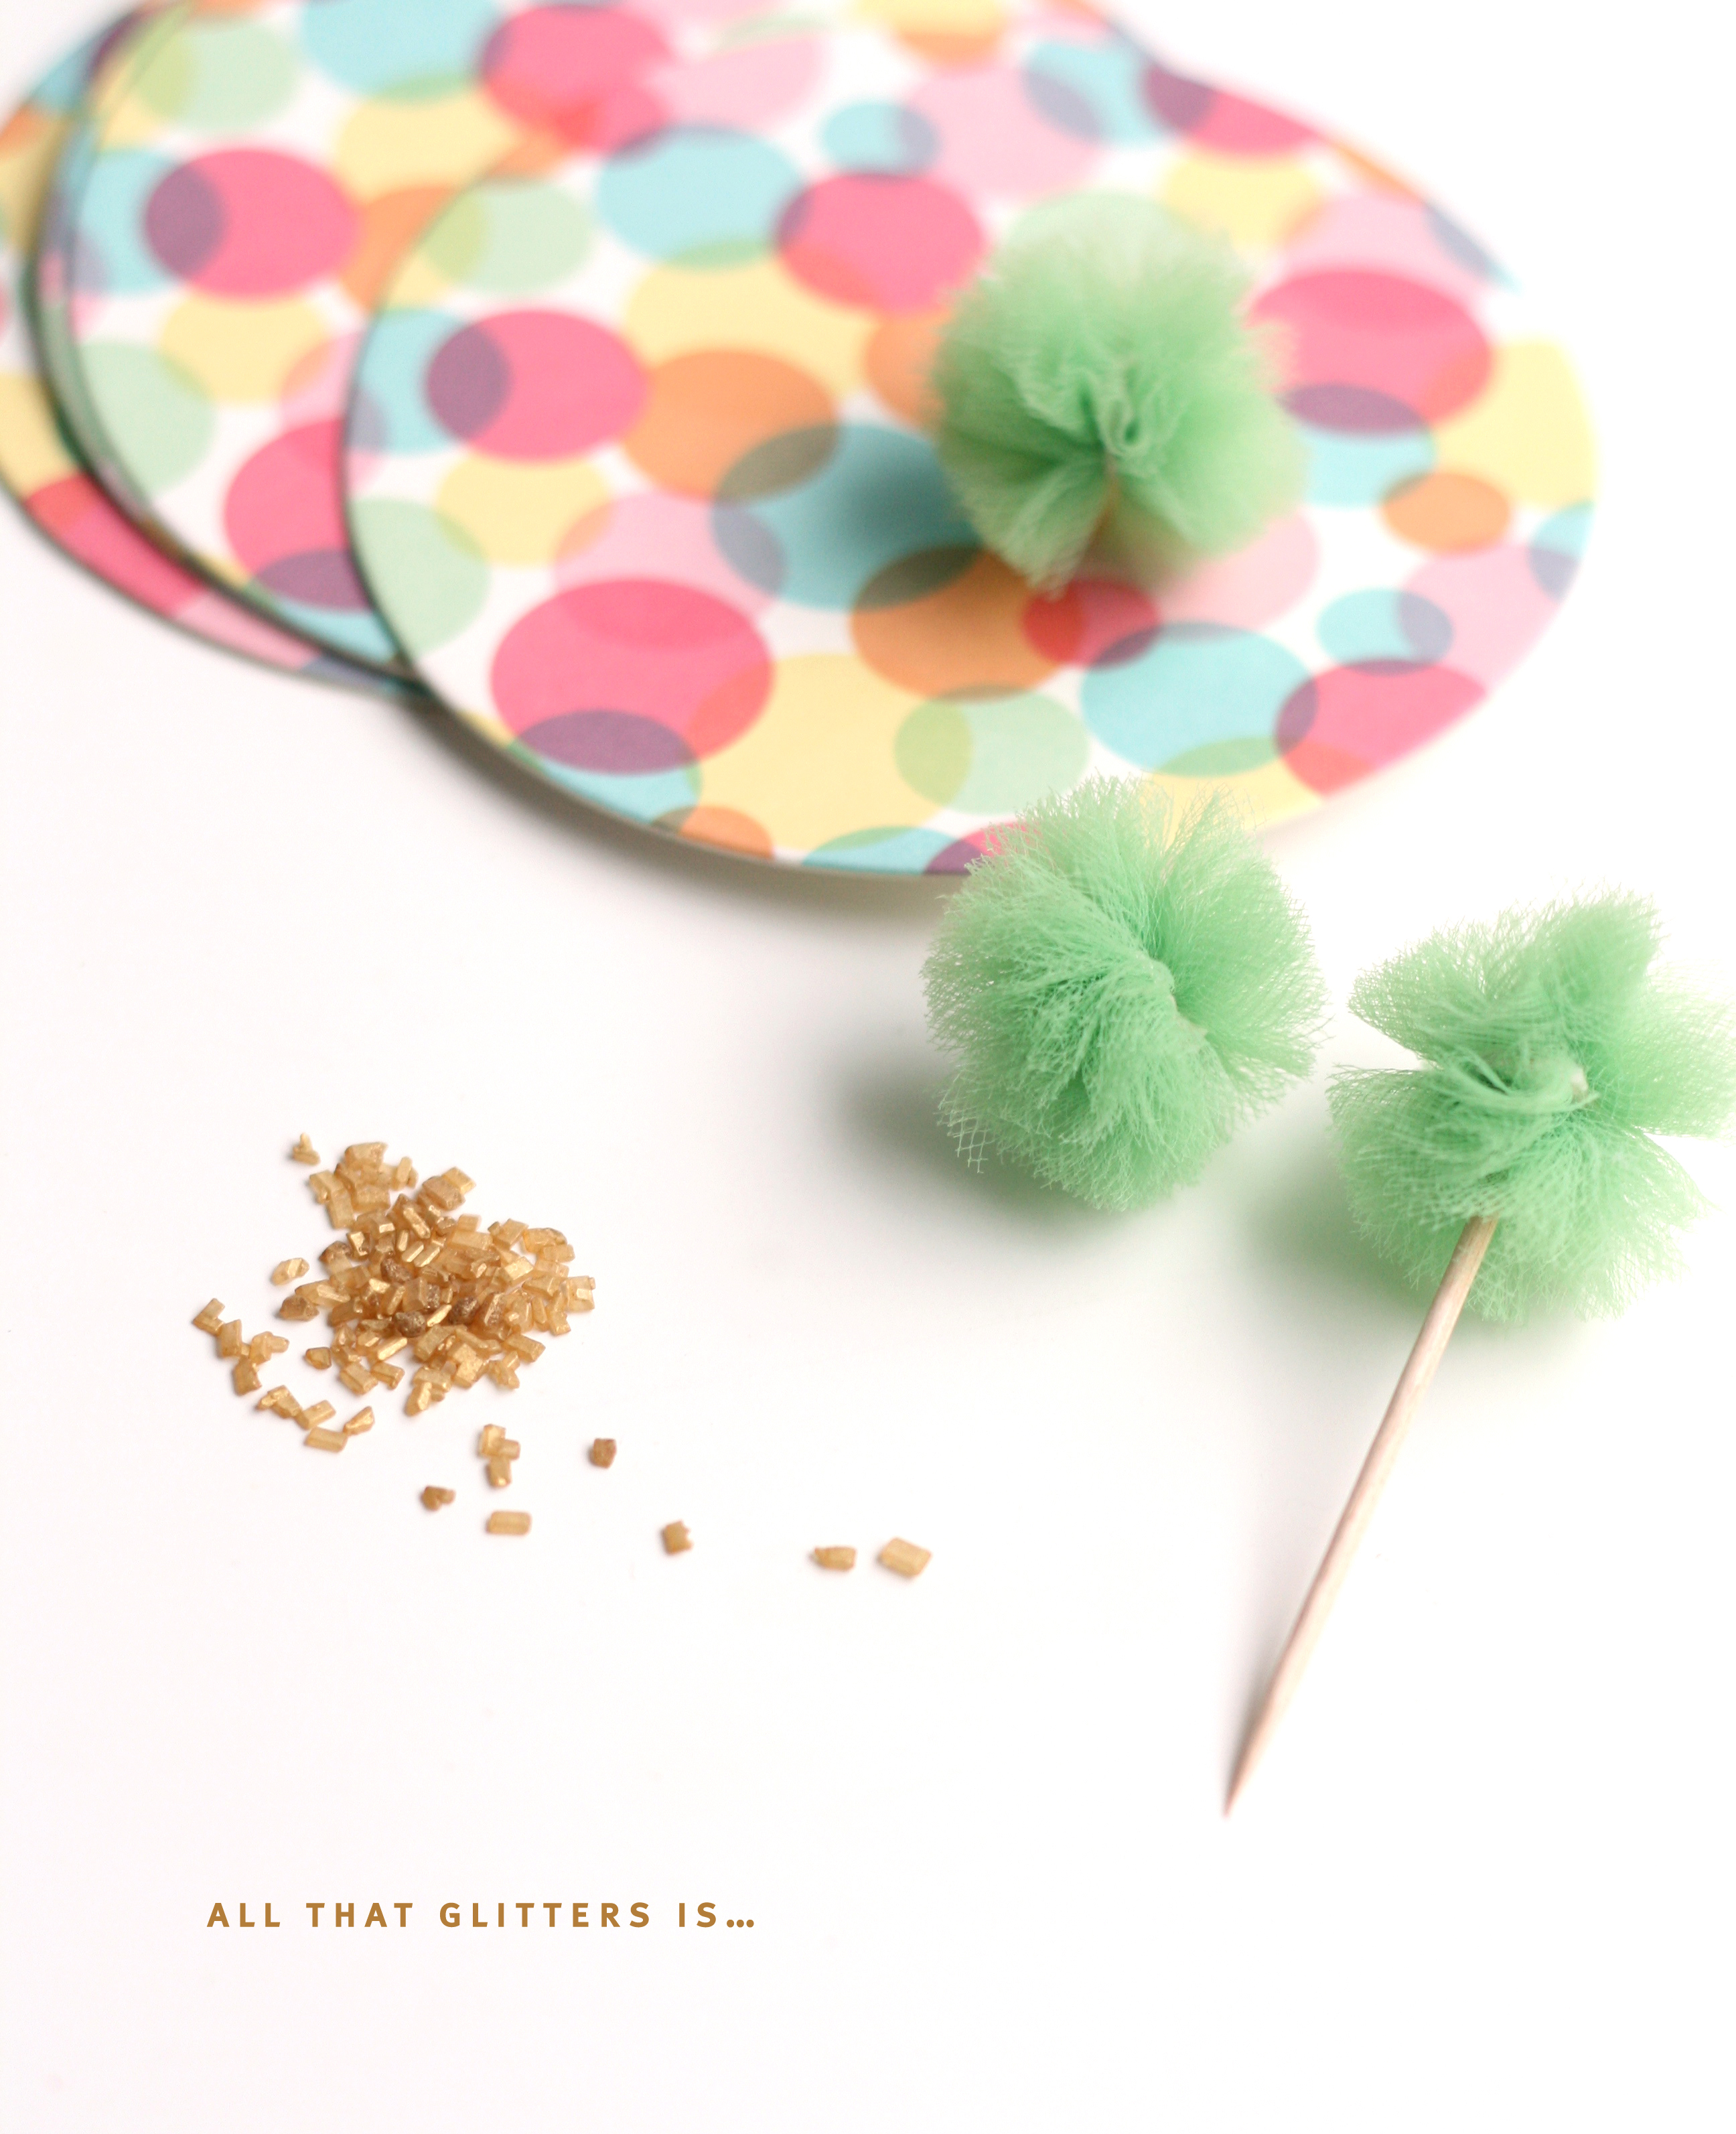
I’ve been holding out on you for a couple months. Keeping a secret. Jumping in my chair. Looking like a crazy lady, I’m sure. Making mini gold cakes. With pom-poms on top. For who you ask? Styled Magazine [insert exclamation point]—created and edited by Victoria, from A Subtle Revelry. I’m still not sure how I made it into these beautiful pages filled with genius ideas and impeccably styled photography. Pinching myself. Read more
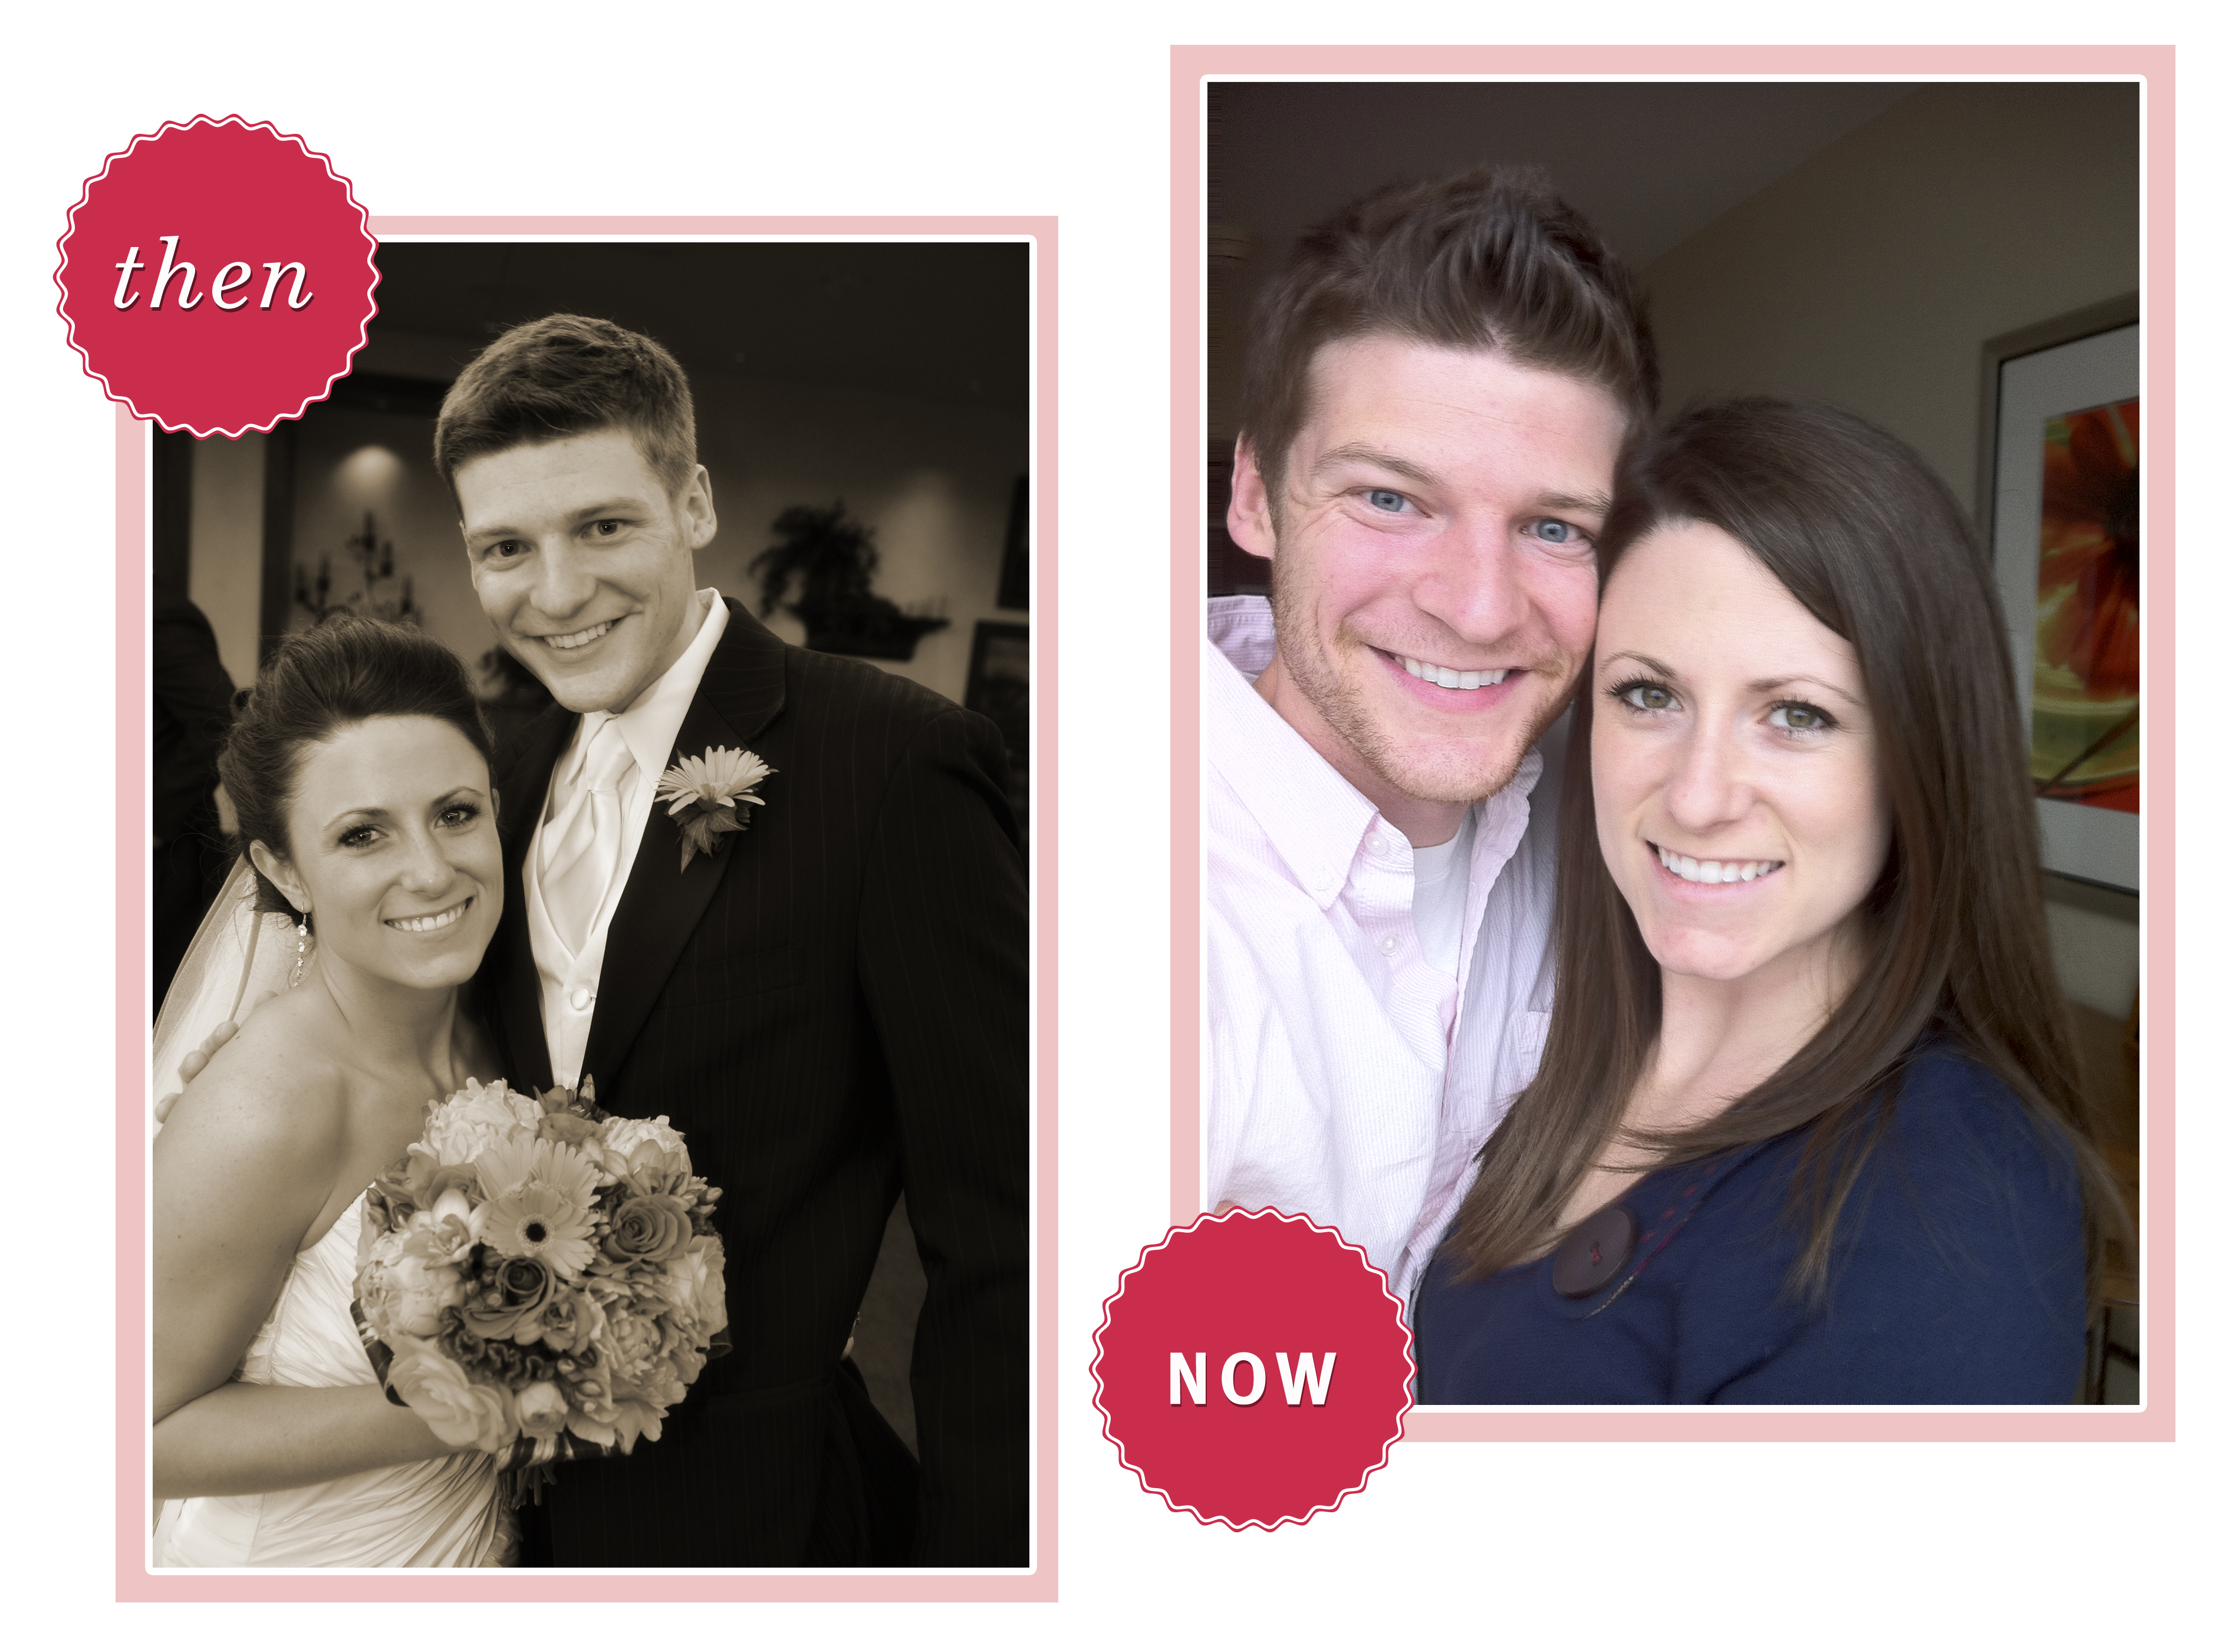
Three years ago today, we said I do. Three years! I guess we’re not newlyweds anymore. And I’m not so sad about that. I love that I know my husband 3 years better than I did when we got married. I love that I love my husband 3 years more than I did when we got married. The path hasn’t always been straight or easy, but it has been rewarding. So thankful to share this journey with Kevin, my sweet graduate school husband. To many decades more!
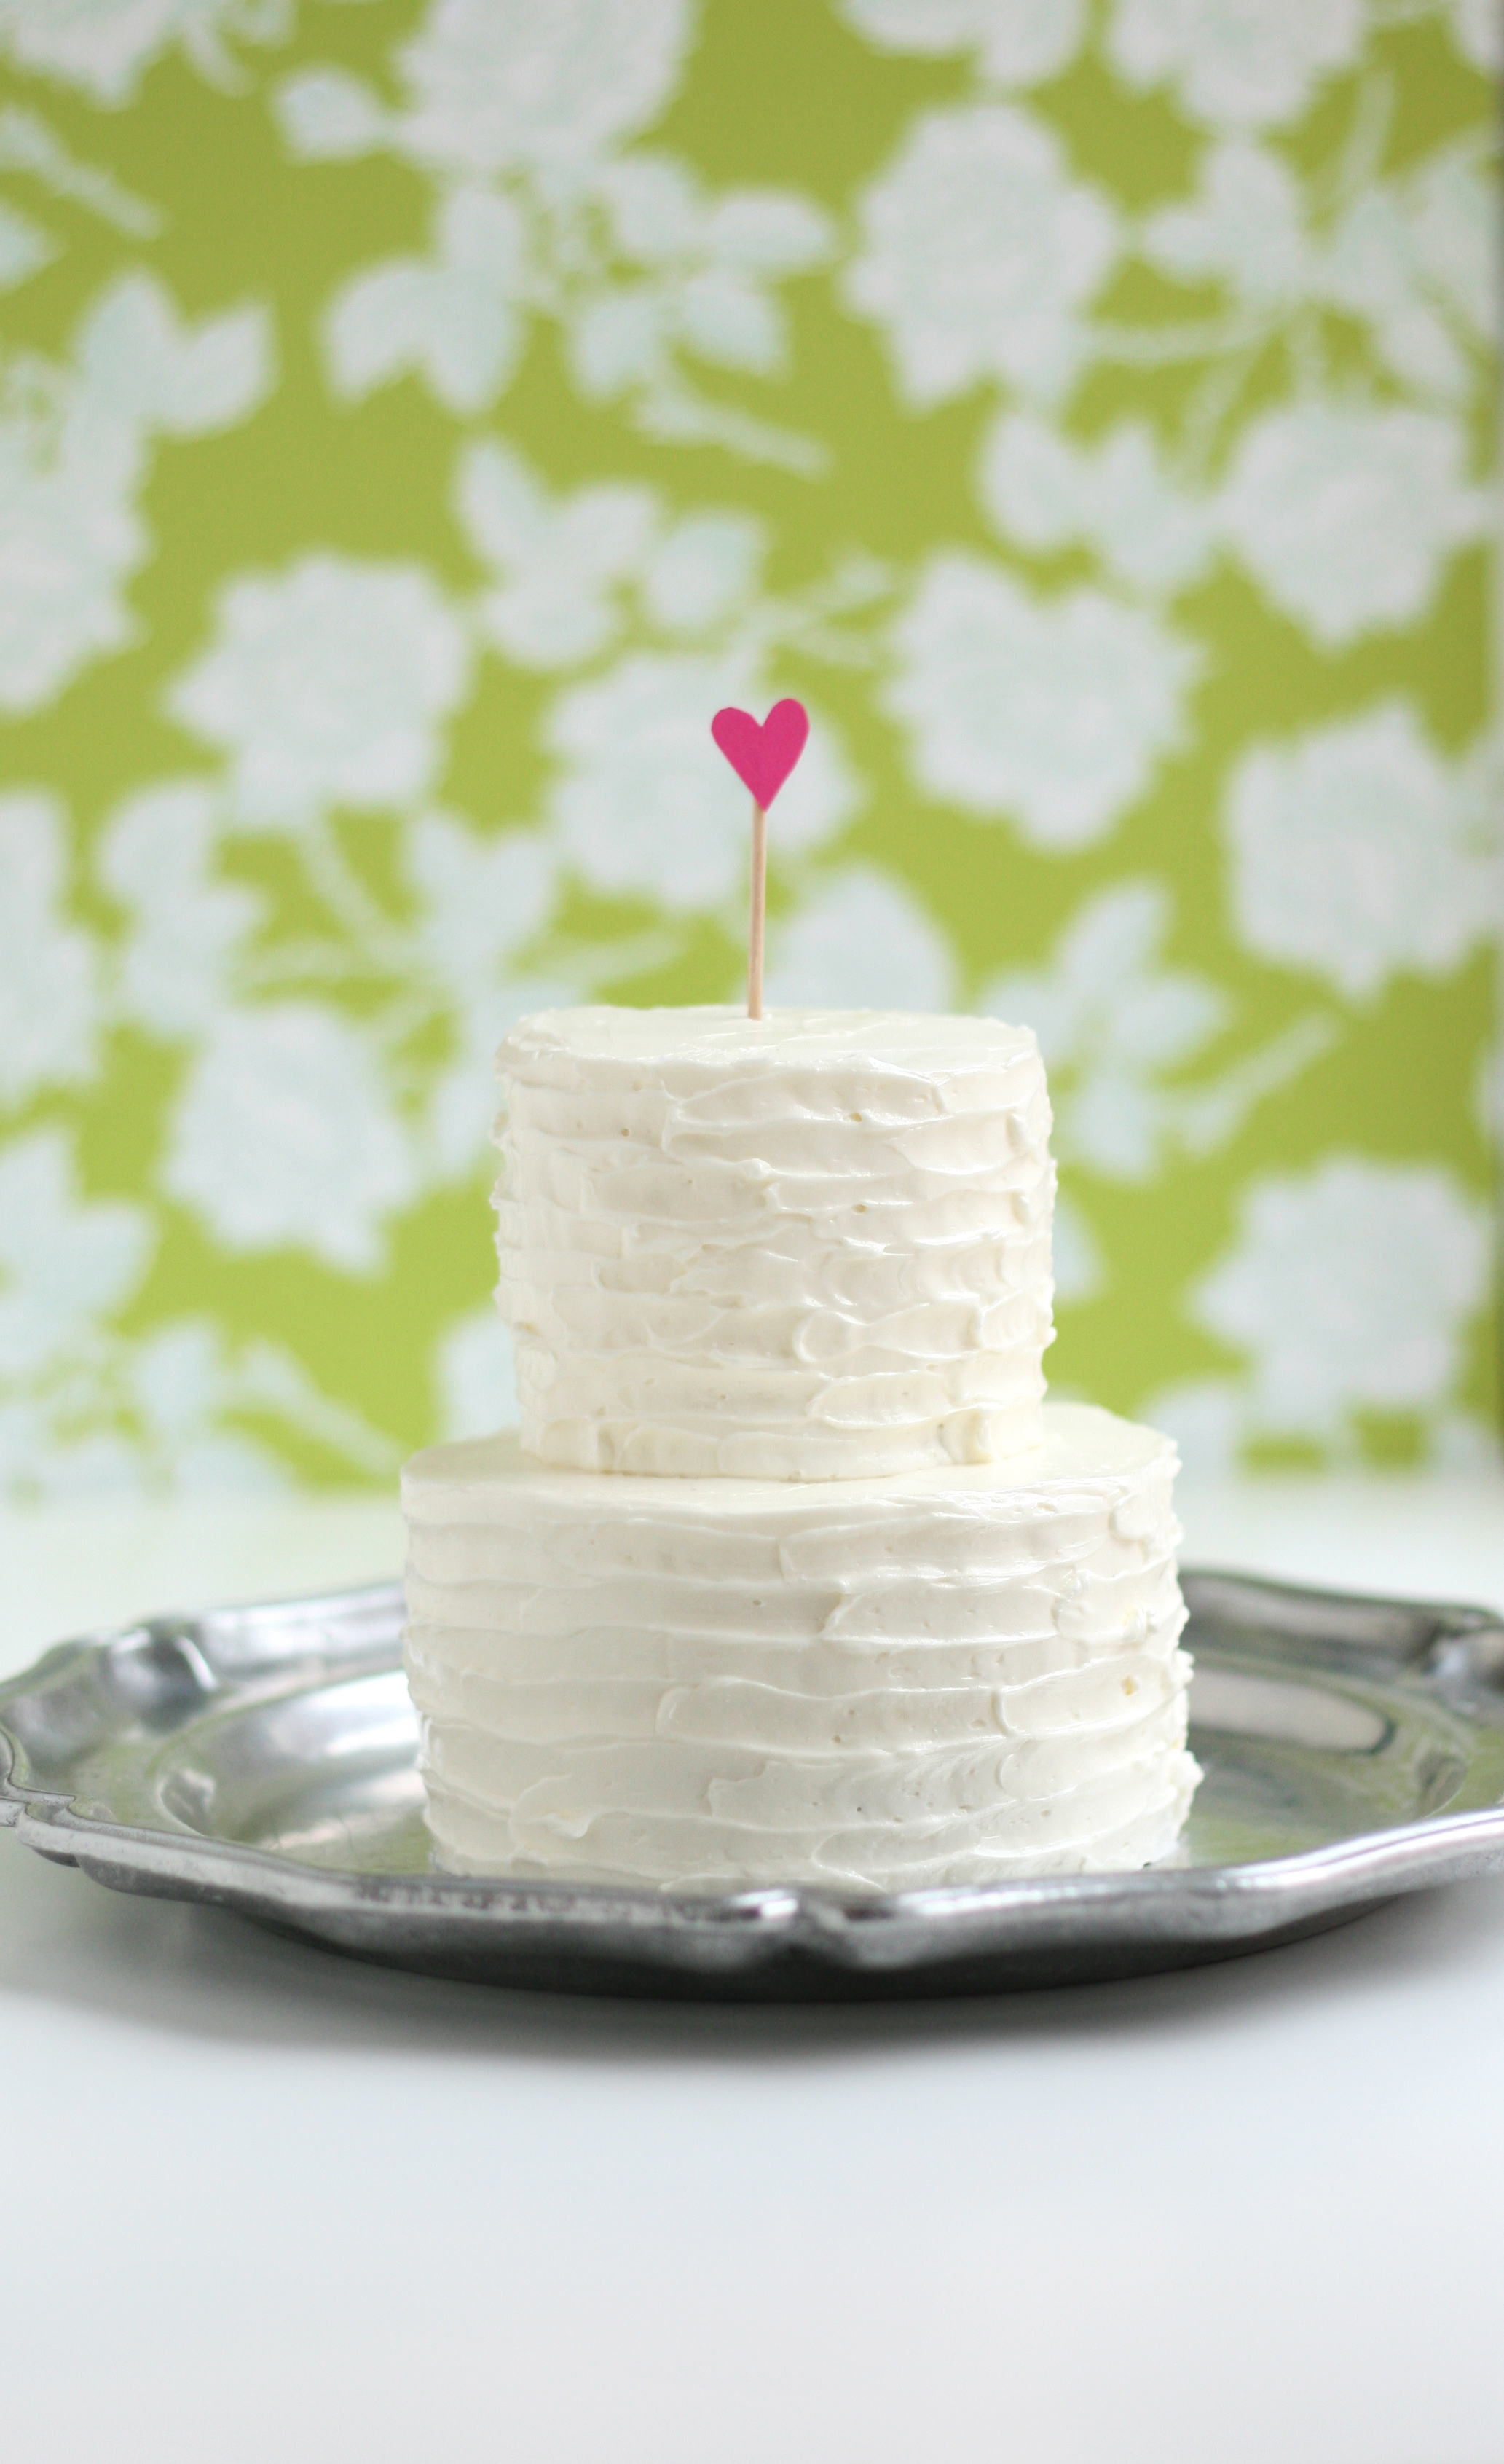
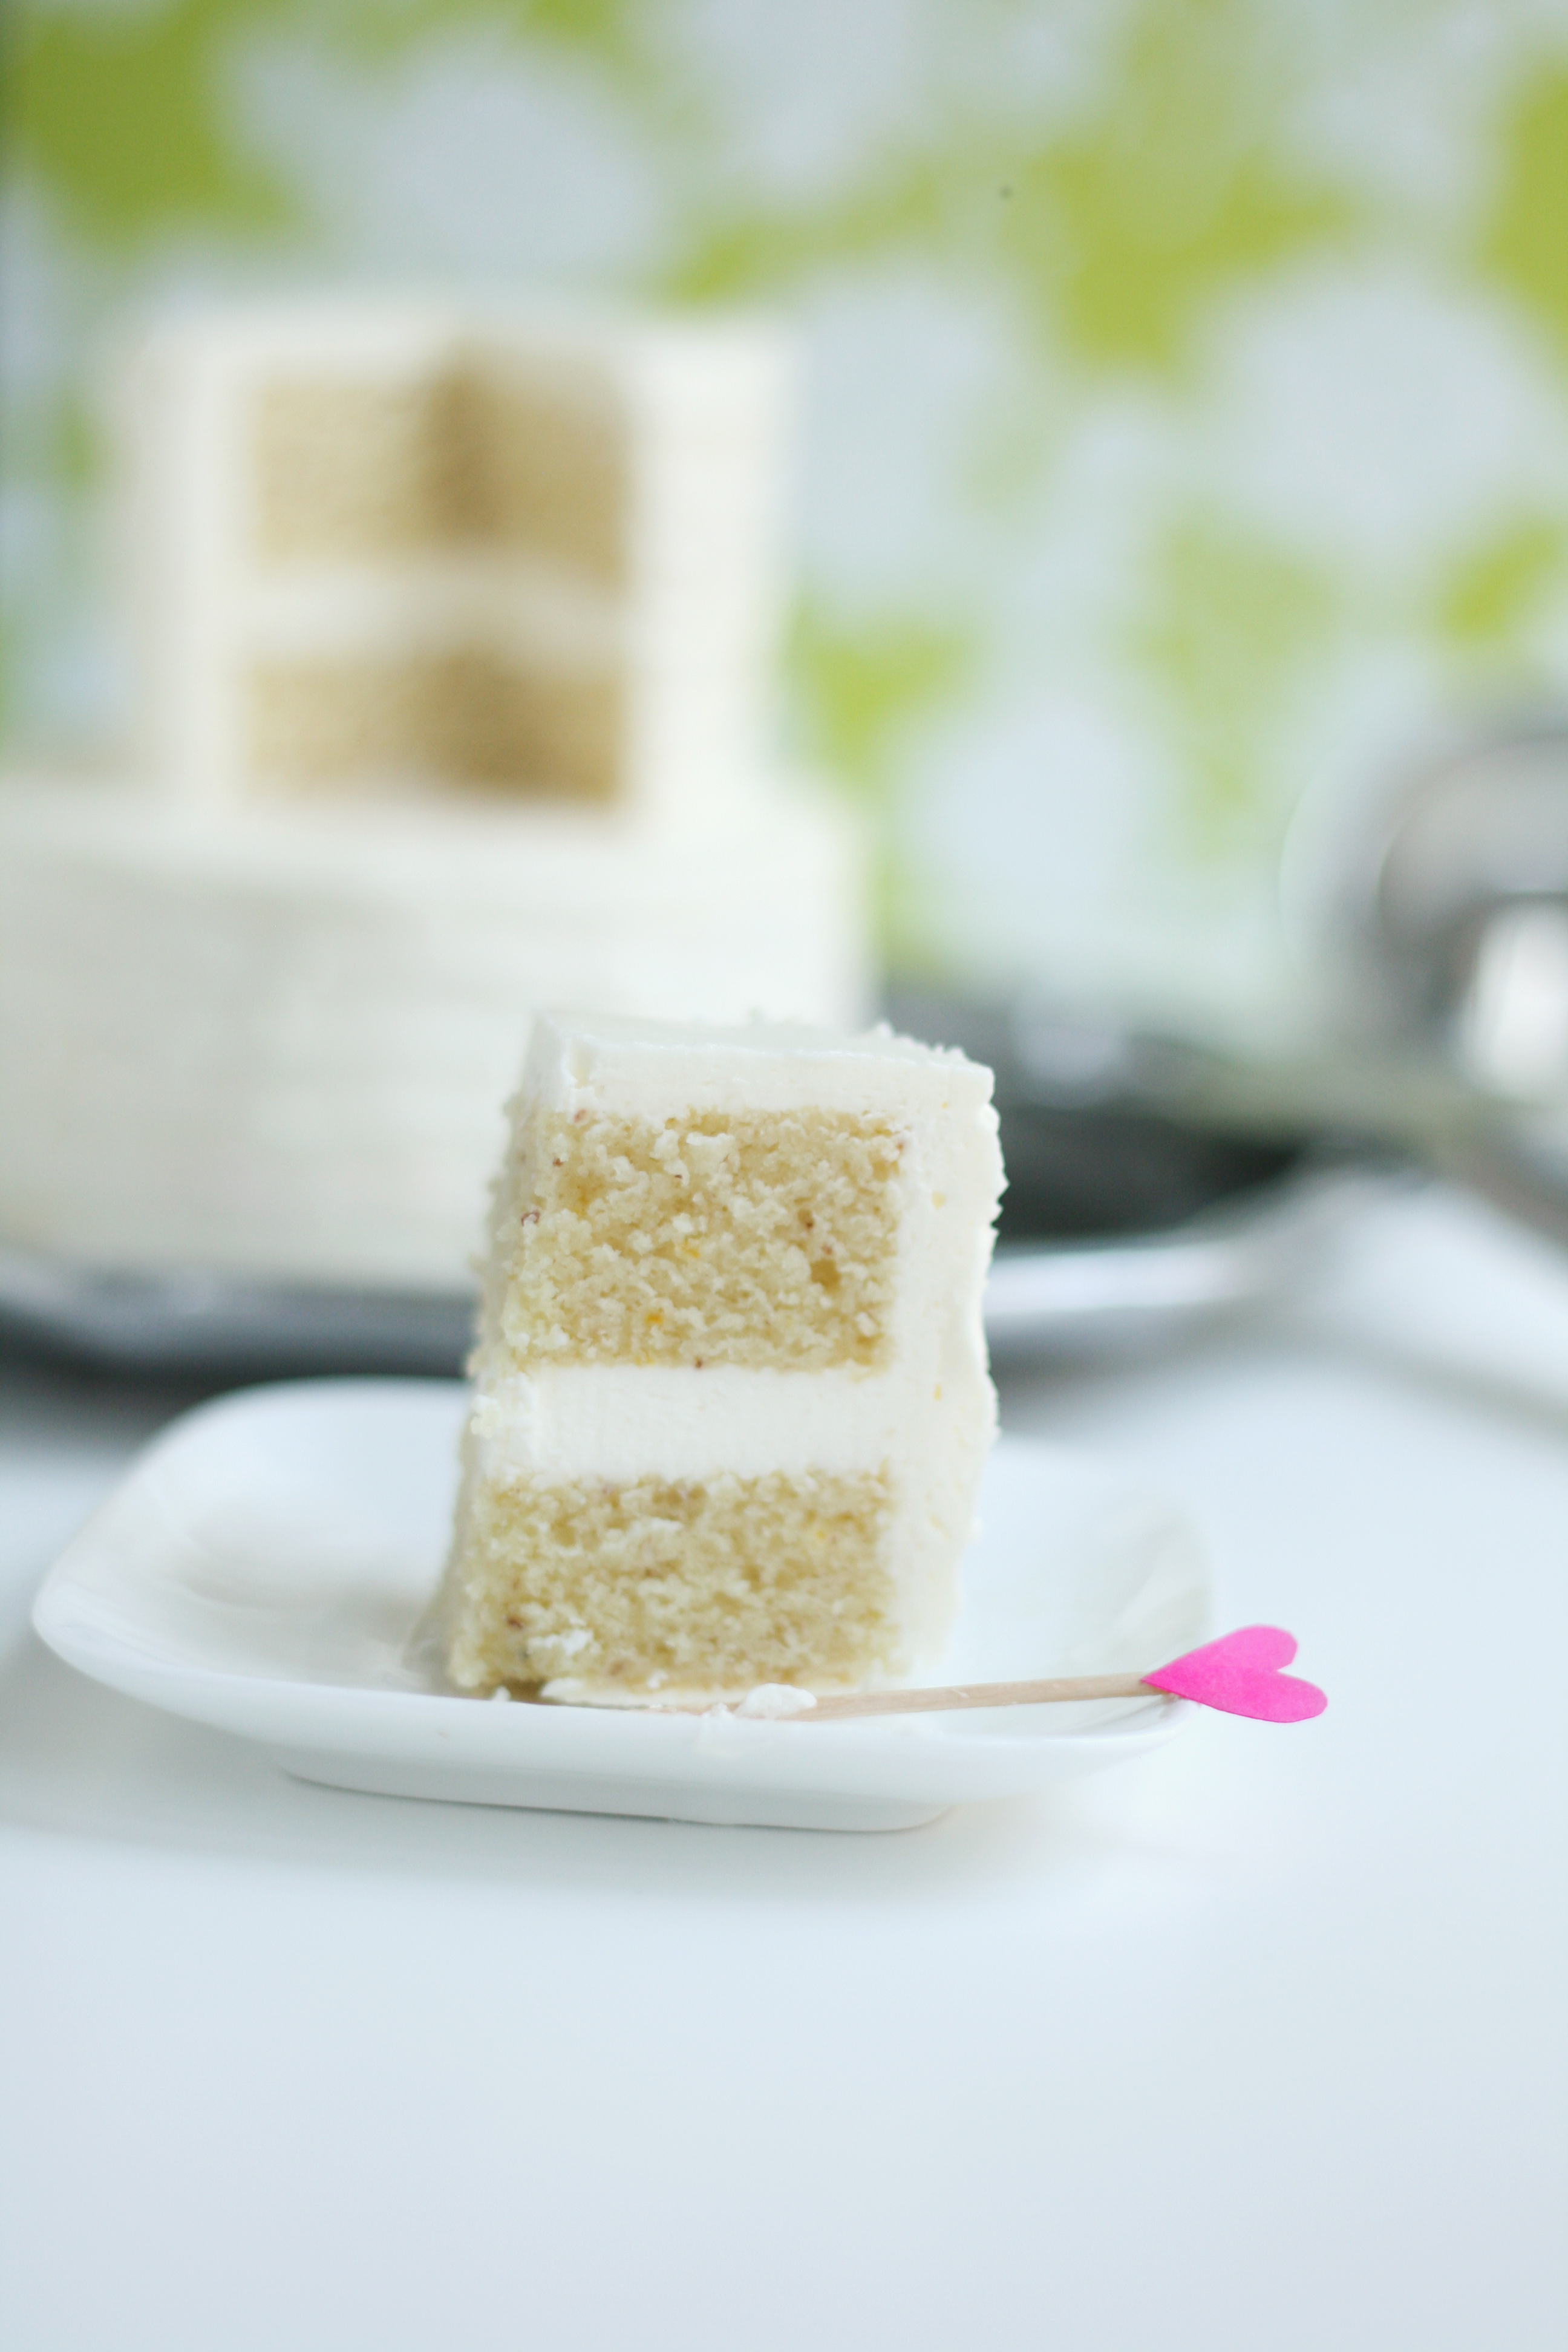
Speaking of sweet, I made a cake. A mini anniversary cake. I think I’ve started a new tradition in our marriage.
Isn’t it cute? Anything tiny is somehow cute. At it’s widest, it’s 3.5 inches—perfect for 2 people. It tastes like a wedding cake too. You know the wedding cake taste—fruity, decadent, and rich. So I took a risk and crafted a new recipe with hints of orange and almond (based off this one). Luckily the risk paid off—it’s my new favorite cake. Happy Anniversary to us!
Anniversary Cake Almond + orange cake, inspired by Cake Love makes one 9-inch pan
DRY 1/2 c.+ 2 tbsp. unbleached AP flour 2 tbsp. potato starch (I use Bob’s Red Mill) 3 tbsp. finely ground almonds 3/4 tsp. baking powder 1/2 tsp. salt
LIQUID 1/2 c. half and half 1/2 tsp. almond extract 1/2 tsp. orange zest 1 tbsp. orange juice, freshly squeezed
CREAMING 6 tbsp. unsalted butter, room temp 3/4 c. + 2 tbsp. extra-fine granulated sugar (I food process my regular sugar) 2 large eggs
1. Preheat oven to 350º. Set rack in the middle of the oven. 2. Set out ingredients and equipment. Sift flour. Finely pulse almonds to a flour like consistency. Measure dry ingredients into separate mixing bowl. Add flour and almonds and whisk together. Measure liquid ingredients into a separate bowl and set aside. Place butter and sugar in bowl of standing mixer. Crack eggs into a separate bowl and set aside. 3. In the bowl of a standing mixer fitted with paddle attachment, cream together the butter and sugar on the lowest speed for 3-5 minutes. (This will feel odd, but keep it on low.) 4. With the mixer still on the lowest speed, add the eggs one at a time, fully incorporating after each addition. Stop the mixer and scrape down the sides of the bowl. 5. Add the dry ingredient mixture alternately with the liquid mixture in 3 to 5 additions each, beginning and ending with the dry mixture. Move swiftly through the step to avoid overworking the batter. Don’t wait for the dry or liquid mixtures to be fully incorporated before adding the next. This step should take a total of about 60 seconds. 6. Stop the mixer and scrape the sides of the bowl all the way down. Don’t miss the clumps of ingredients hiding on the bottom. Mix on medium speed for 15 to 20 seconds to develop the batter’s structure. 7. Prepare the 9-inch round cake pan. Line the bottom with parchment paper. Do not spray the sides of the pan. (This helps to keep your cake from doming in the middle as it bakes. The cake is able to crawl up the side as it bakes and maintain an even shape.) 8. Place batter in pan. Bake for 28 minutes. 9. Once the top of the cake doesn’t jiggle in the center, test for doneness by inserting a toothpick into the middle of the cake. The center should be an even blonde color and the edges should be just beginning to pull away from the pan. When the skewer shows a touch of crumbs or comes out clean, the cake is done. 10. Cool cake for 20 minutes before removing from the pan. Use a small off-set spatula to loosen the cake from the rim of the pan. Carefully invert and remove parchment paper. Allow to cool completely before assembling.
Italian Meringue Buttercream with a hint of orange recipe from Cake Love by Warren Brown; makes 2-2 1/2 cups * a candy thermometer is necessary for this recipe
1. Set out ingredients and equipment. Separate the egg whites into the bowl of a standing mixer fitted with the whisk attachment (for the 1/2 egg white, crack into separate bowl and only add half of the white). Measure 1/2 cup sugar and the water into a 1-quart, heavy-bottomed saucepan. Gently stir to combine. Measure the remaining 2 tablespoons of sugar into a separate bowl. Cut the butter into tablespoon sized pieces and set aside. 2. To make the sugar syrup, place the candy thermomometer in the sauce pan and heat the mixture over medium-high heat. Partially cover with lid to capture the evaporating water—this helps to moisten the sides of the saucepan to prevent sugar crystals from forming. 3. With the mixer on high speed, begin whipping the egg whites to stiff peaks. When the peaks are stiff, you have a meringue. 4. Keep the mixture running and pour the 2 tablespoons of sugar into the meringue. 5. Raise the heat under the sugar syrup to bring the syrup to 245° if it’s not there already. When it has reached 245°, remove the thermometer and slowly pour the syrup into the meringue, with the mixer running. (It helps to hold the pan just above the height of the mixer. Pour confidently trying to hit the meringue and not the side of the bowl.) 6. After 1 to 2 minutes, reduce the speed of the mixture to medium for 3-4 minutes or until meringue is cooled. Add the butter 1 tablespoon at a time. Increase the mixer speed to high for 1 to 2 minutes or until the butter is fully incorporated. Add orange oil. Mix one final time.
Assemble the Cake 1. Using biscuit cutters, cut two 3.5″ circles and two 2.5″ circles. 2. Assemble the tiers separately. Fill bottom layer of each tier with buttercream. Apply a crumb coat to each tier. Refrigerate for 30 minutes. 3. Ice bottom tier and top tier separately. To achieve the rustic look, pull a butter knife around the circumference of the cake. Start from bottom and work up. 4. Using a flexible spatula, carefully place the top tier of cake on to bottom tier. Clean up any knicks in the move. The italian meringue buttercream repairs easily. 5. Store cake in refrigerator, covered. Serve at room temperature. *For in-depth cake assembly instructions, click here.
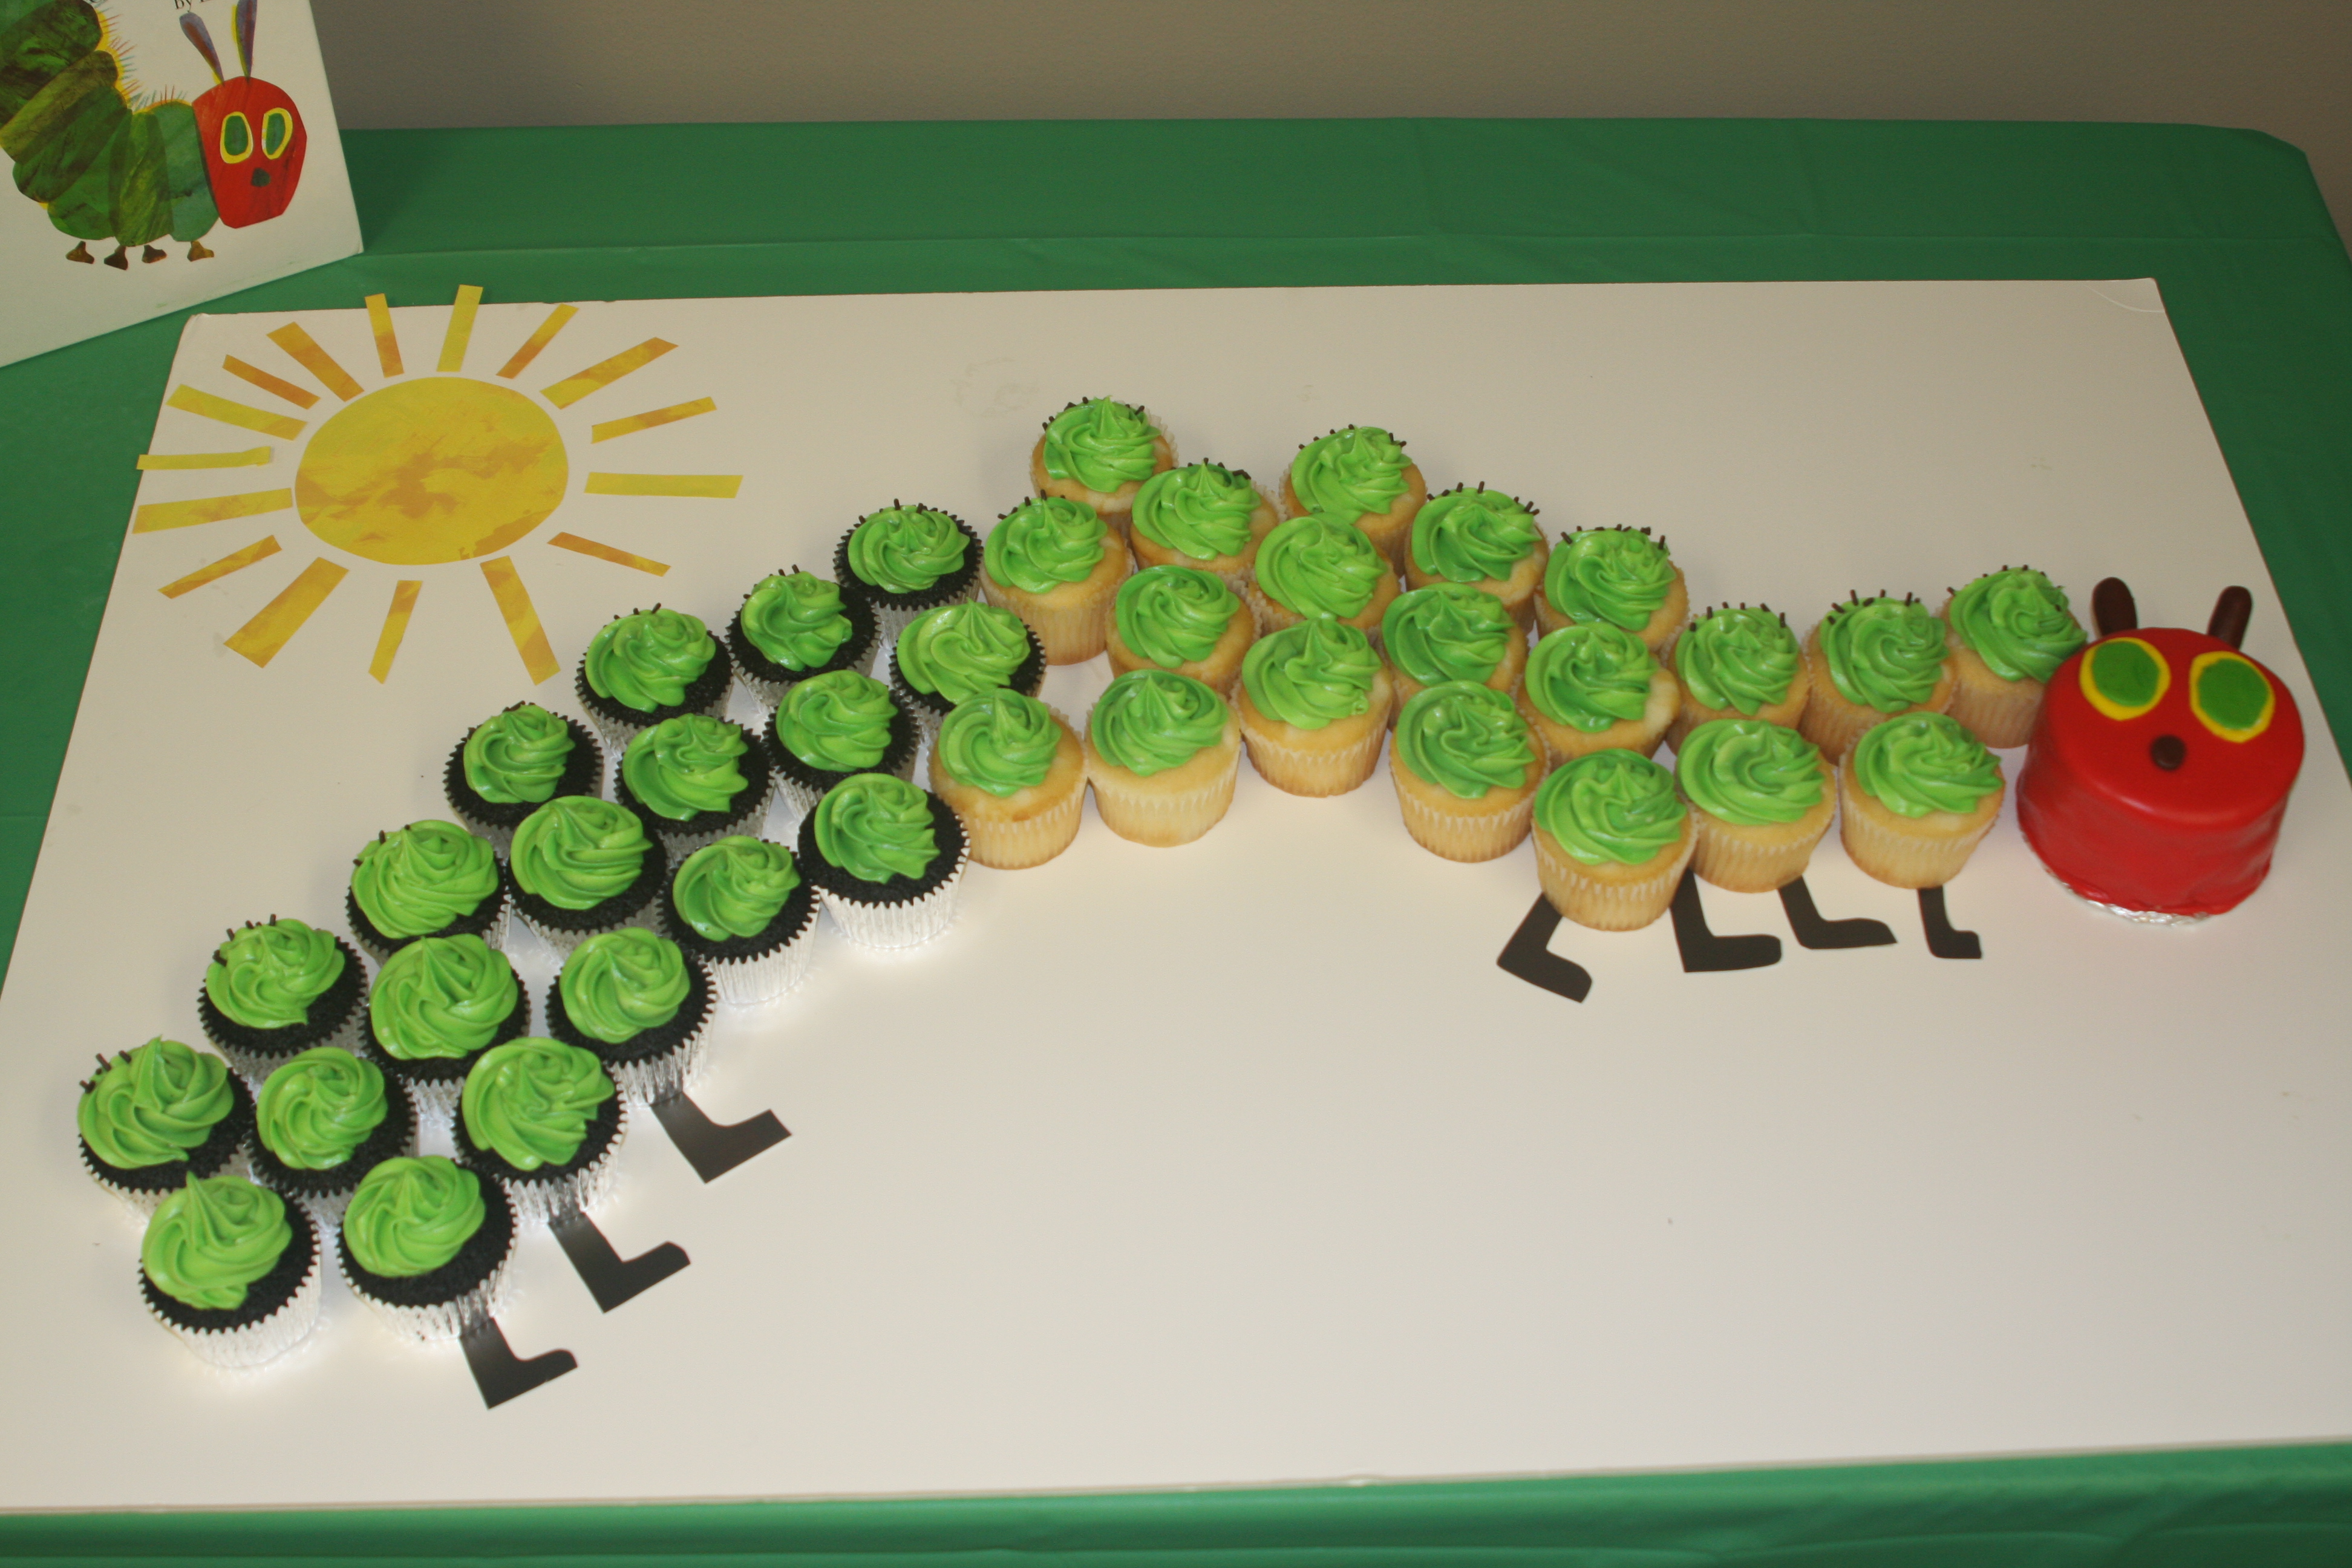
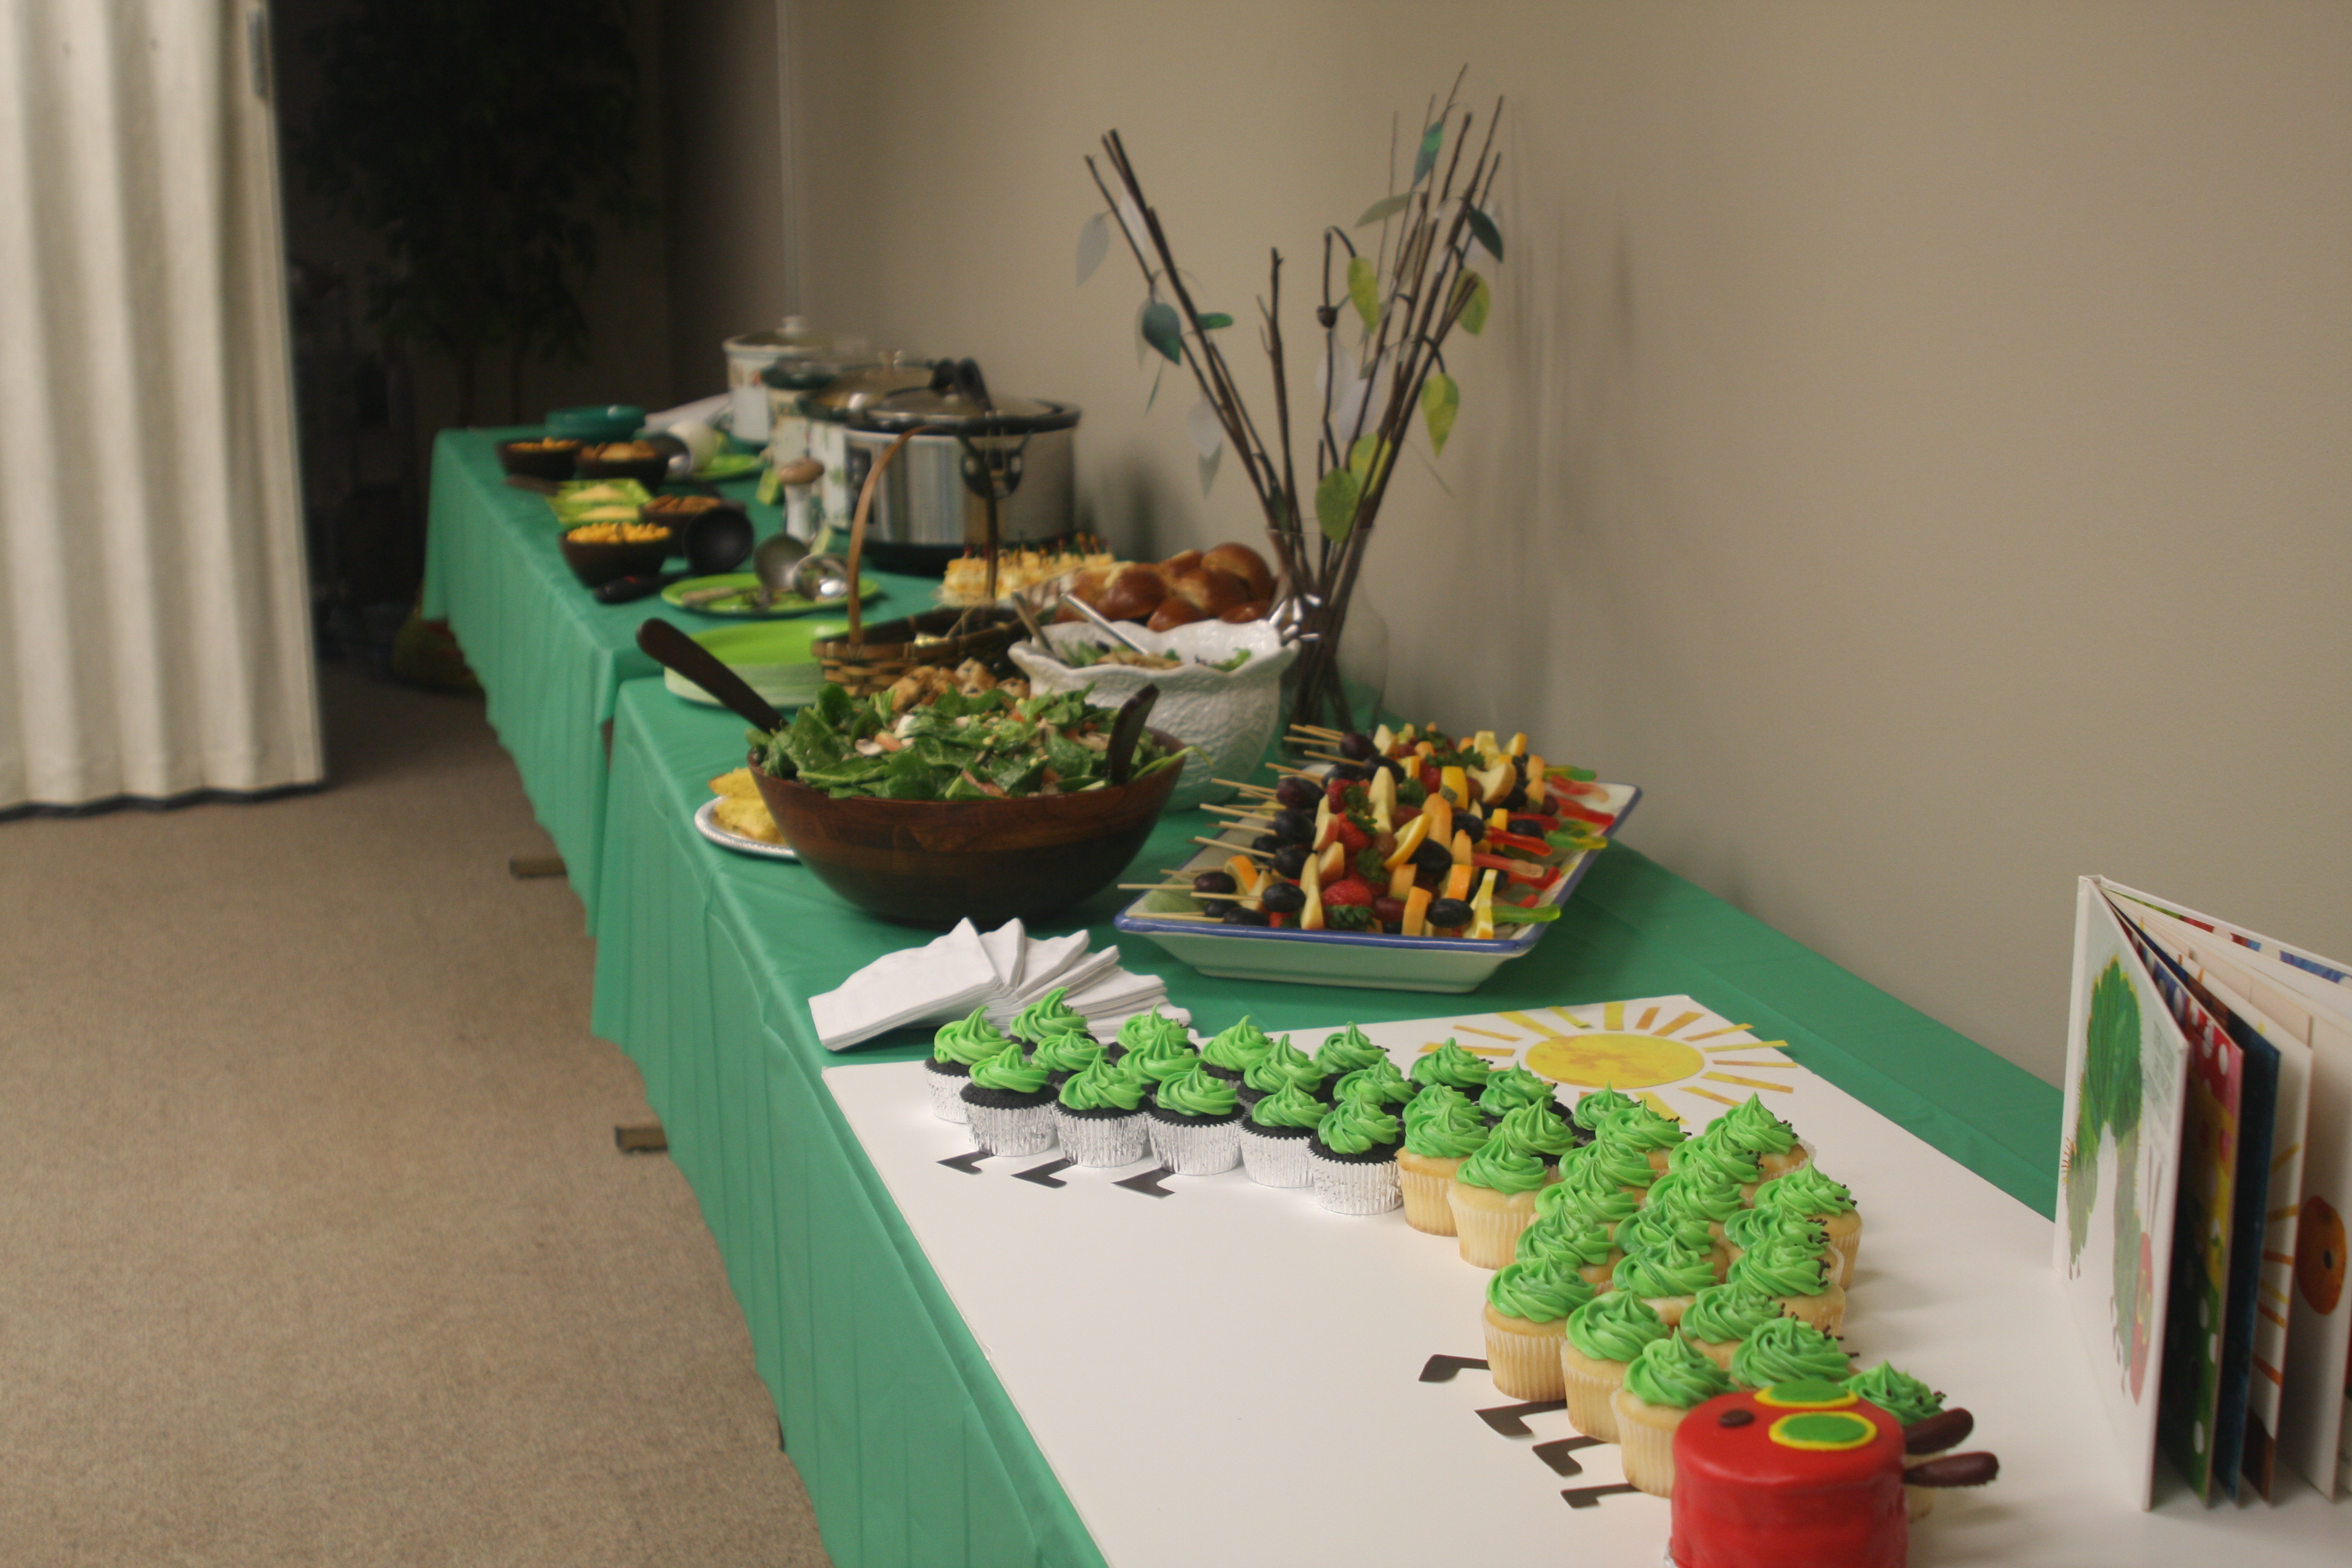
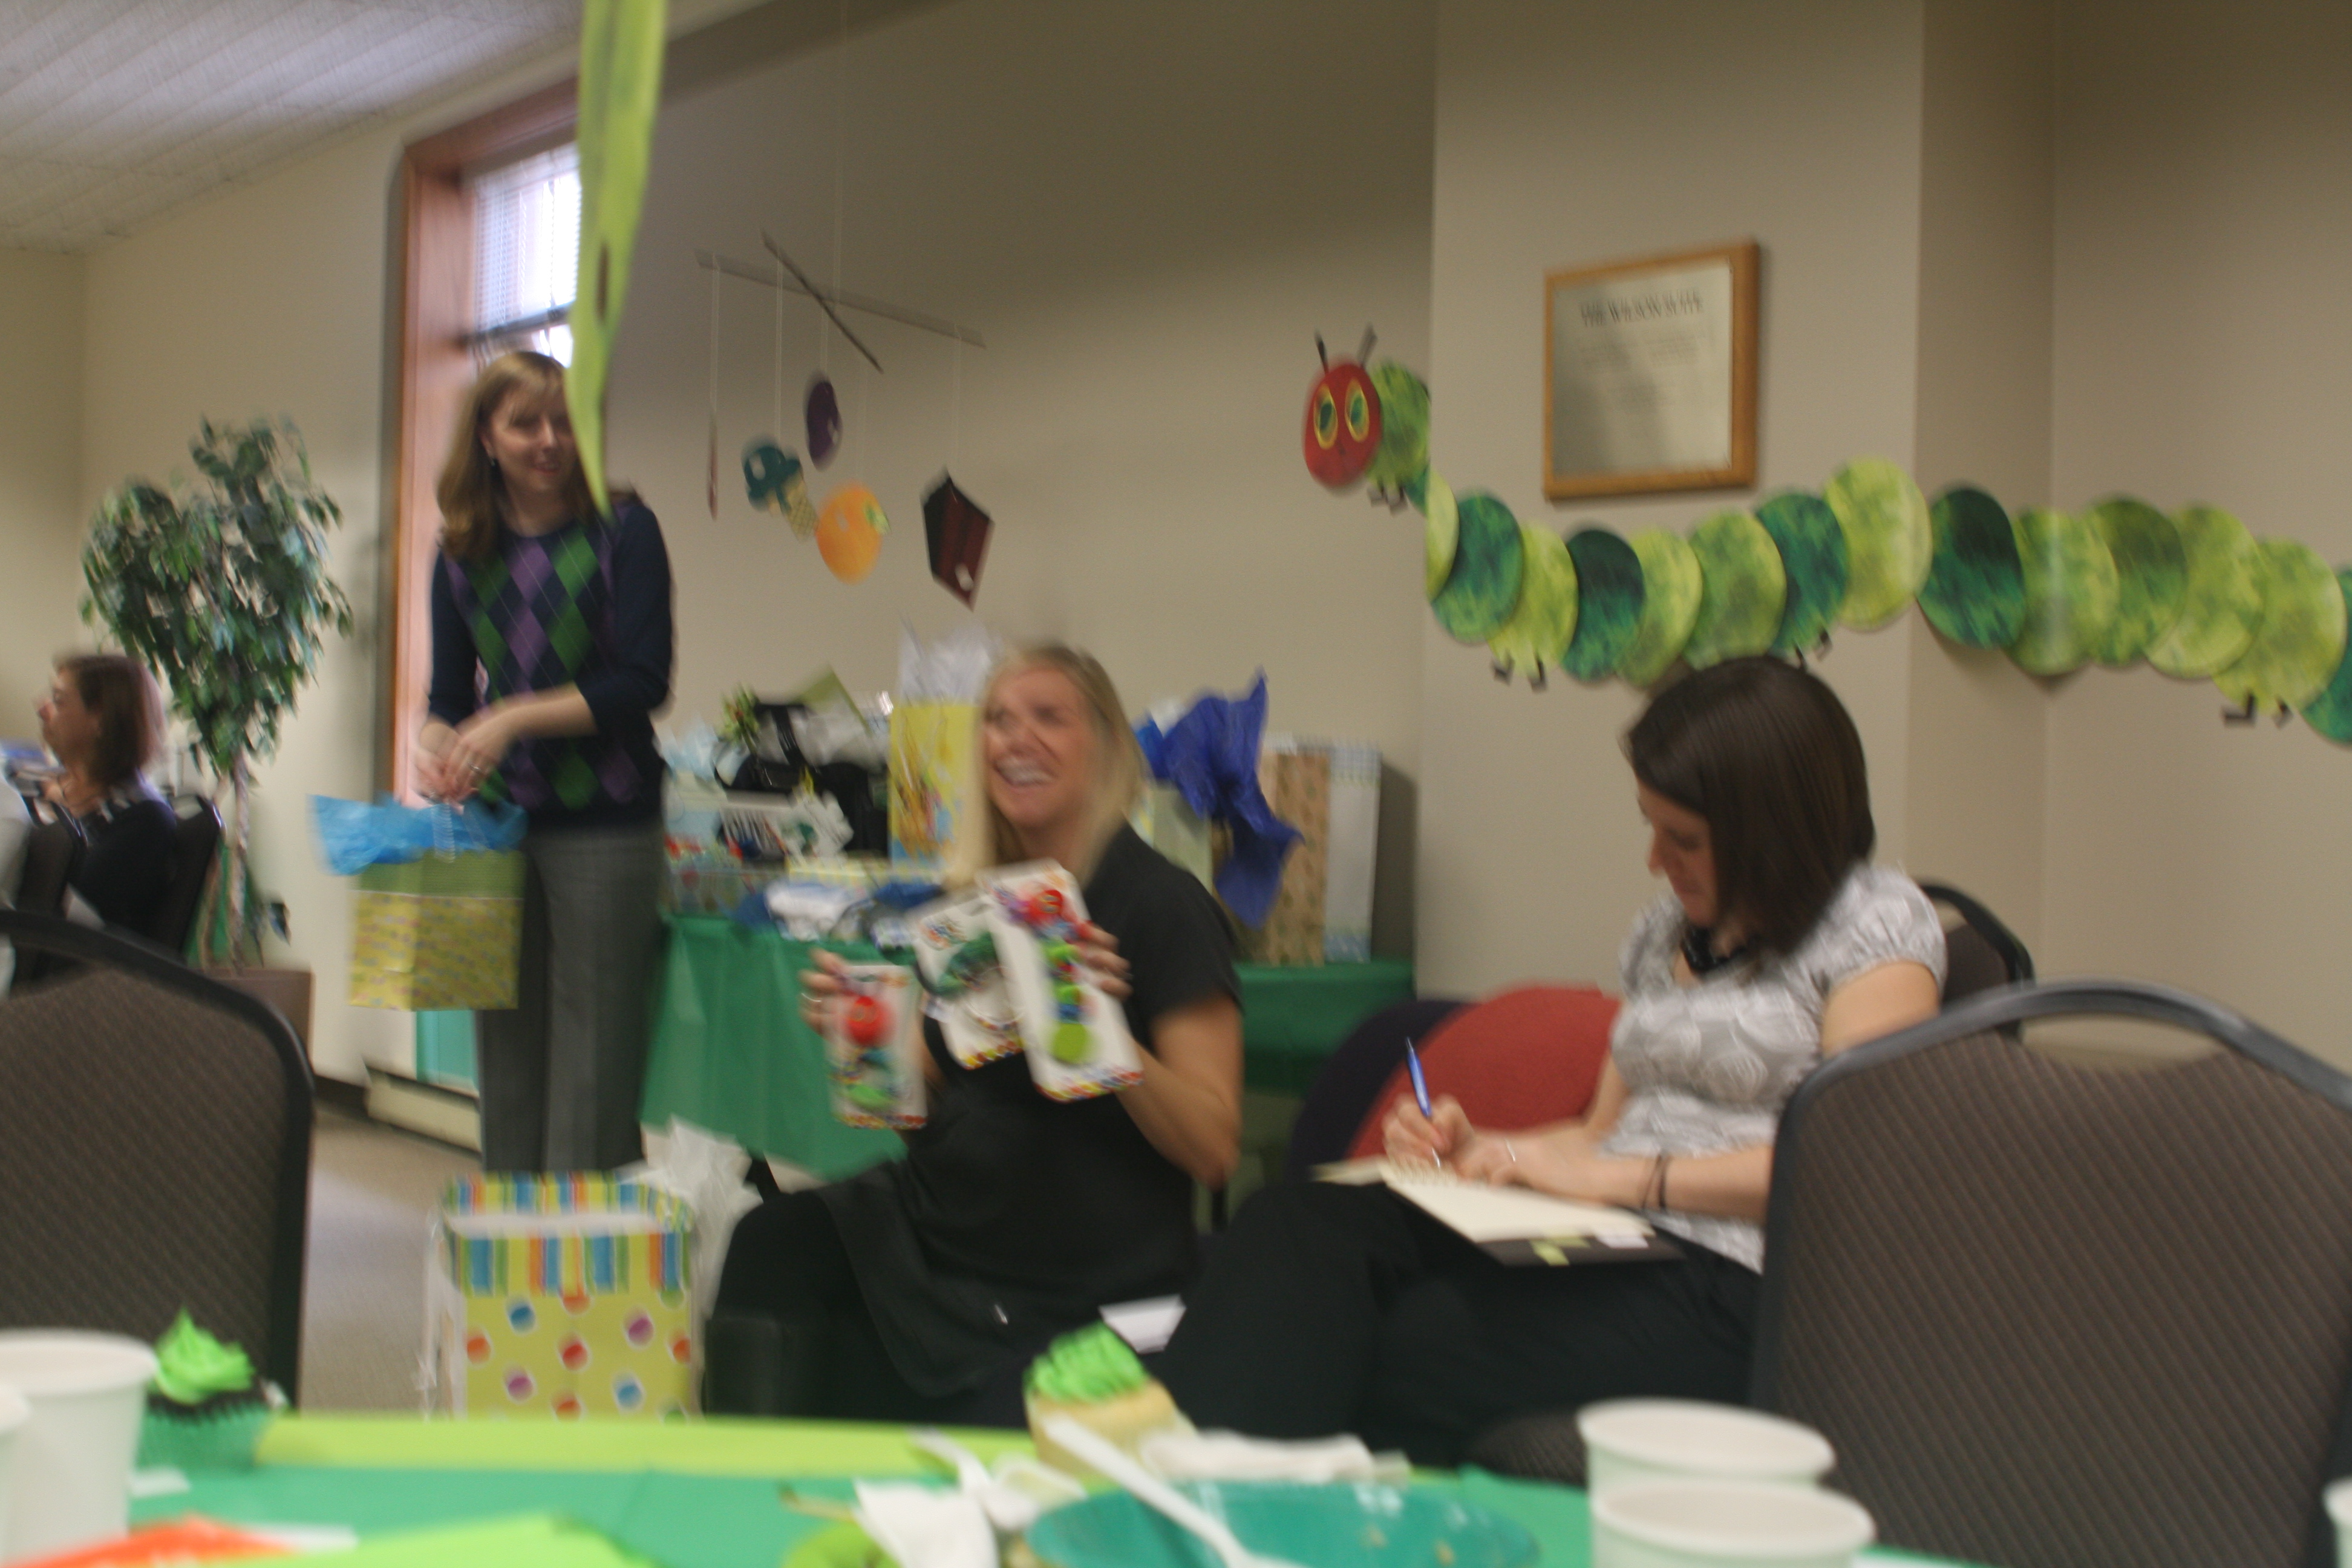
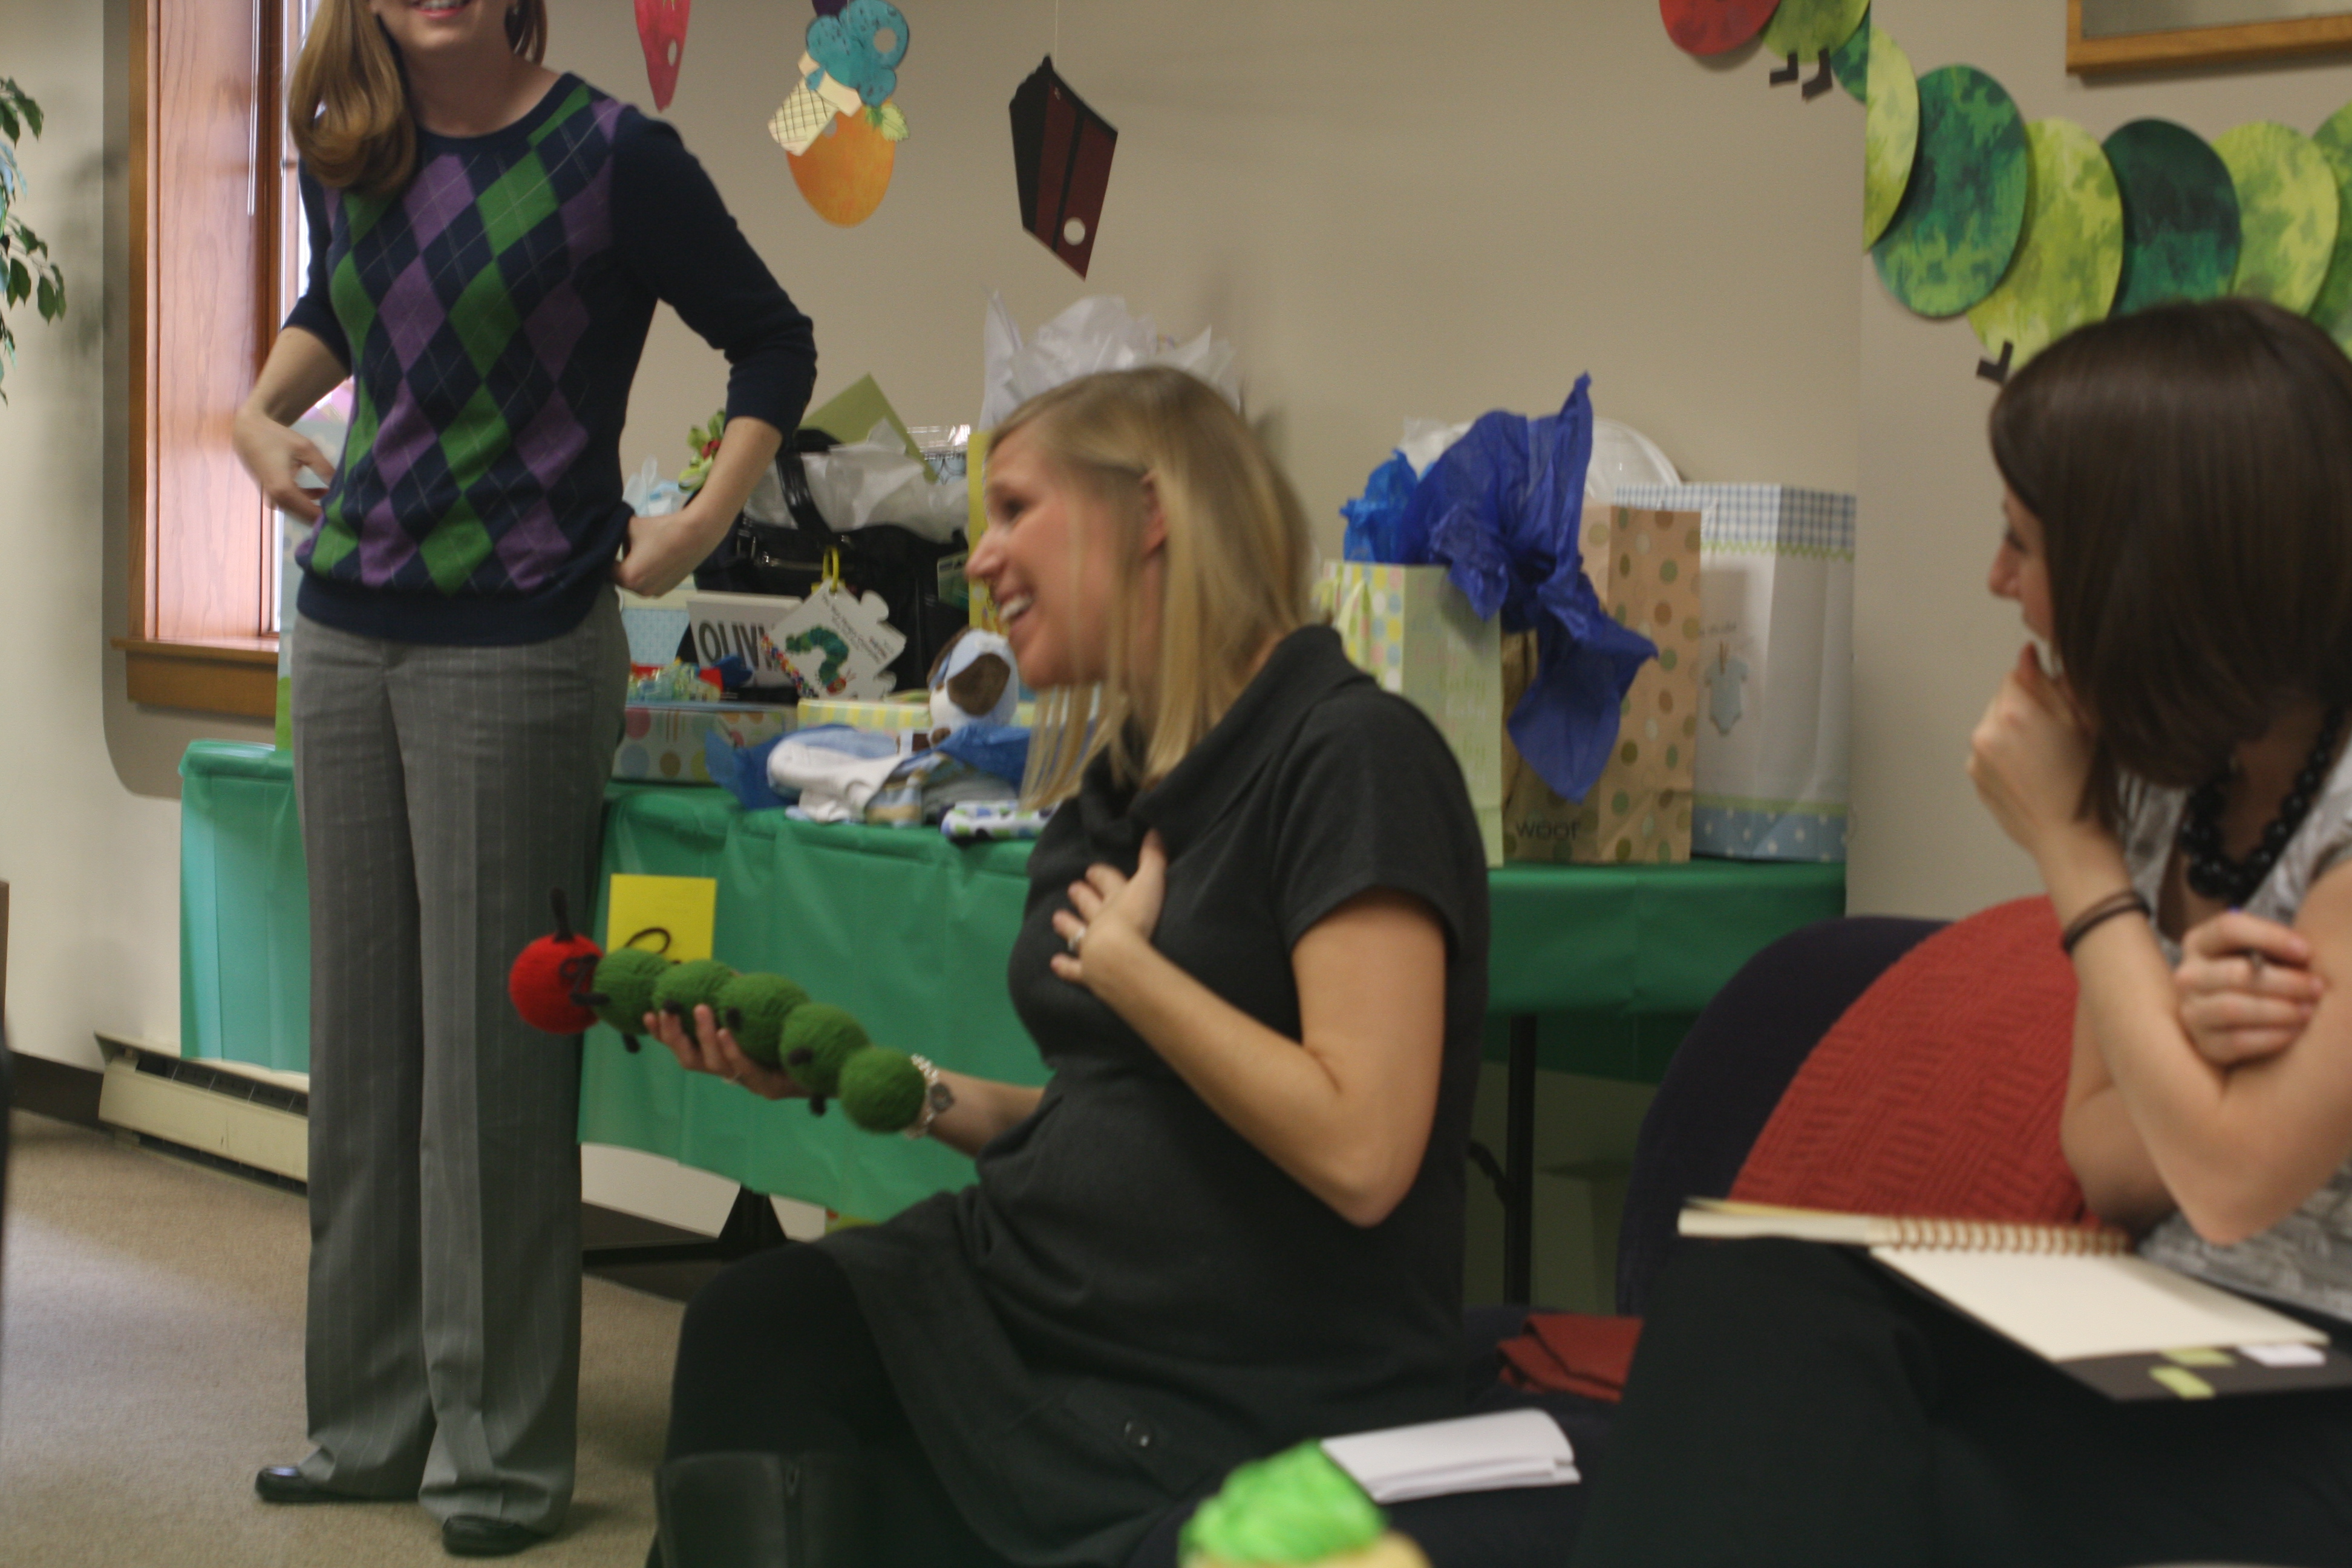
My coworkers and I threw a baby shower this week for our dear friend Kim. She and her husband Dan have a little boy on the way. No offense to all the men out there, but boy baby showers are a lot harder to plan than little girl showers where all you need are different shades of pink, some polka dots, cute girly baby outfits, eww’s & aww’s, cupcakes, and you’re set.Mary, my coworker, came up with the theme for the shower— The Very Hungry Caterpillar, and it turned out excellent! Cupcakes still made their appearance at the shower, there were plenty of cute little boy outfits, and an abundance of eww’s & aww’s!
The idea for the cupcakes came from Coco Cake. It is a lot easier than it looks. In order to create this, make cupcakes (we had 48 total). It has become a staple in my kitchen to use Cake Love‘s recipes for the chocolate cupcakes (LaTonya, another coworker, brought in the vanilla cupcakes). To decorate the cupcakes, I use the Wilton Dessert Decorator Pro—it makes icing cupcakes super easy. Drop different shades of green in the dispenser to add some variation in color as you ice. I made a cream cheese buttercream (cream cheese, butter, powdered sugar, vanilla, a dash of salt, and food coloring). After icing, use brown long sprinkles along the outer edge of the cupcakes for his hair. Now, onto the head. It does get a little trickier here. You can buy fondant and color it. Or, you can make it. Can you guess what I did? I had to try it myself, of course, allowing a little too much room for disaster to occur the night before the shower. Thankfully, it worked. To make the fondant, get a jar of marshmallow fluff (7-8 oz.) and add lots and lots, I mean lots, of powdered sugar. The recipe I used called for 2 cups of powdered sugar, but that had to be a lie. I used at least double. You need to get all the sticky out of the fluff so that you can roll it out smoothly without it sticking to your surface.After you have a good consistency, add in your food coloring. When rolling the fondant out, don’t be afraid to dowse your surface with powdered sugar. You can brush it off afterward, or, if you let it sit overnight, it will soak in. Decorate your head as you please, and voila, you now have a Very Hungry Caterpillar Cake!