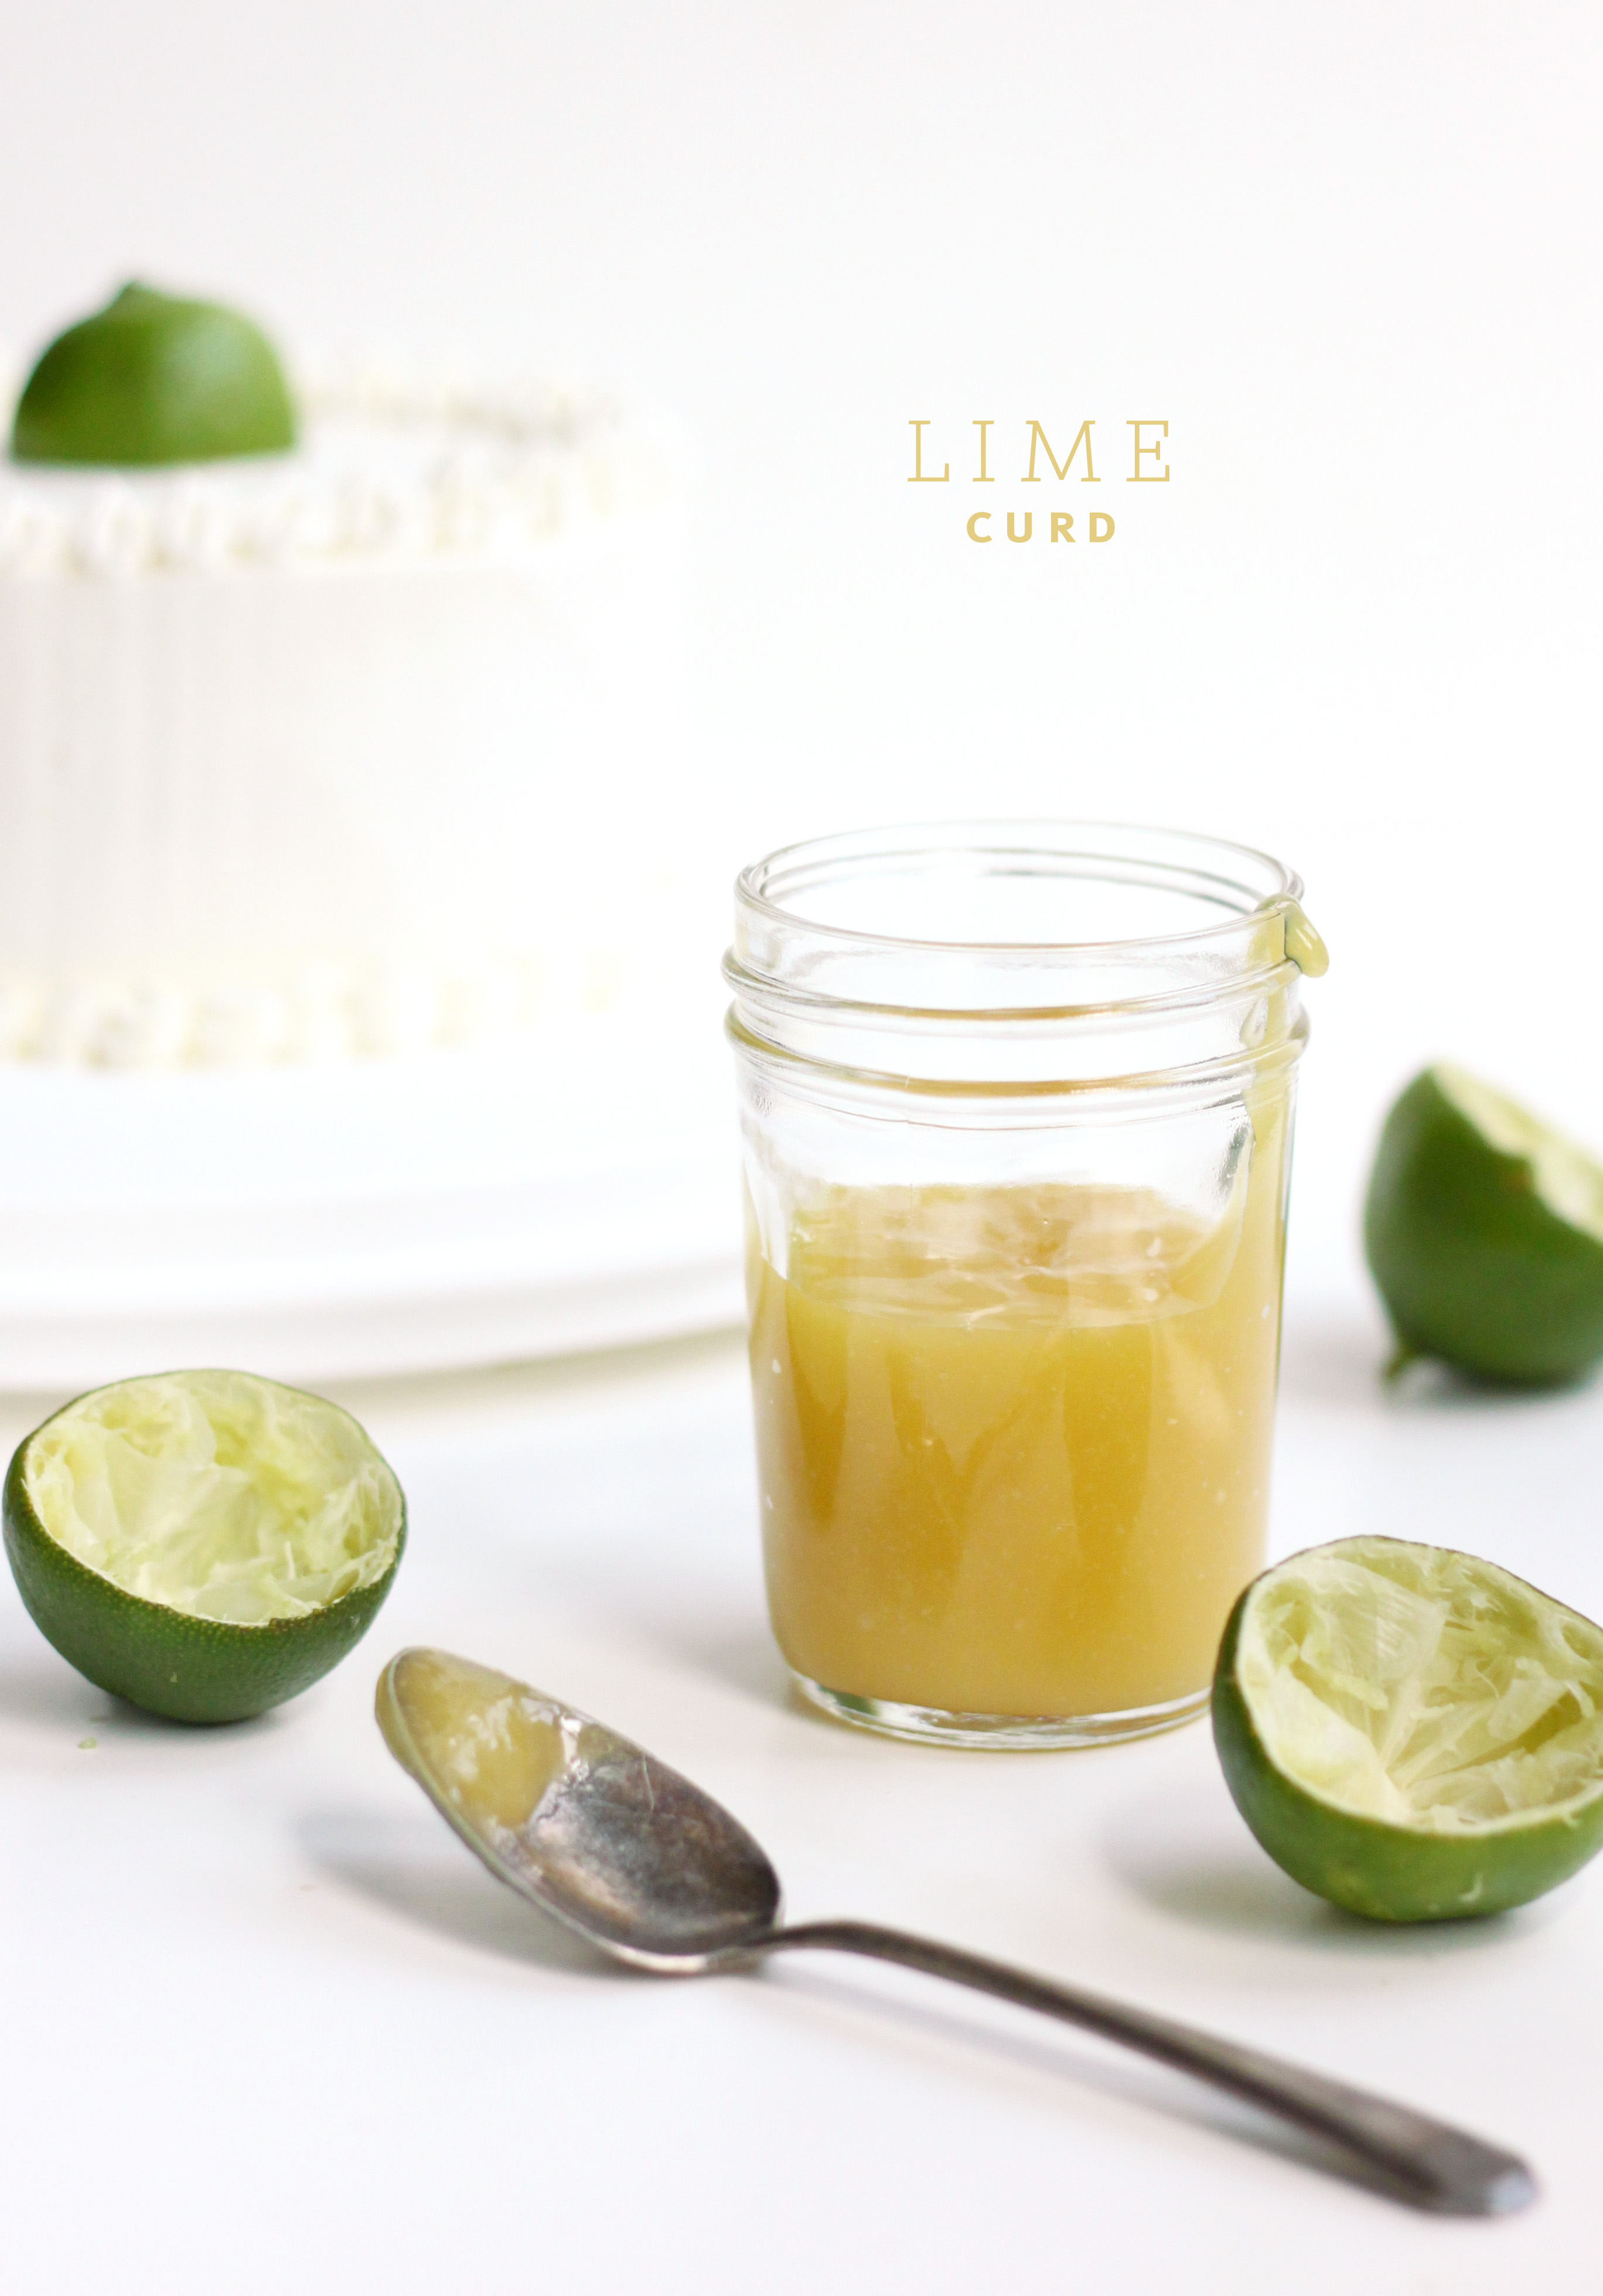
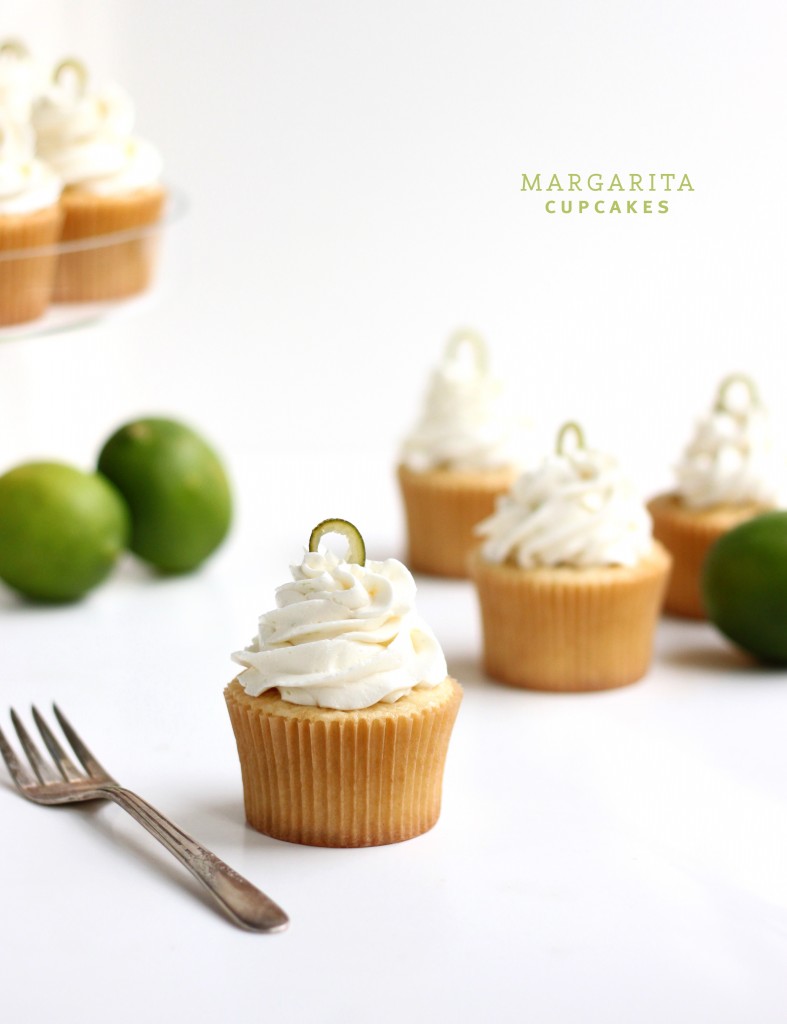
Making margarita cupcakes turned into making more margarita cupcakes.
![]()
Which turned into an excess of limes and eggs lying around the kitchen. Read more
![]()

Making margarita cupcakes turned into making more margarita cupcakes.
![]()
Which turned into an excess of limes and eggs lying around the kitchen. Read more
I should be packing. And organizing. And throwing out things I haven’t touched in the past four years since moving to Chicago. I shouldn’t be blogging and baking and coming up with new recipes. I shouldn’t be running to Trader Joe’s to pick up bags of ingredients. Or setting up my white boards in front of the window to wait for the light to turn just right. Read more
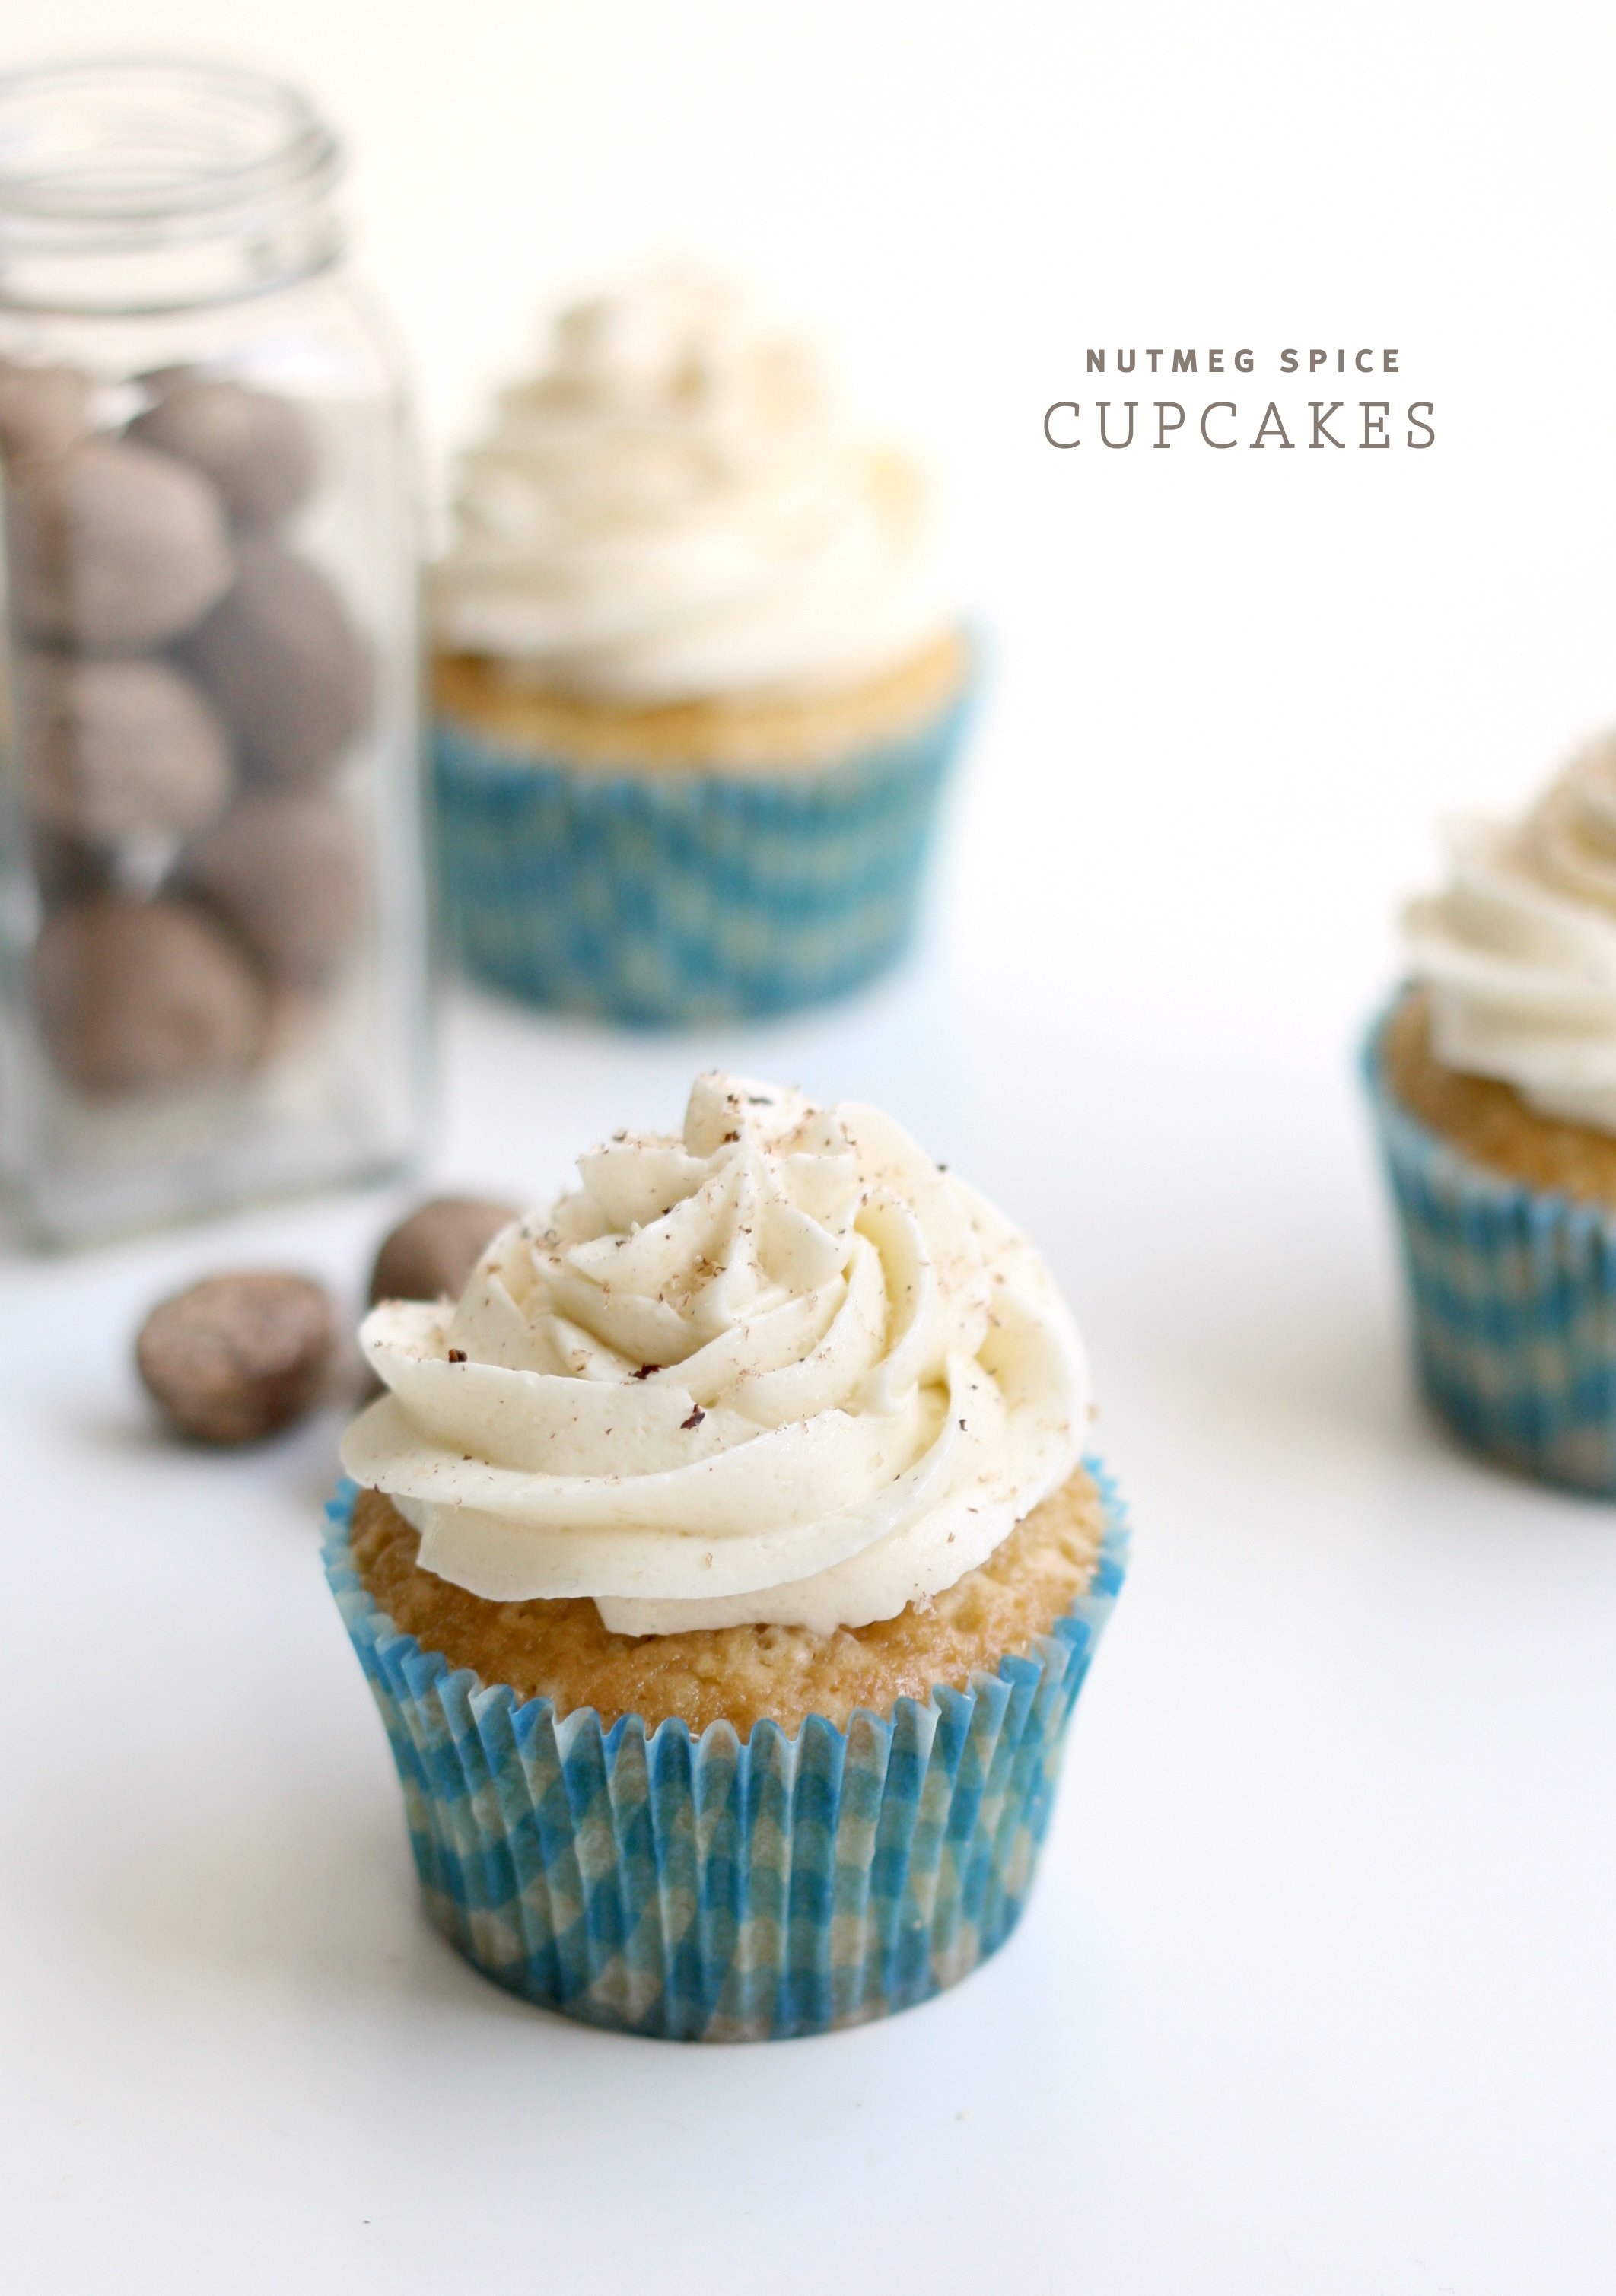
Match Day—done! Hallelujah and thank you for all the crossed fingers, prayers, and happy thoughts! Last Thursday night felt like Christmas Eve as a 5 year old. I was up every hour hoping Santa had already come. The fateful email finally came in a little after 7:30 am, only moments to spare before having a heart attack.
I promised you answers in the form of a sweet treat. Here she is. Nutmeg Spice Cupcake. Can you figure out where we’re going? If you’ve read this blog long enough, you know I love Warren Brown and his cake recipes. So when it came time to announce the Match Day results, I flipped open Warren’s book—United Cakes of America. Page 38. Connecticut. The nutmeg state. Read more
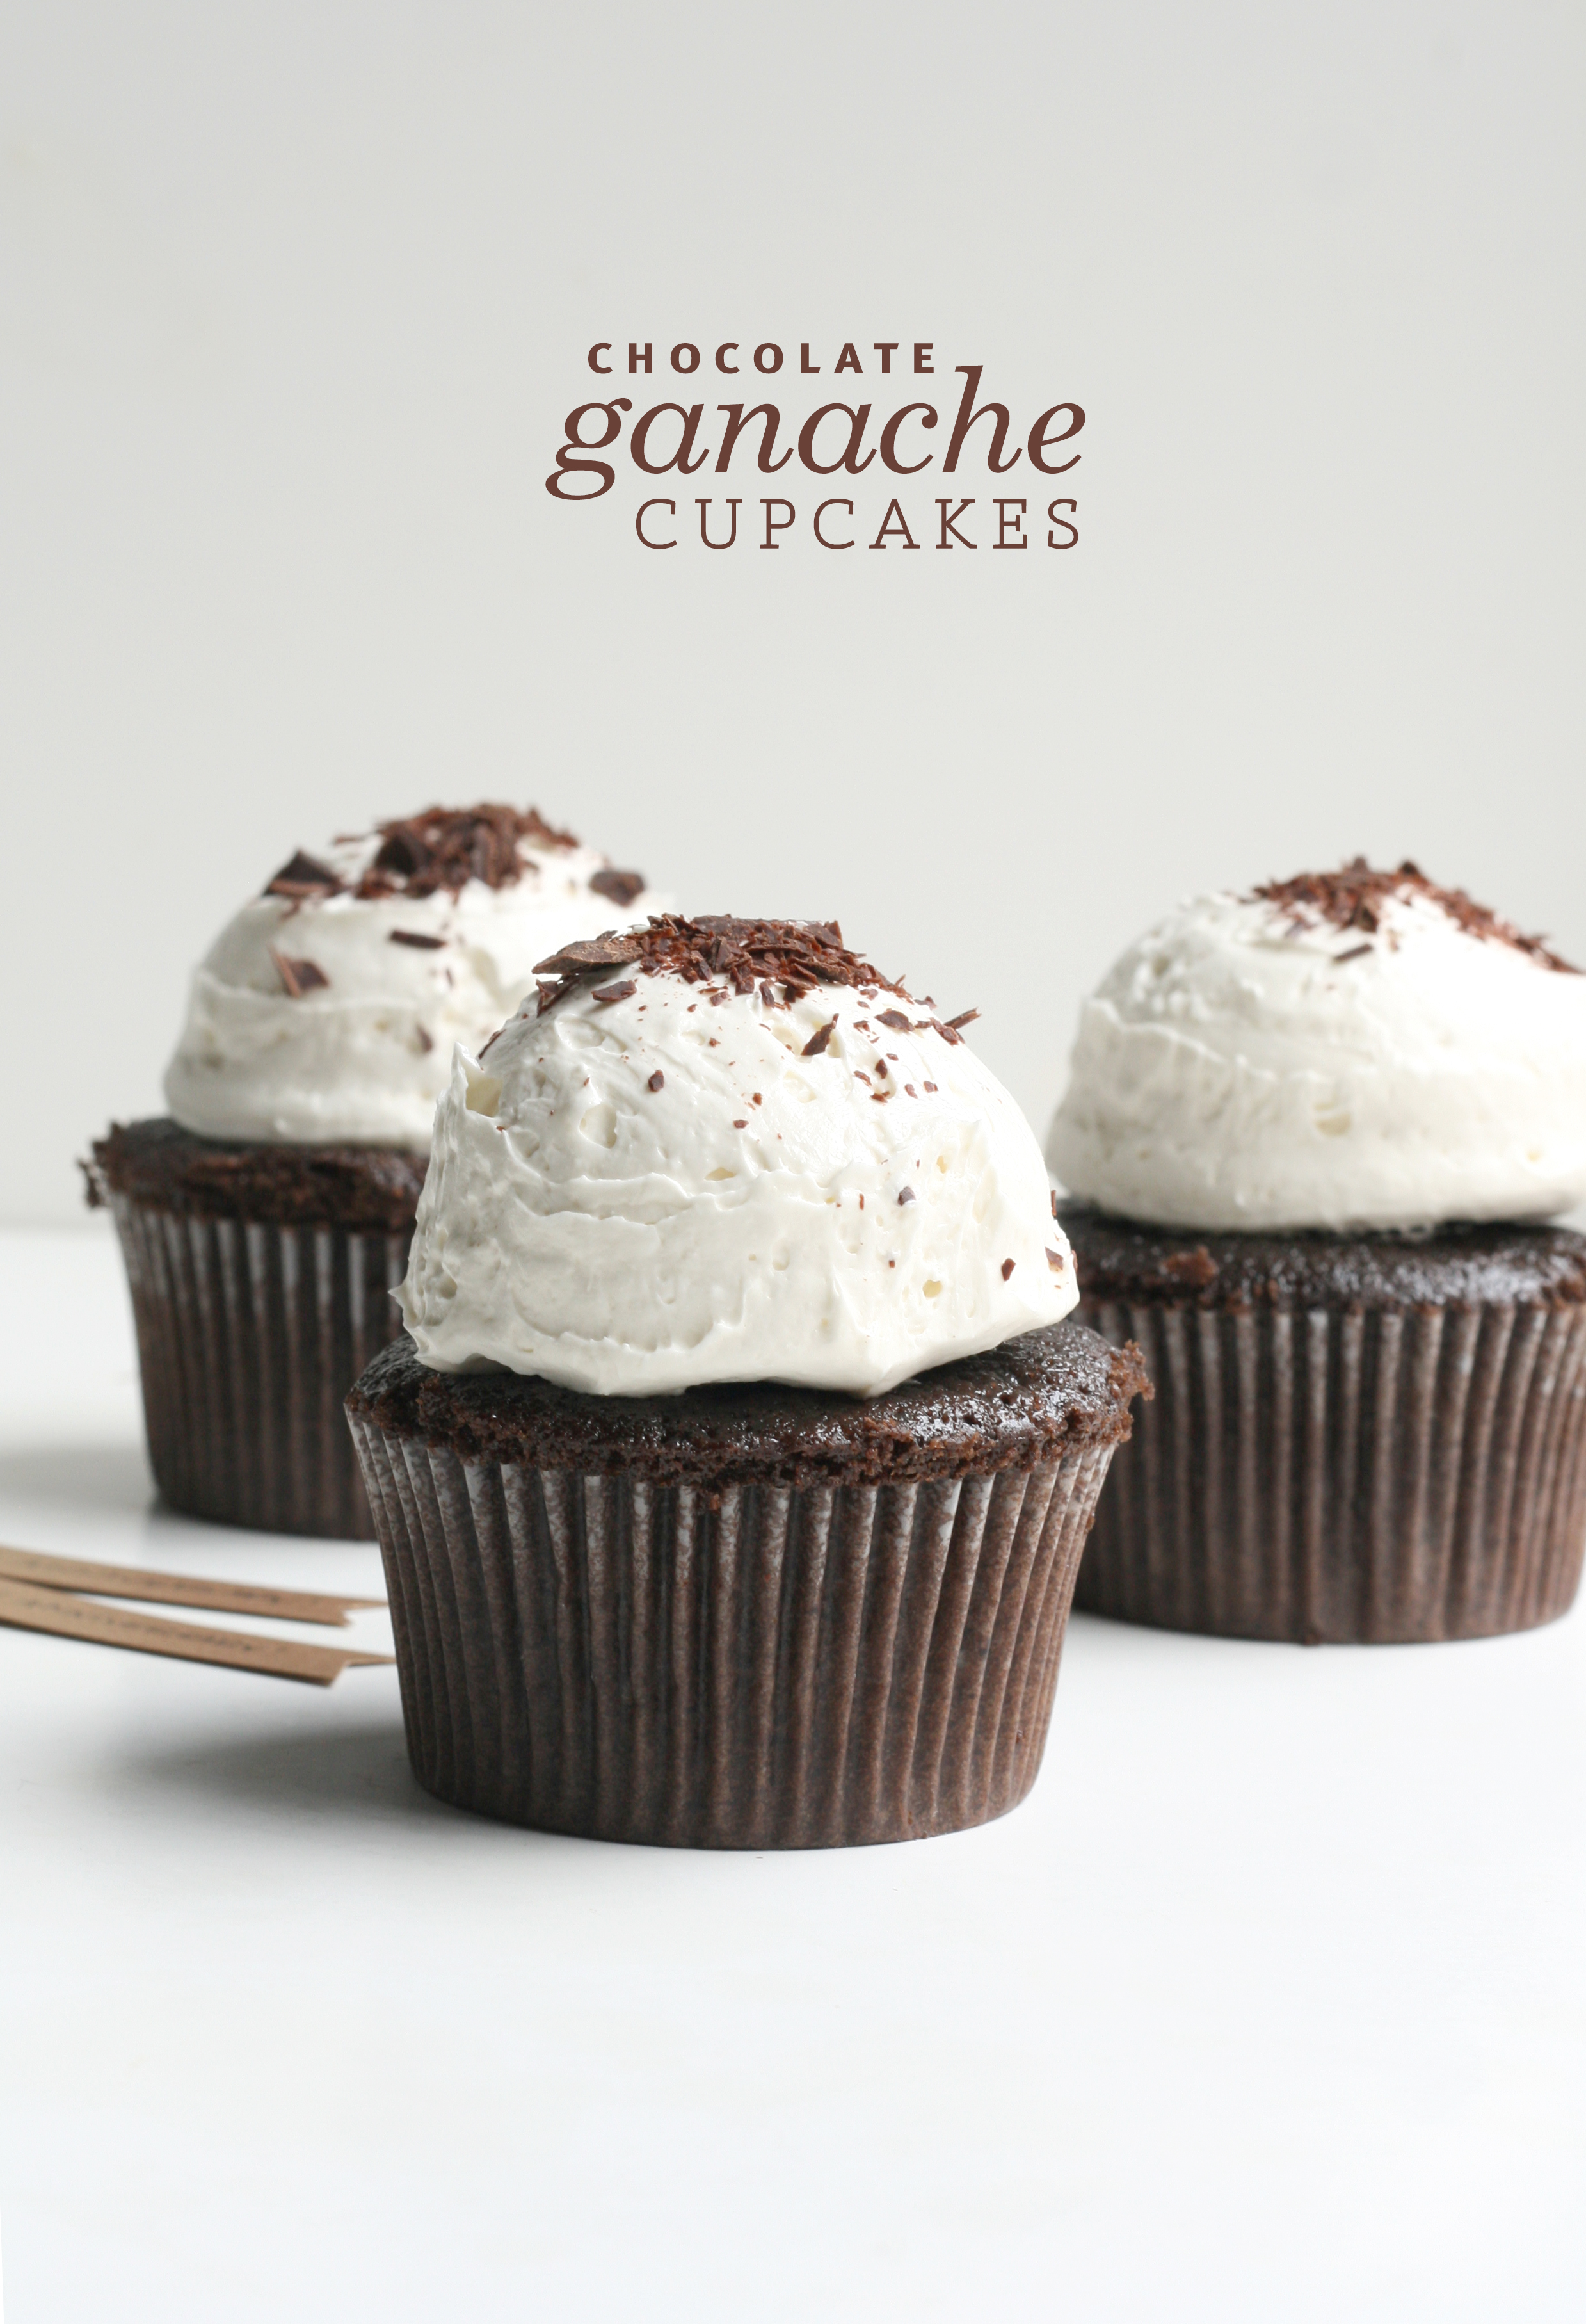
If there’s one thing I know about food blogging, it’s that people love chocolate. And If there’s one thing I know about myself, it’s that I love chocolate. Rich, dark chocolate. So dark it’s healthy. At least that’s what I tell myself. But somehow, I have yet to post a chocolate cake. Sometimes things get consumed before I get ahold of a camera. And we all know a post without a picture is no bueno. This, however, is bueno. Muy bueno. Read more
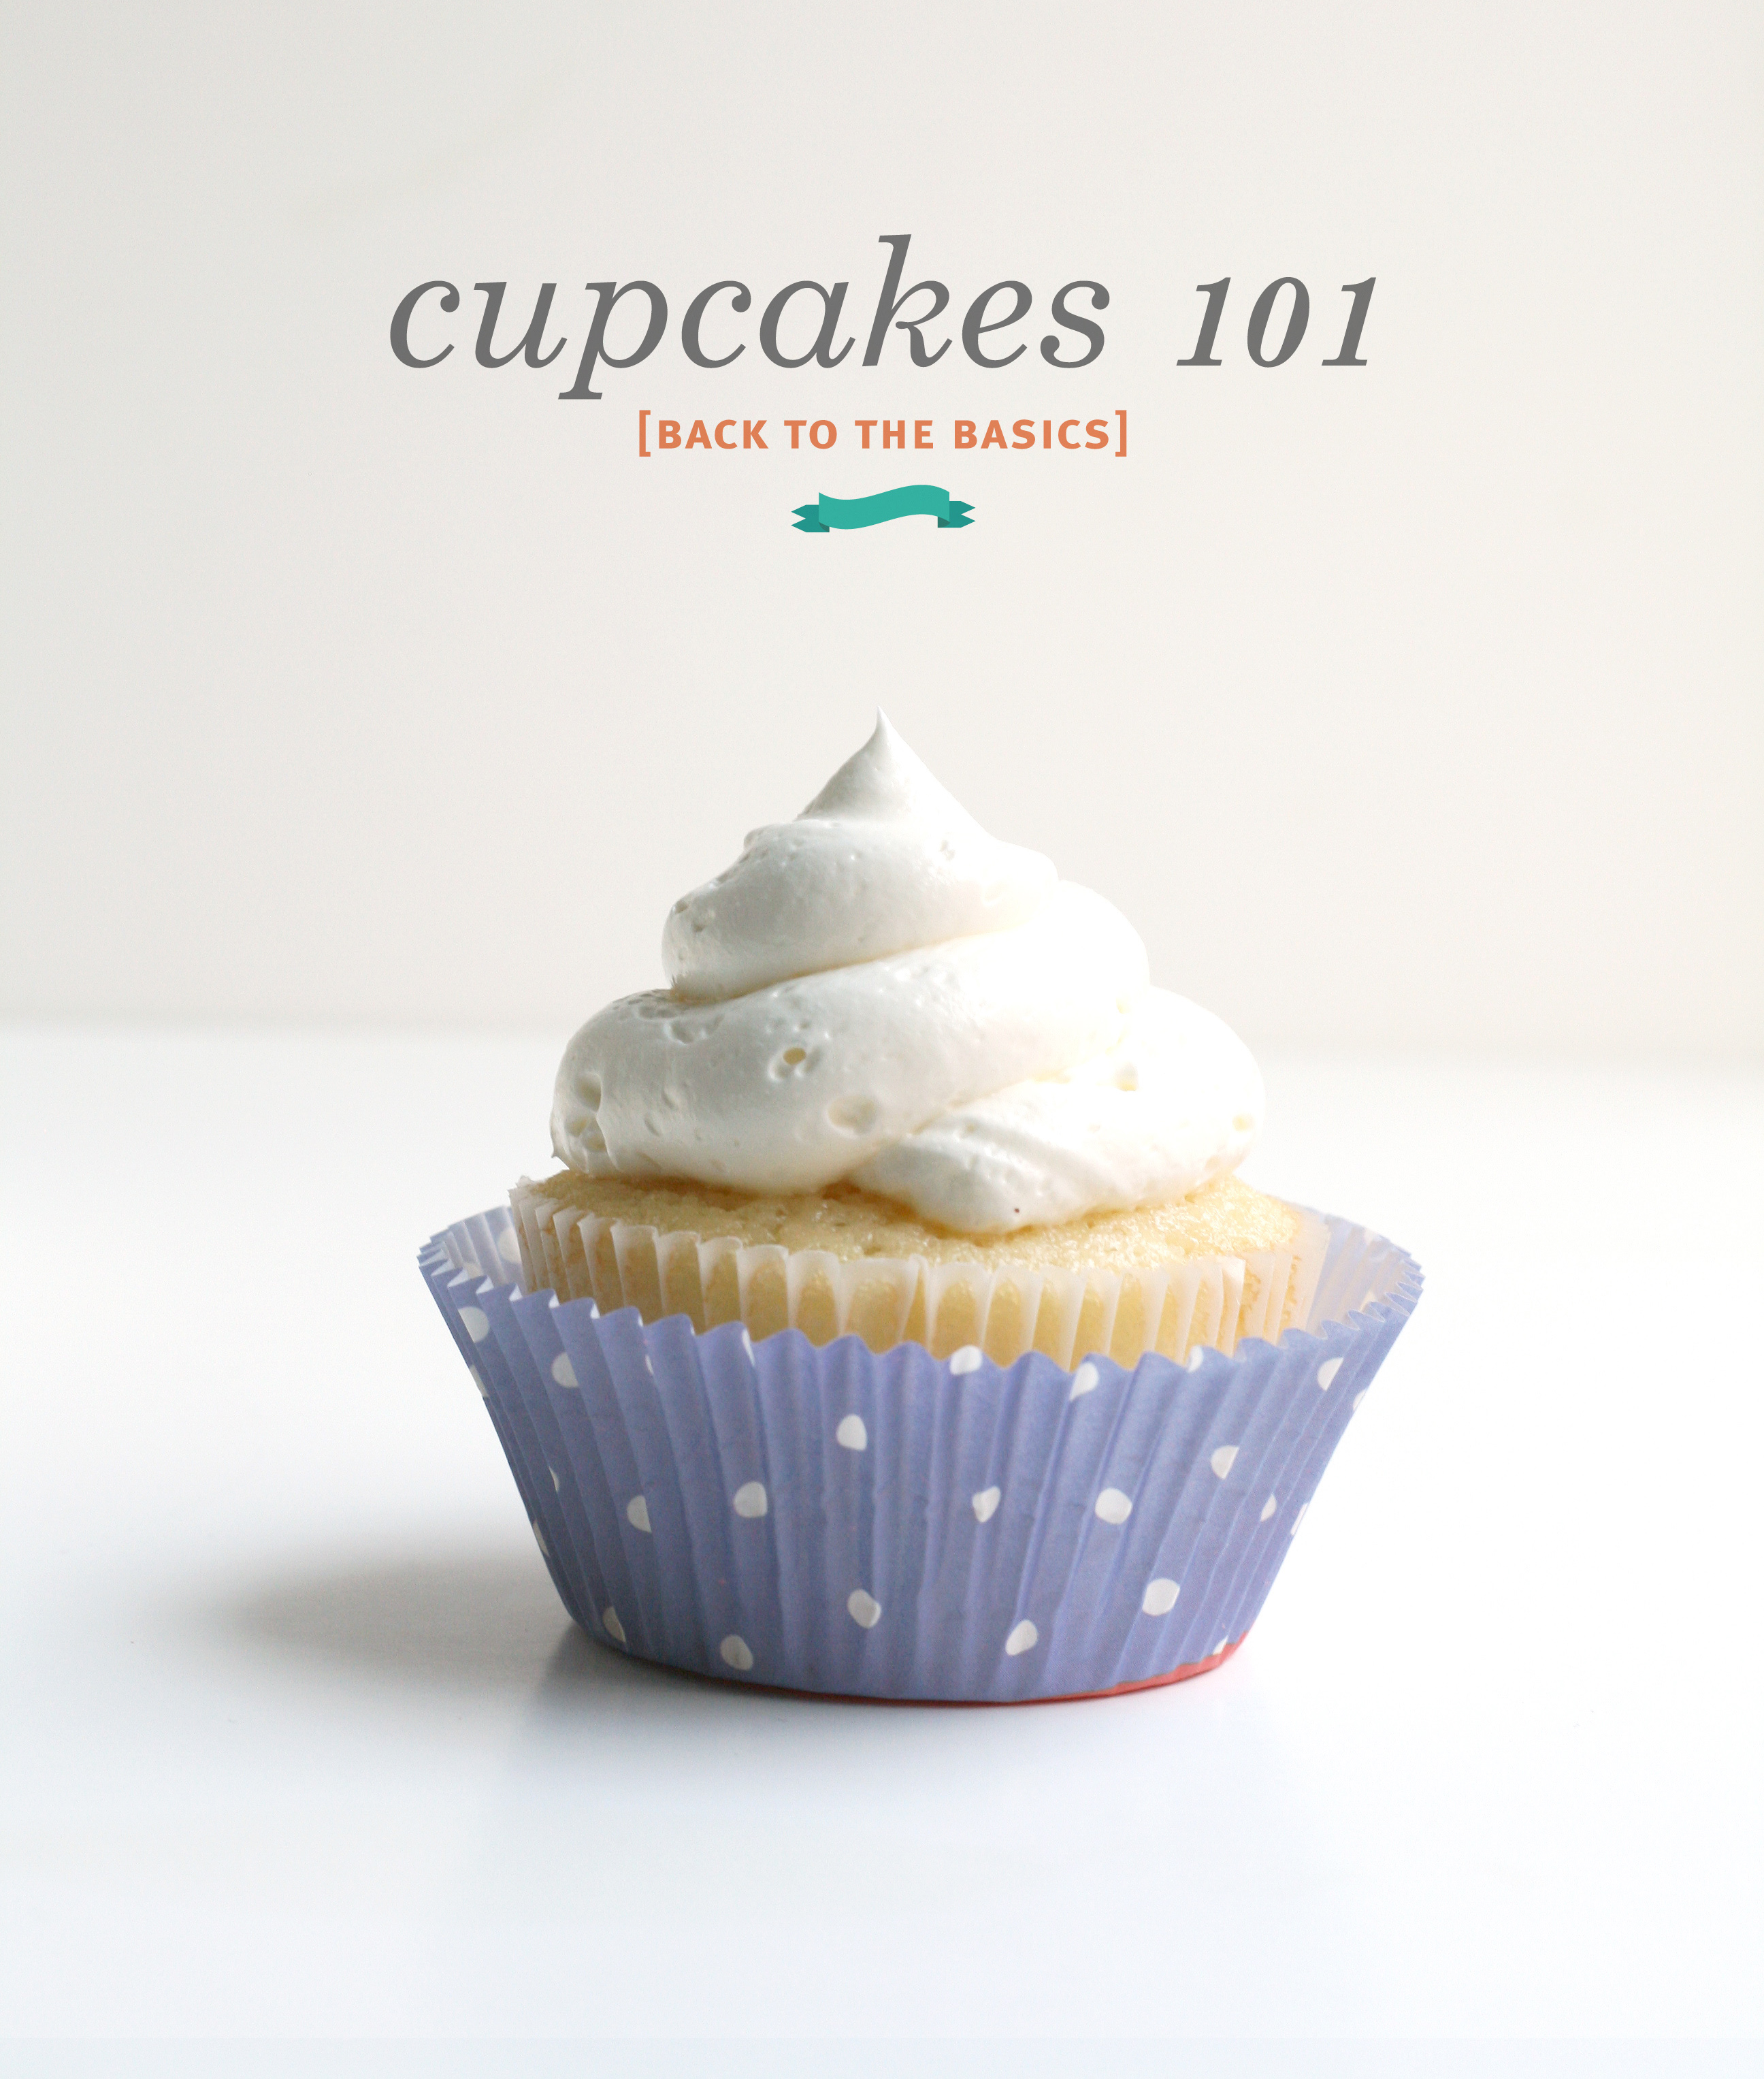
I’m not sure if I should title this Cupcakes 101, Baking 101, or Melissa’s Baking Philosophy. I did a presentation on this a couple weeks ago and called it Cupcakes 101. So we’ll stick with that. Just know—this isn’t your ordinary cupcake talk. I apologize.
I mentioned doing a presentation. On food. First time ever. Yes, I was nervous. Nail biting nervous. I’m used to presenting logos, brochures, and ideas, but food…I love food. It’s got an extra soft spot in my heart and in my stomach. But I’m no expert. I’m self taught. I guess you could say Martha taught me everything I know via daytime television. That gives me some credibility. But it ends there. Most days, it’s just me, my kitchen, trial, and error. Read more
I had planned on doing an easter post today. But my idea flopped. Many tireless hours went into, and it flopped. Yes, I do want some cheese with this wine. I wasn’t going to tell you what I was making incase I decided to give it another try. But, I’m not. I’m no good at these things. And by “things” I mean cake balls. I’ve tried a couple times, and they’re just not my forte. I have these conflicting thoughts of “Don’t give up!” and “Just stick with what you’re good at.” Well, I’ve decided to stick with what I’m good at, leaving the cake balls to Bakerella. Don’t get me wrong, I’m up for a good challenge. And, I don’t mind if I fail from time to time. But I’ve learned I’m much better at baking than I am at decorating (case in point—cake ball fail). I’m much better at perfecting the classics (scones, cakes, cookies, macarons) than coming up with something new. I’m much better at sticking to my purist ways, than bending the rules and using the not so pure stuff. My take-away from all of this is—stick with what you’re good at, and get really good at it.
Shawoof (wiping sweat off brow). That was cathartic.

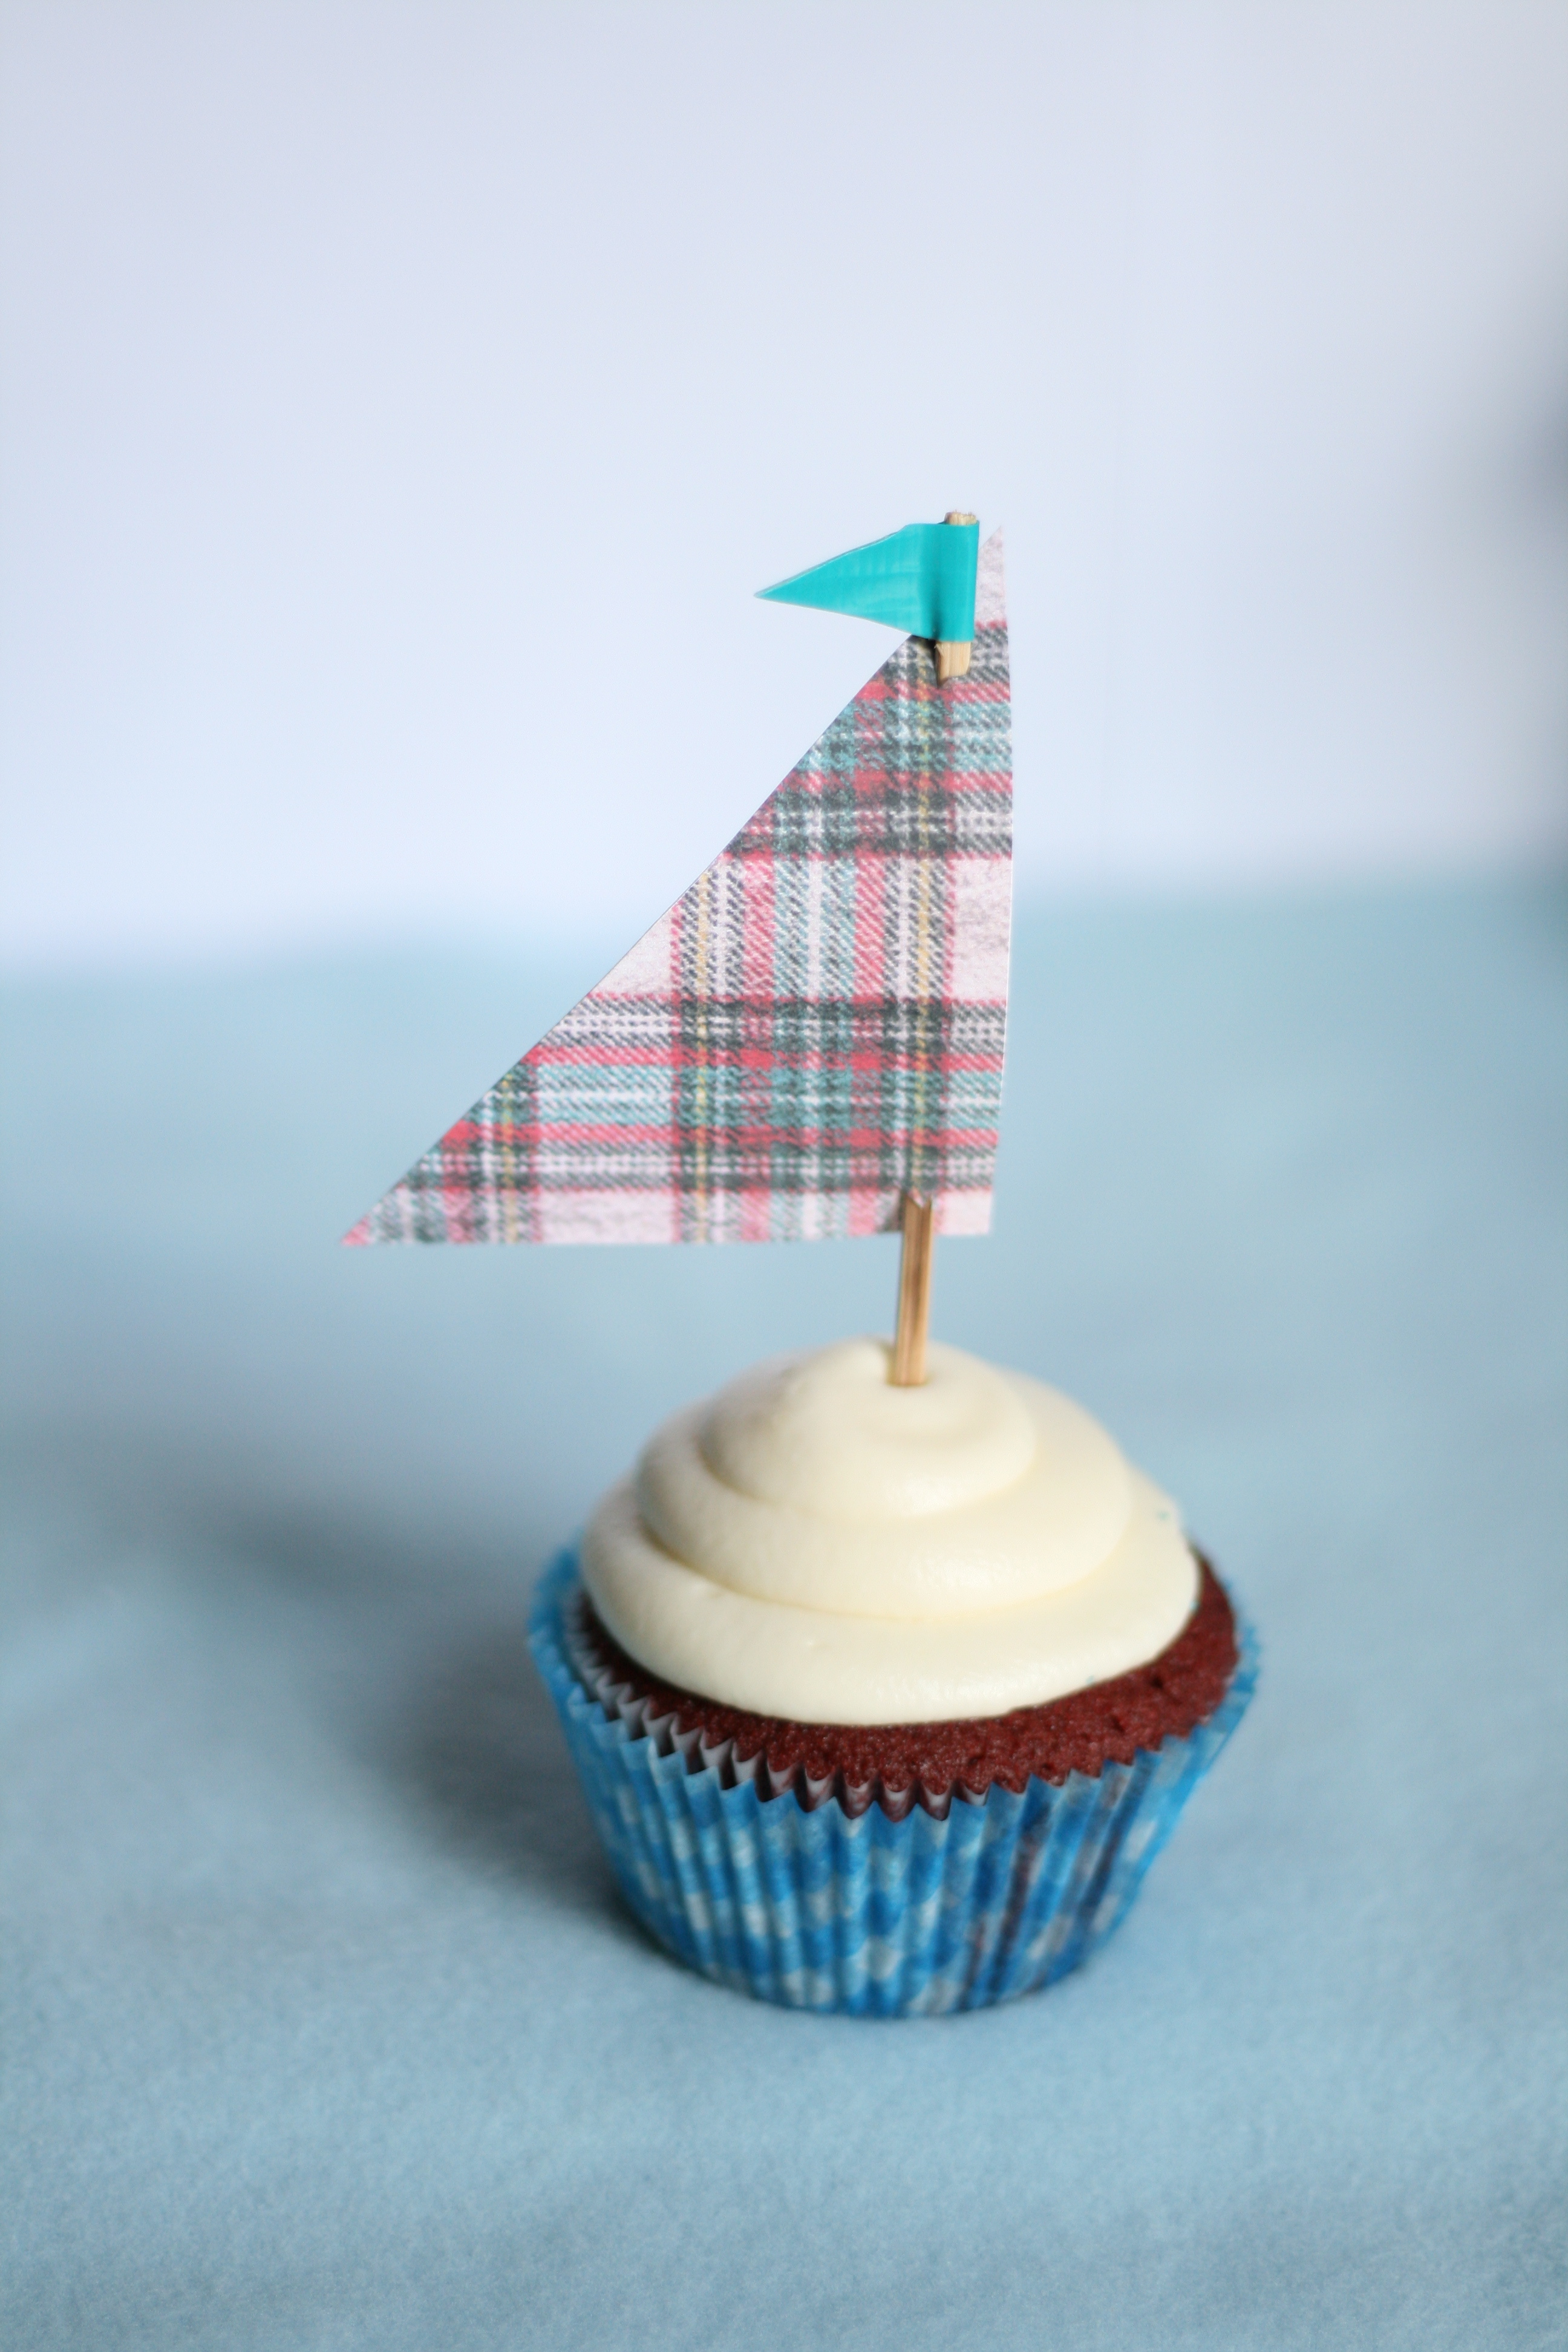
Now on to the good stuff. Red Velvet Cake! Remember the Sailboat Cupcakes from the last post? I told you I’d be back with the recipe. As promised, here it is. But first, I have to do another plug for my favorite baker—Warren Brown from Cake Love. His recipes make the best cakes ever (no lie). He is a purist as well. He believes in baking cakes from scratch. None of that artificial stuff. However, he does make a Red Velvet Cake because of it’overwhelming request at his bakery. It’s the only thing he uses food coloring in. You can leave the food coloring out and call it Brown Velvet. Or you can use the India Tree products (this is what I use), which are made from vegetables pigments.
Red Velvet Cake
recipe from Warren Brown, United Cakes of America
makes 24 cupcakes
DRY INGREDIENTS
2 1/4 c. Cake Flour (I used unbleached AP Flour)
2 tbsp. Cocoa Powder
1 tsp. Salt
1 tsp. Baking soda
WET INGREDIENTS
1 c. Buttermilk
1 tsp. Vanilla Extract
1 tsp. Apple Cider Vinegar
CREAMING INGREDIENTS
2 sticks of Unsalted Butter (room temp)
1 1/2 c. Superfine Sugar (You can pop regular sugar in a food processor to achieve this)
2 large eggs
1 oz. Red Food Dye (Opt out and make it Brown Velvet)
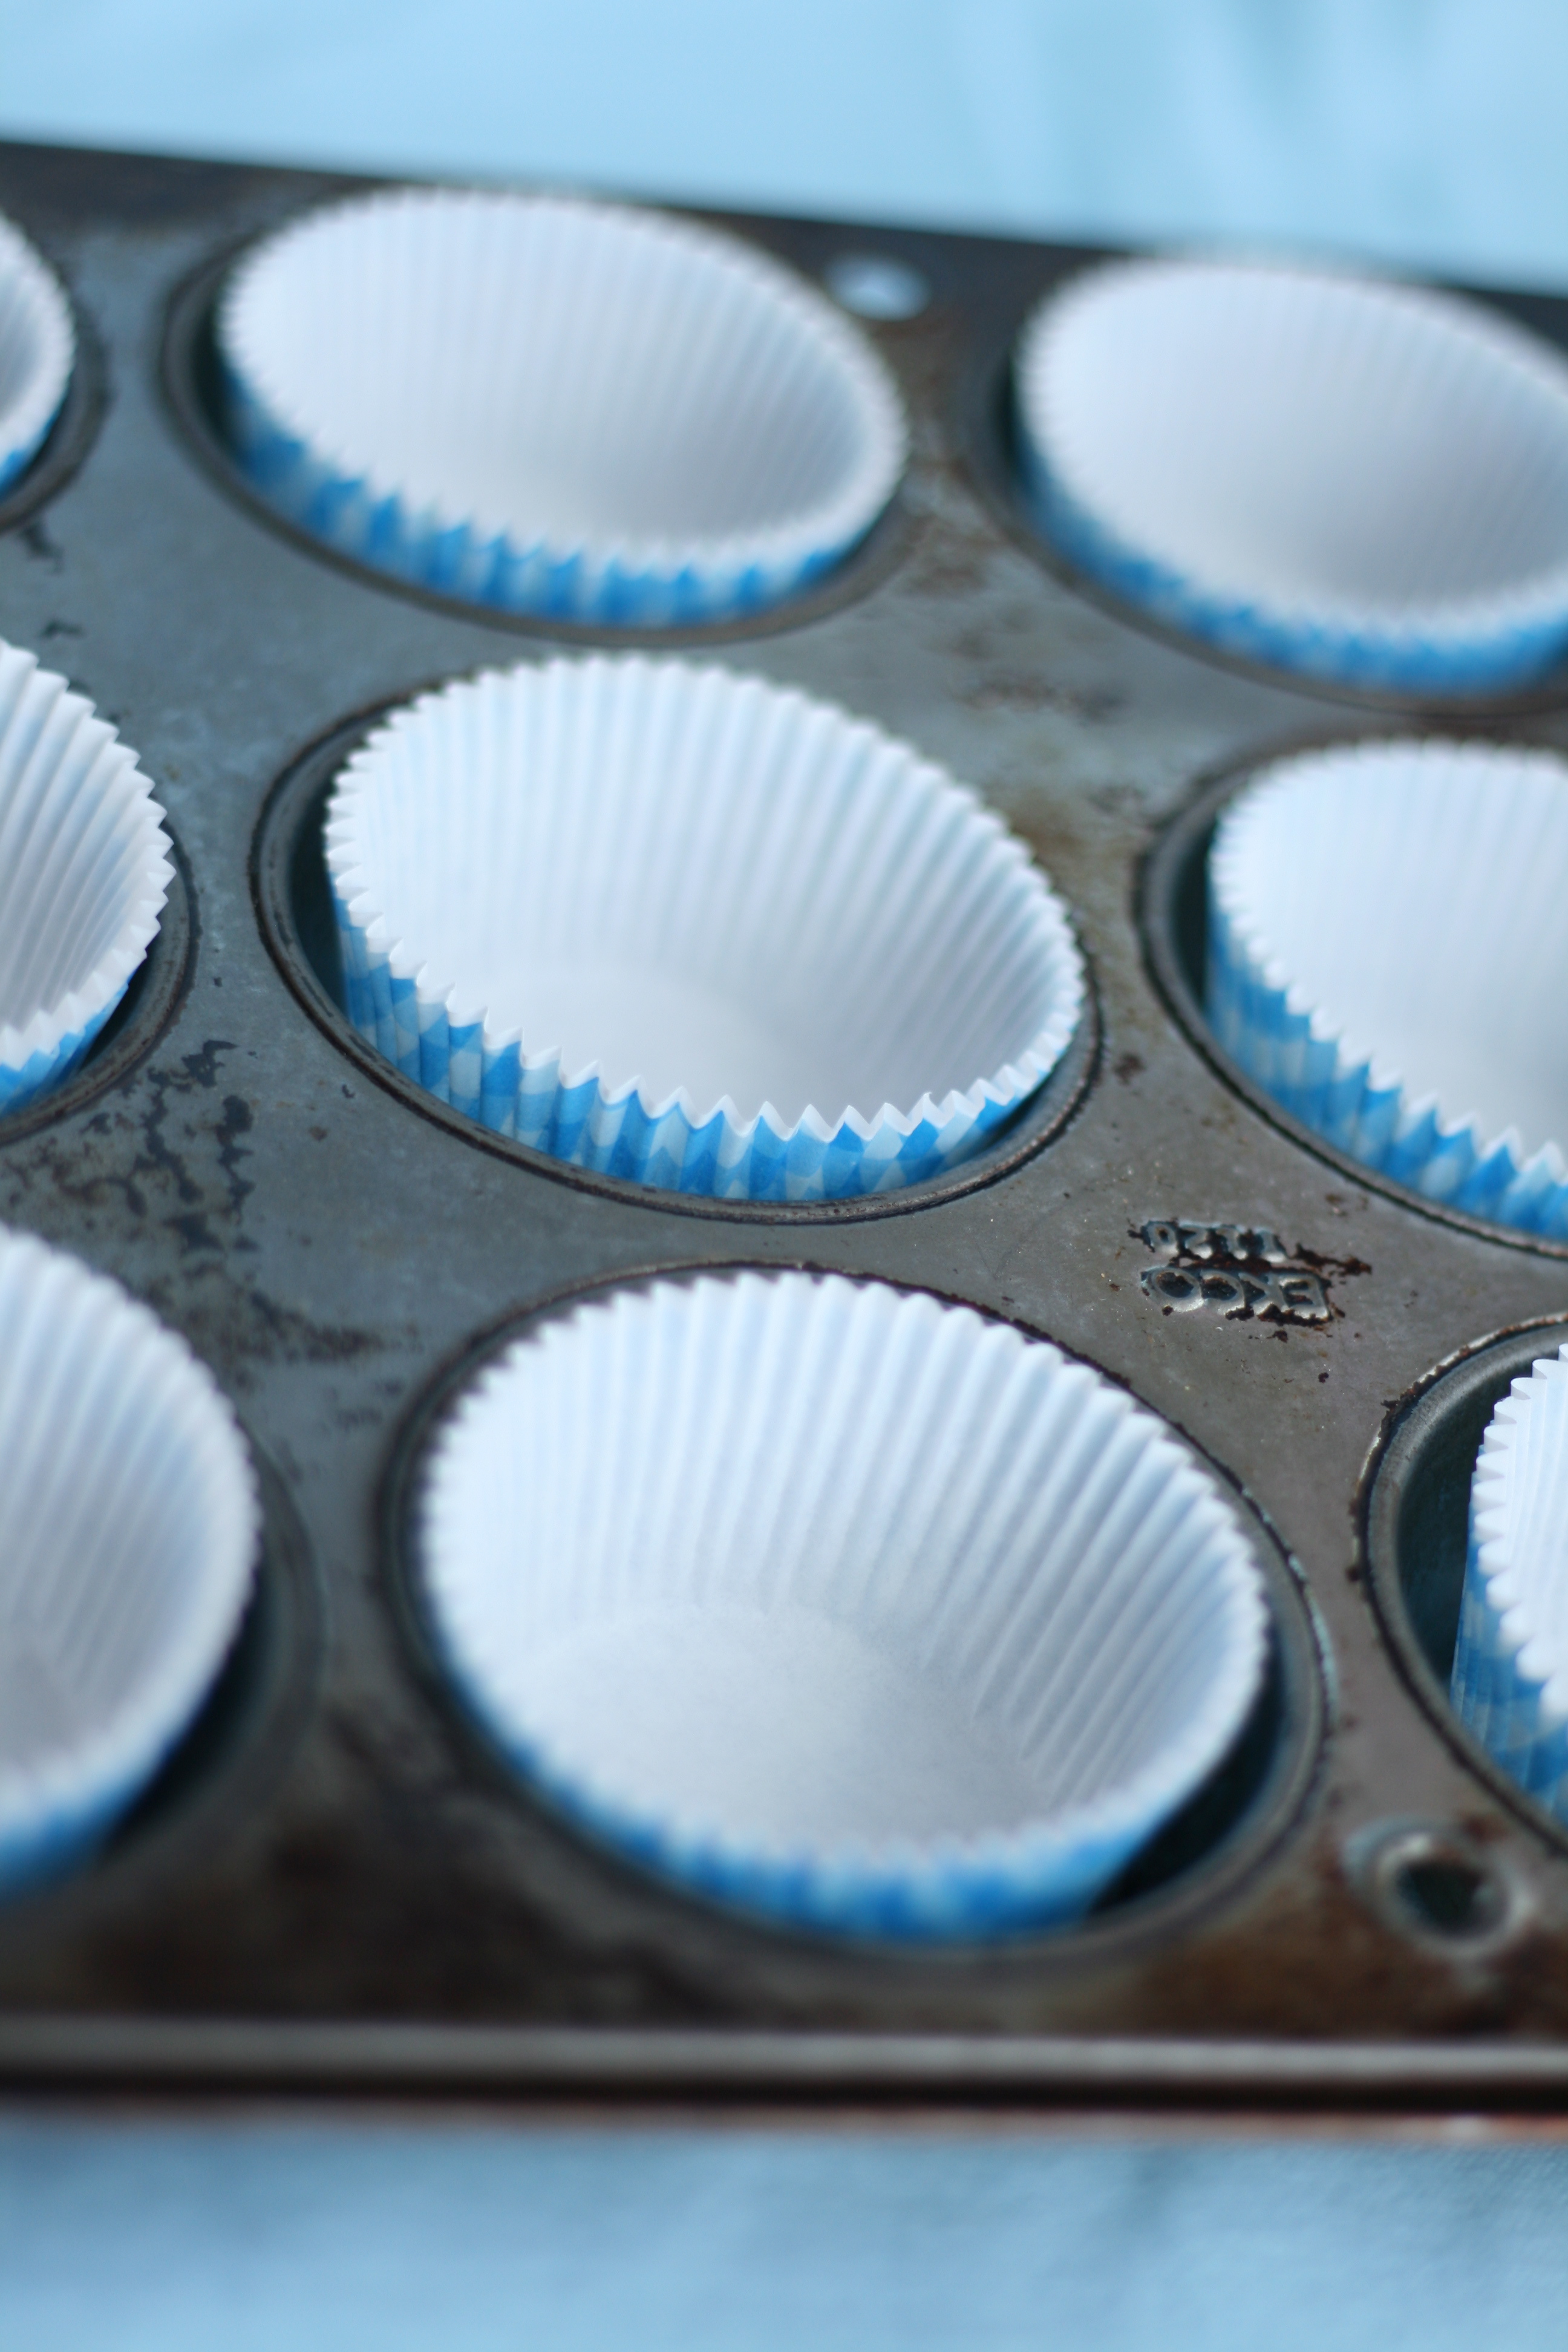
1. Preheat oven to 335° and place the rack in the middle position. Line 2 cupcake pans. (Read the last post for a cupcake liner tip.)
2. Measure the dry ingredients and wet ingredients into 2 separate bowls. Whisk each to combine.
3. Measure the the butter and sugar into the bowl of a standing mixer fitted with the paddle attachment. Cream together on low speed for about 5 minutes.
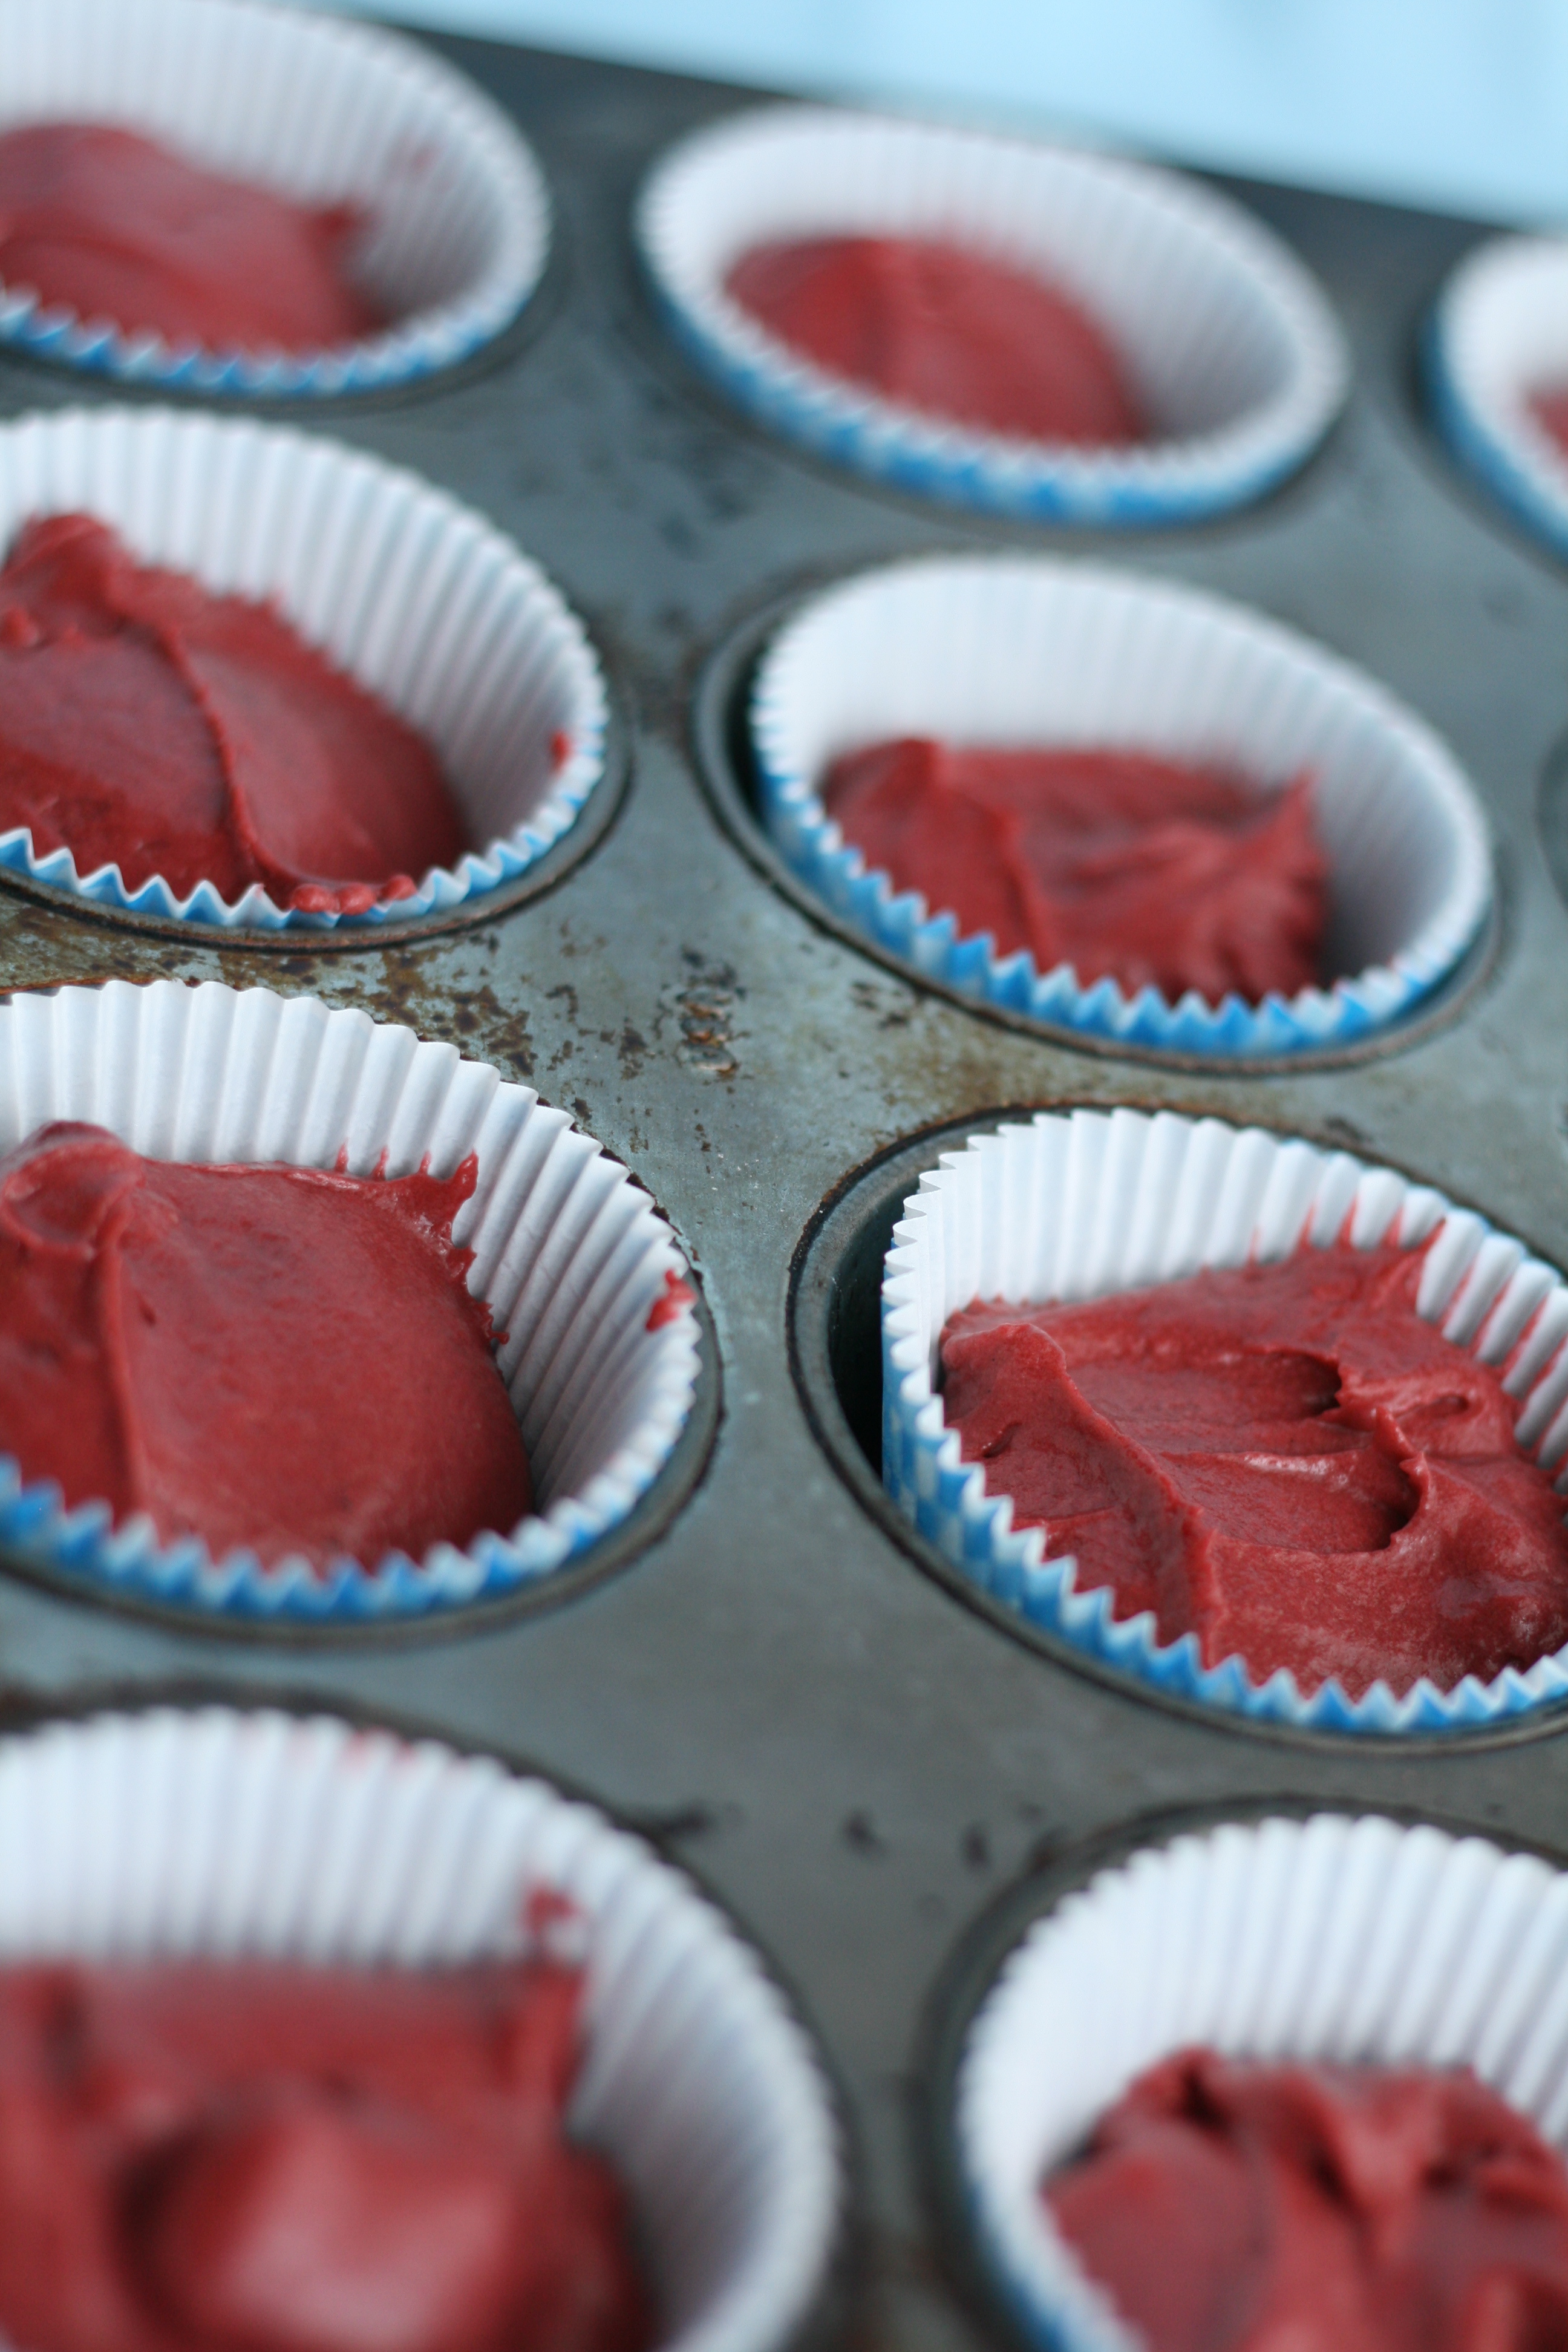
4. Add eggs one at a time into the well creamed butter. Beat in the dye.
5. Alternately add the dry and wet ingredients about a quarter at a time. (This should only take a minute.) Scrape sides. Beat on medium-high speed for 1 minute.
6. Pour the batter into the liners and bake the cupcakes for 20 to 24 minutes, or until a wooden skewer comes out clean.
7. Cool the cupcakes for 5 minutes before inverting them on to a flat surface. Allow them to come to room temperature before frosting.
Cream Cheese Frosting
recipe by yours truly
2 sticks of Unsalted Butter (room temp)
16 oz. Cream Cheese (room temp)
1 tsp. Vanilla Extract
Dash of Sea Salt
3-4 c. Powdered Sugar
1. Cream together butter and cream cheese.
2. Add vanilla extract and salt. Mix.
3. Add powdered sugar one cup at a time. Mix well between each addition. After 3 cups, taste to see if additional powdered sugar is necessary.
4. Ice your cupcakes. Looking for tips? Check out the last post.
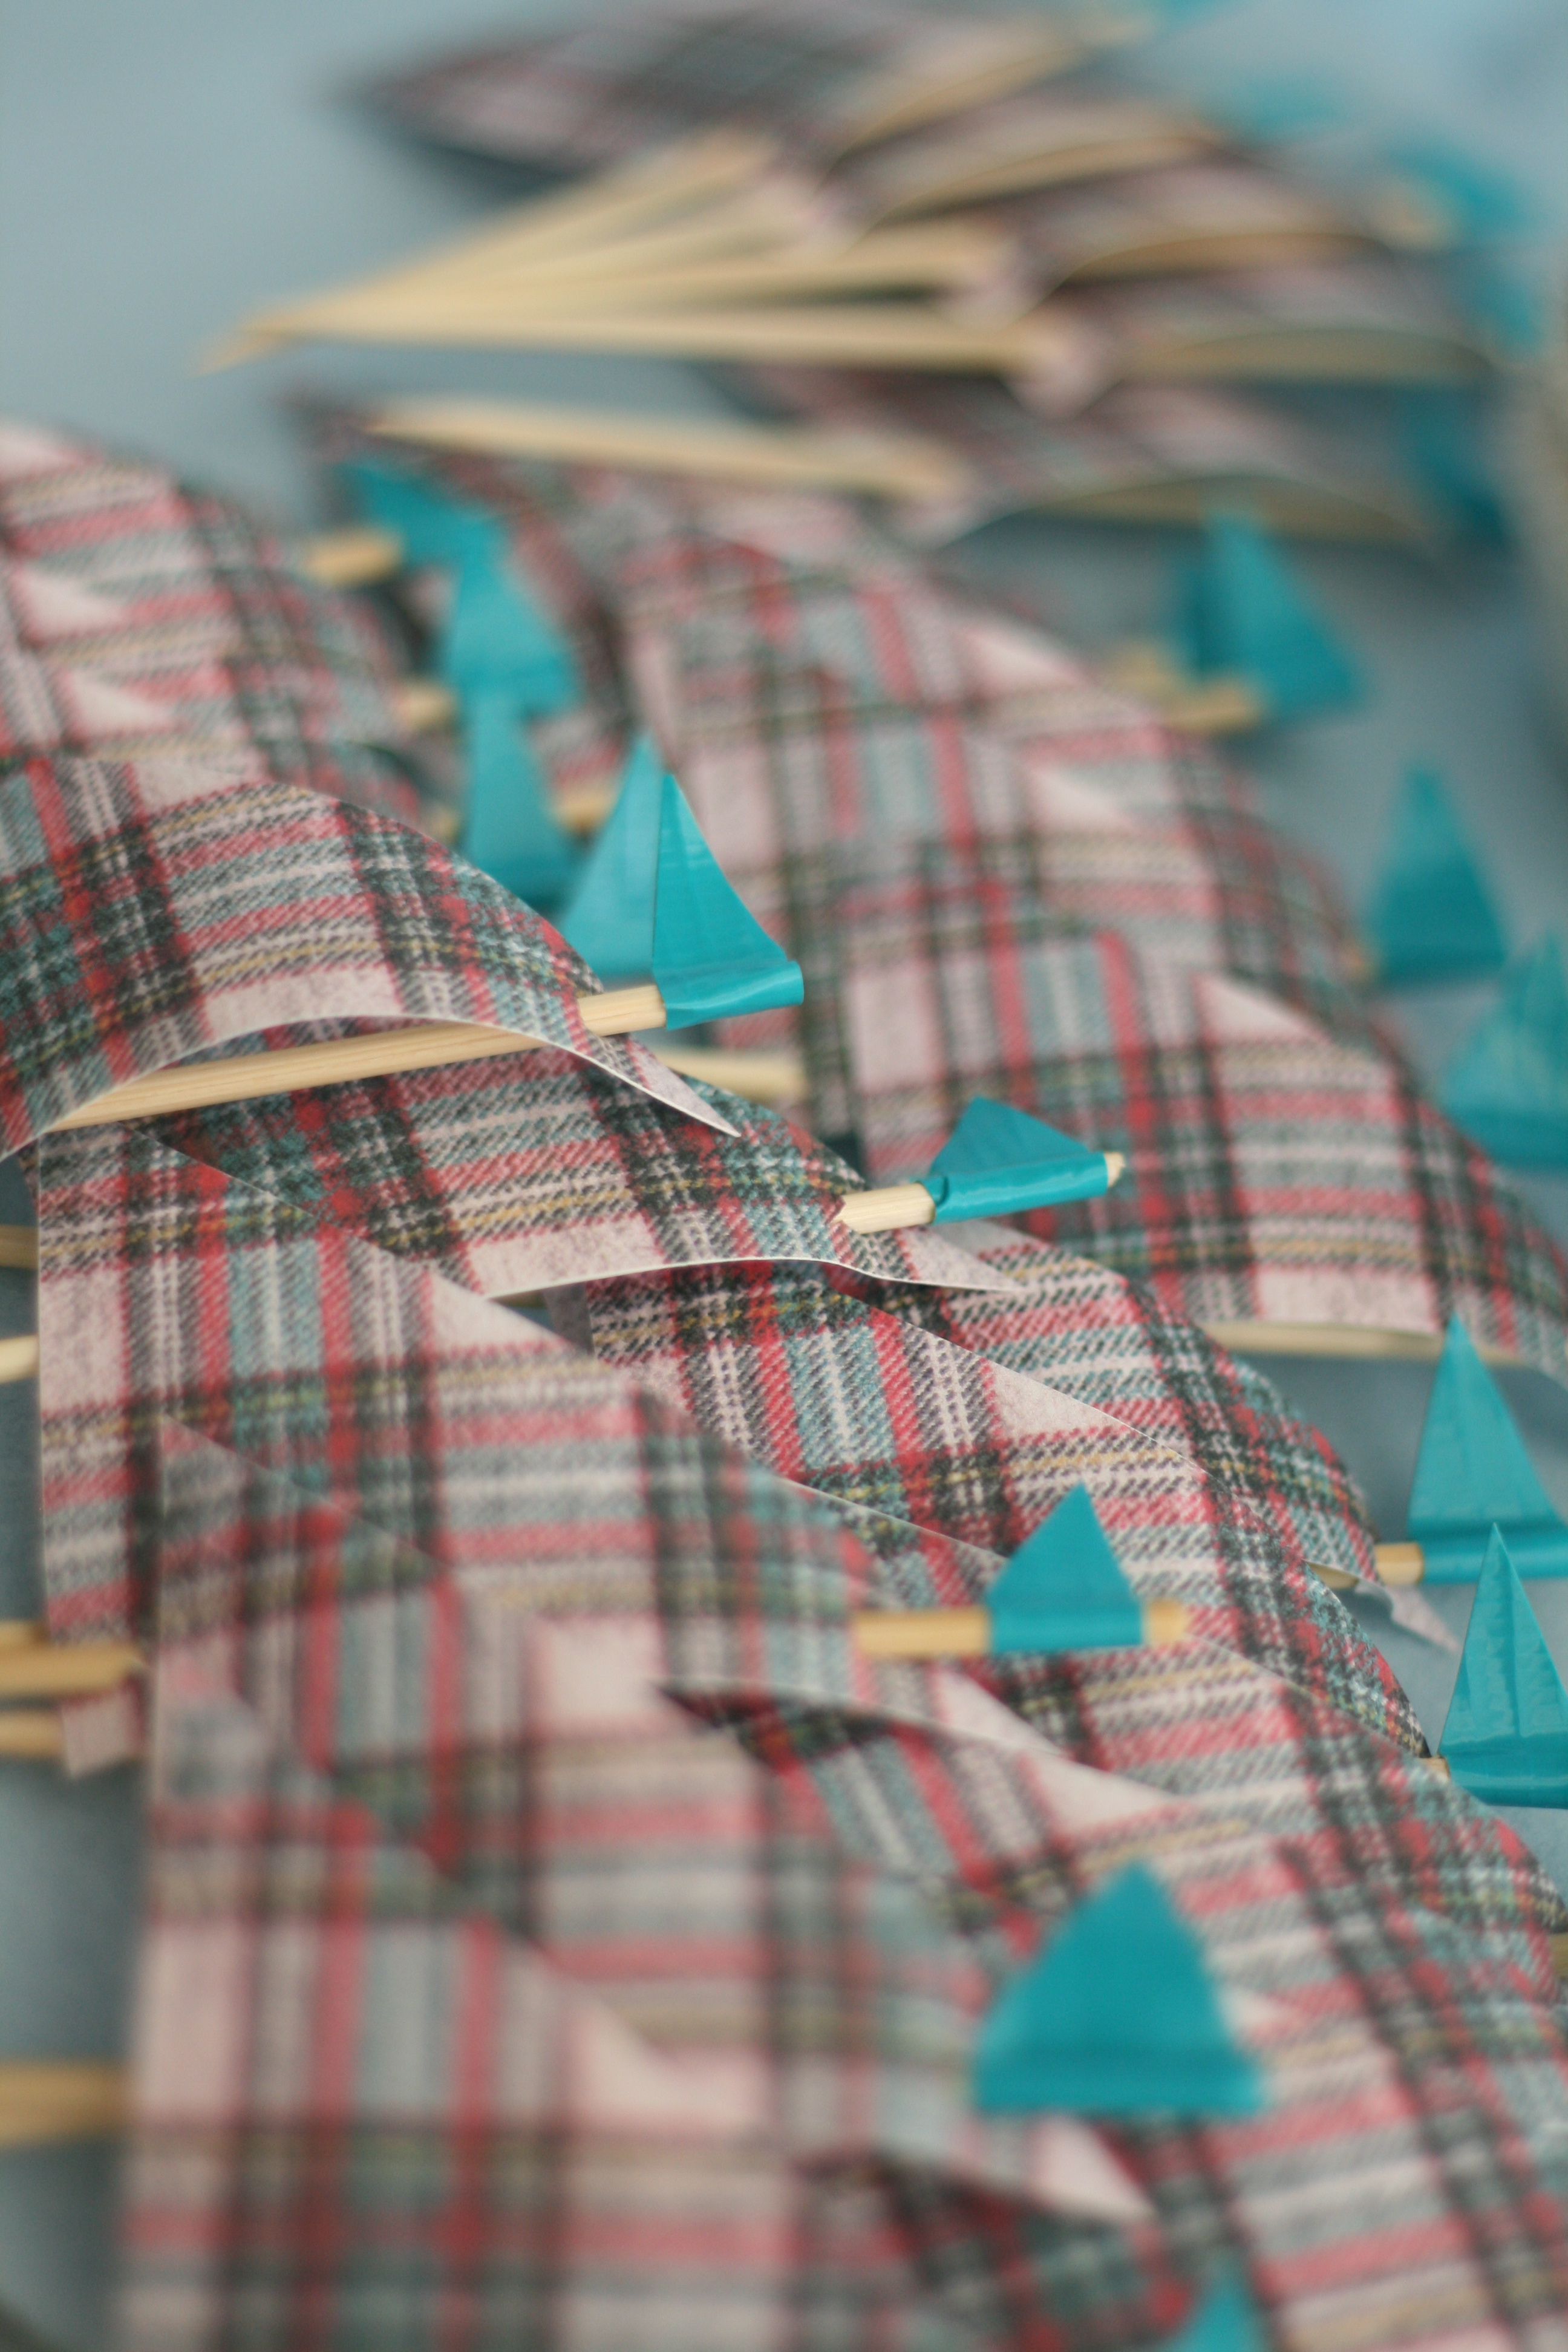
If you missed it, click here for the sailboat decorations. For matching invitations, click here.
P.S.—These lovely little sailboats made their debut on the very talented Shauna Younge’s blog! Thanks Shauna!
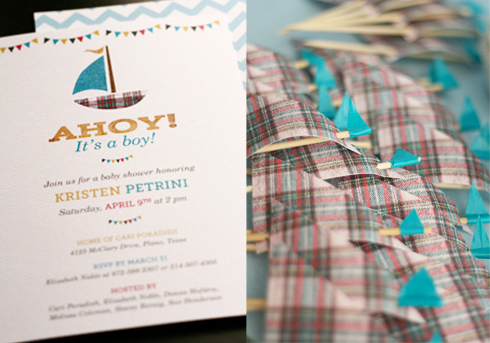
Remember the Ahoy! It’s a boy! invites I shared with you a couple weeks ago? I told you I may or may not be making cupcakes with a cute DIY topper. Well, I wasn’t lying. It’s time for more sharing and free downloads!
This post includes DIY instructions for the sailboat cupcake toppers. Another post on the recipe for red velvet cupcakes and cream cheese frosting is to come. So sit down, get out a pen an paper (or just bookmark this page), and let’s get decorating!
Here’s what you’ll need:
• Plaid Cupcake Liners (I ordered mine from Bake it Pretty. Sweet LuLu is another great resource for cute baking supplies.)
• White Cupcake Liners (Always double up your liners so you can actually see the pretty liner. If you use one liner, when the cupcake bakes, the color of the cupcake will bleed into the liner thus losing its pretty pattern. Sad.)
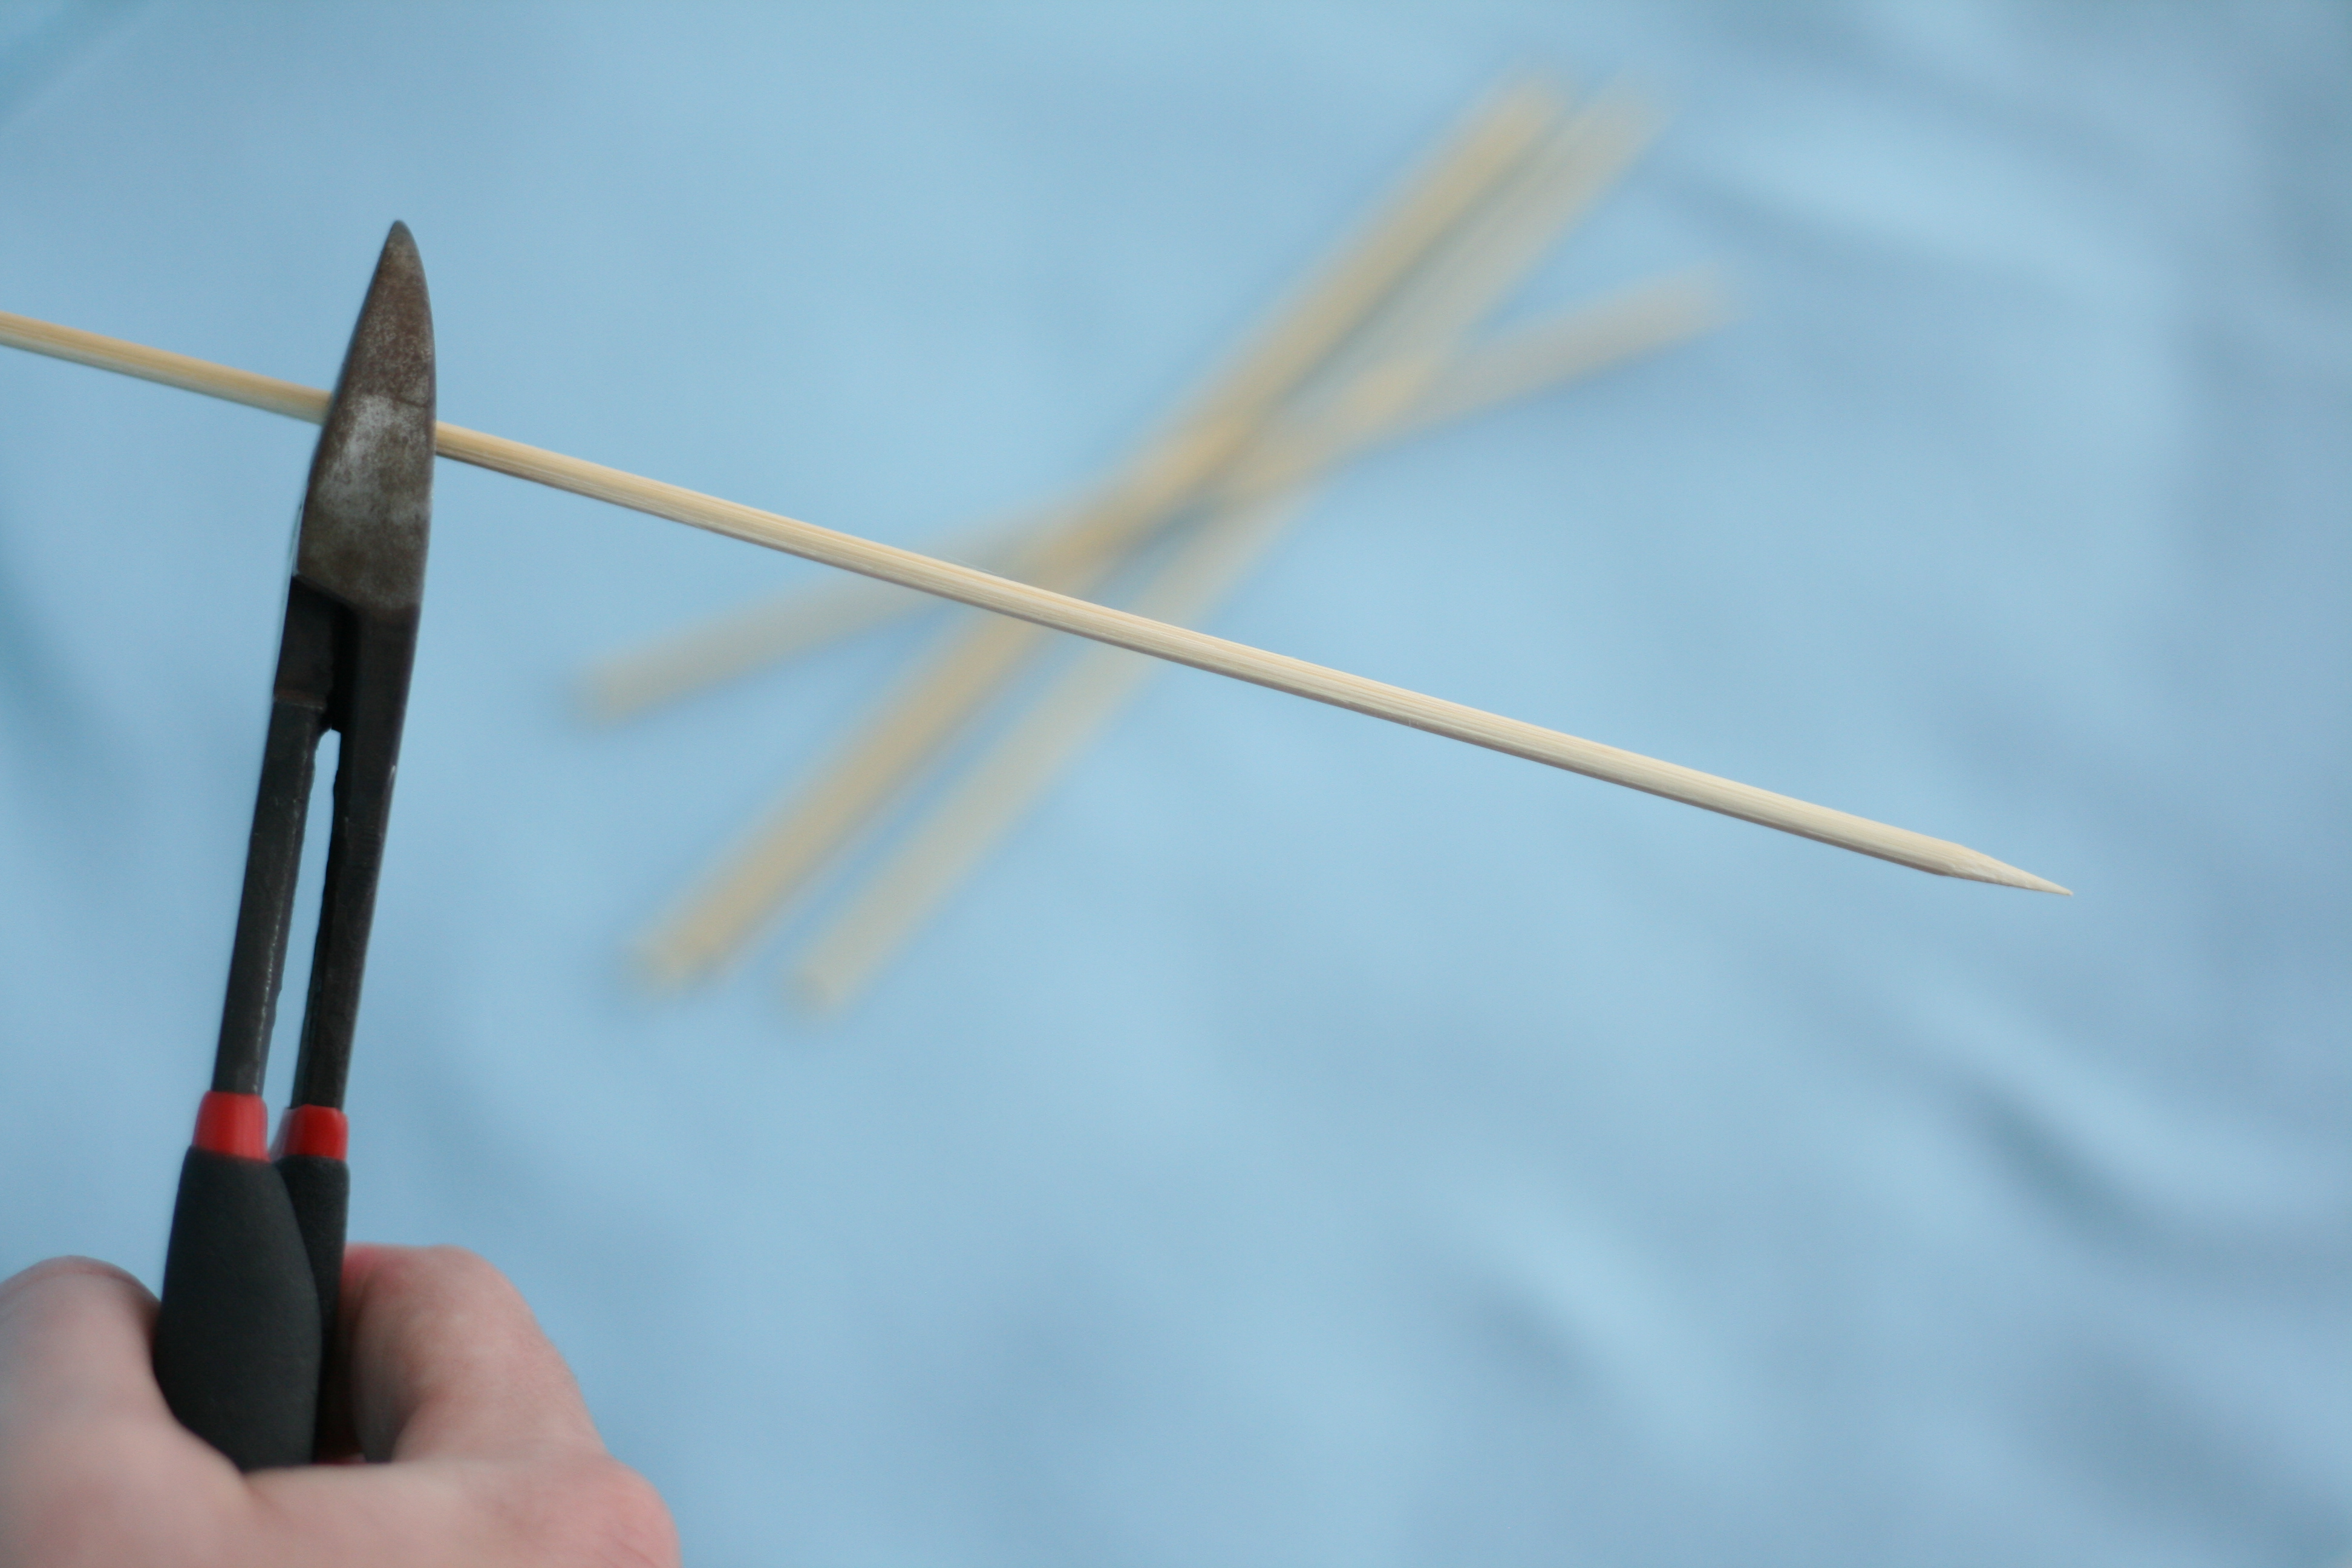
• Wooden Skewers (Think kabobs.)
• Wire Cutters
• FauxMartha Cupcake Sail Pattern
• Printer
• Textured, cardstock weight paper
• Scissors
• Exacto Knife
• Cutting Board
• Colored Duck Tape (or colored masking tape)
Here’s how to achieve the look (pictures below):
1. Make and bake your cupcakes, using a recipe of your choice. Remember to use 2 liners. Place the white liner inside the plaid liner. Allow cupcakes to fully cool before icing and decorating.
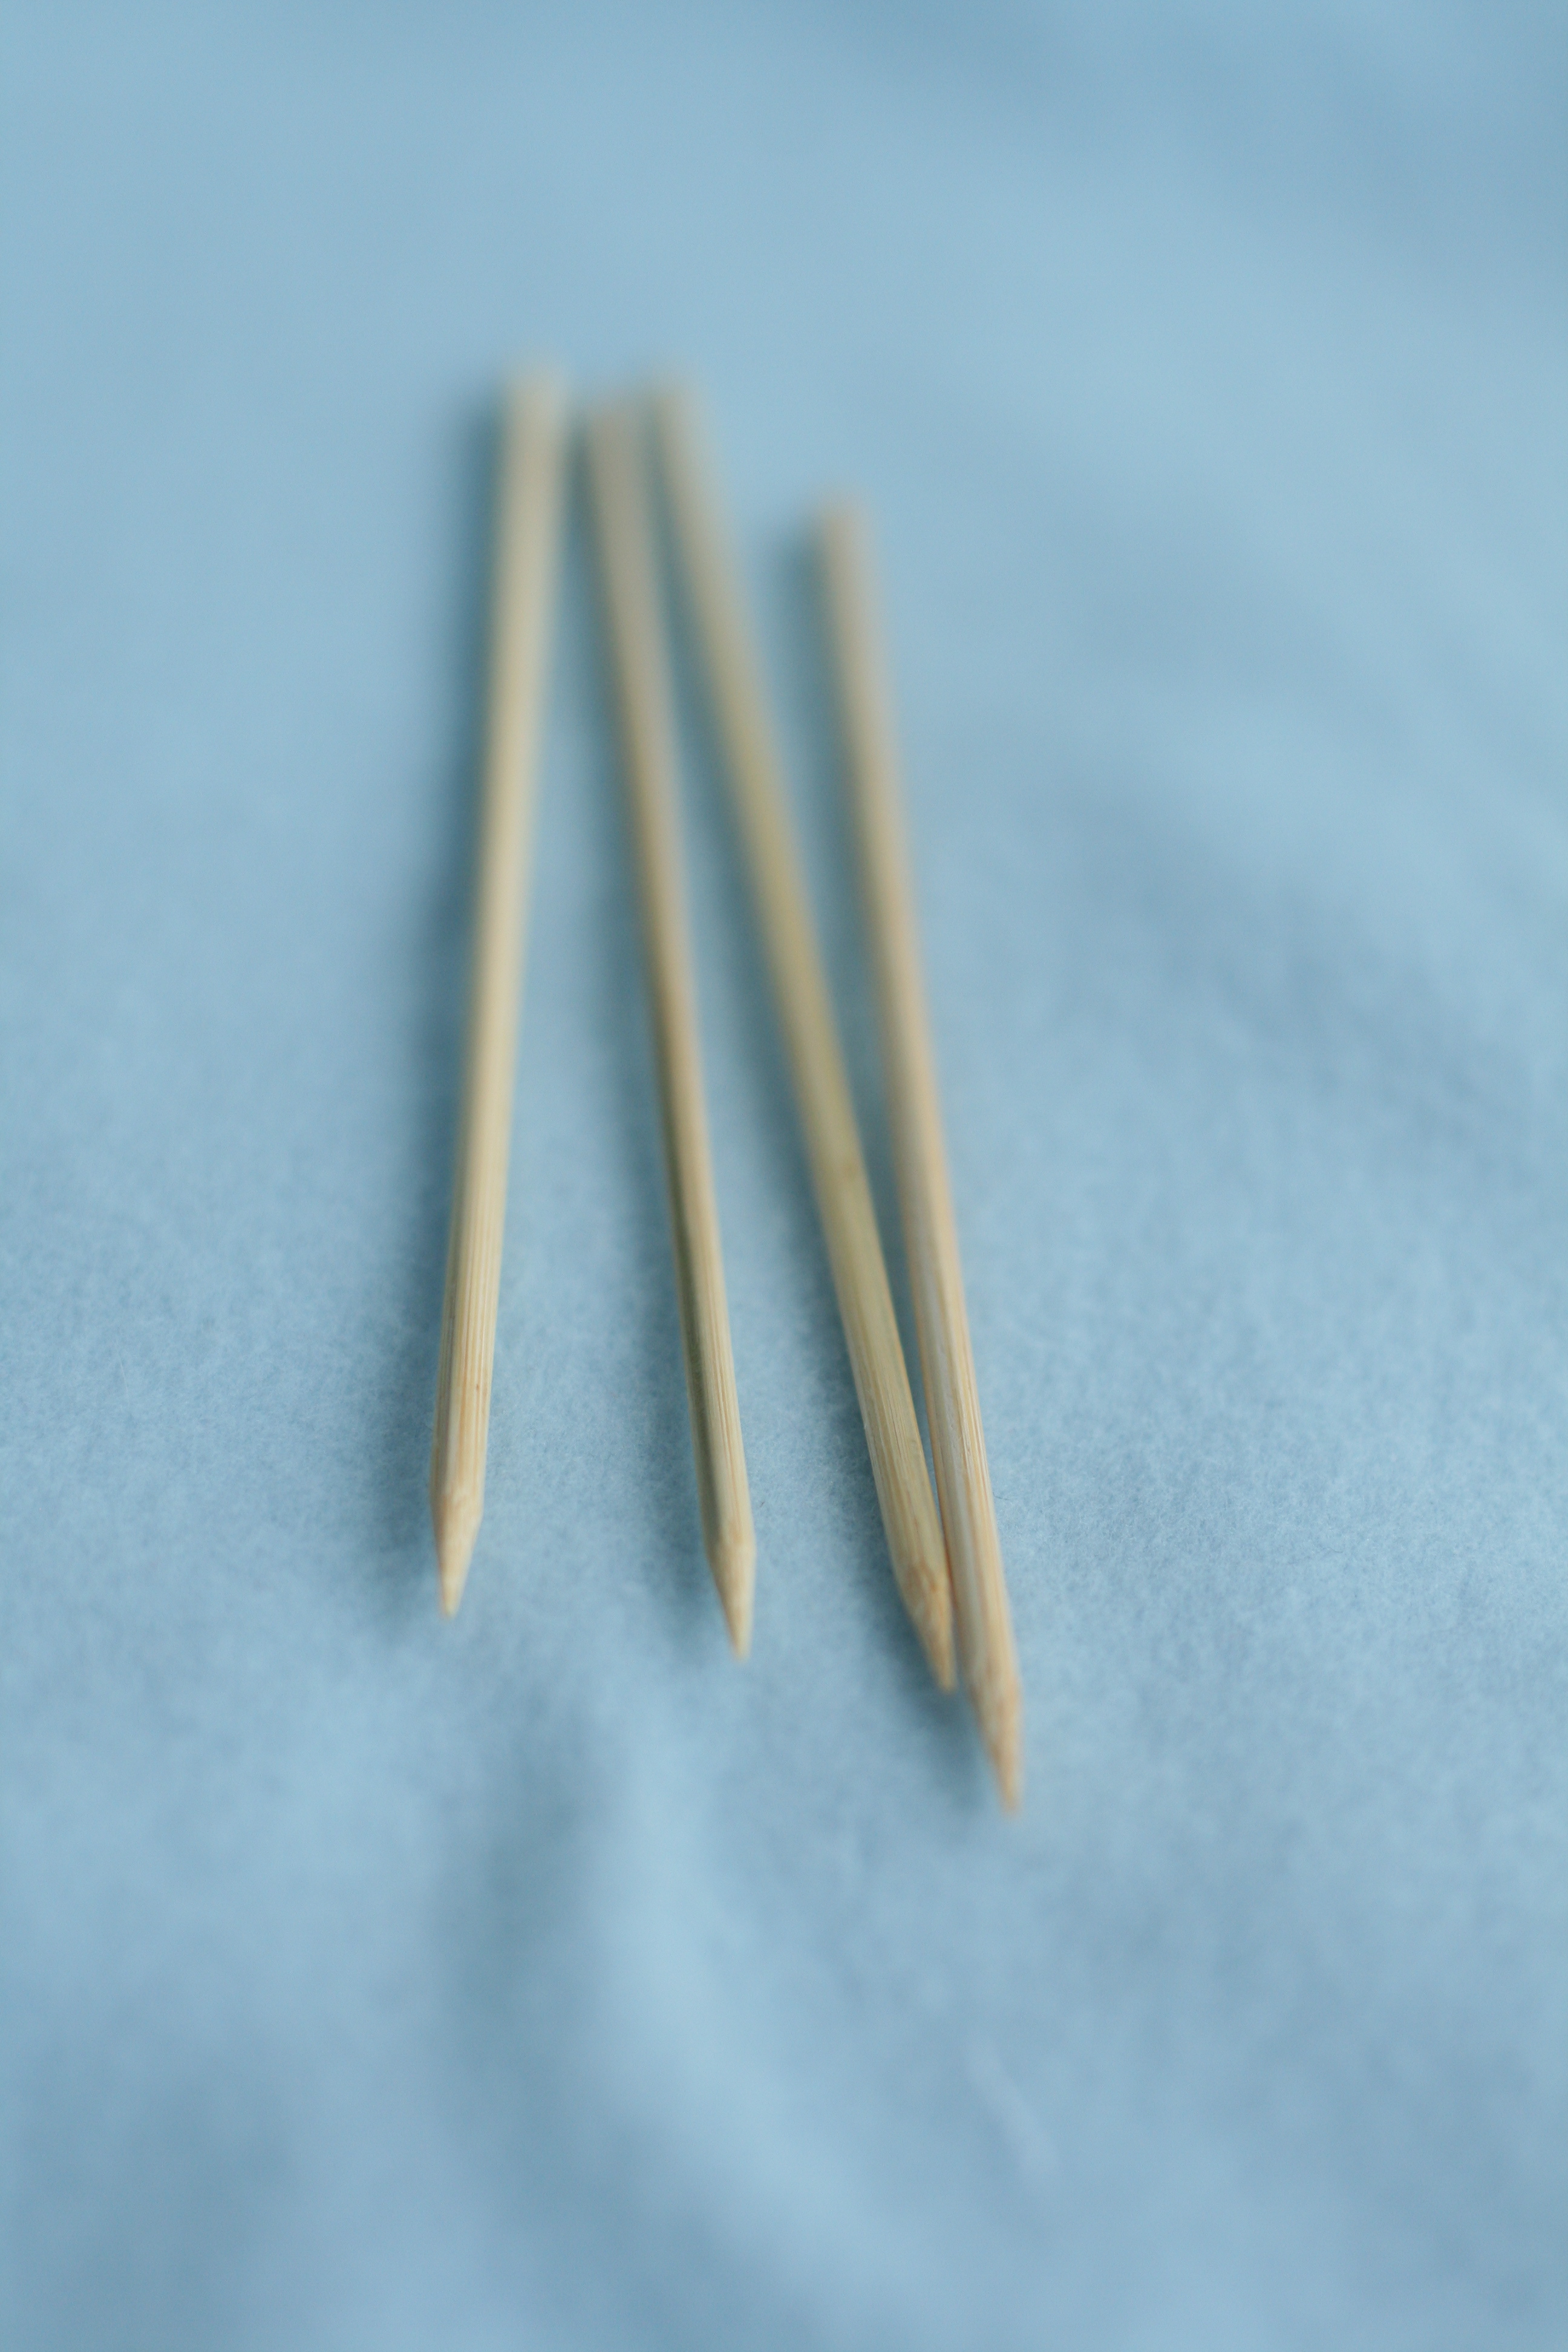
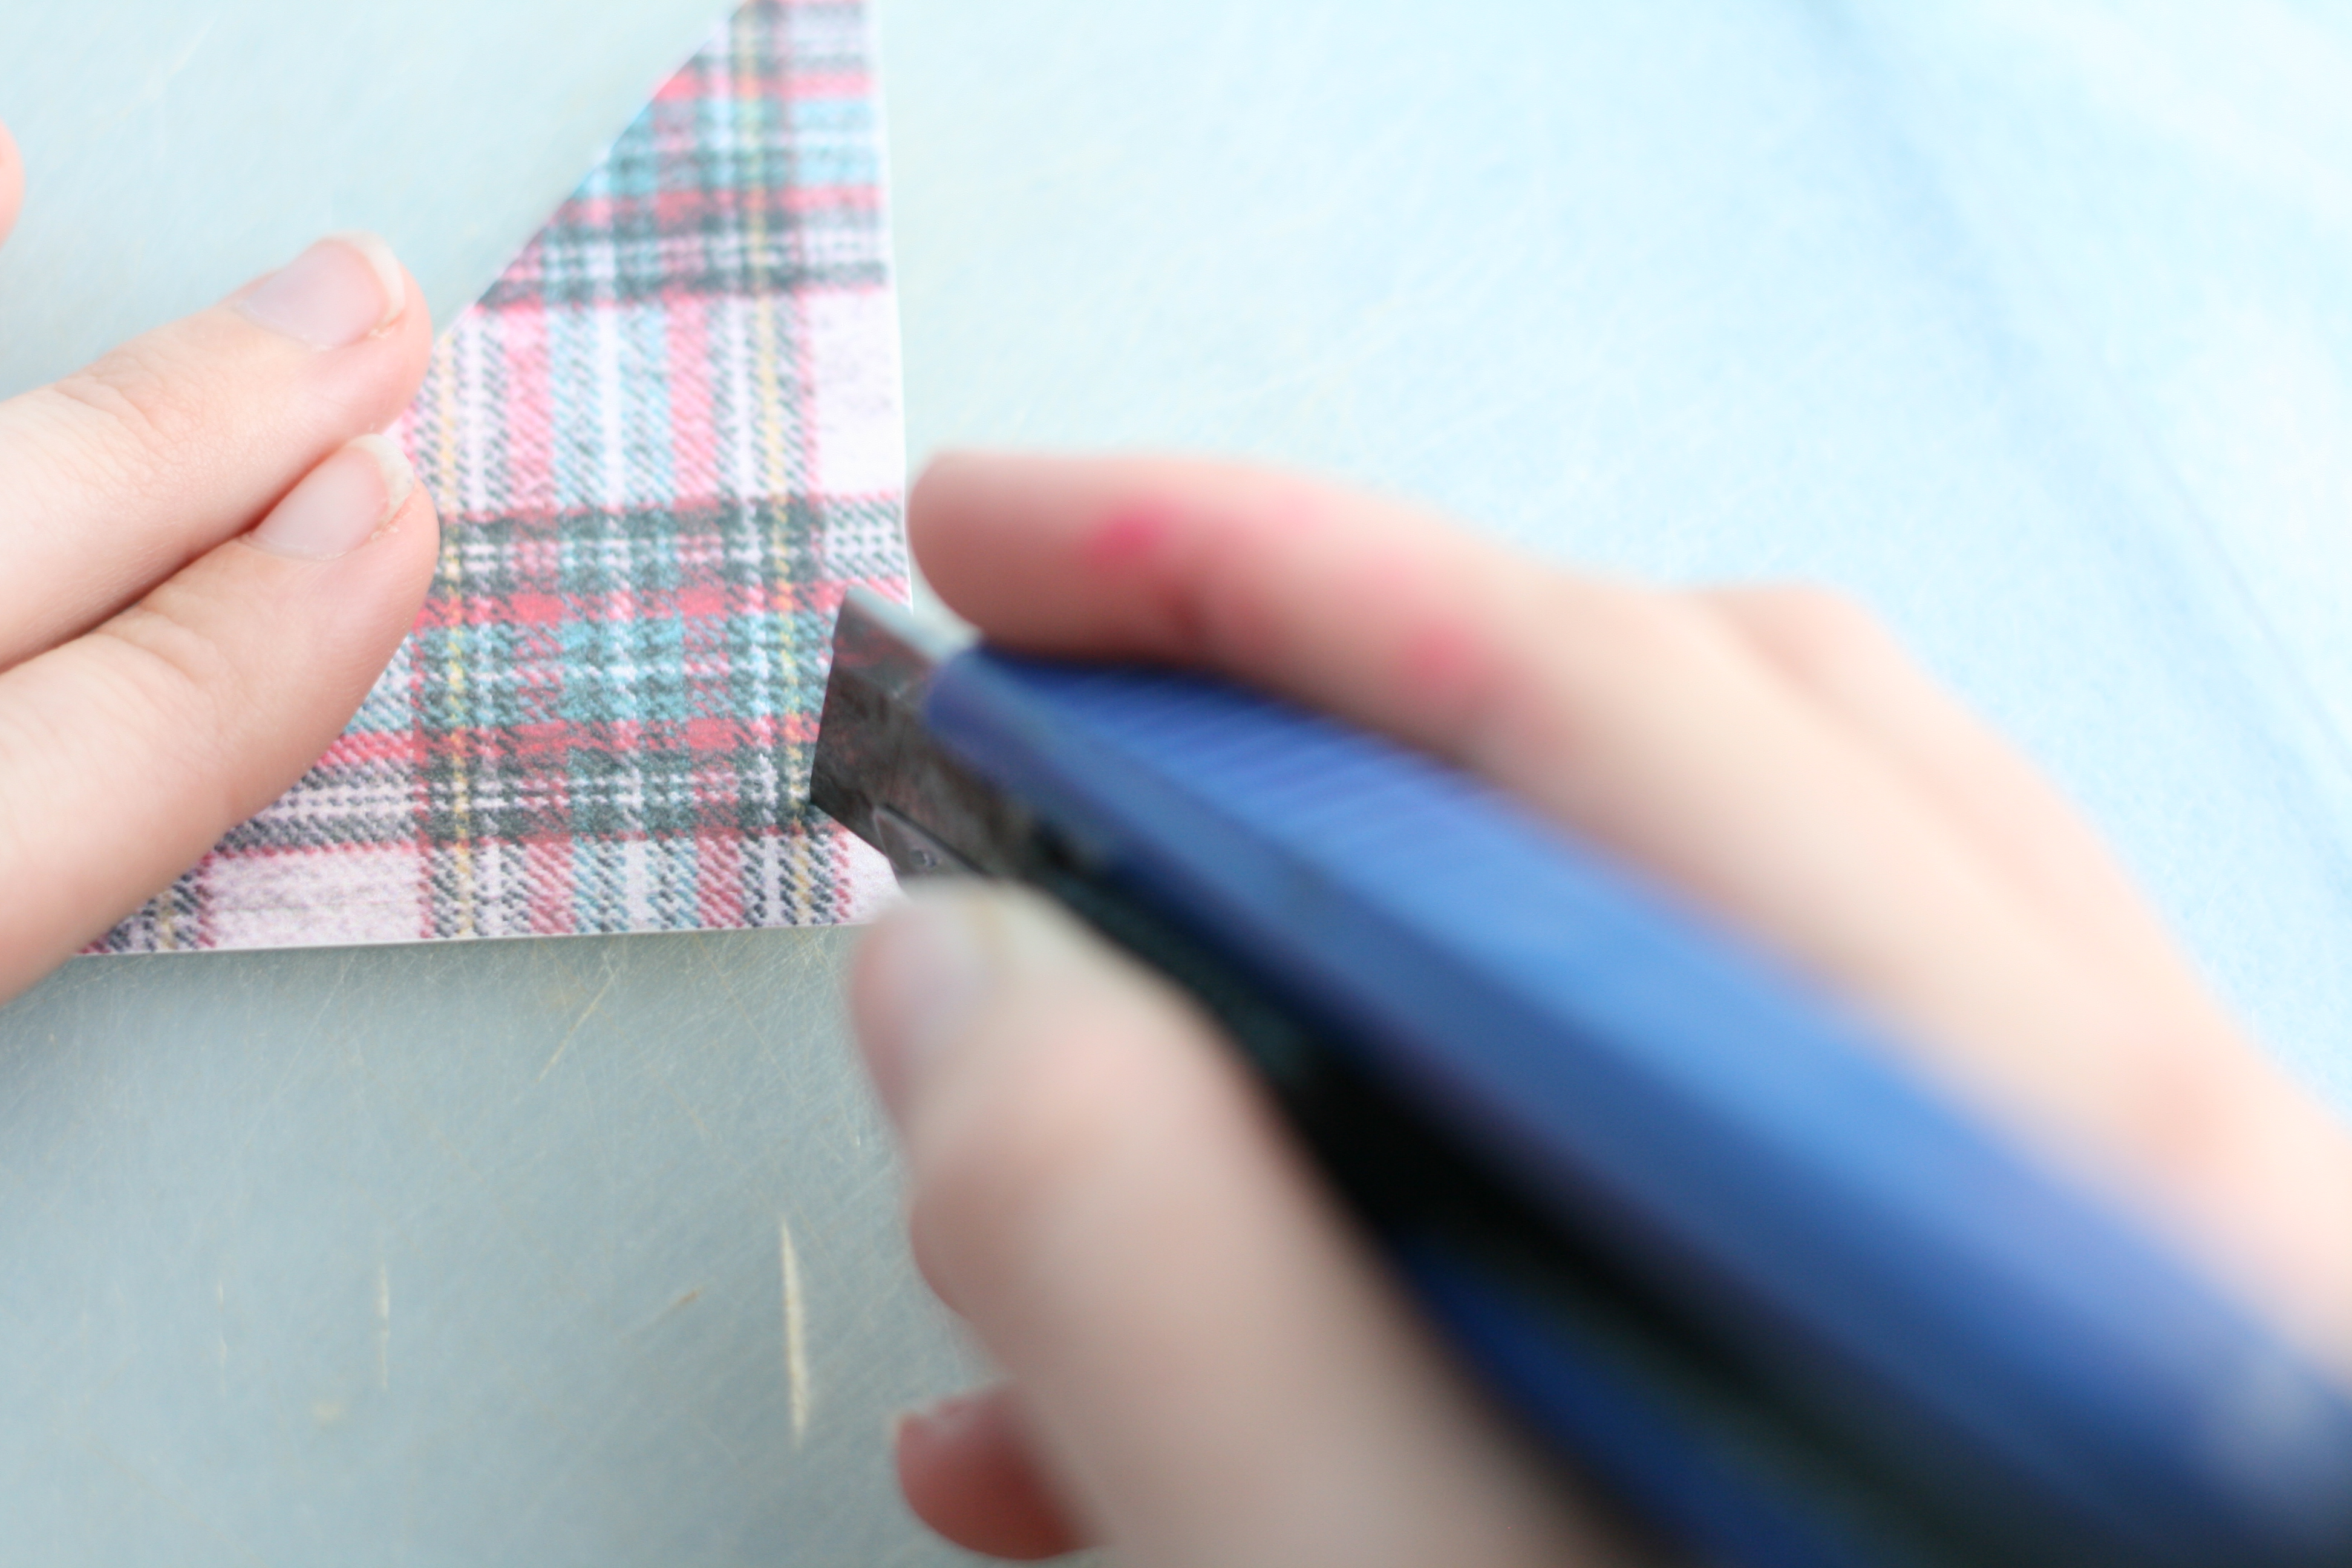
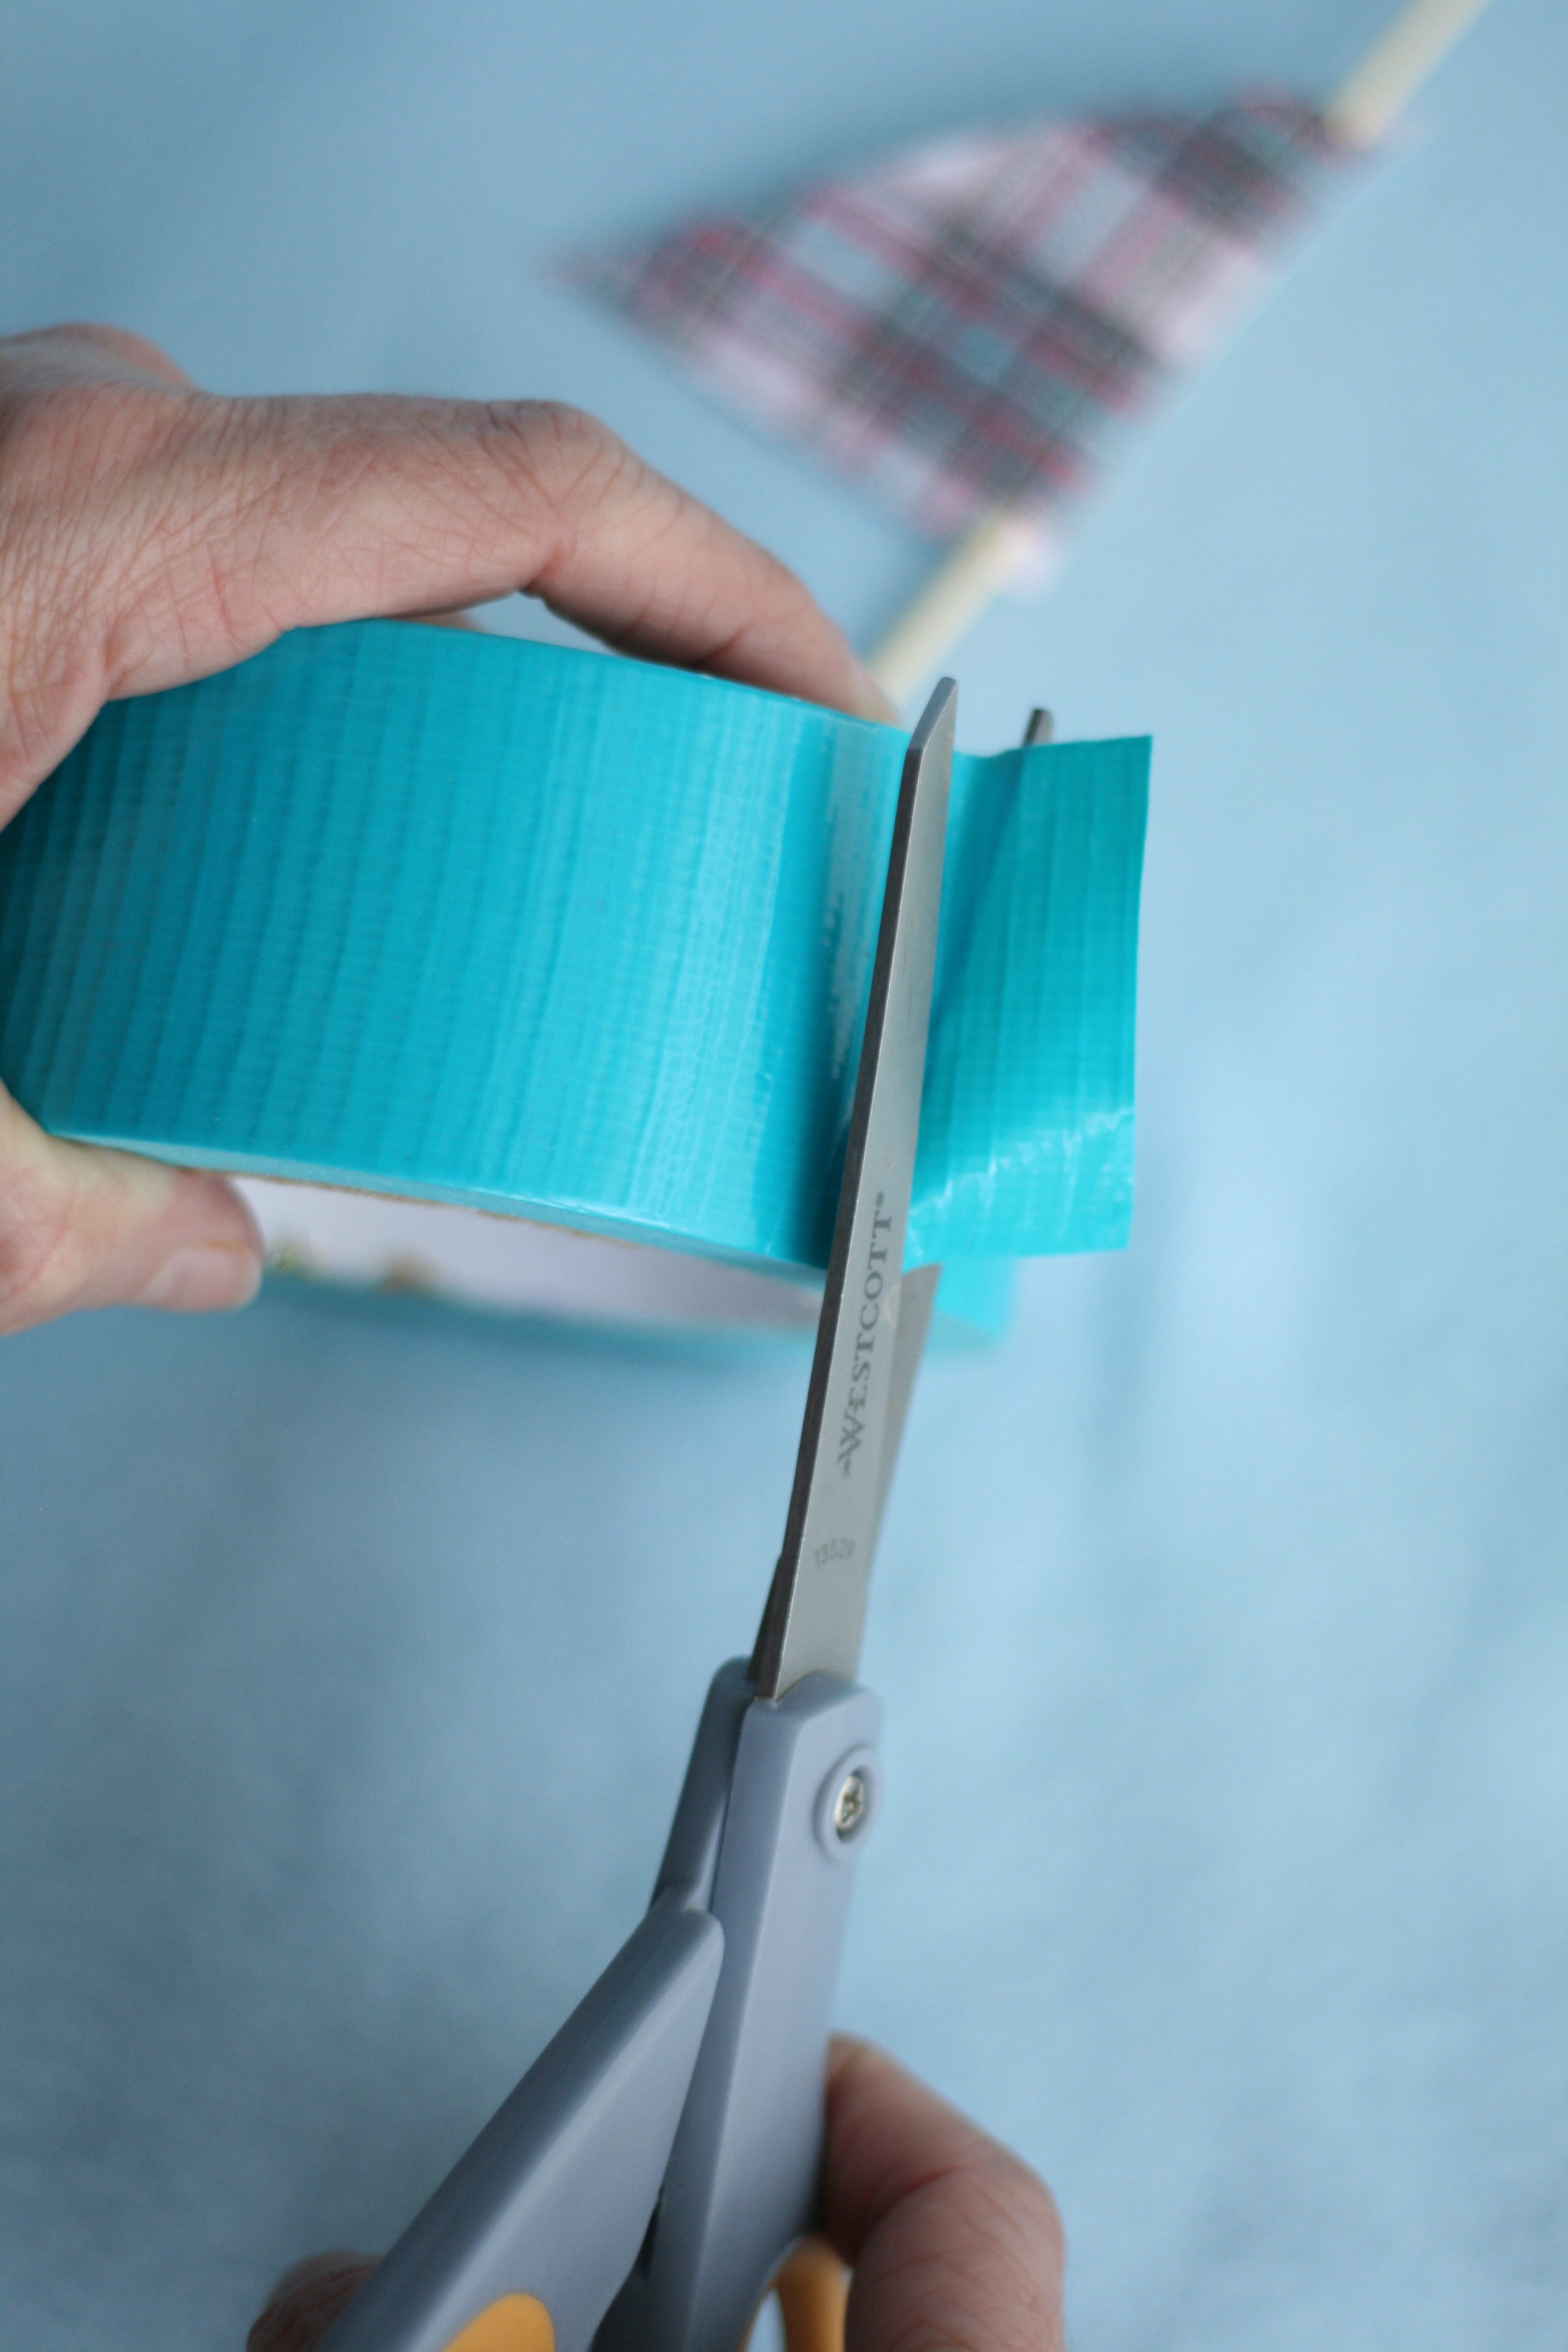
2. Meanwhile, cut wooden skewers about 5″ long using wire cutters or some other cutting utensil. Keep the side with the pointed end. Don’t worry if the wood begins to fray where you made the cut. We will cover that up shortly.
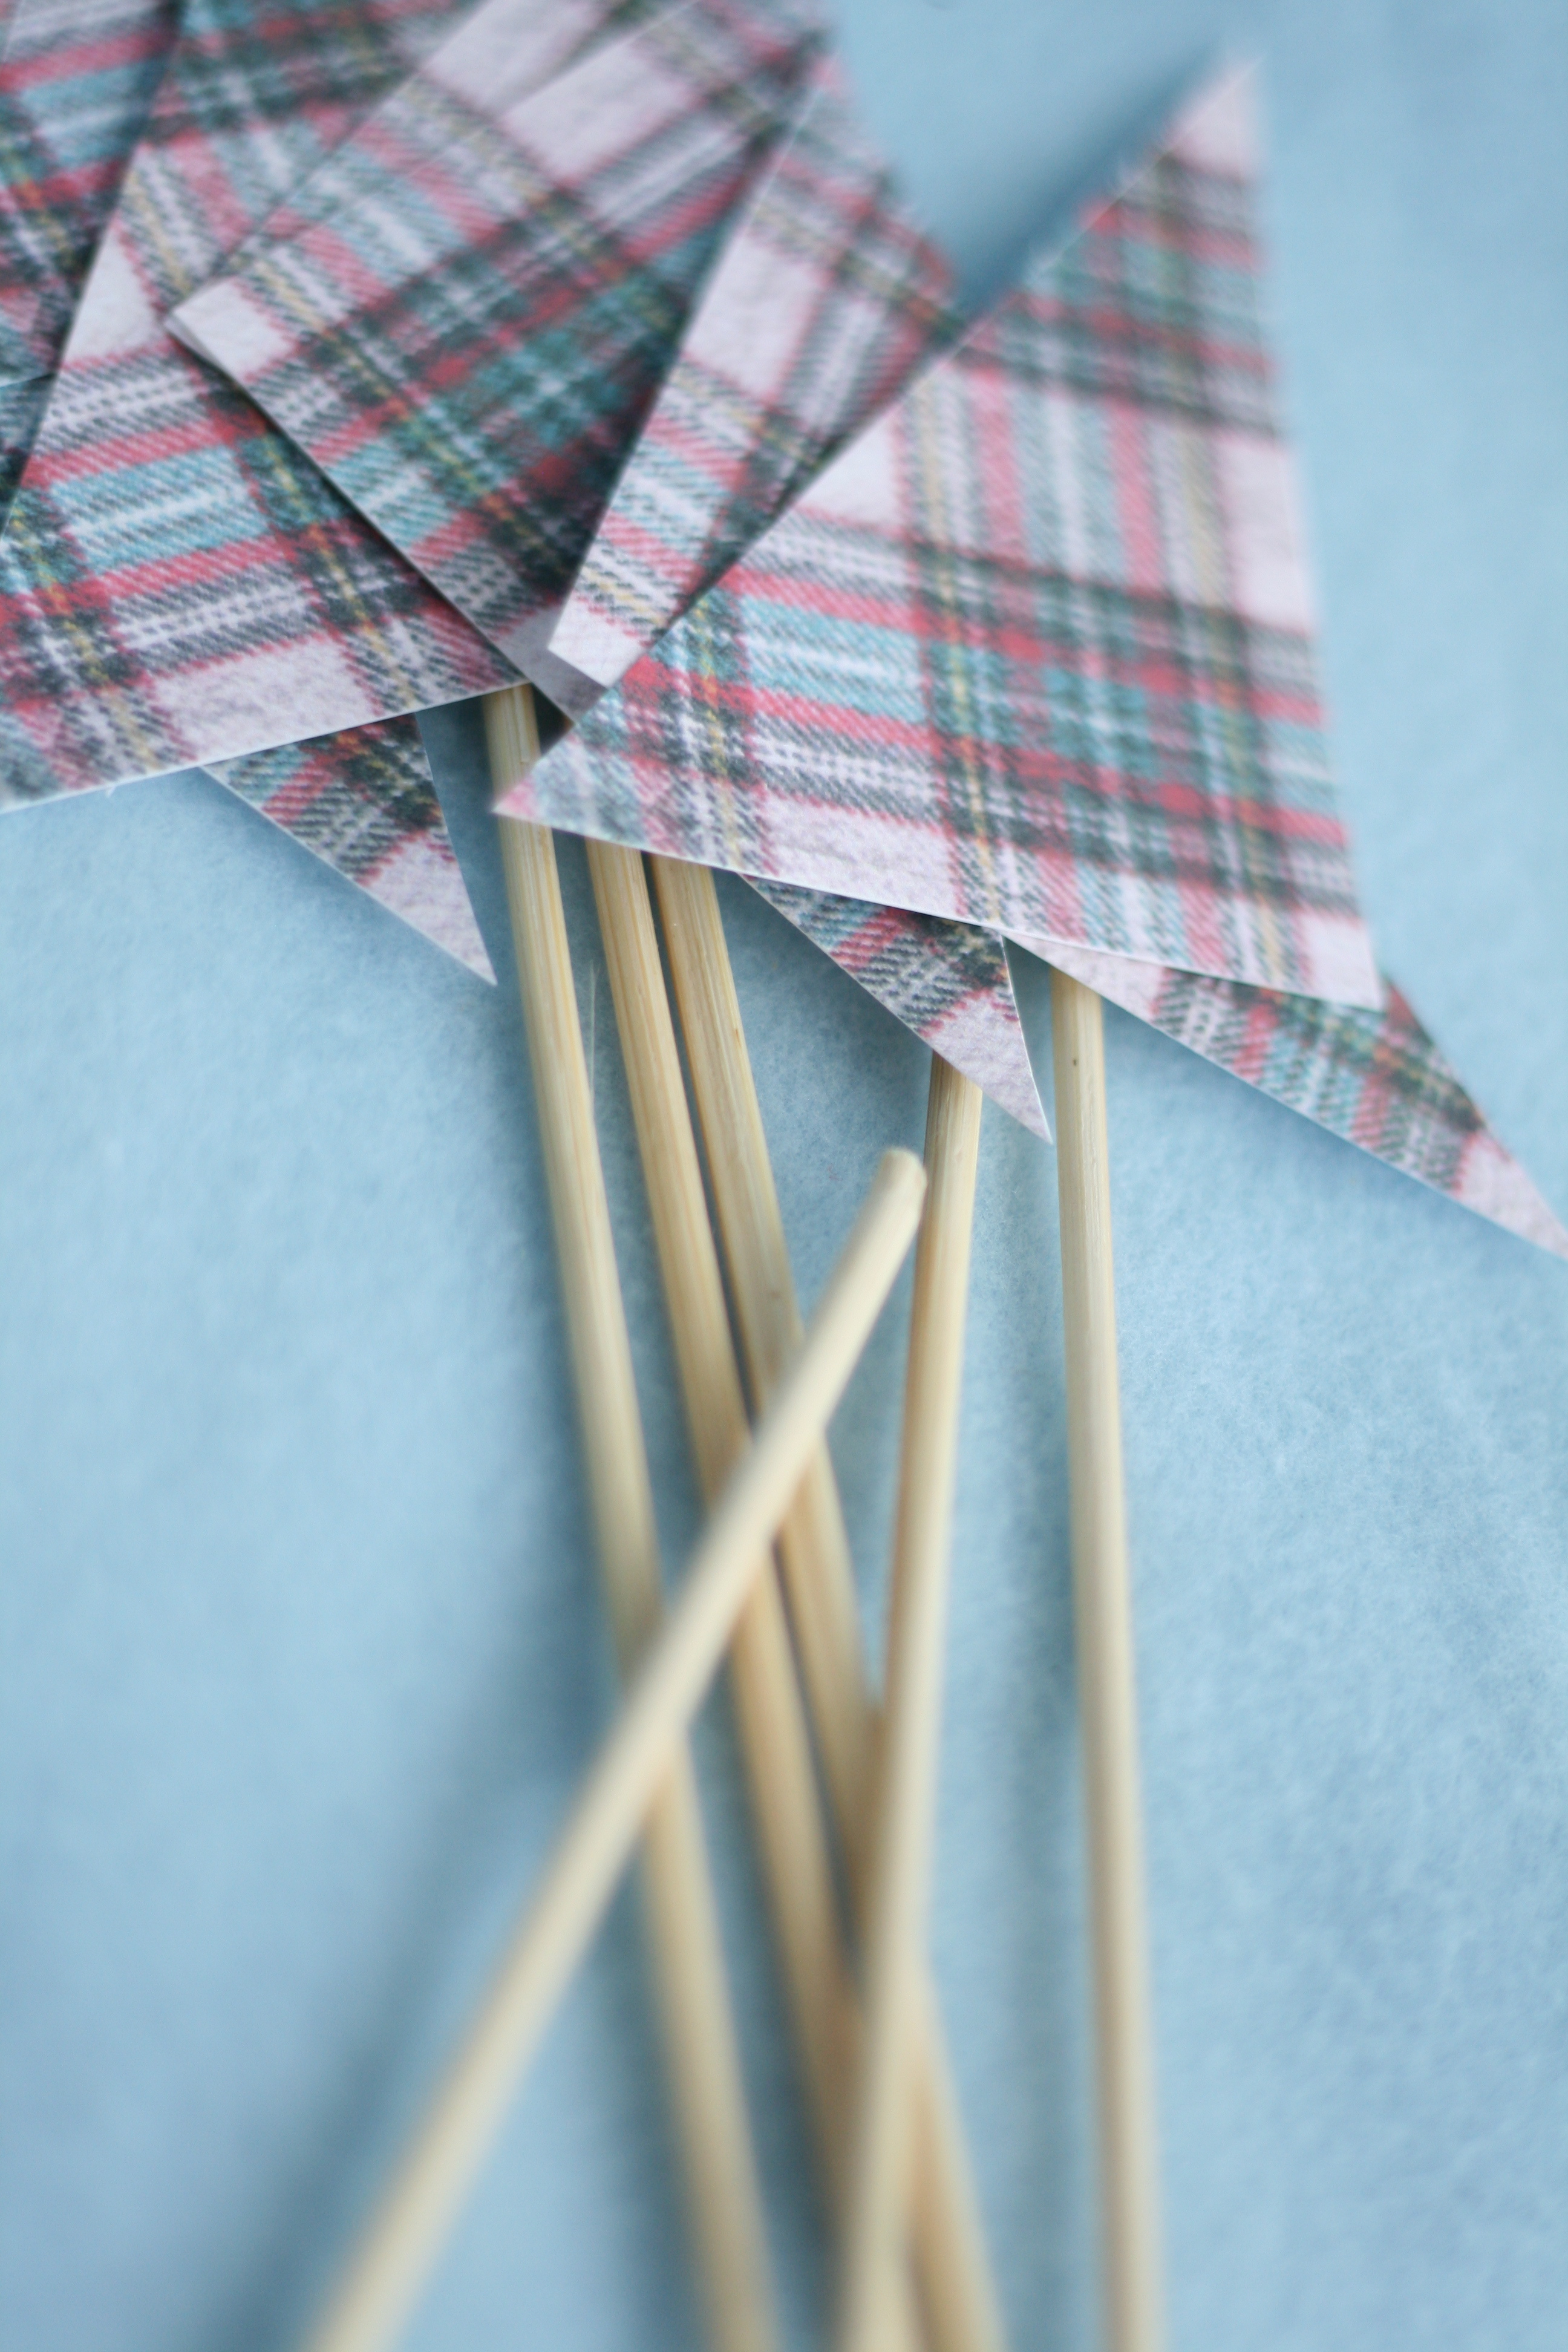
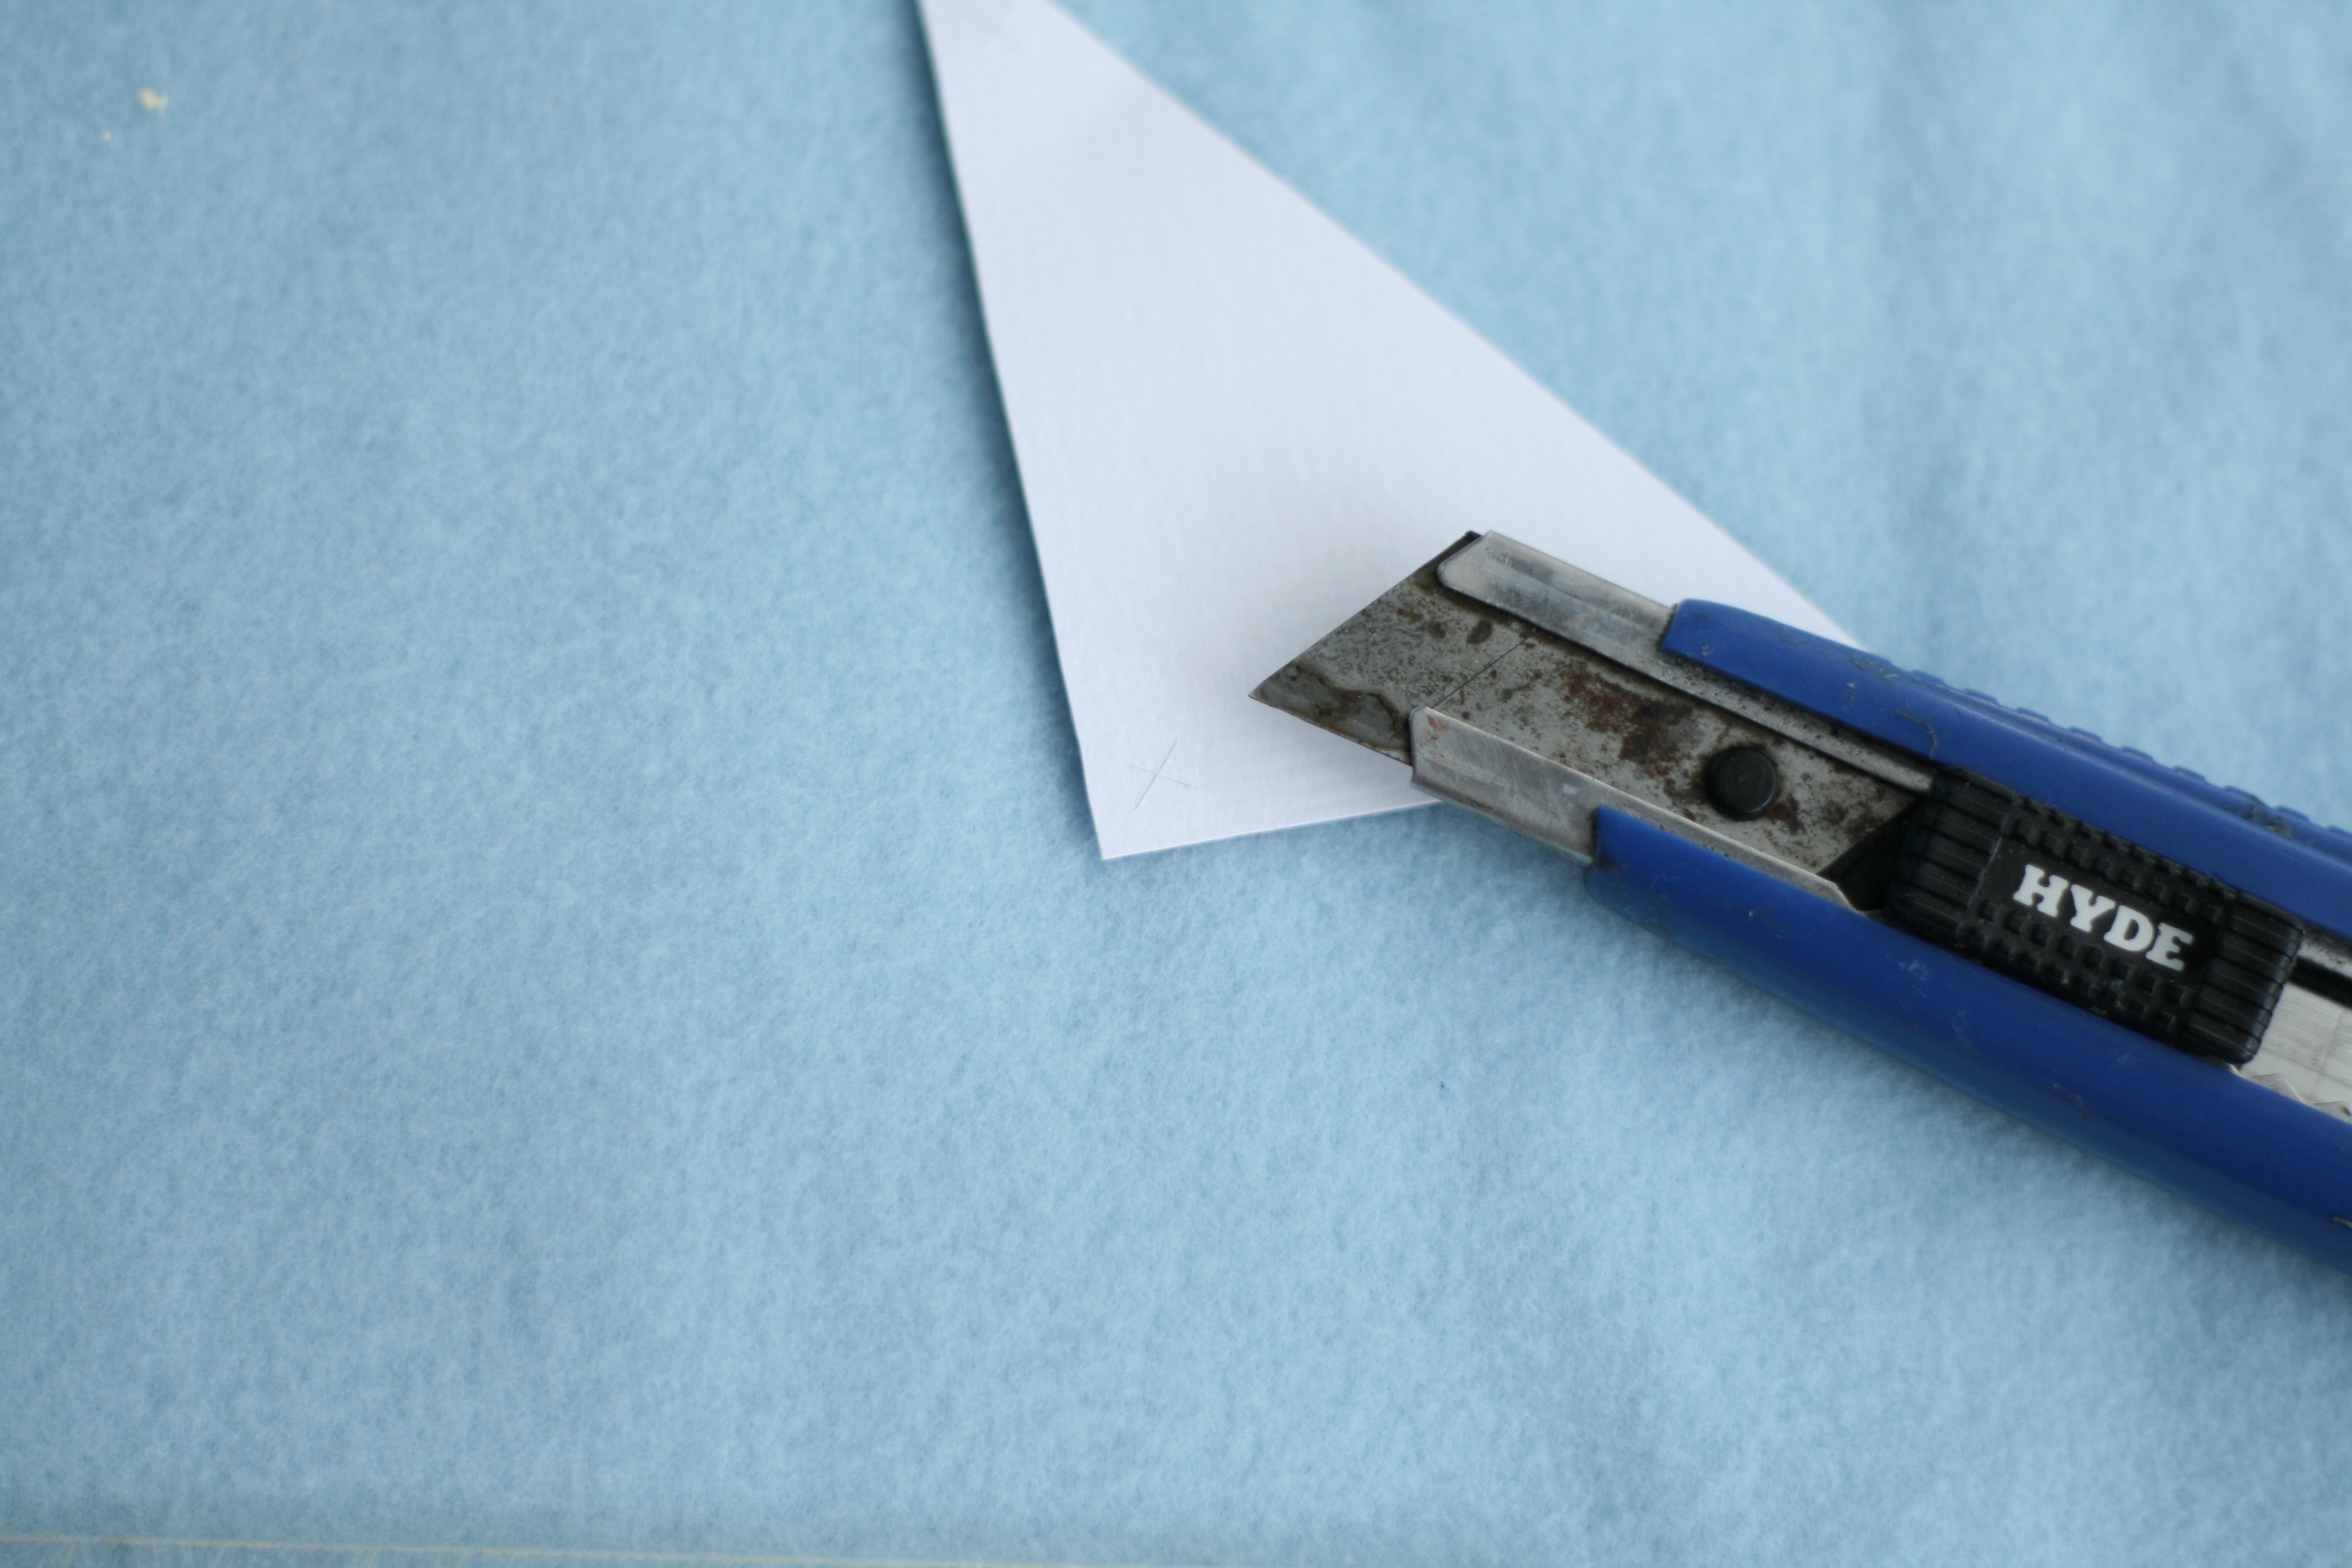
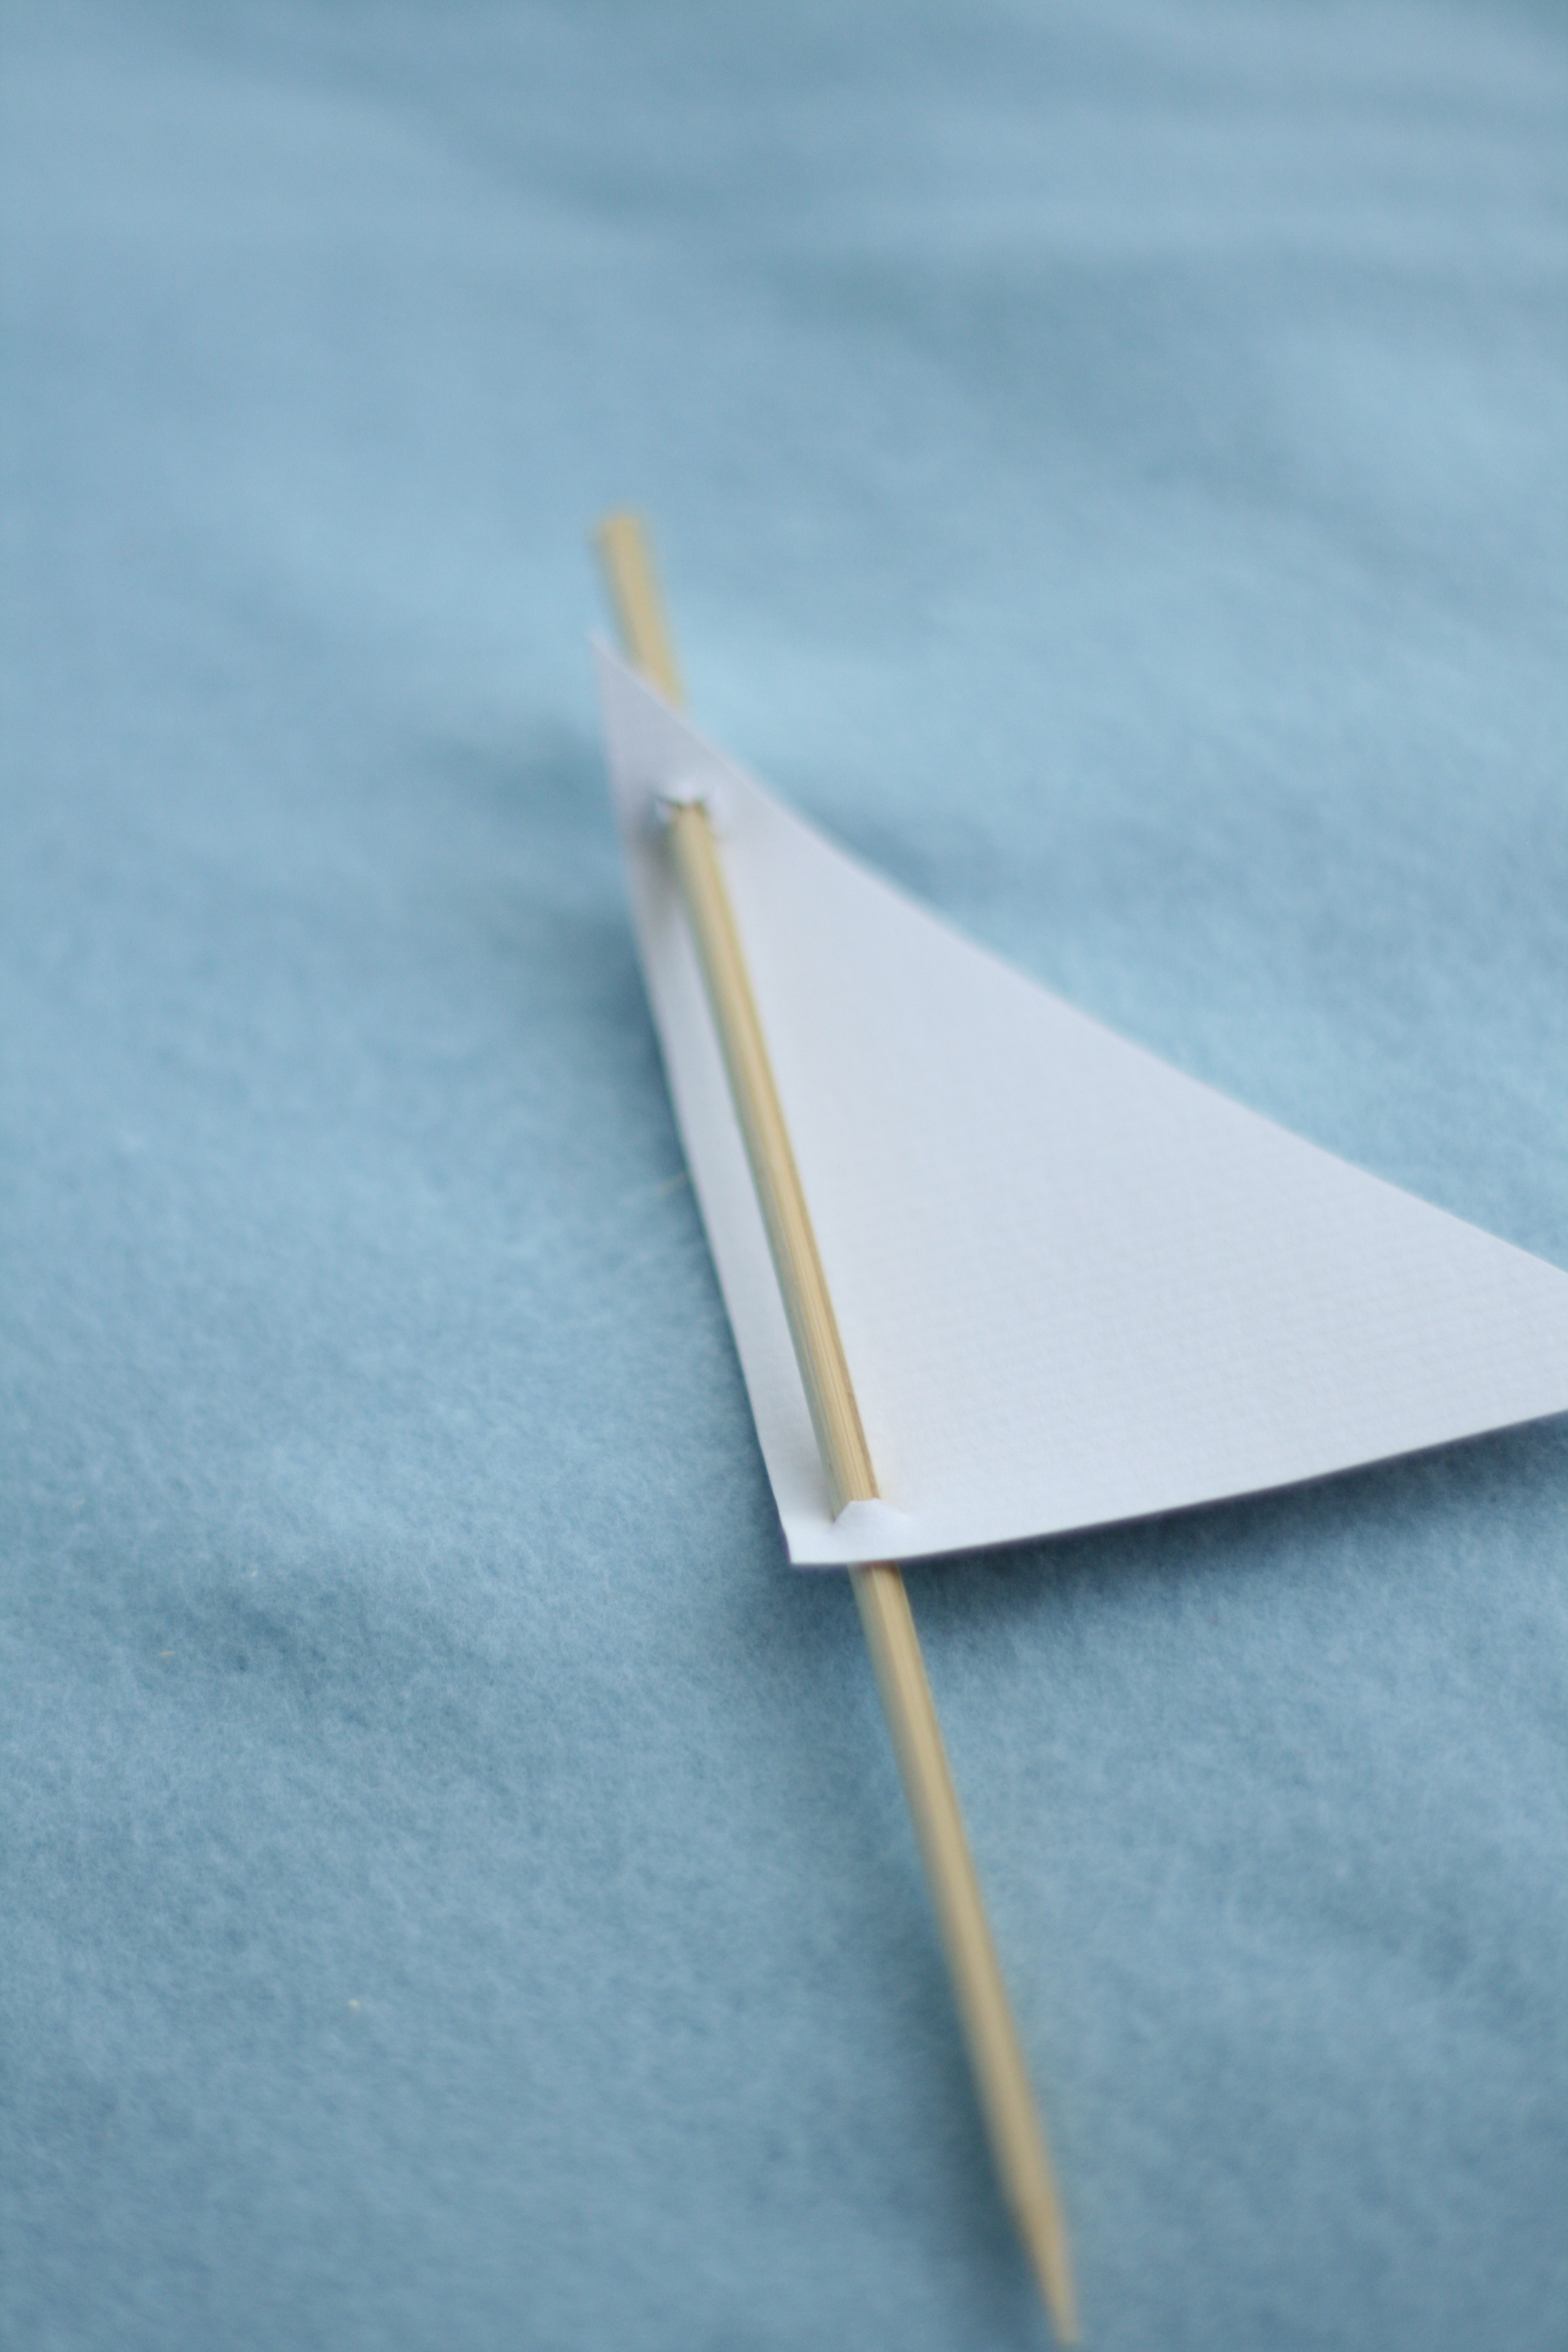
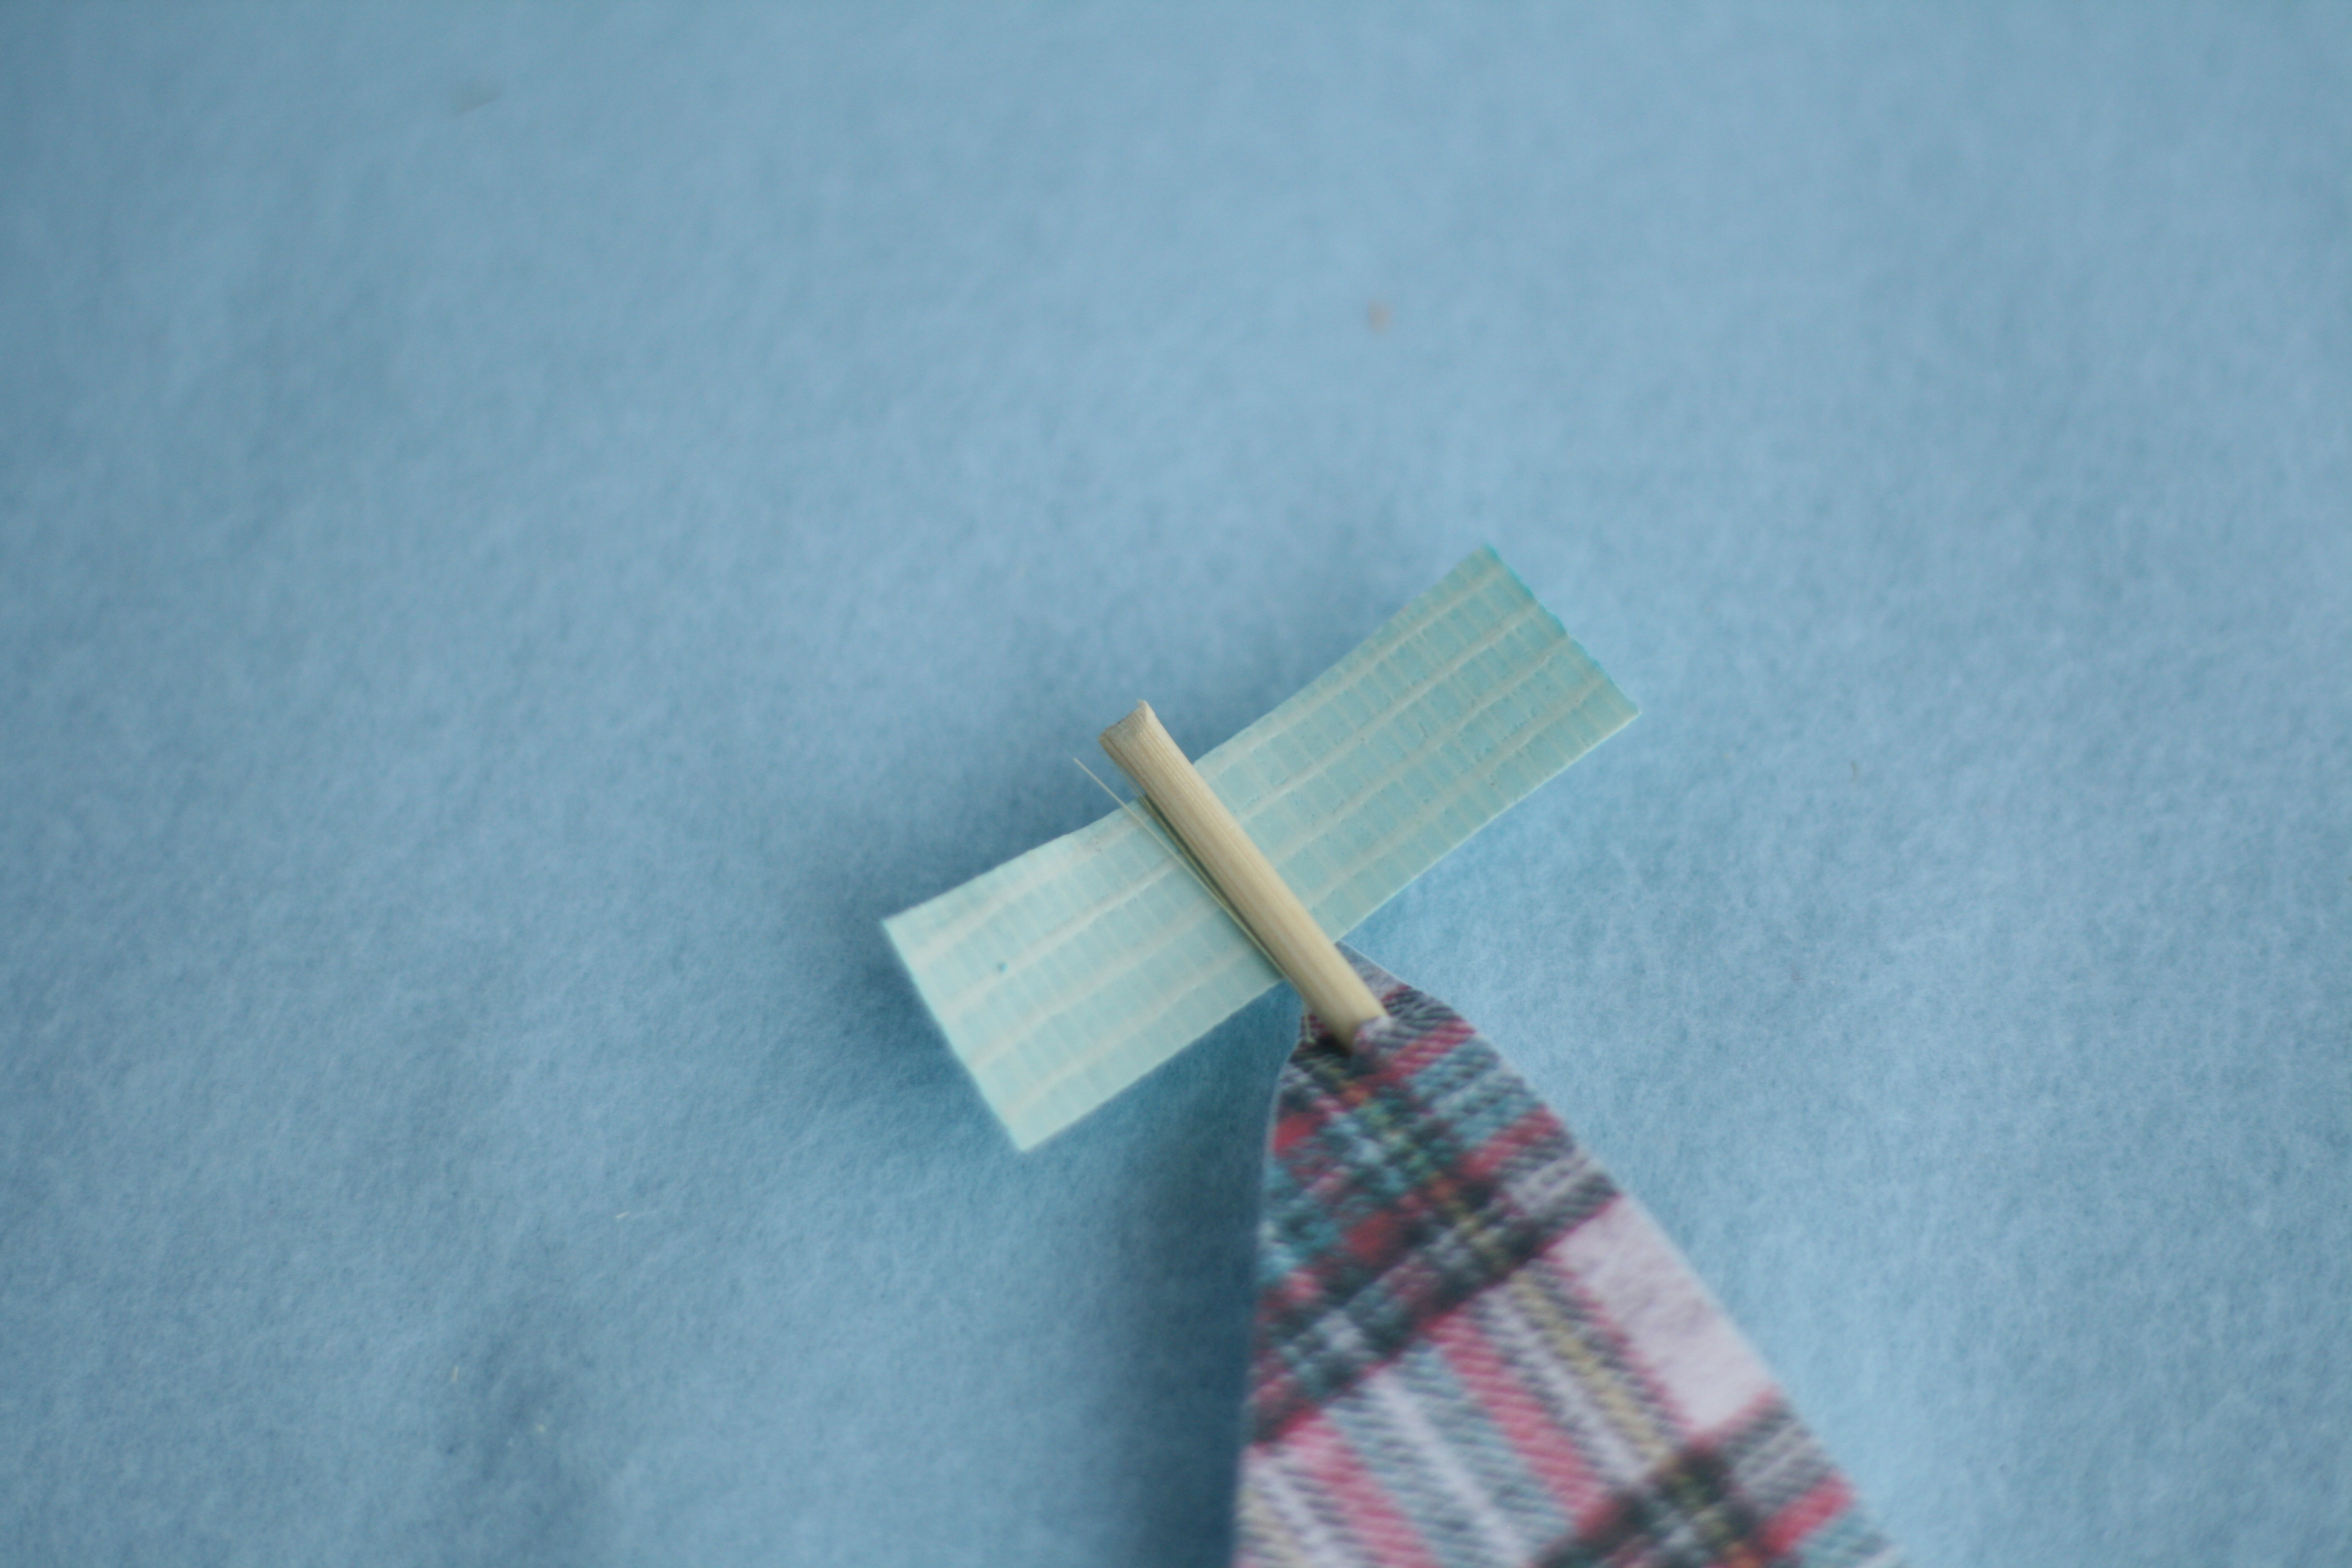
3. Print out the FauxMartha Cupcake Sail Pattern on textured cardstock. Cut out each sail. Using the longest side of the triangle (not the angle), cut an “x” at the top and bottom on a cutting board. Insert pointed end of wooden skewer into the top “x” on the printed side. Continue to insert the skewer through the second “x”.
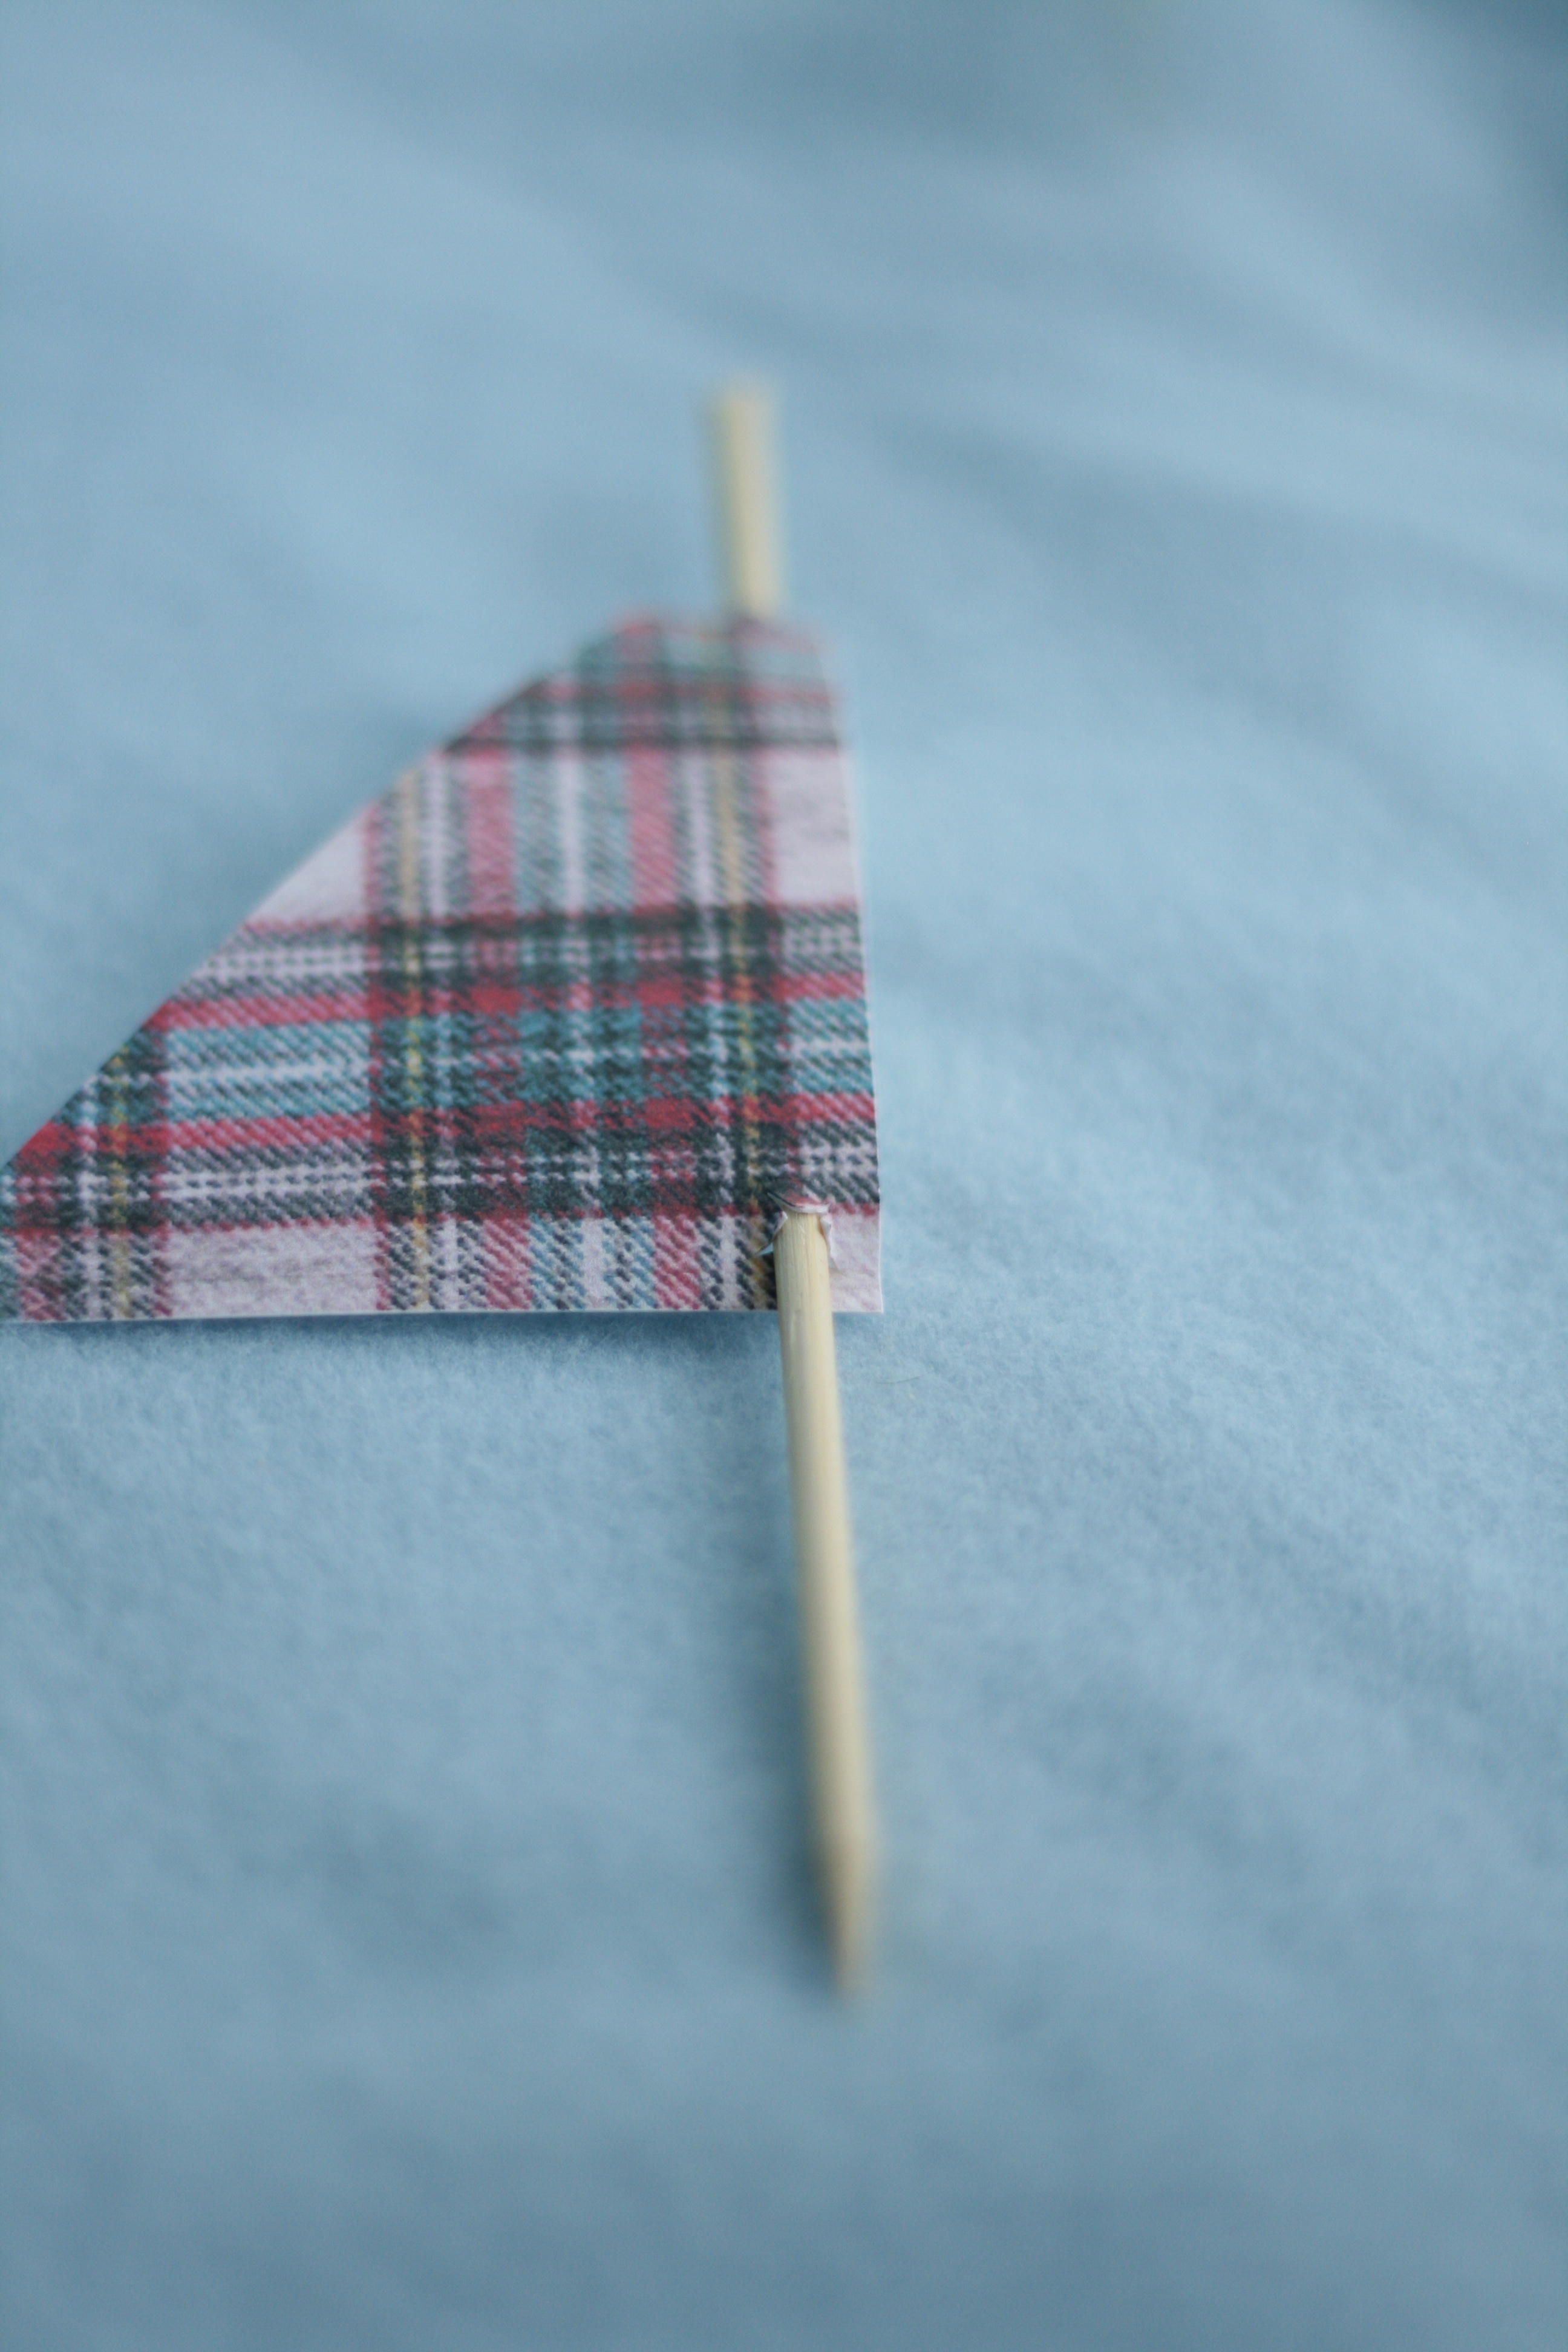
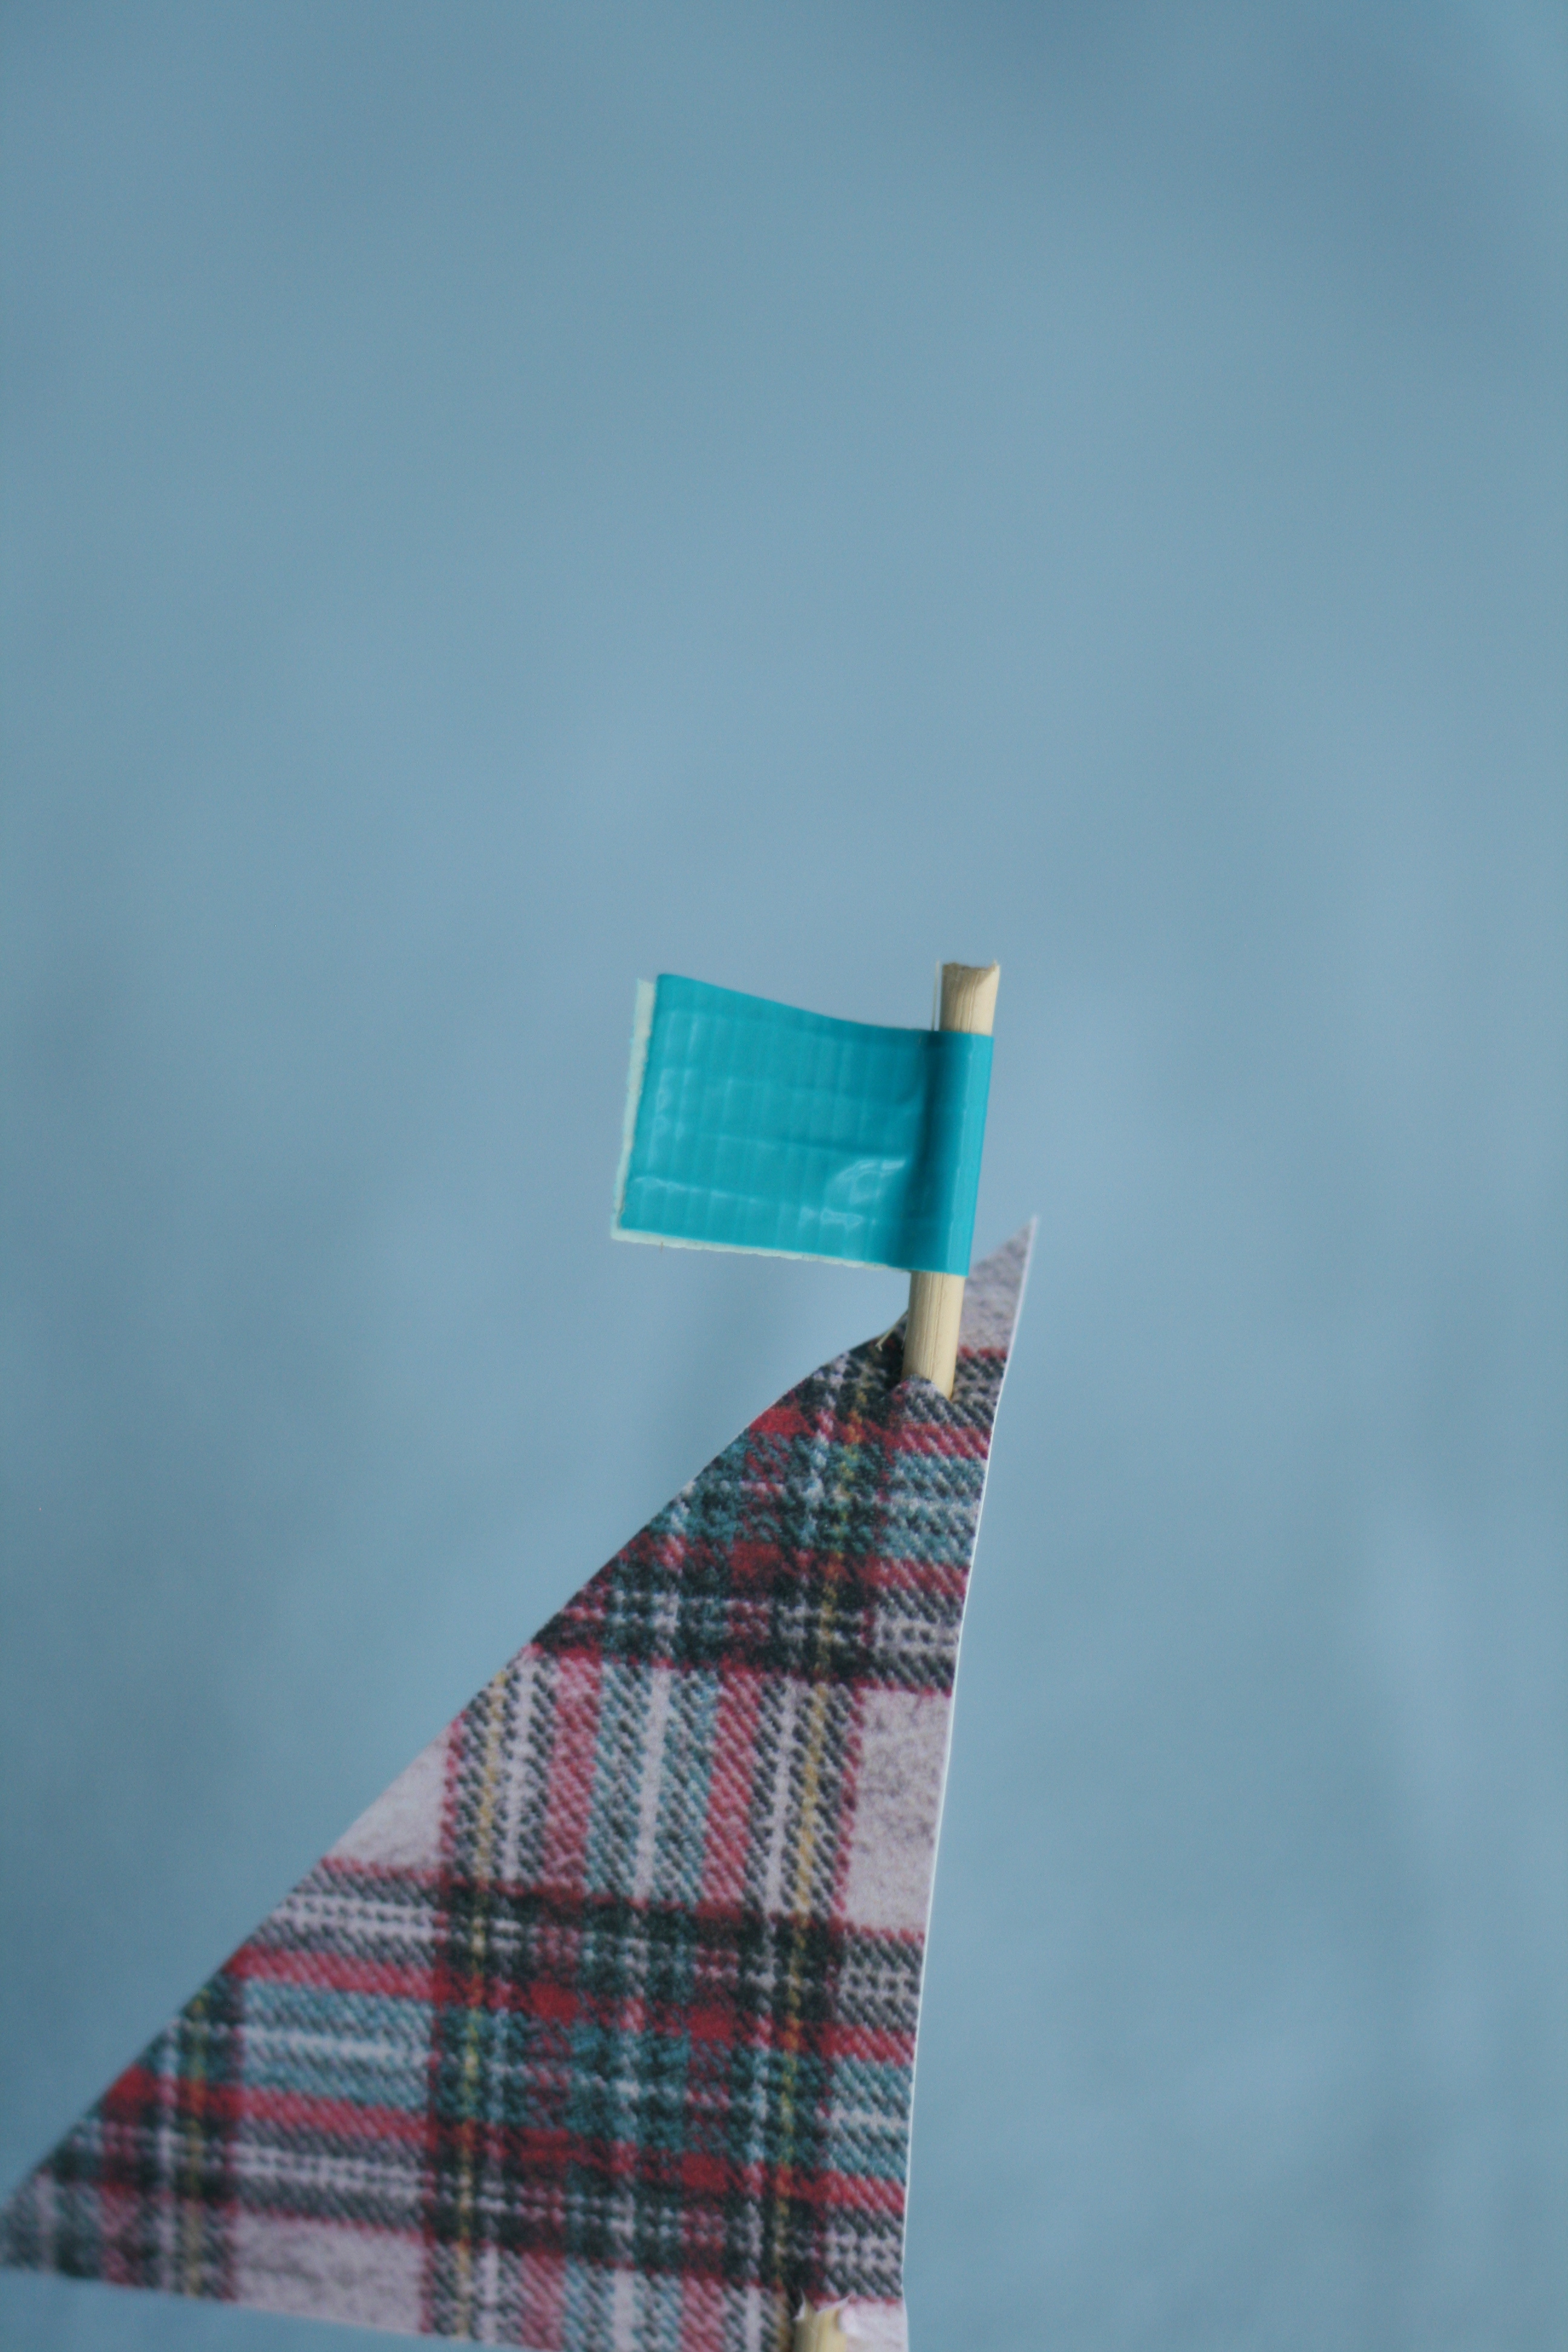
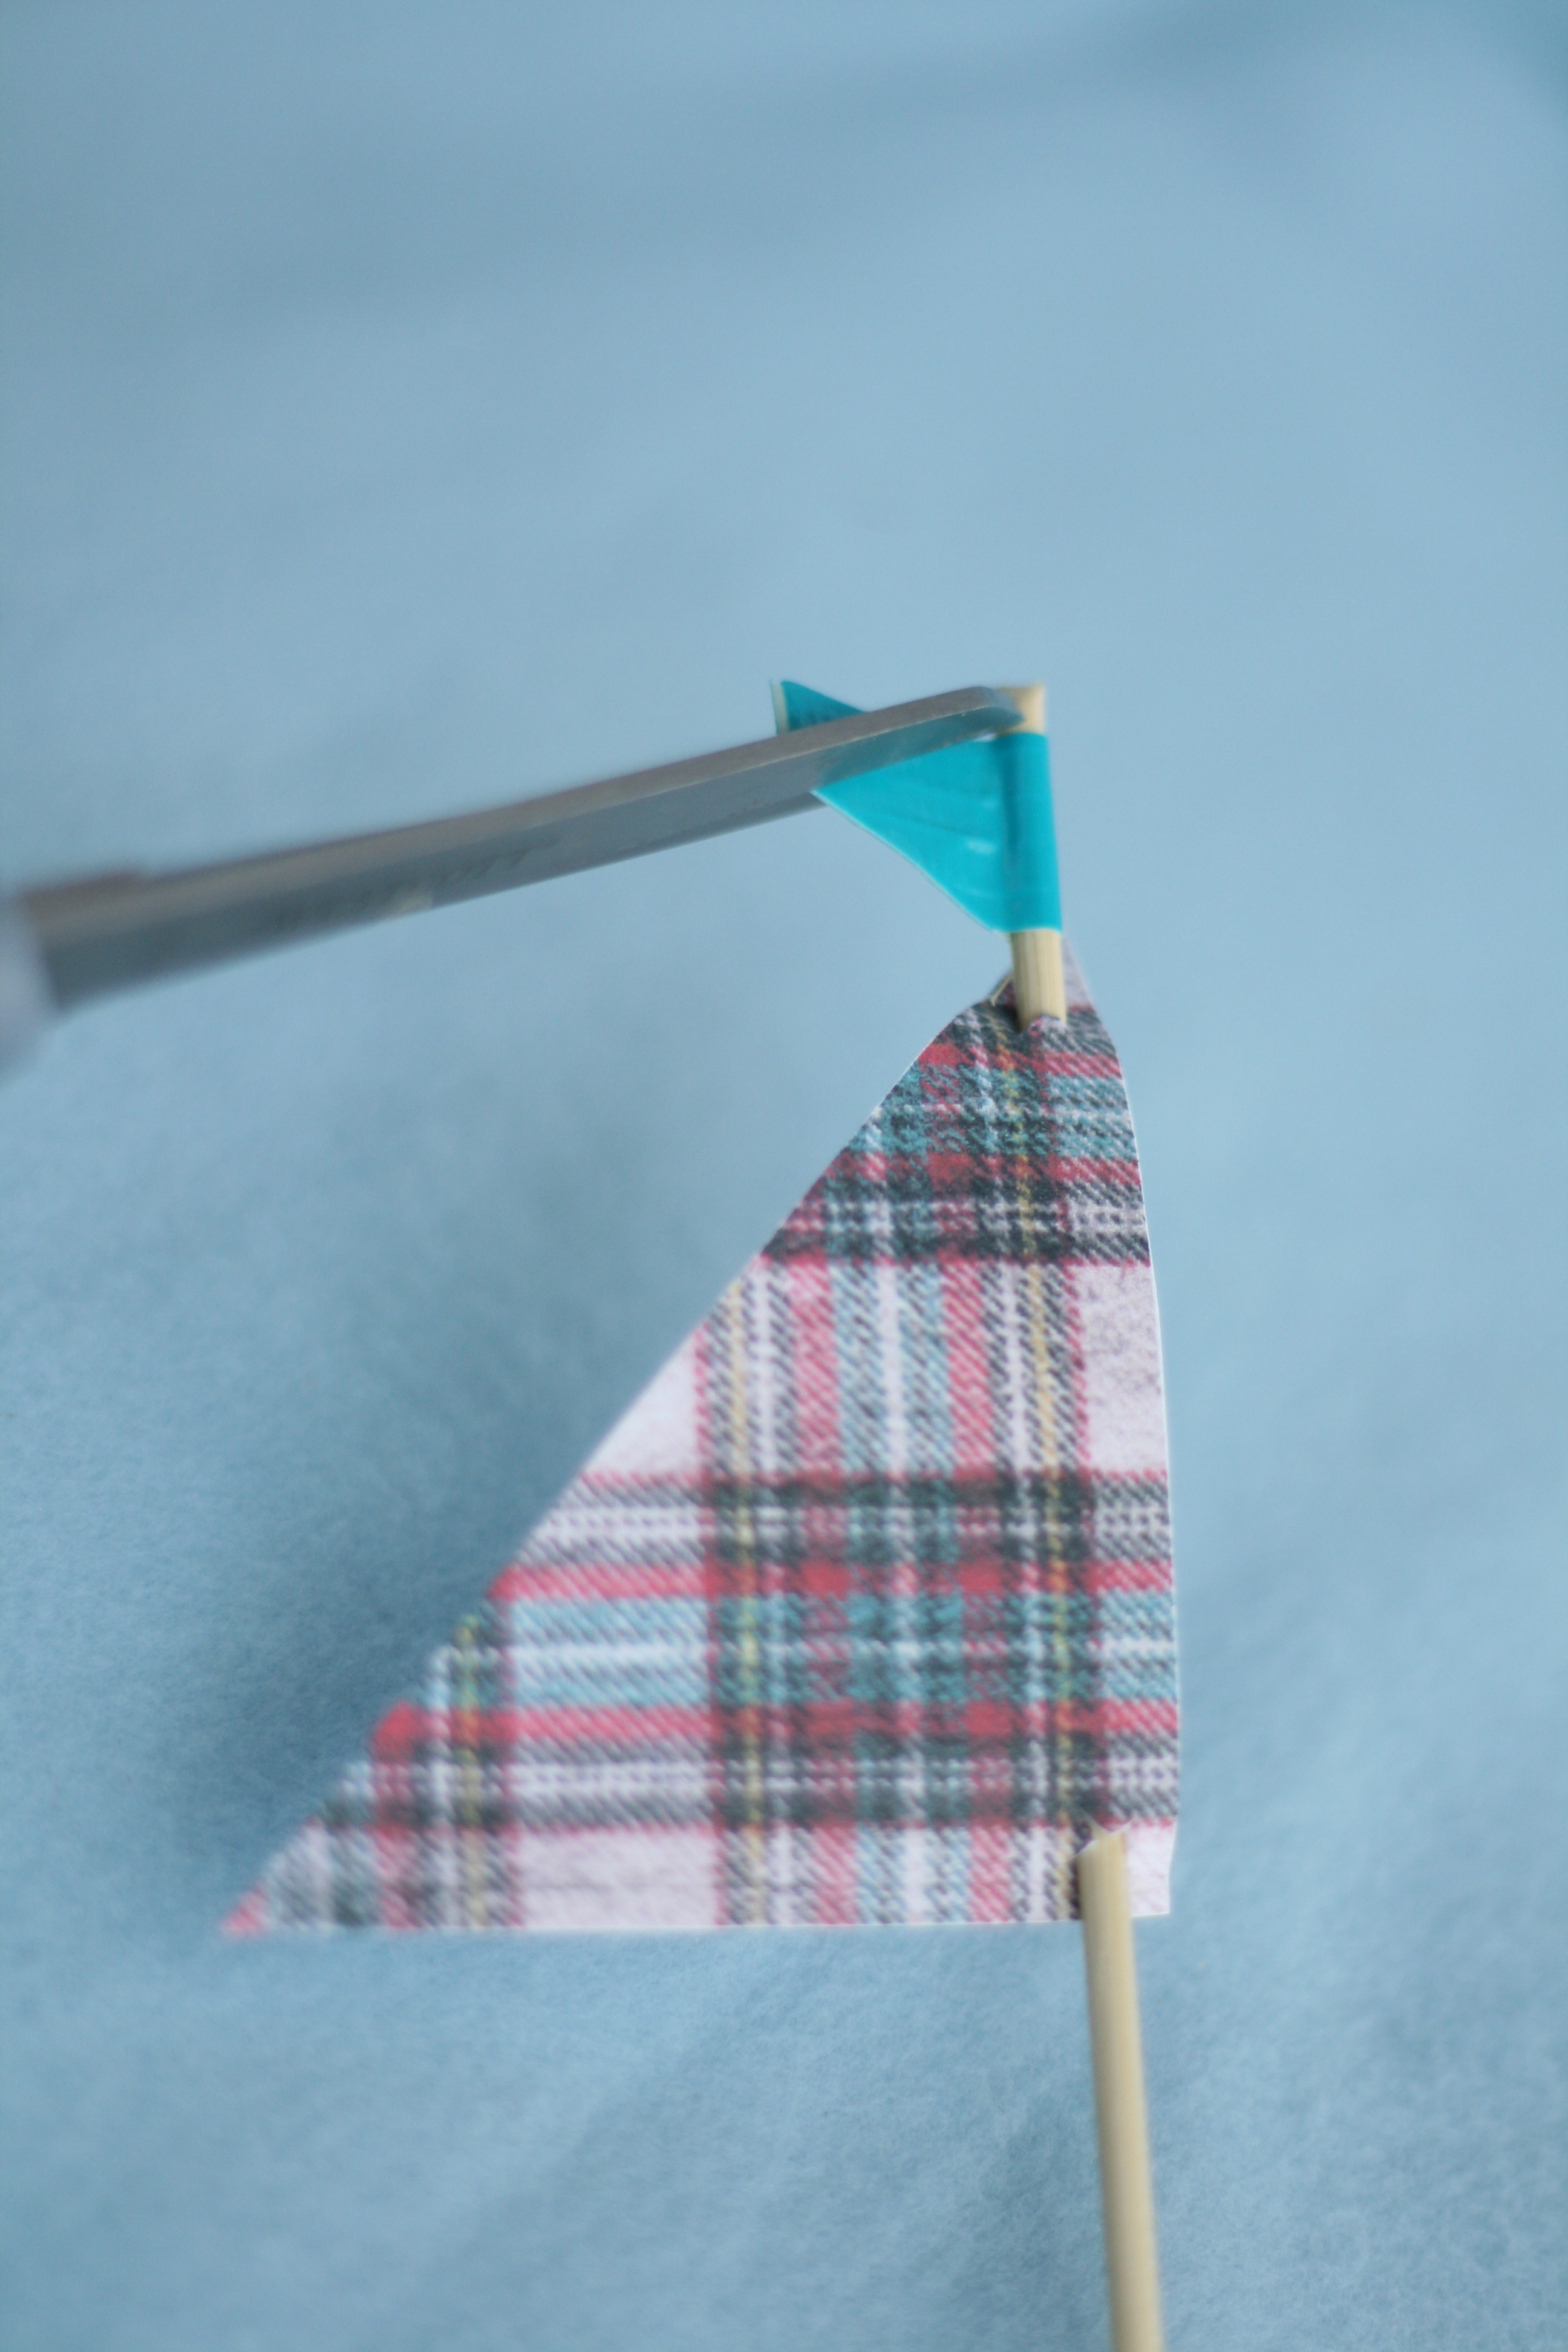
4. Cut thin 1/2″ strips of duck tape. Place tape on the top of skewer where you made your original cut. Evenly fold over. Make 2 diagonal cuts to achieve a flag. Push sail up to give it that curved wind blown look.
5. Ice your cupcakes with the frosting of your choice. I use the Wilton Dessert Decorator Pro to ice my cupcakes. In order to get the thick swirls, I don’t use a tip. Place pointed end of the sail into cupcake and you’ve got yourself a cute sailboat cupcake!
If your visual, like me, these should help:

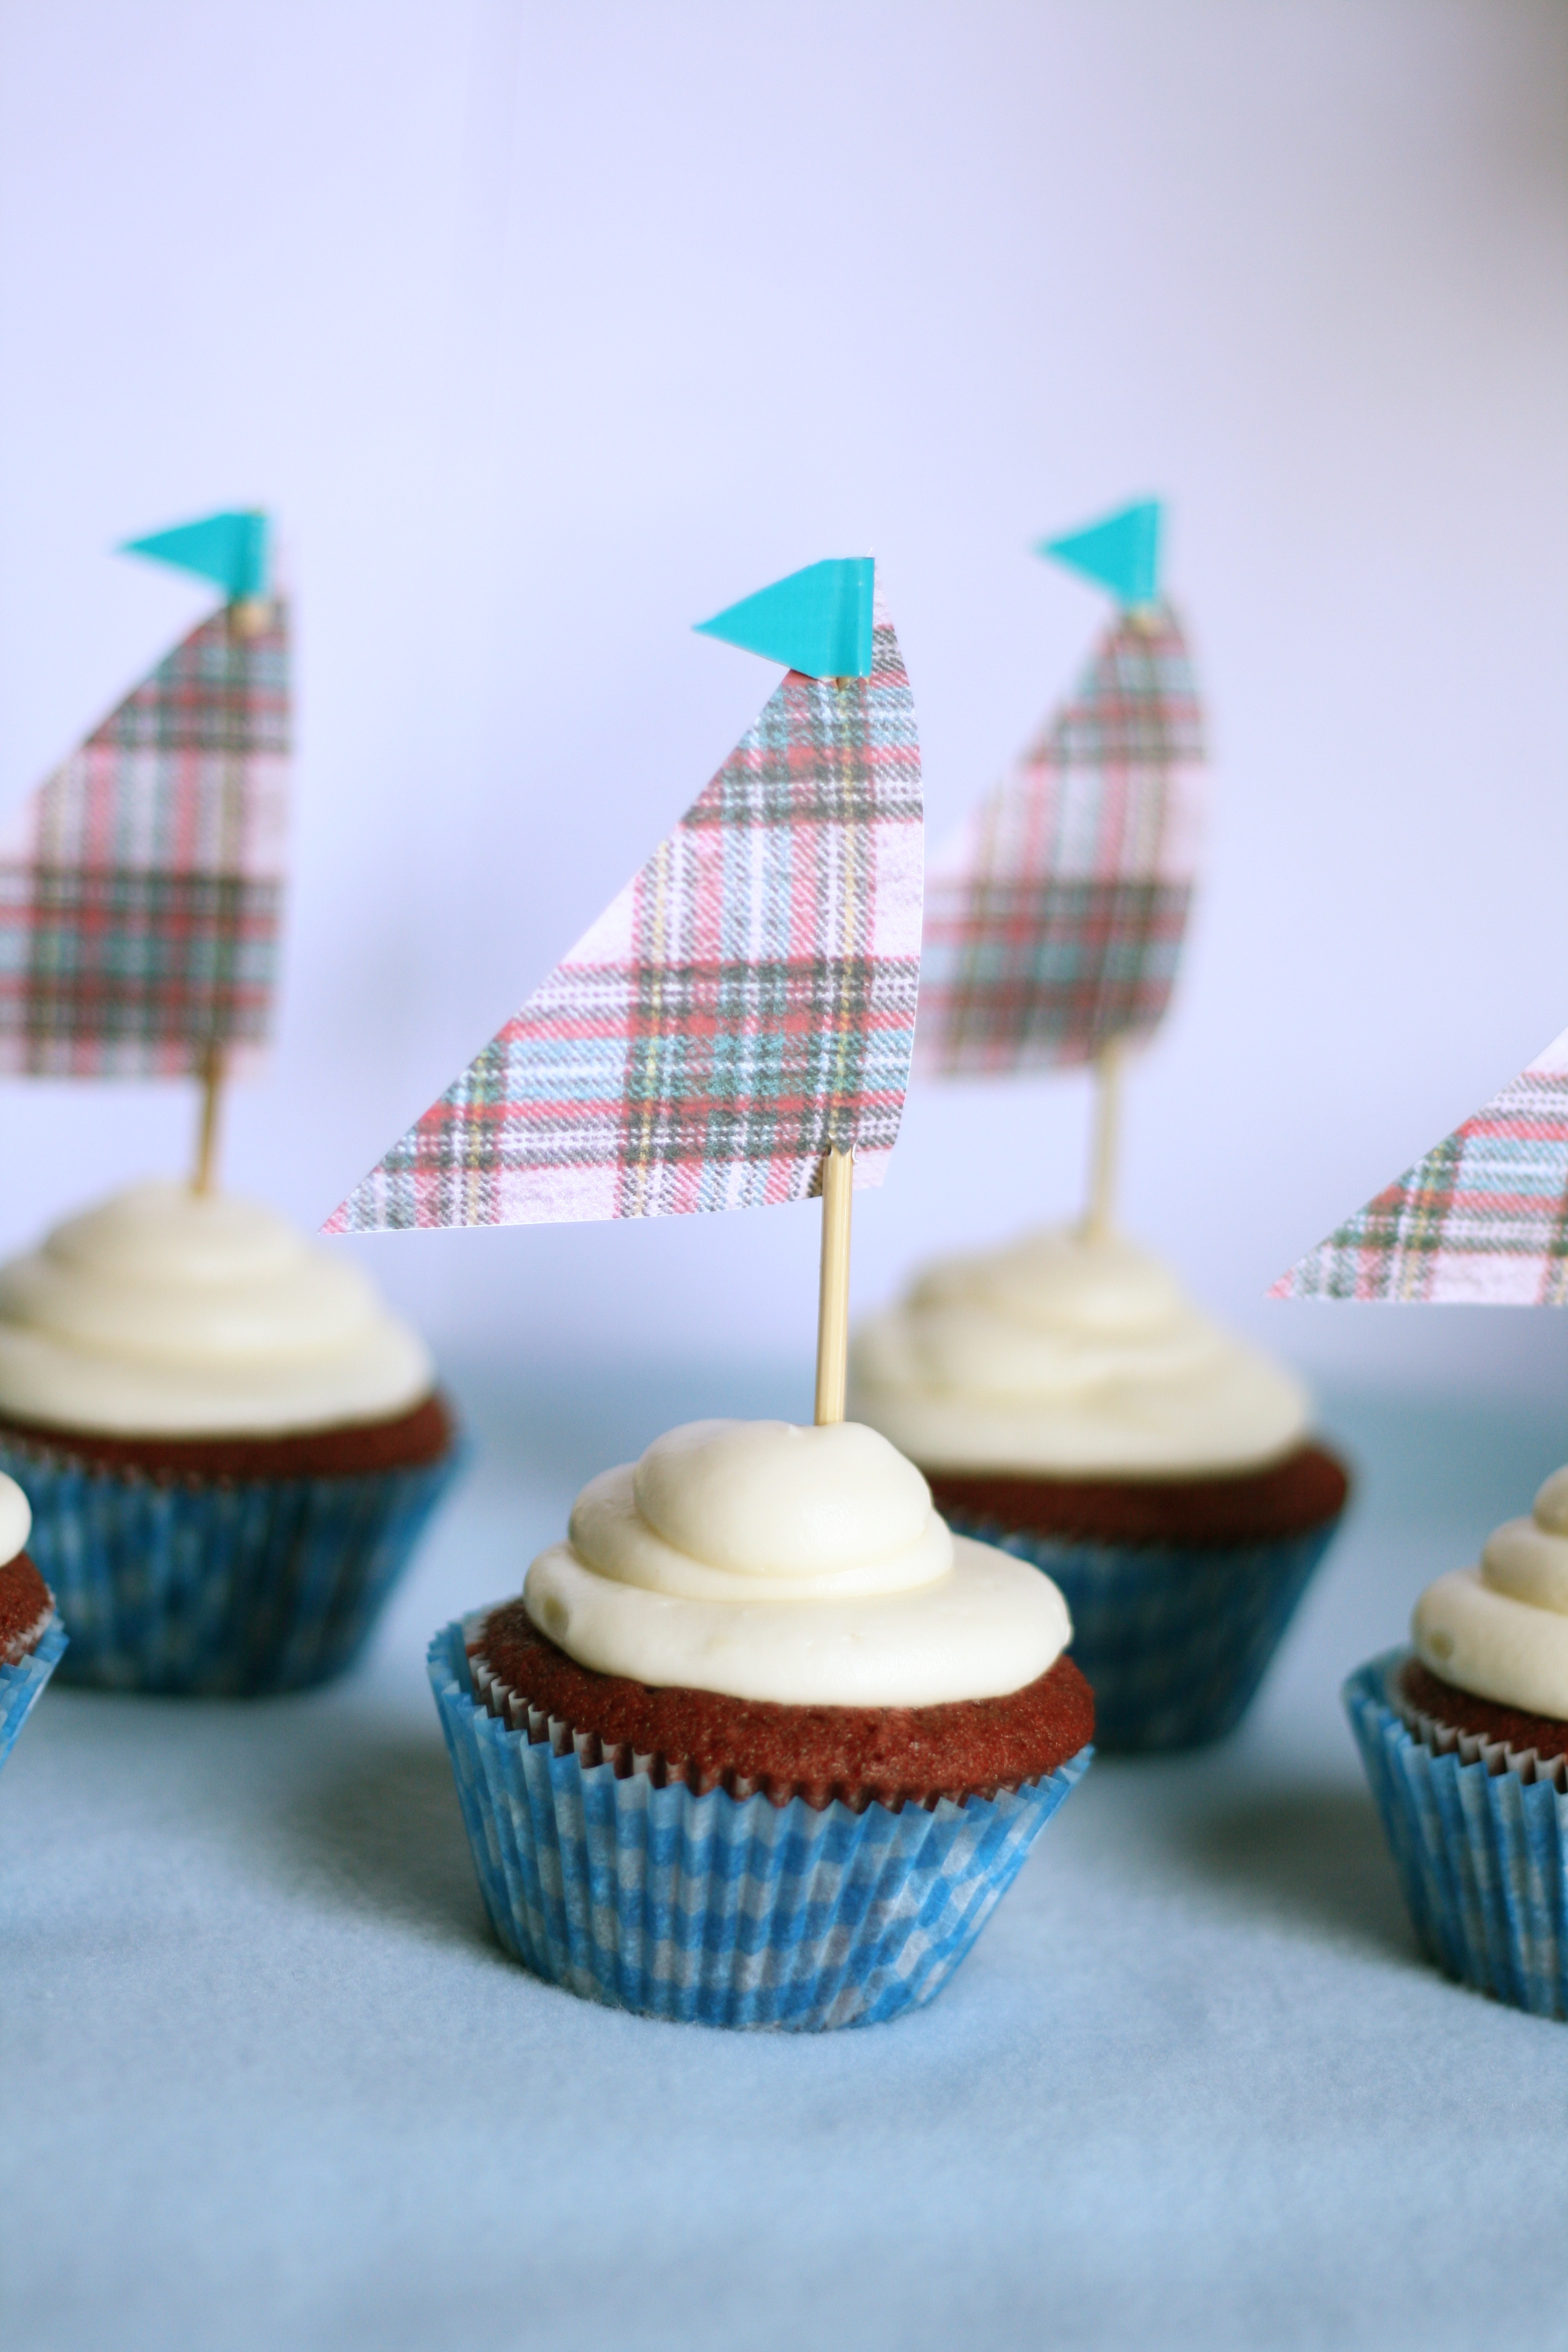
If you missed them, click here for the matching baby shower invites. Now that you have everything you need to get started, happy baby shower planning!

Whoopie Pies are the new cupcake. Okay, maybe that’s not true but it might be after you try one. Upon eating, it’ll leave you exclaiming, “Whoopee!” Literally.
Whoopie Pies stepped onto the scene through the Amish tradition. As the story goes, Amish wives used their extra cake batter to bake mini cakes. Thou shalt let nothing go to waste. They’d plop some icing in between two small cakes and pack it into their husband’s lunch box. After biting into these little gems, a common response from the male would be “Whoopee!” And there you have it—the Whoopie Pie was born.
Since the previous post tells you how to make homemade pumpkin puree, let’s go ahead and make Pumpkin Whoopie Pies! ‘Tis the season.
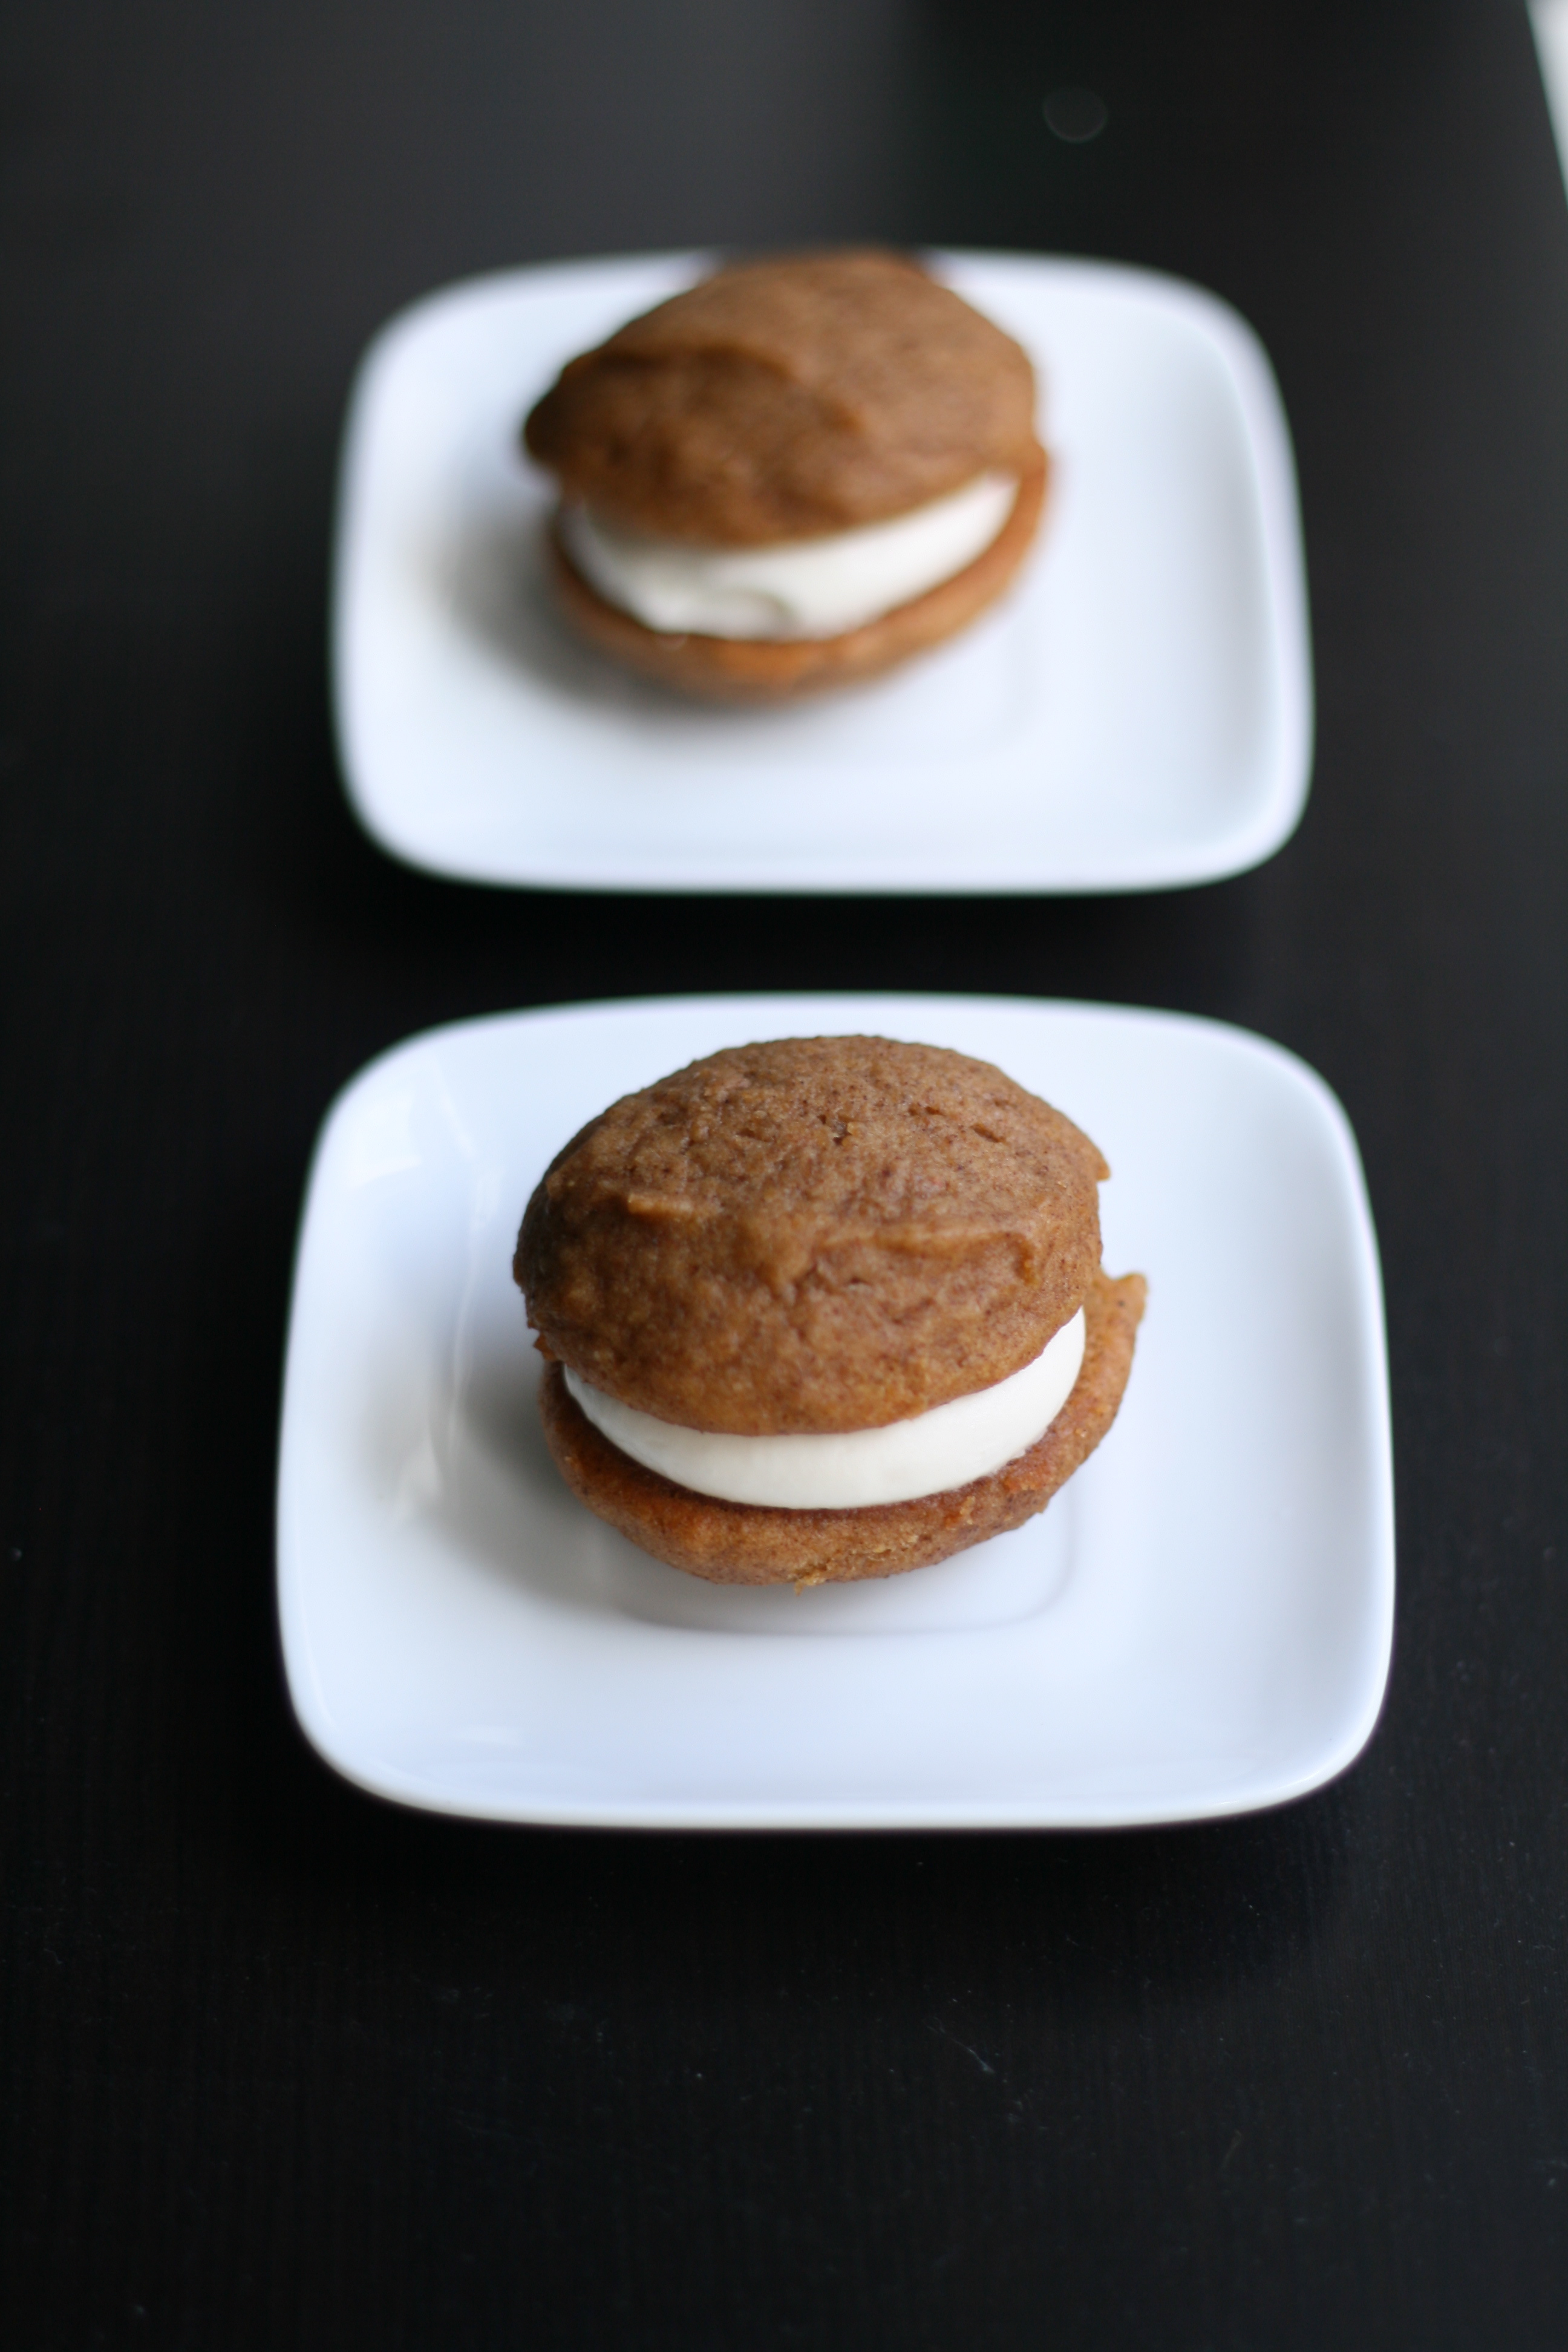
Pumpkin Whoopie Pies
Makes 12; Recipe adapted from Matt Lewis of Baked bakery via Martha Stewart
Visual learner? Watch this video.
FOR THE PIES
3 cups all-purpose flour (I used half AP flour, half whole wheat flour)
1 teaspoon salt
1 teaspoon baking powder
1 teaspoon baking soda
2 tablespoons ground cinnamon
1 teaspoon ground ginger (original recipe calls for 1 tbsp)
1 teaspoon ground cloves (original recipe calls for 1 tbsp)
a dash of nutmeg
2 cups firmly packed dark-brown sugar
1 cup canola oil
3 cups pumpkin puree, chilled
2 large eggs
1 teaspoon pure vanilla extract
FOR THE FILLING
3 cups confectioners’ sugar
1/2 cup (1 stick) unsalted butter, softened
8 ounces cream cheese, softened
1 teaspoon pure vanilla extract
1. Make the pies: Preheat oven to 350°. Line two baking sheets with parchment paper or a nonstick baking mat; set aside.
2. In a large bowl, whisk together flour, salt, baking powder, baking soda, cinnamon, ginger, and cloves; set aside. In another large bowl, whisk together brown sugar and oil until well combined. Add pumpkin puree and whisk until combined. Add eggs and vanilla and whisk until well combined. Sprinkle flour mixture over pumpkin mixture and whisk until fully incorporated.
3. Using a small ice cream scoop with a release mechanism, drop heaping tablespoons of dough onto prepared baking sheets, about 1 inch apart. Transfer to oven and bake until pies are just starting to crack on top and a toothpick inserted into the center of each pie comes out clean, about 15 minutes. Let cool completely on pan.
4. Make the filling: Sift confectioner’ sugar into a medium bowl; set aside. In the bowl of an electric mixer fitted with the paddle attachment, beat butter until smooth. Add cream cheese and beat until well combined. Add confectioners’ sugar and vanilla, beat just until smooth. (I only used about 2 1/2 cups of confectioners sugar.)
5. Assemble the whoopie pies: Line a baking sheet with parchment paper and set aside. Transfer filling to a disposable pastry bag and snip the end. When pies have cooled completely, pipe a large dollop of filling on the flat side of half of the pie. Sandwich with remaining pie, pressing down slightly so that the filling spreads to the edge of the cookies. Transfer to prepared baking sheet and cover with plastic wrap. Refrigerate pies at least 30 minutes before serving and up to 3 days.
TIPS:
• Runny batter is not your friend. If you find yourself in this situation, you may need to add a little more flour to help a batter out.
• Make sure to bake an even amount of pies.
• Mini Whoopie Pies make for a good portion size! And they’re cute.


